Creator(s): Milton Bradleydesigners, artists etc are uncredited.
The simplest and yet often the most frustrating of games!
Connect 4is a popular game played most often by children of primary school age (7-11). It has a very simple your-turn-my-turn game play and can be quite frustrating if your opponent keeps winning.
What’s In The Box:
1 Fold-out game grid
21 yellow and red counters
Playing The Game:
Objective: To create a line of four of your counters either horizontally, vertically or diagonally, before your opponent.
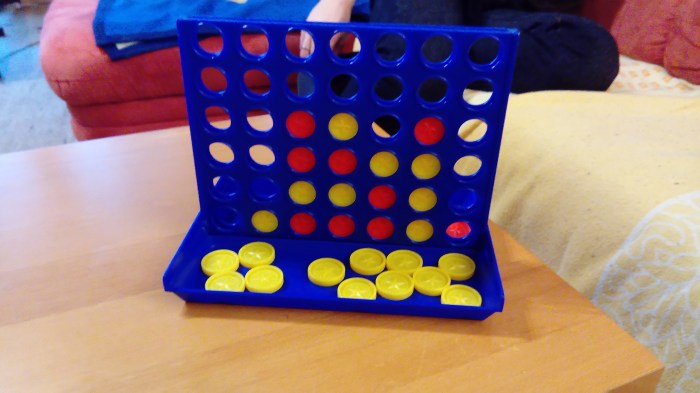
This game is incredibly simple in its original form. The yellow player takes the first turn, and places one of their counters into the top of any column on the grid, this then falls to the bottom, taking a position on the lowest line on the grid. The red player then follows suit.
This is what a game that is about halfway through might look like.
The game continues in this manner, with players each dropping counters into whichever column they like, until either one player has succeeded in creating a line of four, or both players have run out of counters.
Winning The Game!
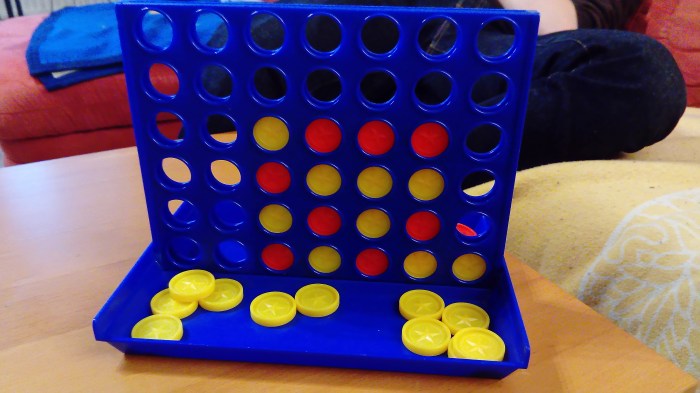
Winning the game is simple, and would look like this:
Yellow player (me) has successfully created a diagonal line through the red players attempt to create a line of four!
Strategy:
This game is one of a group of games that can always be won by the first player, provided they play correctly. Strategically the best starting position for the first player is the central column, as from there they can choose to play on either side of grid whilst knowing that they’ll be connected to their other counters. I generally play to block off my opponent at every turn, whilst simultaneously trying to create a position in which I can create two lines of four, meaning that my opponent, at that point, cannot stop me from winning.
History and Interesting Things:
The game was first sold under this name by Milton Bradley in February of 1974, but is also known by these names: Captain’s Mistress, Four Up, Plot Four, Find Four, Four in a Row, Four in a Line and Gravitaps (Soviet Union)
The game is a Solvedgame, meaning that its outcome can be correctly predicted from any position, assuming that both player play perfectly.
The game has been mathematically solved by several different people, the first of whom was James Dow Allen on October 1st, 1988.
There are several different variations of the game; Pop Out, Pop 10, 5-in-a-Row and Power Up. They can be read about in more detail here.
Hasbroproduces various sized outdoor versions of the game, the largest of which is built from weather-resistant wood, and measures 120cm in width and height.
A rumor that the game was created by David Bowie was started by NME broadcaster and reporter Stuart Maconie which then became an urban myth.
Another version of the game, Connect 4 Twist & Turn was published by Winning Movesin 2015. This version features a game tower instead of a grid, with five rings that twist independently. The objective, to create a row of four of your colour disc, is the same, however as a player can choose to twist a ring after they’ve played a disc a new level of strategy is added to the game.
Look at that! I managed to find quite a few interesting things about this game!
To Conclude:
This game is great, as a child I loved it (and am still good at it). I rated it 4.5 instead of 5 because of the problem where the first player can always win. Although there’s not much that can be done about it in the original form of the game it doesn’t still make the game technically unfair. Aside from that though, I have nothing to complain about, the game is great for kids as it makes them think a little tactically, plus, it’s simple enough that it can be learnt in a few minutes. I’d say that this a game to have in the house if you’ve got children, especially as it’s easy to tidy up due to not having lots of tiny pieces.
There’s No One More Mindful Than Me Here, You Could Even Say I’m The Mastermind!
Okay, I know that’s a bad line, but we actually already wrote a post about this game which you can read here, so I didn’t have much creativity flowing through me. So, if we’ve already reviewed this game, why are we reviewing it again, I hear you ask. Well it’s simple really, the first Mastermindpost that we wrote was actually about Mastermind Juniorwhich is the simple-for-kids version of the game. Hence my second Mastermind post.
However, as this is a follow-on post it’s going to be quite short, as the fundamental way of playing the game is exactly the same.
Playing The Game And The Differences Between The Two Versions:
Adult Mastermind is exactly the same as Mastermind Junior in that one player makes a pattern or code using the colours and hides it from their opponent. The opponent then uses the remaining colours to try and crack the code. The first player indicates whether or not their guess is correct using the (in this game) black and white pegs. A white peg means a colour is right but in the wrong place, and a black peg means a colour is right and in the right place. This the where the difference between the two games comes in; in Mastermind Junior the first player indicates which colour is right by the placement of the pegs, but in regular Mastermind the second player doesn’t know which of the colours they’ve chosen is correct, only that one of them is.
So here you can see how correct colours/placements are indicated in Mastermind Junior:
The white animals indicate correct colour and placement.
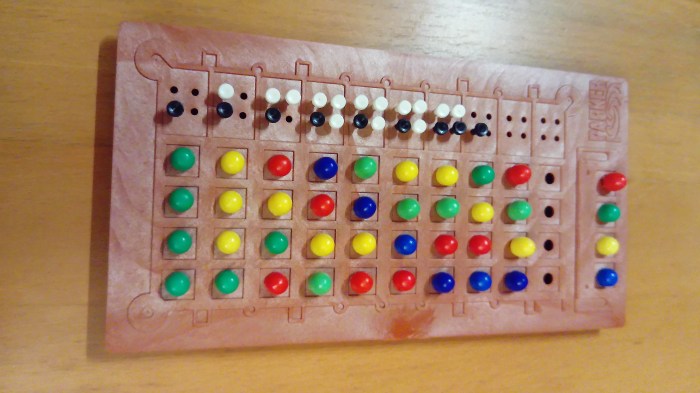
And here how they’re indicated in regular Mastermind:
I apologise for the weird angle of the photo, WordPress refuses to let make the photo vertical so that it looks less strange. But here black pegs indicate correct colour and place, and white correct colour but wrong place. You can see that there’s no way to tell which of your colours is correct with this layout.
There’s a slight difference. The first difference between the games is that in the adult version you play with one extra colour in the code, making it that little bit harder to crack. In addition to that your opponent doesn’t indicate to you which of your colours is correct, so you have more guessing to do.
Winning The Game:
Traditionally this game is played in rounds; the players decide before starting how many rounds are going to be played (always and even number) with the roles of code-maker and code-breaker alternating every round. The winner is the player with the most points at the end of this. Points are scored by the code-maker. S/he gets one point for each guess the code-breaker makes, and is given an extra point if the code-breaker doesn’t manage to accurately guess the entire code in their last move. Points are kept track of across the rounds and added up at the end.
Strategy:
In the Junior version of the game, not much strategy is required, as the code is only three pegs rather than four. In the adult version my preferred strategy is the one seen in the photo above. I like to start with four of one colour and see if any of them are right. This does seem pointless to some people but it’s a very quick and useful way of knowing, is this colour in the pattern. From that first one you simply continue in a similar pattern with other colours until you have the code. Though this strategy doesn’t crack the code in the optimal 5 moves most of the time I will say that I’ve never lost a game playing that way.
History and Interesting Things:
The modern game, played with pegs, closely resembles a pen and paper game called Bulls and Cows that may be over a century old.
The rights to the game have been held by Invicta Plastics since 1971, initially they manufactured it themselves, but have since licensed it to Hasbro, Pressman Toys and Orda Industries for production across the world.
The 1973 edition of the game features a well-dressed white man sitting in the foreground with an attractive Asian woman standing behind him. Bill Woodward and Cecilia Fung reunited in 2003 after 30 years to pose for another publicity photo.
In a standard set of the game, allowing a four-peg code, with six colour options, there are 1,296 different possible code patterns (including, and allowing for duplicates).
In 1977 Donald Knuthshowed that the code-breaker can solve in a maximum of five moves, using this algorithm.
There have been computer versions of the game produced, as well as multiple different editions released.
The difficulty level of the game is altered simply by changing the number of pegs allowed for the code, or the way in which the code-maker indicates a correct or incorrect guess.
Conclusion:
To conclude, I have to reaffirm how much I like this game. In both the child and adult forms. I think it’s a great game for kids because it’s quick, it’s easy to understand, and it promotes logic, problem-solving thinking. I think it’s a must-have if you have kids, or if you like quick games.
P.S. I know I borrowed the History section (and the winning section) from the previous Mastermind post, by they were still applicable, so please don’t be grumpy!
Is what my mum and grandma used to say to me when I was small and doing puzzles (I love puzzles, for the record, but I wasn’t a particularly patient child) and the piece I wanted to put in a certain place didn’t fit and I’d just stubbornly push it, trying to bend it to my will. Eventually one of them would intervene though, to stop me from destroying the puzzle.
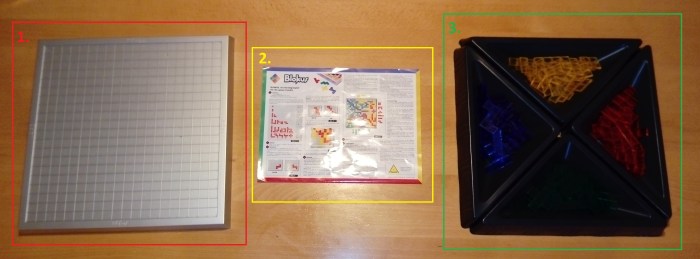
Fortunately, Blokusisn’t a puzzle in that way. But it is a rather good, simple abstract strategy game.
What’s In The Box:
Grid-Patterned Game Board
Game Rules
Four-Coloured Game Tiles
Playing The Game:
Objective: To play all your tiles onto the board.
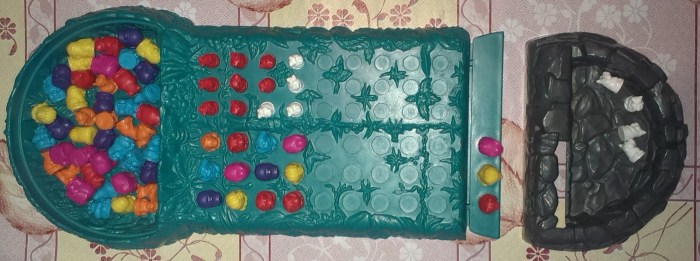
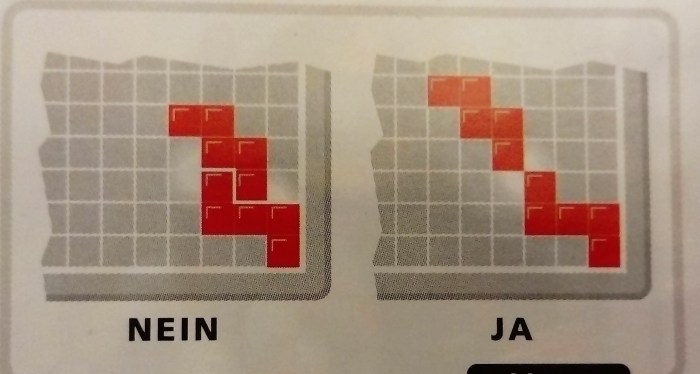
Blokus is a very straightforward game. Every player chooses a colour and takes all those pieces. Players then take it in turns to place one of their coloured pieces onto the board starting from the corner closest to them. However, pieces cannot be placed with the flat edges touching, but must be places point to point, as you can see in the picture below:
It may be noted that I’m using German rules for the game currently – that’s because I’m in Austria, so any photos of rules posted may not be in English.
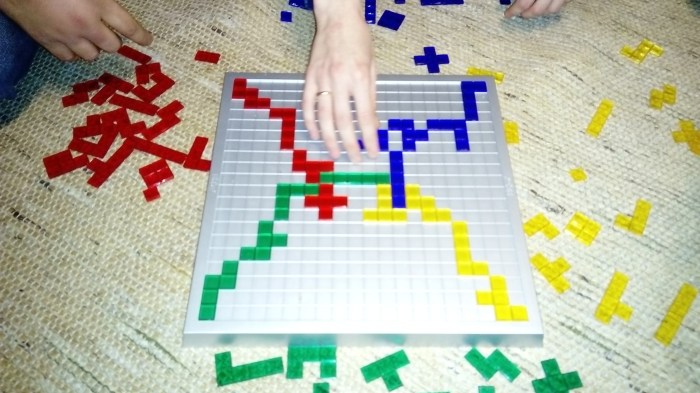
The idea is simply to manage to play all your pieces without getting blocked in by other players. With less than four players this game is very easy. Everyone usually manages to play all their tiles without any problems. However, with four people it does get more challenging, especially when you get closer to the end of the game.
I realize that the above is a pretty bad picture, but you can clearly see that the green and blue players have managed to create a kind of blockade in the middle of the board. I don’t have a picture, but this was quite problematic for the green player later in the game as they effectively sealed themselves off from one part of the board.
Strategy!
This game does require you to think a few steps ahead, as the further into the game you get, the harder to have to think about where you’re putting your pieces, and which way around is the best to place them. In my opinion the best strategy is to get rid of the biggest, most awkward-shaped pieces as quickly as possible, as these are the pieces that will really be difficult to get rid of when the board is fuller. On top of that if you can manage to get through to every section of the board then you’re doing very well. The more places you can reach, the more likely you are to be able to put down every tile. The best way to develop a tactic for this game is to just go for it. Play, watch your opponents, and give a reasonable amount of consideration to each of your moves.
Winning The Game!
It is possible for every player to win this game, so it may not be as appealing to some people, but to be honest I consider it more of a personal challenge to get all my pieces down. However, if no player is able to lay all their tiles then the player with the fewest squares (once counted up from their remaining pieces) left not on the board is declared the winner.
History and Interesting Things:
Blokus was first published in 2000, the inspiration for it was most likely the very popular retro game Tetris.
Between 2002 – 2005 it won five awards and was nominated for two others.
There is also a Solitaire version of the game where one player tries to get rid of all the pieces in one sitting.
To Conclude:
I rated the game 4.5 because although it’s very well thought-out and easy to understand and play, I think the 3/2- player variations are too easy. If I were developing the game I would add some kind of additional “2-3 Player Challenge!” to the game, so that it could be played in the original form, or with, for instance, white tiles randomly placed around the board in a few places that add an extra dimension of challenge to the game. Something like that. It seems to me that there’s room for improvement.
Having said that, I recommend this game. It’s quick, it’s easy, it’s good, old-fashioned fun!
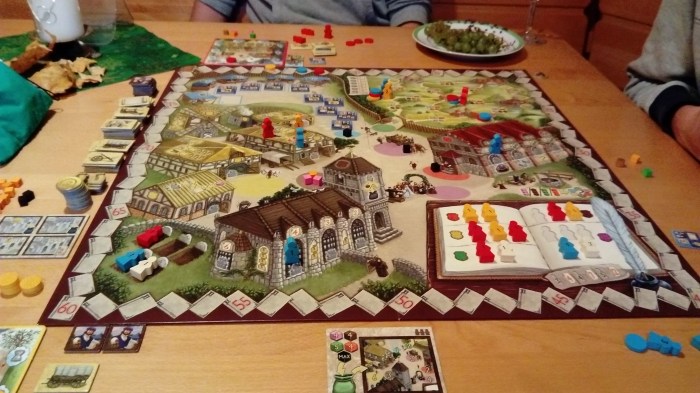
Ever wanted to go travelling, but just didn’t have the time? Ever wanted to become a friar but you were too female to join a monastery? Well inVillageyou can fulfill all of those unfulfilled life dreams that you may have had any time in your life. Take control of four generations of one family to make your all dreams come true! (Okay, maybe I’m lying about all your dreams coming true, but it’s still good fun, okay?)
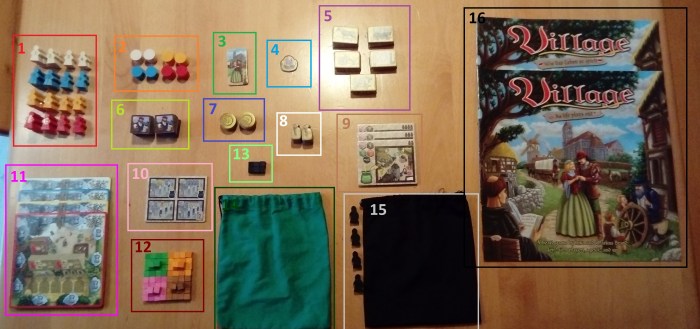
What’s In The Box:
44 Family Members in four colours
32 Markers in four colours
1 Starting Player Marker
1 Next Starting Player Marker
40 Goods Tiles
24 Customer Tiles
15 Coins
20 Bags of Grain
3 Setup Cards
1 Mass Overview Card
4 Farmyards
72 Influence Cubes (Brown, Pink, Orange, Green)
6 Plague Cubes (Black)
1 Green Bag
1 Black Bag and 4 Black Monks
2 Rule Books (German and English)
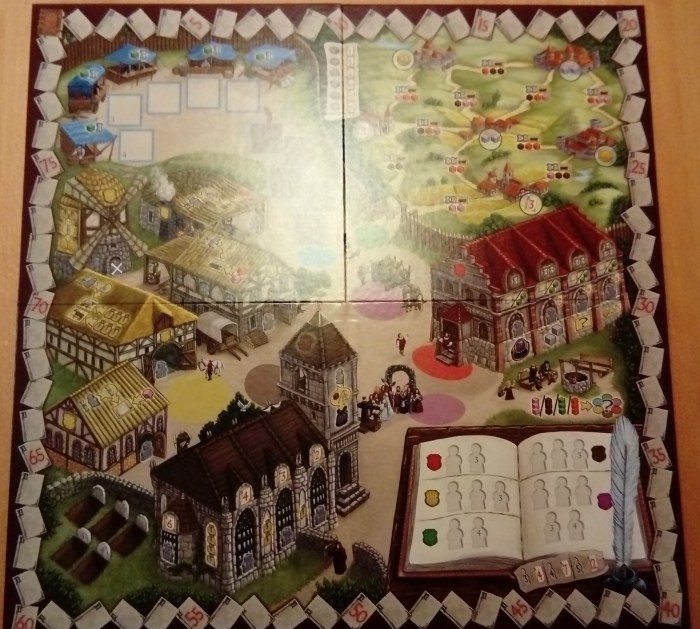
1 Game Board
Playing The Game:
Objective: To efficiently manage the lifespans of each of your family members so as to gain the maximum number of prestige points.
To start the game each player chooses a family, and is given a farmyard, one gold coin and all of their coloured markers. One marker is placed on the closed book symbol in the top left-hand corner of the board. Each family has four generations of people. To begin the game only the four people marked with a 1 are placed on the farmyard.
Setting Up The Board:
Once you’ve chosen your family and claimed all of the pieces you need to begin you then follow the instructions relevant to the number of players there are. As you can see there is a big book in the bottom right-hand corner of the board. This is call the Village Chronicle, it’s the dream of all the villagers to have their name written in this book when they die. When playing with less than four players there are spaces there, and in the unmarked graves (bottom left-hand corner) which are marked with a 3 or a 4. These spaces have to be filled with a member of an unclaimed family at the start of a two or three-player game. This helps to control how long the play time of the game is.
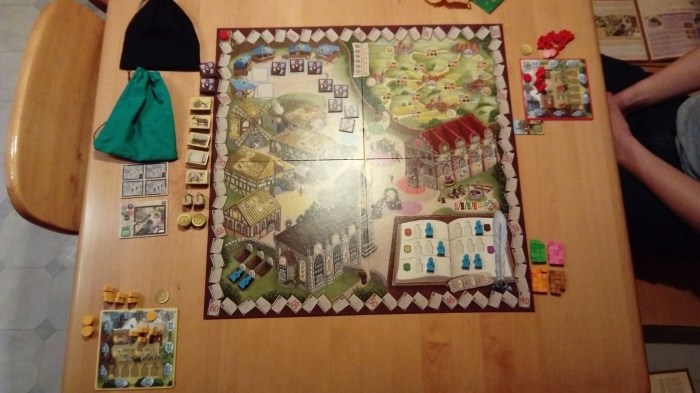
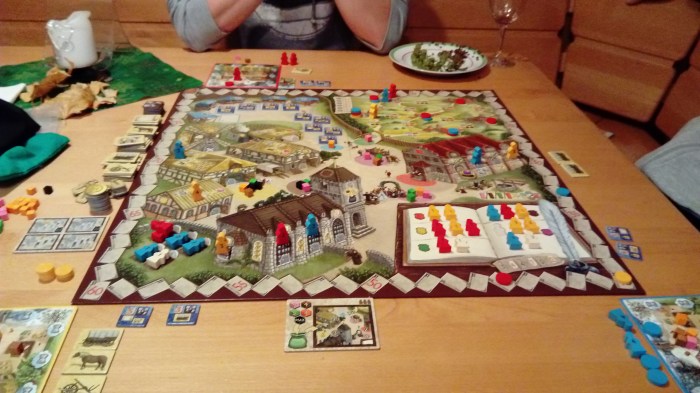
Basic starting setup for two players.
At the start of the game the oldest player immediately becomes first play (you can see the red player in this game has the strange marker with the couple on it next to his farm). This player then takes a pre-determined number of the coloured Influence Cubes from the pool at the side of board and puts them, and all the Plague Cubes into the green bag. These are then drawn at random and used to Seed the board. The Setup Card for the number of players indicates how many cubes should be placed on each coloured patch of the board. Each of these patches represents a potential action that you can take on your turn.
The only other thing left to do now is place customer tiles on the indicated number of marker squares on the board. Once this is done you’re ready to play!
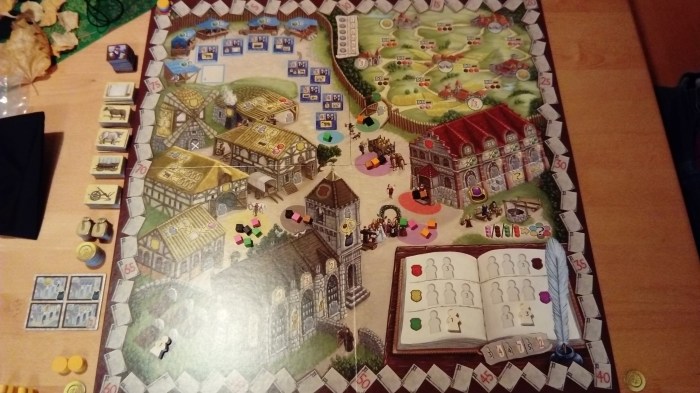
As you can see, Influence Cubes and Plague Cubes have been randomly distributed to the different coloured patches on the board according to the Setup Card and Customer Tiles have been placed in the Market area.
The Rules:
We found that the rulebook for this game is very well written. It’s quite clear what is and isn’t allowed, and there’s very little ambiguity, this makes the game pretty straightforward to play as there’s little opportunity for argument about whether one action is or isn’t allowed.
Taking Your Turn:
This game is quite clever; because each round consists of a few turns for each player – but the actual turn itself is quite short – the game should keep going at a reasonable pace, making the impatient among us much happier as their turn comes round more often. To begin your turn you take an Influence or Plague Cub from the action spot of your choice, the choices are:
Grain Harvest – if you have one or more family members on your farmyard you can perform this action. Take an Influence or Plague Cube from the spot with the wagon on it and then immediately take 2 bags of grain from the supply. If you do not have any family members on your farmyard you cannot perform this action.
Family – when you perform this action a new family member is born! Take a cube from the patch with all the people standing next to it and then take a new family member from the next generation of your family (if you have all of the 1st generation on your farm or the board somewhere then take one from generation 2 and so on) and put them on your farm. Alternatively, instead of taking a new family member from the supply, you can also use this action to recall a family member from somewhere on the game board to your farm.
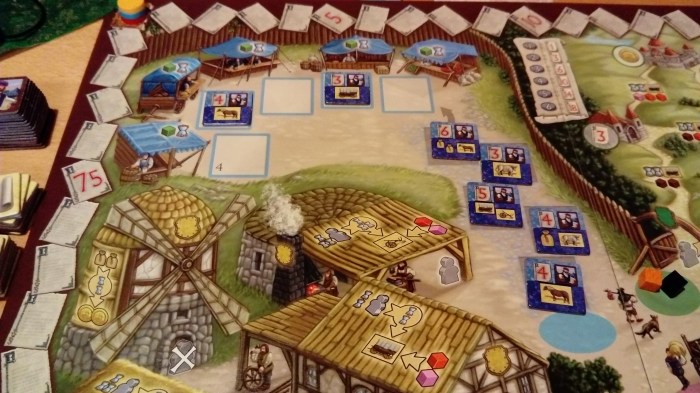
Crafts – Take a cube from the yellow patch by the workshops. You can now send a family member to one of the workshops to learn a skill. Each workshop will show on it how much time must be spent to train a family member, and then again how much time must be put in to create. Note: the train cost of time only has to be paid once per family member in a workshop.
Market – when a Cube is taken from the blue patch by the market place a market day is immediately triggered. Each player has a chance now to trade at the market. However, only the spaces directly in front of a market stall can be traded with. The player who triggers the market day performs the first trade action and can perform this for free. Every other player who wishes to trade at the market must pay both one time and one green Influence Cube before they can trade.
As you can see, we have only traded with the customers who were directly in front of the market stalls. No other customers have been served.
Travel – The green patch near the gate out of the village indicates travel. You can use this patch to send a family member to other villages. This gains you prestige points and other benefits depending on where you go.
Council Chamber – taking a Cube from the red patch by the council building allows you send a family member into the local council. As you train them they gain influence in the council and the benefits you receive from them increase.
Church – the brown patch nearest the church allows you send a family member to orders. Once sent this family member goes into the Black Bag with the Monks and is not used again until Mass is said at the end of the round.
A Family Member Dies:
As each action costs you time eventually someone will have to pay. On your farm you will see clouds with sand-timers in them around the edge of the farmyard. Each time you perform an action that requires time you must move your marker the requisite number of spaces. Every time your marker passes the bride at the top of your farm, a family member from your oldest generation has to die. When this happens you may complete the action that you were performing fully before choosing which family member to kill.
Note: with the exception of Market Day. If Market Day is trigger by taking a Plague Cube you must immediately pay the 2 time and if someone dies they must be removed from the board before completing the Market action.
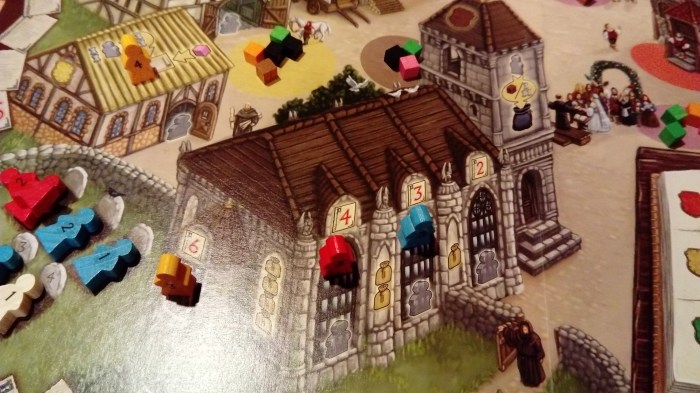
It is beneficial to plan which family members will die as there are a certain number of spaces in the Village Chronicle for each profession. Once these are full no other people who die whilst in this occupation can go there and must be buried in the unmarked graves. This is important because you gain Prestige Points at the end of the game for the number of family members in the Village Chronicle, but you do not gain points for any in the unmarked graves.
Here you can see family members in both the Village Chronicle and the Unmarked Graves. Orange and Red have here achieved the most strategic deaths so far.
Ending A Round And Saying Mass:
Once the last Influence or Plague Cube has been taken from the board the round ends once that player has completed their action. At this point Mass is said. Four monks are drawn from the Black Bag to say Mass. If any player has a family member in the bag they are allowed to pay one gold coin to have their family member definitely say Mass. If the players do not pay them those saying Mass are drawn randomly. Any coloured Monks drawn from the bag are placed on the first window of the church, and any black Monks are returned to the bag. Players may now move their Monks further up the church hierarchy by paying the indicated number of Bags of Grain back to the supply. Once this is done the player with the highest number of family members in the church is awarded two prestige points. If there’s a tie then the player with the highest ranking family member wins, if there is still a tie then the tied players all receive two Prestige Points.
Here, Orange has paid the most grain and been made Abbot in exchange. Red is a senior Monk of some sort, and Blue is sadly just a Novice still.
Once Mass is ended the board is re-Seeded and a new round begins.
Ending The Game:
The game ends once either all the spaces in the Village Chronicle or the unmarked graves have been filled.
Winning The Game!
At the end of the game Prestige Points from all the different aspects of your life in the village are added up. The player with the most Prestige Points wins!
Note: The board is clearly marked with which actions will give you more Prestige Points when continued with for longer periods of time.
Red is victorious! Orange not far behind, and Blue seriously lacking in Prestige…
You can see that the score has been added up by moving each players coloured counter around the track on the edge of the board. Red has won, but not by much!
Strategy:
There are several different strategies that can be adopted for this game. The one I played (I was orange) was to try and have family members in as many different professions as possible, so as to be able to spend a lot of time and have them in the maximum number of available Village Chronicle spaces. I gained a lot of Prestige Points from this. The other aspect of my plan was to try and get reasonably high in the church, as you get points from this, and to have traveled a reasonable amount, for the same reason. I didn’t win the game though, the winning strategy was to build things using the Crafting action and to travel as much as possible. Although this strategy won, it only just won, so it would be worth playing again and seeing if I can alter my strategy a little to make it the winning one!
Both of us playing used the Market action. I had more Market points and I know from a previous time we played this game that if a player is focused enough it is also possible to win using only the Crafting and Market actions. But this requires serious dedication and single-mindedness.
Tactically it is also worth triggering a Market Day when you can trade but you know no-one else can. Even if you only have one thing to trade. You may only get a few points for this action, but no-one else gets any, which gives you a bit of an edge.
History and Interesting Things:
Between 2011 – 2014 this game won 7 awards, and was nominated for 14!
It’s set in a kind of 1700’s era Village.
To be honest, the game was only published in 2011 and doesn’t have much extra-curricular information about it, so I’m going to have to fail at giving any extra points here!
Further Reading and Other Editions of the Game:
This game is still relatively new – only five years old – but it has four expansions:
As you can see, I have actually had very little to write about the history or background info to this game, but having said that, I would recommend the game. It’s not particularly complicated and it’s good for a chilled-out afternoon with family or friends. It’s also great for playing with friends who like board games, but aren’t fanatic enough about them to spend more than about 2 hours playing one. I particularly enjoyed it because you can explore so many different ways to win. Having played the game twice in the last three days I can say that at the moment one of the strongest win-strategies seems to be trying to travel to all six of the other towns.
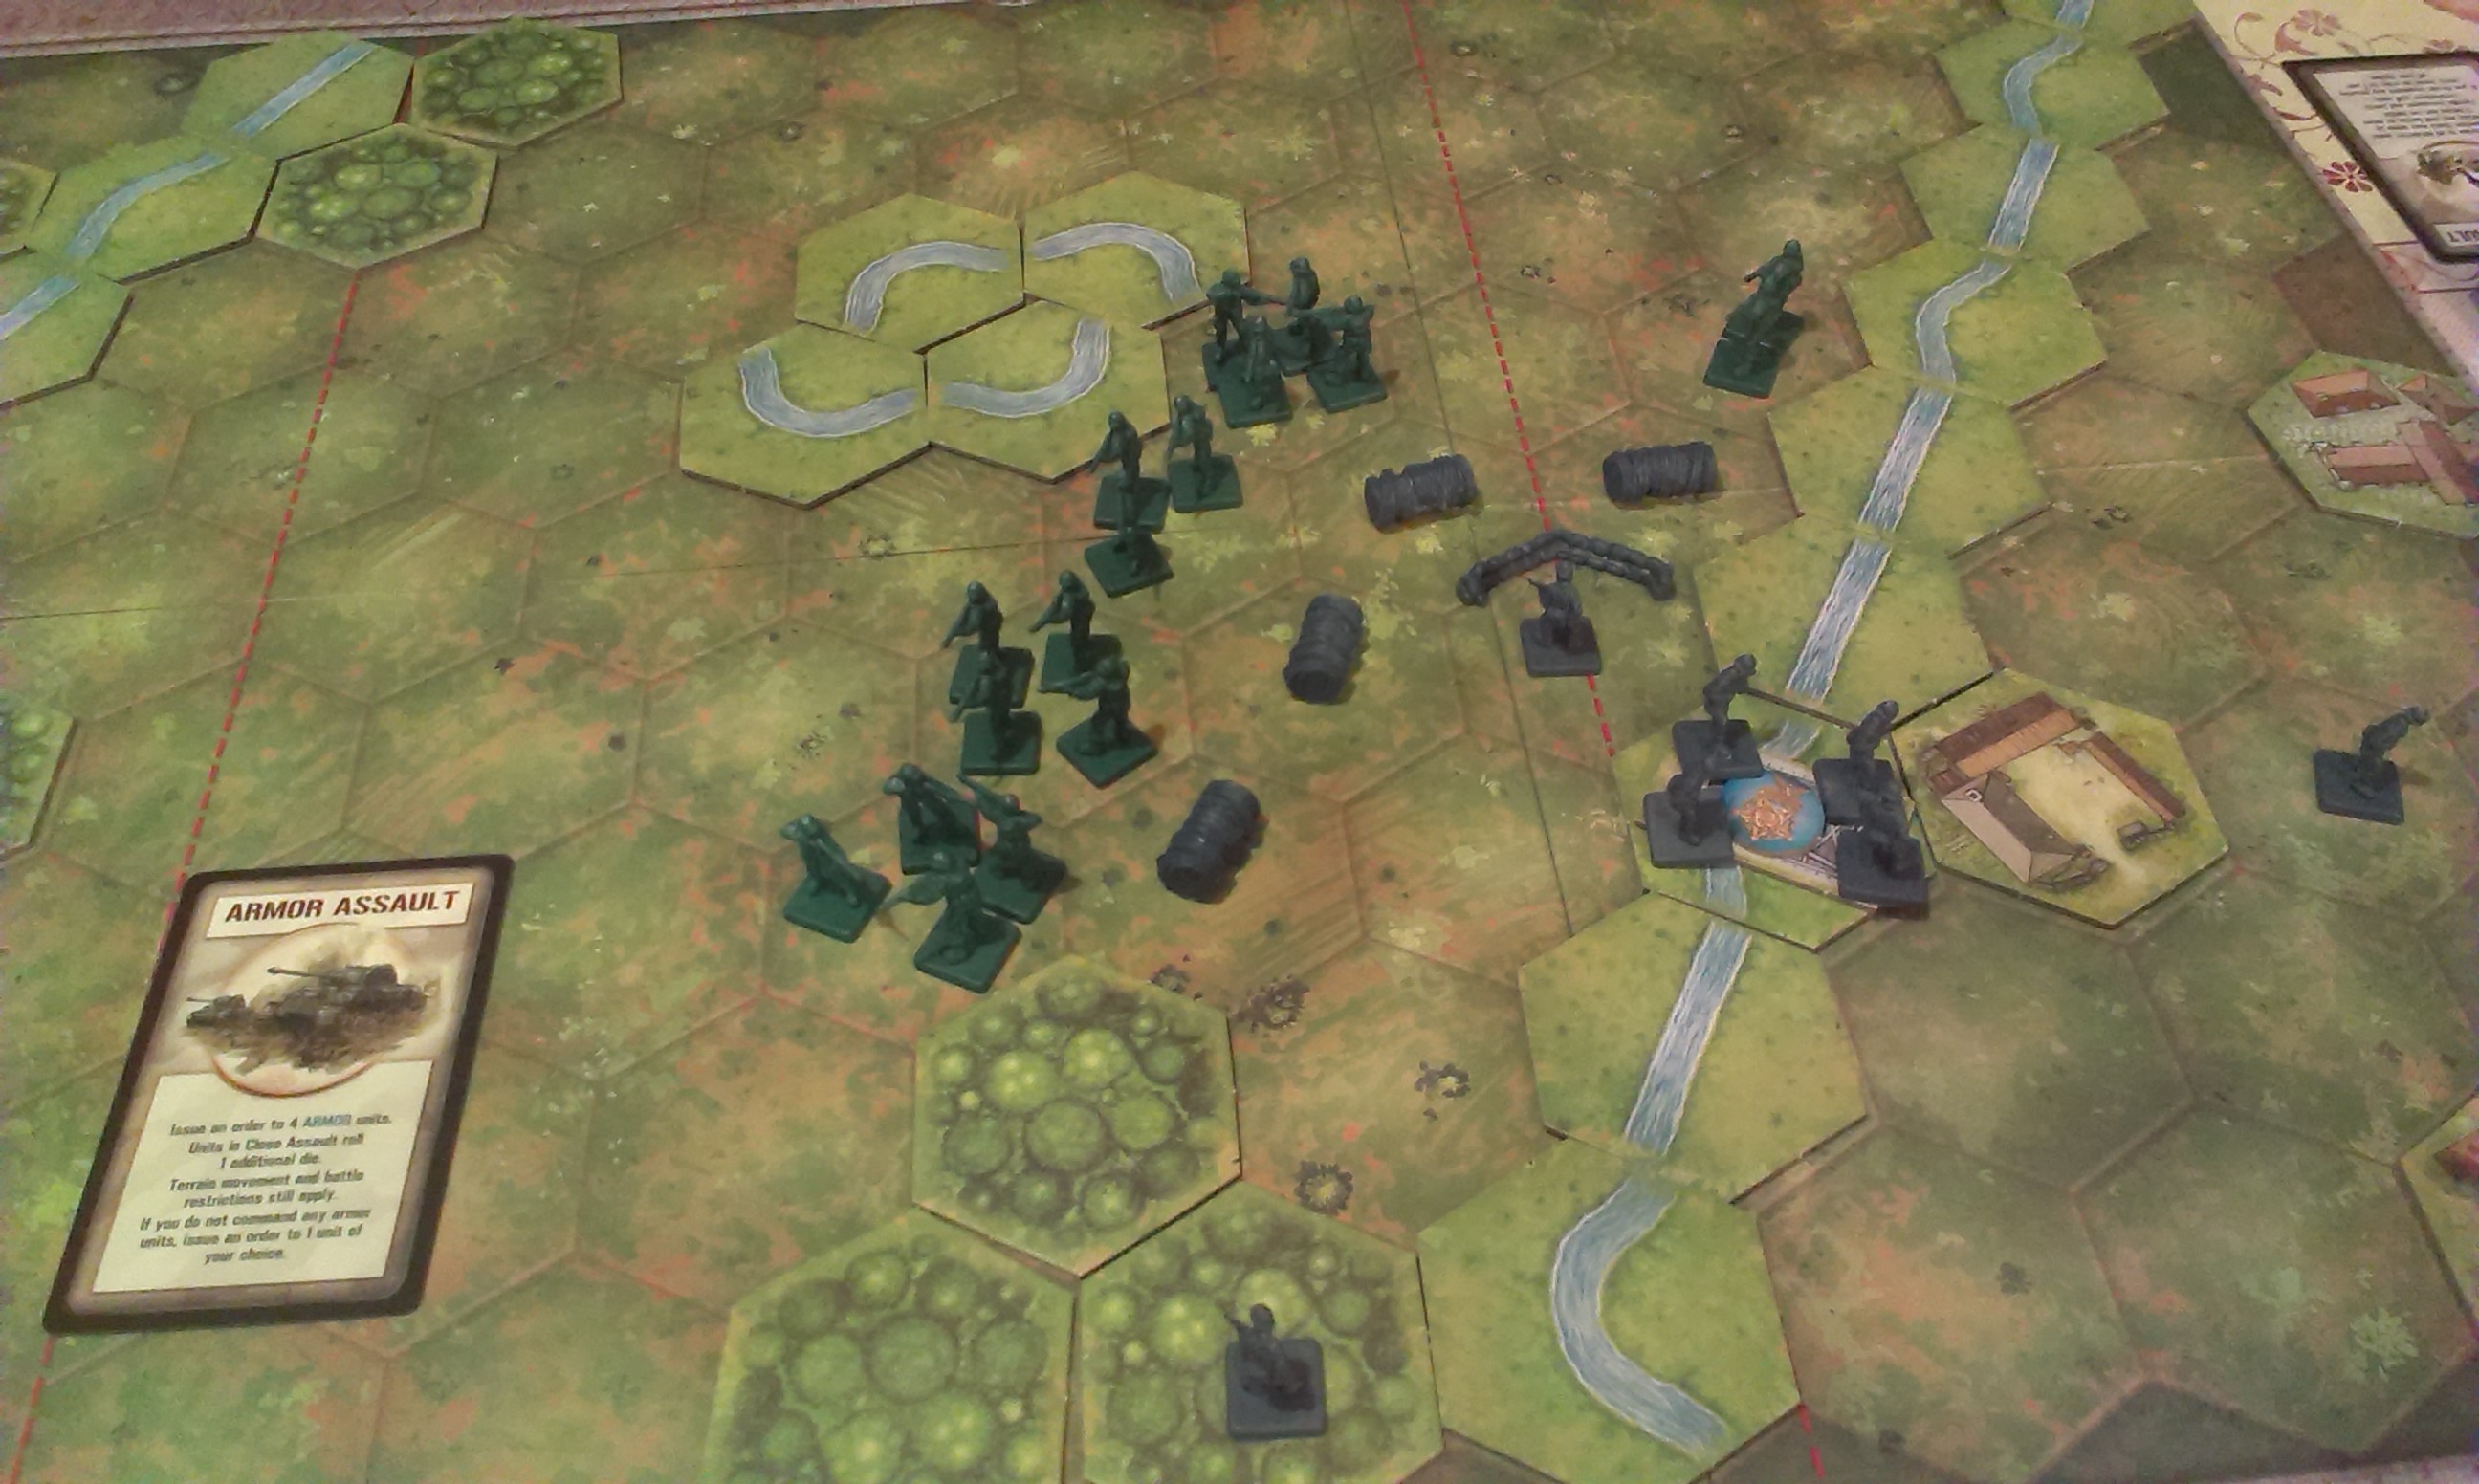
The rules of the game tell us a brief history of this battle; June 6th, 1944.
It was felt by the Allies that the position the Germans held on top of the cliffs at Pointe-Du-Hoc was too strong. They had guns with them that could, from the top of the 100 foot cliff, accurately hit anything attempting to land on the beach.
The Second Rangers (an American unit formed specifically for this mission), under the command of Colonel James E. Rudder were assigned to stop them. After a difficult landing, under heavy fire from the Germans they managed to reach the top of cliffs. Here they found that the guns had been withdrawn from their stations several days beforehand and only dummies left in their casements. One Ranger patrol went south searching for the missing guns.
Two concentrations of Germans had remained; one in the south-west antiaircraft bunker, the other in the observation bunker. Despite repeated attacks these resisted and were the most dangerous of the German forces in the area.
The single Ranger unit finally found the guns sitting quietly, unguarded, in an apple orchard inland. They placed incendiary devices inside them and completed their mission.
Pointe-Du-Hoc
The Steup.
Strategy:
Allies:
Landing on the beach puts you at a fairly strong disadvantage to the Axis player; you’re in the sea, which gives you movement restrictions, and retreat penalties, but you get six command cards and you move first, so it’s not all bad.
You have to factor in that you cannot scale the cliffs in one move, the special rules for this scenario state that you must use two moves, to scale a cliff from the beach side.
However, your units are Rangers, so they can all move two hexes and still battle, which is a big advantage, and makes life much harder for the Germans.
The victory condition is four medals; we found that the most promising way to achieve this was to storm straight up the middle and try and take out the units in the sandbags, plus the left-hand one in the bunker. Then capture medals at the back to win. You should also try and do this as quickly as possible.
In this scenario I would say that keeping your units pretty close together was probably a better bet than spreading them thin, simply because the victory condition in not so high as in other scenarios, and it’s easier to outgun a unit if you’ve several of your units attacking them.
Axis:
You get the fun of defending in this one. Dave and I did have a bit of a debate about whether or not it was more advantageous to stay in the bunkers and let the Allied player come to you, or to go out and meet them. We played it both ways.
You’ve got a bit of an interesting set up, on the top of the cliff. You’re position is very good defensively, but a little annoying until the Allied player has moved a fair few of their units.
You’ll probably find that although you can attack maybe on or two of their units, you can probably only do so with one battle die, which is an incredibly tedious (although completely acceptable, and sometimes necessary) way of destroying a unit
My main comment for this one is to not (if possible) let your enemy destroy your artillery. Because of its range this unit is incredibly useful, but annoyingly, also fairly easy to obliterate if an enemy unit gets close enough. PROTECT IT. That’s what your unit in the bunker on the point is for – to stop anything getting to your artillery.
General strategy point: be aware of the spread of your units in relation to your command cards. It’s very unwise to bunch all your units in one section of the board, as there may come a time when you have no command cards relevant to that section, which renders your turn useless and gives your opponent the upper hand.
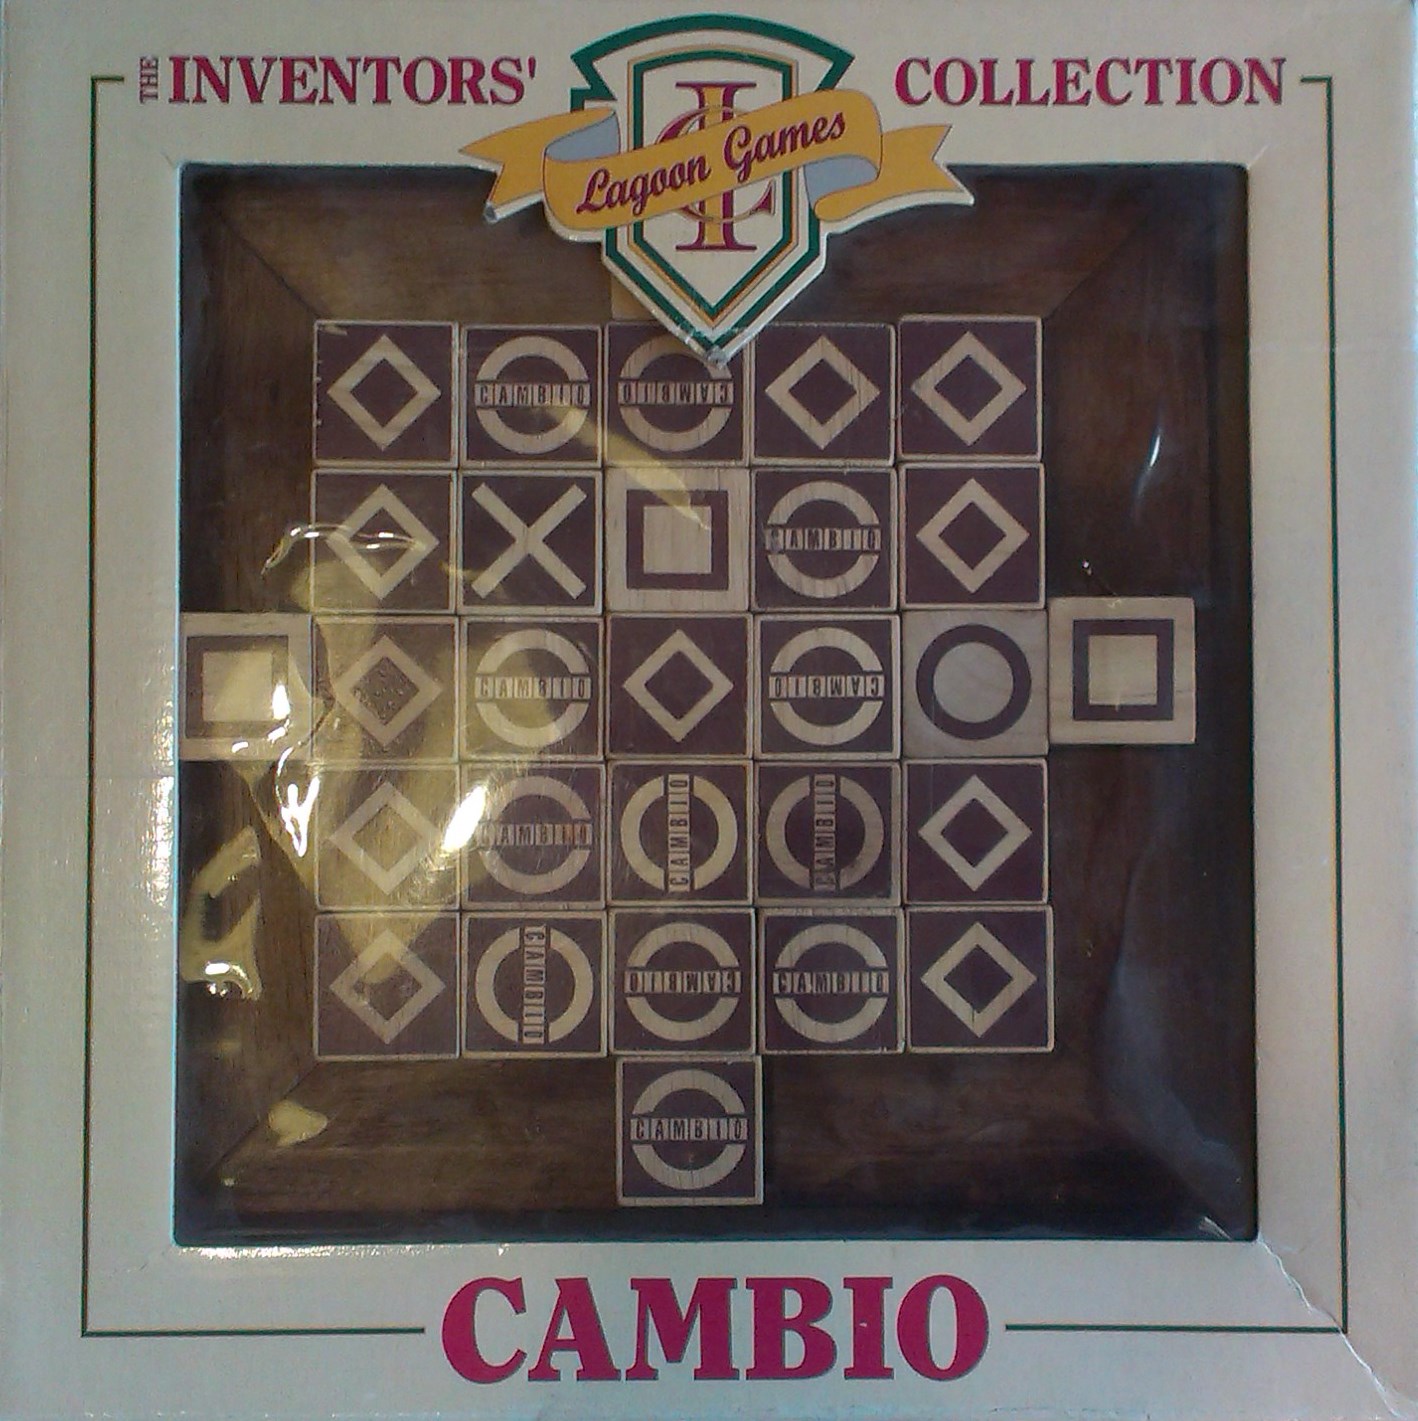
Cambio, similarly to Quarto!, is a complicated or ‘thinking mans version’ of Tic-Tac-Toe (Naughts and Crosses). For this review we’ve done another video. The video covers all our normal sections except ‘History and Interesting Things’ so check it out below:
History and Interesting Things:
There are only a couple of notable things about this game and they are:
The game was invented by Maureen Hiron in 1996. She is a very successful game inventor and know for inventing several other games including: 7 Ate 9, Continuo and Qwitch.
The word Cambio means exchange.
To Conclude:
Like we say in the video we like this game, the design of our specific issue of it could be better but apart from that its a fun and fairly simple strategy game thats not too long to play but not so fast you miss what just happened.
Quarto! is complicated Connect Four and for this review we’ve done a video, our first real video review! The video covers all our normal sections except ‘History and Interesting Things’ so check it out below:
History and Interesting Things:
There are only a couple of notable things about this game and they are:
The game was invented in 1991 by Swiss mathematician Blaise Müller.
Like we say in the video, we like this game a lot! My only issue with it is retaining enough concentration to keep in check all of the eight different piece attributes that could create a line. However I would highly recommend this game and if you like games that range from Connect Four to Chess then you will most probably love this game.
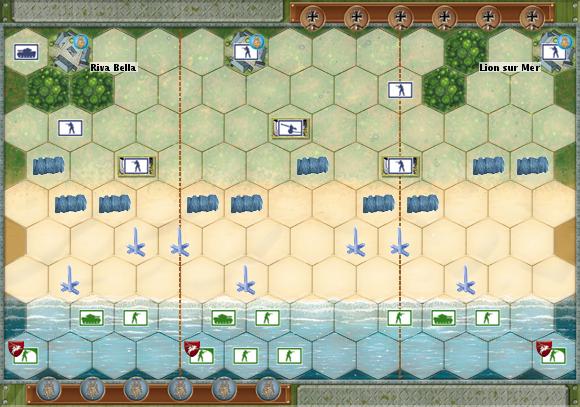
Morning. June 6th. 1944. The 8th Brigade Group of the 3rd British Division, supported by Commandos of the 1st Special Service Brigade and the Sherman tanks of the 13th and 18th Hussars make up the first wave of Allied forces to land on “Sword” beach, near the mouth of the Orne River.
The objective of the day was for the Allied forces to retake the city of Caen, and although the French troops captured the Casino at River Bella, the Allies failed in this objective. The sea was difficult that day, the tanks were supposed to land first and engage the enemy before the infantry landed, however, tanks and infantry ended up landing together. This coupled with the German resistance meant that the inland advance was seriously delayed. The failure to retake Caen was one of the biggest set-backs of D-Day and the consequences were still felt well into July of that year.
Strategy and Tactics:
Axis:
You have a defensive advantage in this scenario. Not only are the Allied forces advancing from the sea, which initially gives them a terrain disadvantage, but some of your forces are also already holed up in bunkers. Bunkers are useful as they give a -2 to tanks and a -1 to infantry when being attacked. You also possess the only artillery unit in this scenario. This is, if you manage to prevent its destruction, probably your most useful unit, as it has the longest attack range.
Despite these advantages you also have fewer troops than your opponent, and your only tank unit starts in a useless position, from which you have to order it twice to get it within attacking range of the Allied forces. You also have one less command card, and move second.
Okay, so that aside, tactically we found that arranging your troops towards the back of the board and then waiting for the Allied forces to come to you was a fairly sound way of playing the scenario. Though it’s definitely worth dragging your tank unit out of the corner early on. I would also generally say that it’s worth keeping the units that are already in the bunkers in them, unless for some dire reason you have to retreat or lose that unit.
Because wood hexes provide a -1 for attacking a unit in the woods it’s also worth trying to position your in Lion Sur Mer in the most forward of the two woods hexes next to it, this moves you closer to the fighting action whilst giving the unit a decent terrain advantage and enabling it to be close enough to try and prevent Allied forces taking the town and claiming the medal there, that contributes to their victory points.
Other than that, I would say, try not to let yourself get surrounded by the Allies, because they’ve got a lot more firepower than you, and also, if possible, knock out their tank units first, as these move further and have a fighting advantage over infantry units as well as needing less hits to destroy a unit.
Allied:
Although you start in the sea, you have an advantage in number units and number of command cards, as well as being the side that starts the scenario. Not only do you have three tank units to the one that your opponent possesses you also have three special forces units available to you, these are able to move up to two hexes and still battle, where regular infantry can either move one and battle, or two and do nothing.
Your first task is to get your units out of the sea, this is slow going because of the terrain restrictions that the sea imposes, but we found that it was tempting just to move either one block of your units out, maybe just from, say, the left flank, or to maybe move one unit from each section of the board, depending on your command cards. This is however, not a good idea. If you move one unit from each section too far from its comrades you make it an easy target, remember that you’re at a disadvantage with the bunkers, not to mention the hedgehogs and barbed wire that’s between you and the Axis forces. And if you only move one block and ignore the others you also make those units targets because if they’re in the sea and they get attacked a retreat roll on the battle dice counts as a hit because you cannot retreat and so must sacrifice one member of your unit for every retreat rolled.
If you start out with any command cards that enable you to annihilate your opponents artillery unit this is a big score early in the game, it levels the playing field a lot. Not only does it have only two pieces to a unit, making it the easiest to destroy in terms of dice rolls needed, but it also makes it much harder for the Axis player to just sit and wait for you, as they can no longer pick off your units from such a distance.
Surrounding bunkers is a good way of destroying a unit completely, if you attack a bunker with three units instead of just one, you’re less effected by the defensive advantage they give to the Axis player.
Lastly, don’t forget about the medals in the three towns at the back of the board. Each one of these counts for one of the five victory points you need to win the scenario if you capture, and hold, the town. They’re worth going after because they mean you need to physically destroy less enemy units.
To Conclude:
I really enjoyed this scenario from both sides. As you can see from the running score we’re keeping – I lost. But it was fairly close both ways round. It was more a lack of useful command cards than any tactical errors made. This scenario is also great because you get artillery and special forces units in play, as well as bunkers, hedgehogs and barbed wire, which adjust the way you have to think about moving around the board. This is great because by this point you’re familiar with the infantry and tank units, and then the game gives you something new to play with. It also starts to pick up the pace of play. Dave mentioned in his last post that he thought it felt a little slow, I agree with him, but I think that this scenario really cranks the game up a bit, making it much more interesting.
Set on the night of June 5th, 1944 this scenario recreates the brief battle for Pegasus Bridge. Or Bénouville Bridge, as it was known at the time, in Normandy, France. Major John Howard led the men of the Oxford and Buckinghamshire Light Infantry in the first airborne assault of D-Day, his objective being to capture both Pegasus Bridge and Orne Bridge. At a few minutes past midnight the Horsa Gliders land in a patch of field only yards away from their objective. The men stream out of the gliders totally surprising the German forces, there’s a brief and furious fight involving a machine gun in a sandbag nest right by the Pegasus Bridge. The British forces secure the Bridge, and the Orne equally as quickly, losing only two men in the process.
The bulk of British troops here start behind the impassable pond, meaning that they must be maneuvered around it to get involved in the battle. The Allied player has the natural advantage in this scenario; they have more men to begin with, receive more Command Cards, and play first.
Strategy and Tactics:
The Allied player here has the upper hand, but if they play badly that’s going to be completely irrelevant. In this game a certain amount of your success as a player is determined by which Command Cards you draw, as on some occasions you may need to give orders to a section of the board that you don’t have the Command Card for, and so can’t. How quickly and efficiently you kill enemy units is also determined by the roll of the battle dice. So some amount is down to luck and chance. But aside from that we’ve found so far that once you’ve found a decent defensive position (for example in a patch of trees) it’s ideal to stay there for as long as possible, all the while you can fire on your enemy from there you should stay as the woods reduce the chances that you’re going to lose men when the enemy fires on you.
In this scenario the German forces have barbed wire and sandbags. These are inconvenient, for an Infantry unit to be able to remove them they have to move into the space that the barbed wire is in, and then remove it instead of battling. So it can be completely suicidal to remove them as you end up adjacent to you enemies units and unable to attack them. Leaving you as a clear target. It’s also important to remember that the rive does not effect line of sight. You can fire on an enemy unit across a river provided that they are within range and no other terrain restrictions that would prevent you attacking them apply.
I found, when playing as the Allied forces, that trying to take the patch of wood on the right flank of the board, by the Orne Bridge, was a strong position to be in. That bridge is under defended and so the woods is a good position from which to either attack the lone German unit at the top of the board there, or to swoosh down and take the bridge from the other German unit. The blue medals on the two bridges count as victory points if the bridges are held by British forces. Meaning that that player has to destroy less of the Axis units to win the scenario.
For Axis forces it’s tactically ideal to get you lonely unit in the top of the right flank down into the patch of woodland before anyone else can, this is a good defensive position to be in, to prevent anyone trying to take the Orne Bridge. Your second unit there could then be on the bridge, between them they’ll put up a good fight against any optimistic British forces.
When we played this scenario we left the Axis units mostly where they were in the center and on the left flank, only really moving the one in the top left corner to bring it closer to the action. On reflection it would probably have been a good idea to shift the unit in the town right next to Pegasus Bridge further down the river to attack the British, because we didn’t actually use it that much.
To Conclude:
This is the starter scenario, so it’s been simplified from the original battle. The Germans has a machine gun in their sandbag nest by Pegasus Bridge that’s been replaced with regular Infantry in this one. But as starters go it’s very good, it’s an easy board to navigate, and the use of only one type of unit allows you to completely get to grips with how they move and battle. It would’ve rated higher, but that it’s been deliberately simplified for learning purposes, so the scenario doesn’t have as much going for it as some of the later, more complex ones do. It’s well designed as an introduction though, and sets you up in good stead for future scenarios.
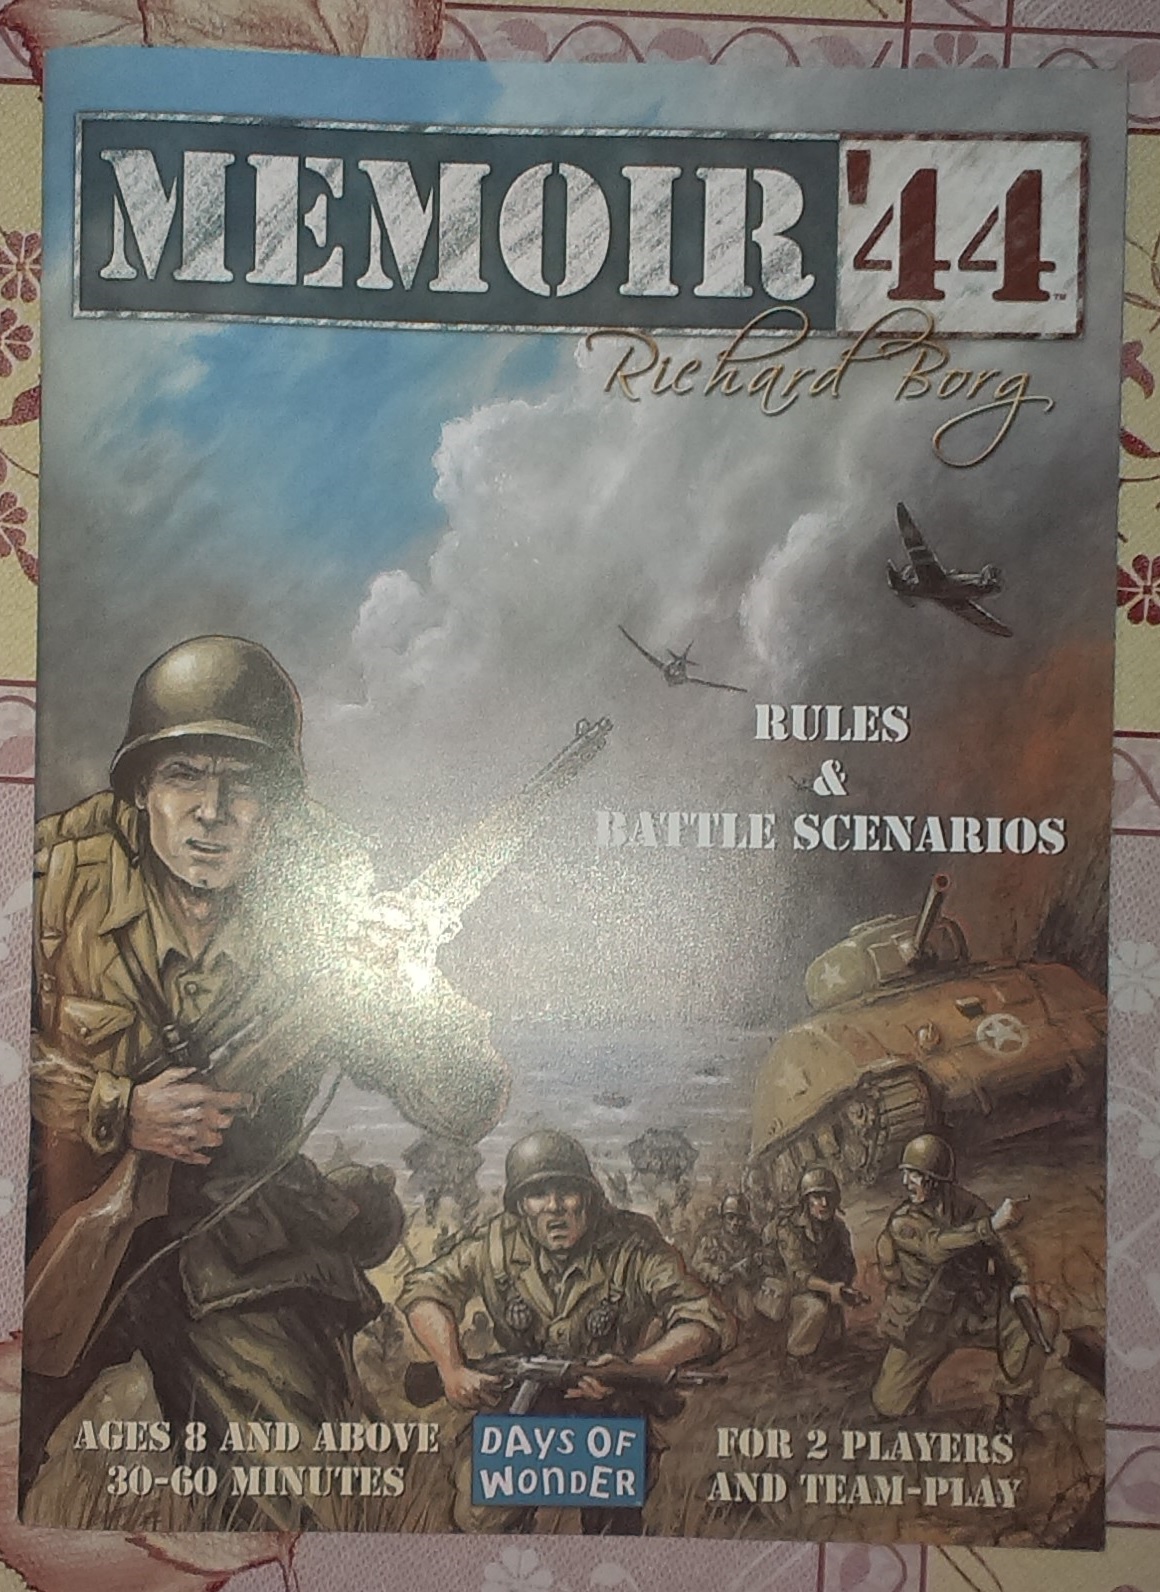
We should really include that in all the titles/opening paragraphs for this blog, since I can’t immediately think of any game that we haven’t played wrong at least once. Memoir ’44, as has been stated at least once now, is a fantastic game. I don’t think we’re likely to ever get bored of it. Based on real scenarios from the Second World War it’s not only interesting for its historical accuracy, but also as a strategic game.
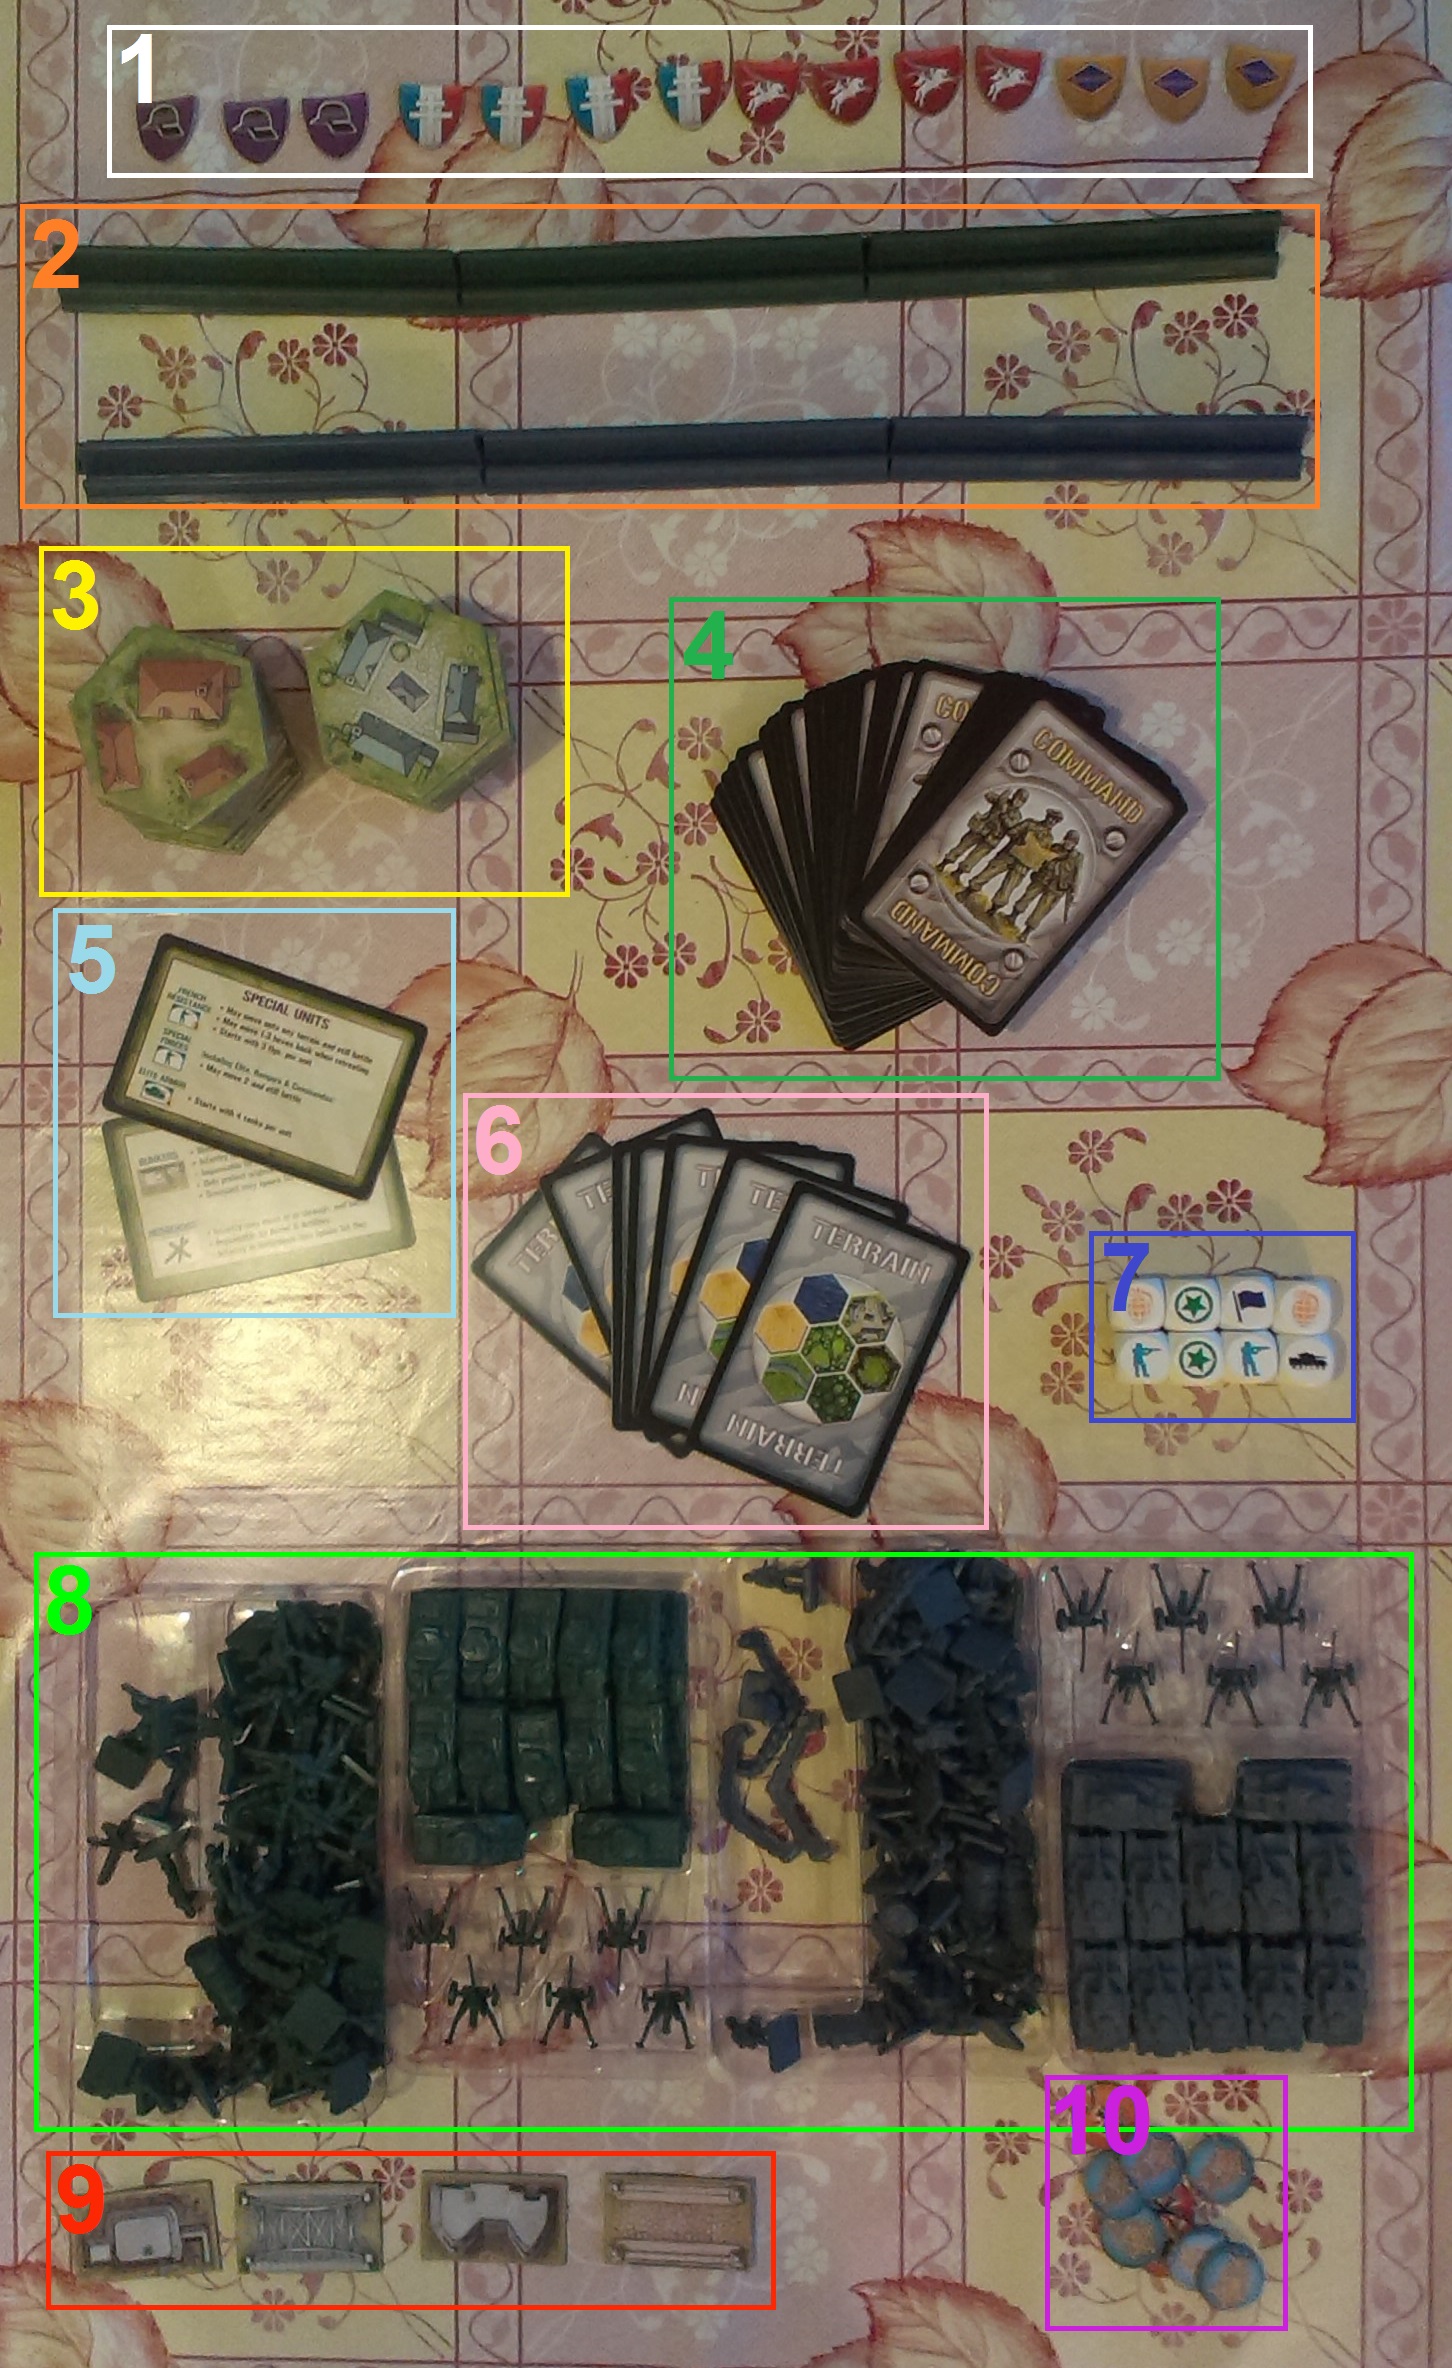
What’s In The Box:
The Stuff
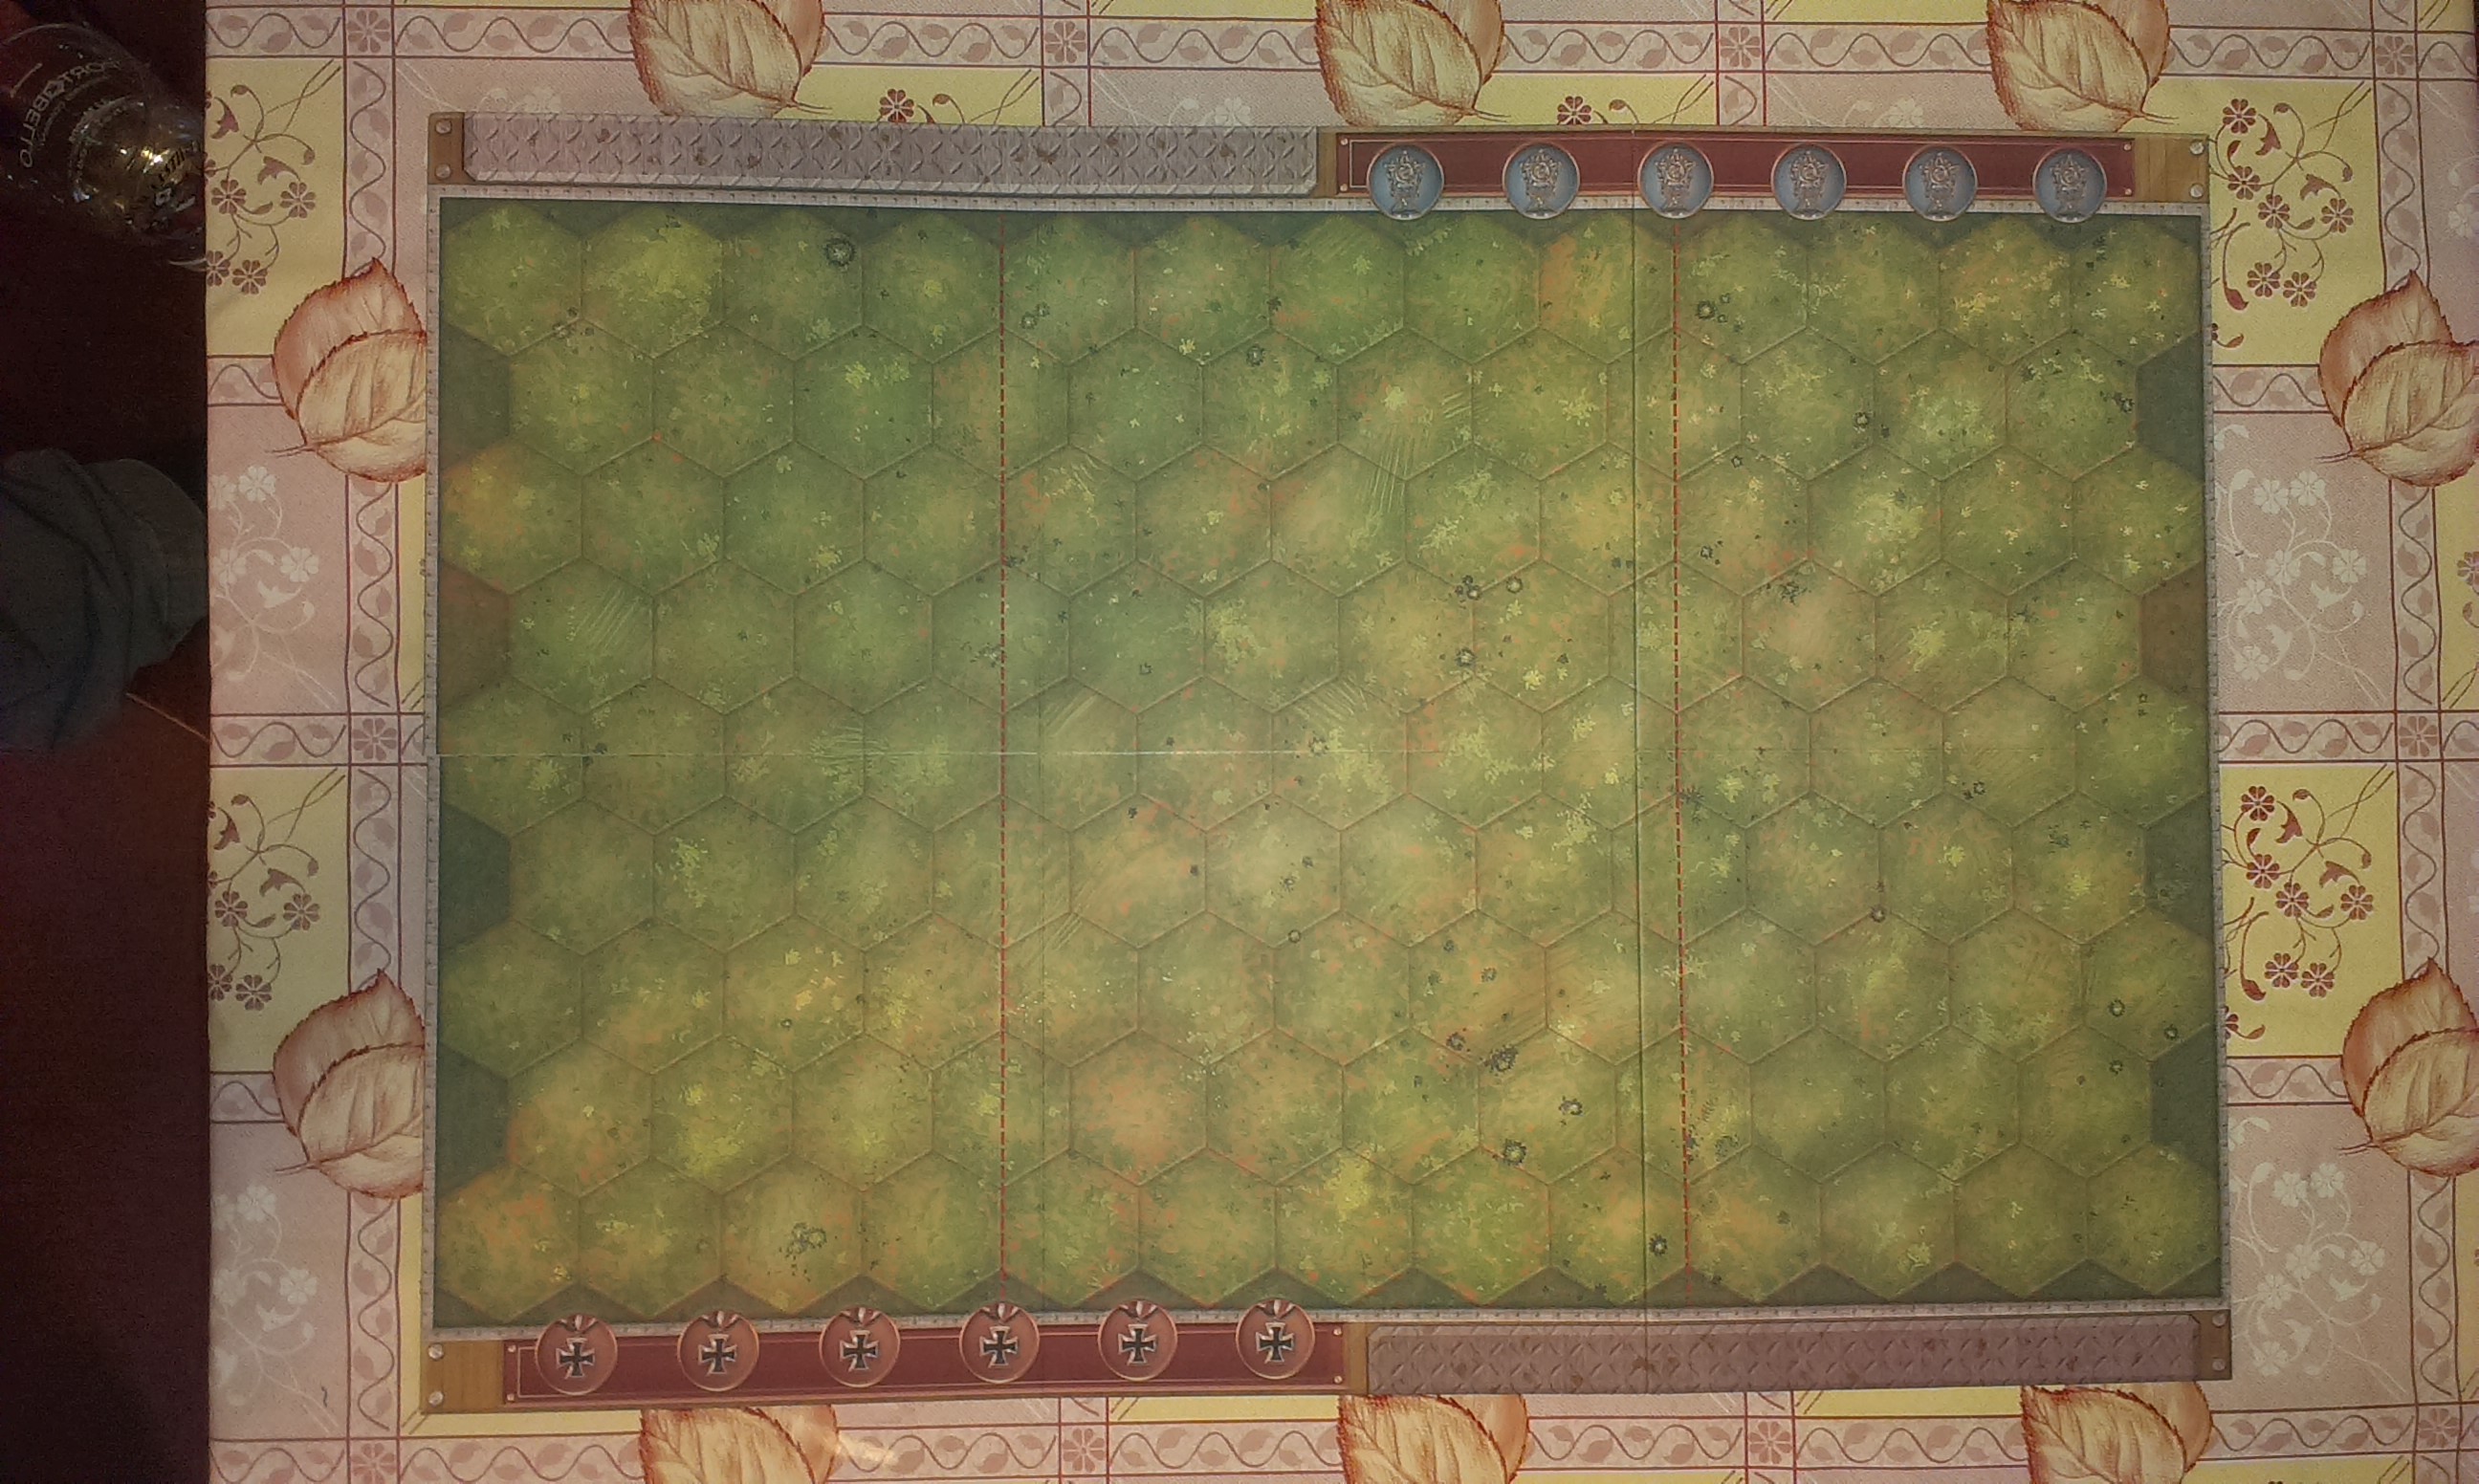
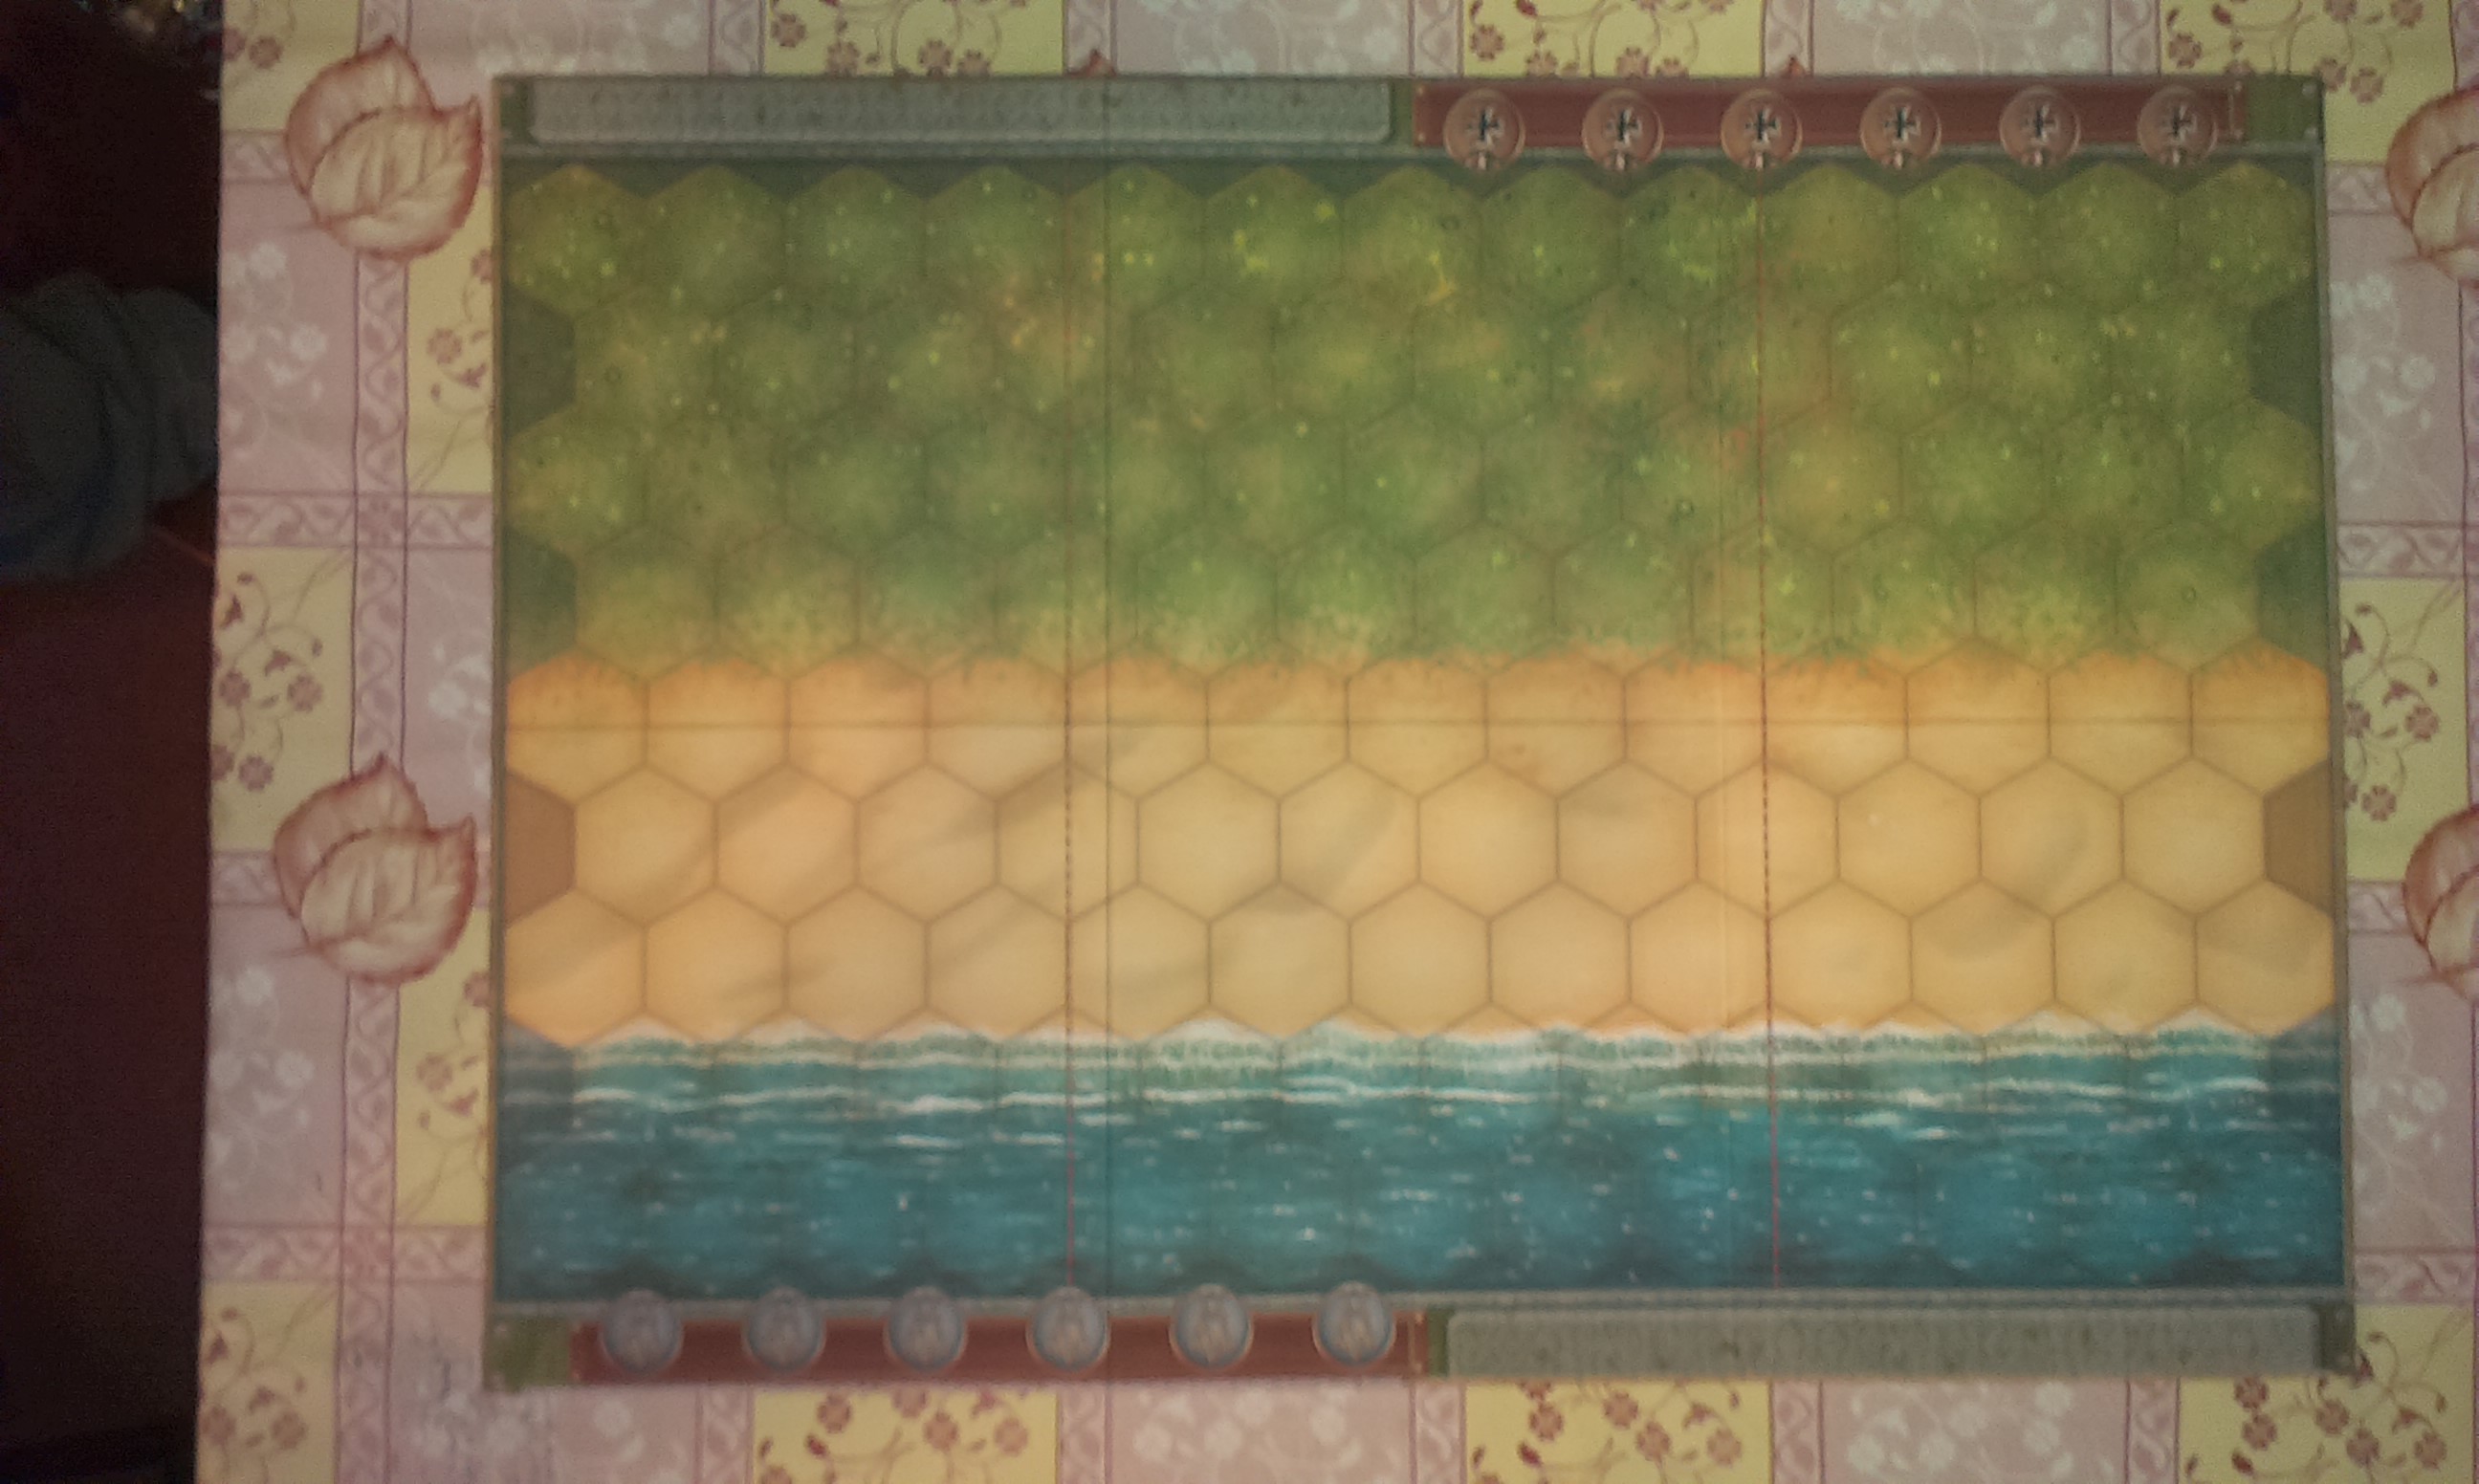
Countryside side of the boardBeach sideThe Rules
14 Special Forces Badges
3 Blue and 3 Green Command Card Holders
44 Double-Sided Terrain Hex Pieces
60 Command Cards
1 Double-Sided Obstacle Summary Card and 1 Double-Sided Unit Summary Card
7 Terrain Cards
8 Battle Dice
2 Sets of Army Miniatures; Green = Allied Forces, Blue-Grey = German/Axis Forces
4 Double-Sided Bunker and Bridge Tiles
10 Double-Sided Victory Medals
1 Double-Sided Battlefield Board Map
1 Rules and Scenario Booklet
Playing The Game:
Objective: To fulfill the scenario’s victory conditions before your opponent and score more points after you’ve switched sides.
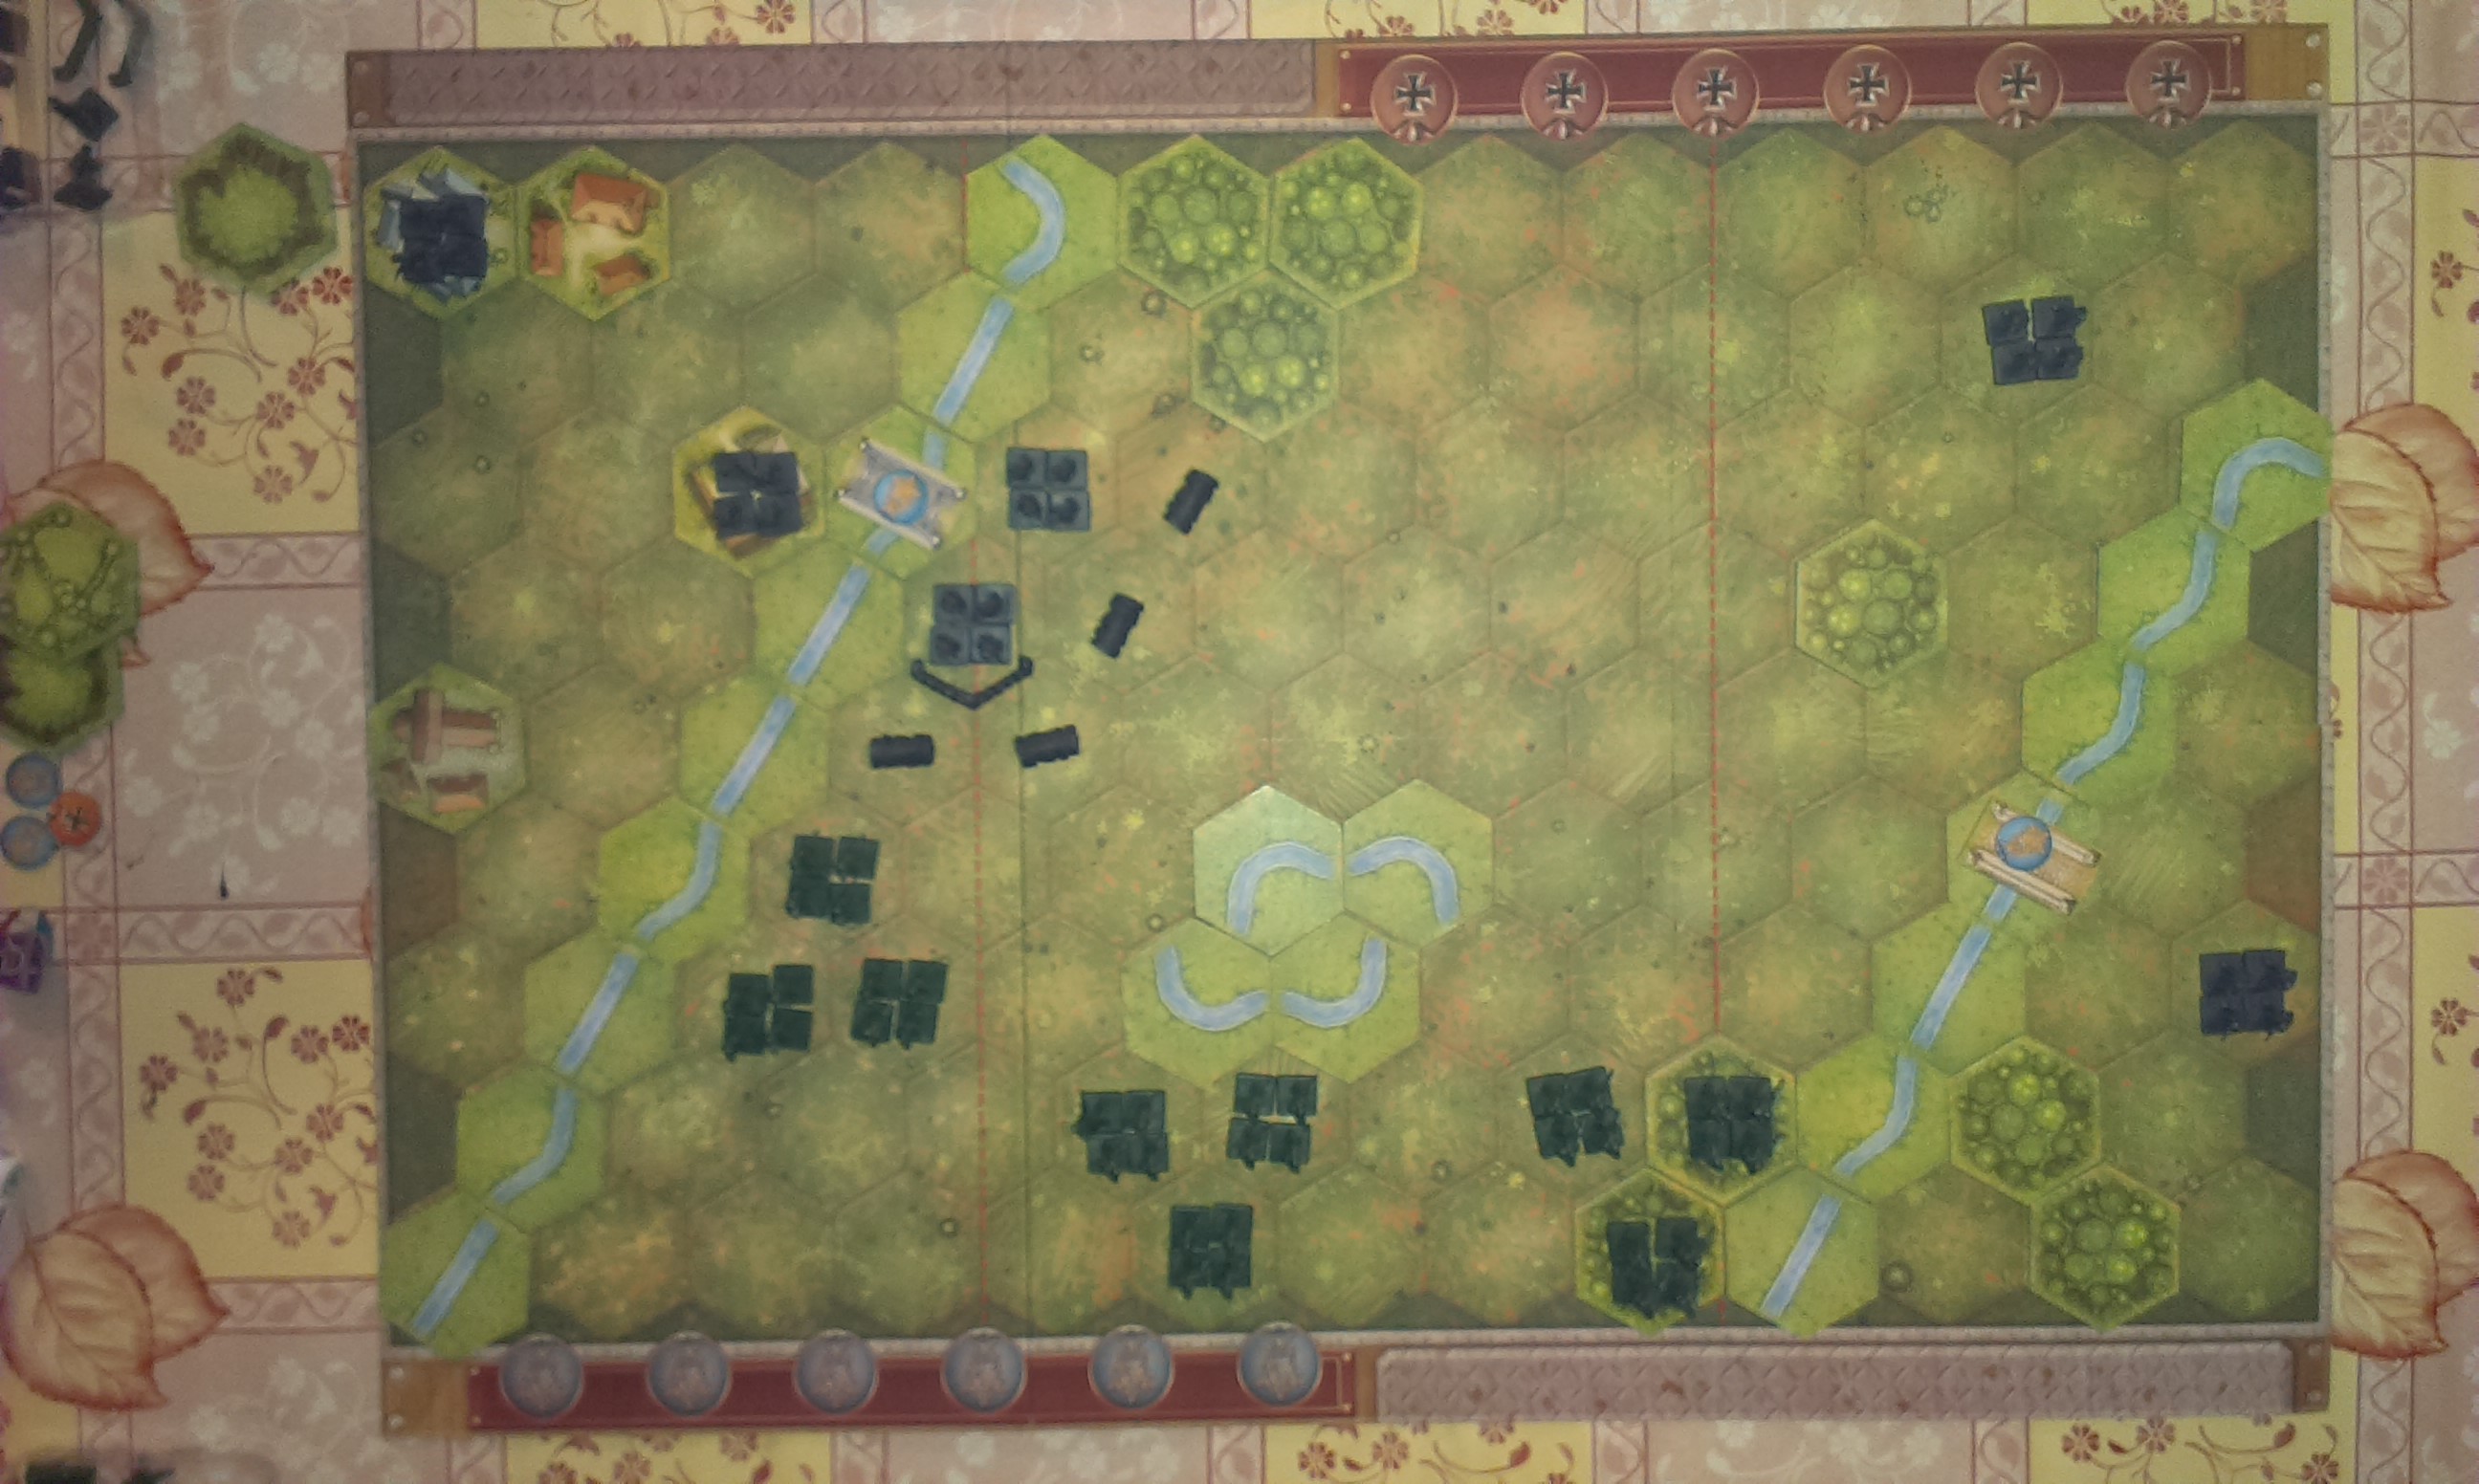
When you read the rules for this game you’ll see that the first scenario it recommends you play uses only the Infantry Units available to each side. This is very good, as the game builds you up to a thorough understanding of each of the different types of unit available to you in different scenarios by introducing them one at a time into gameplay.
You start by setting up the board, as directed in the instructions for the scenario you’re playing. You change the look and layout of the board by using the terrain hexes to put in woods, hills, villages, rivers etc.
The starting set up of the first scenario in the rule book
Once you’ve set the board up for the scenario you then decide who’s playing as who. In the rule book the scenario instructions will tell you which side plays first, and how many Command Cards each player is dealt to begin with. Players then take turns. There will be a preset condition for victory in each scenario.
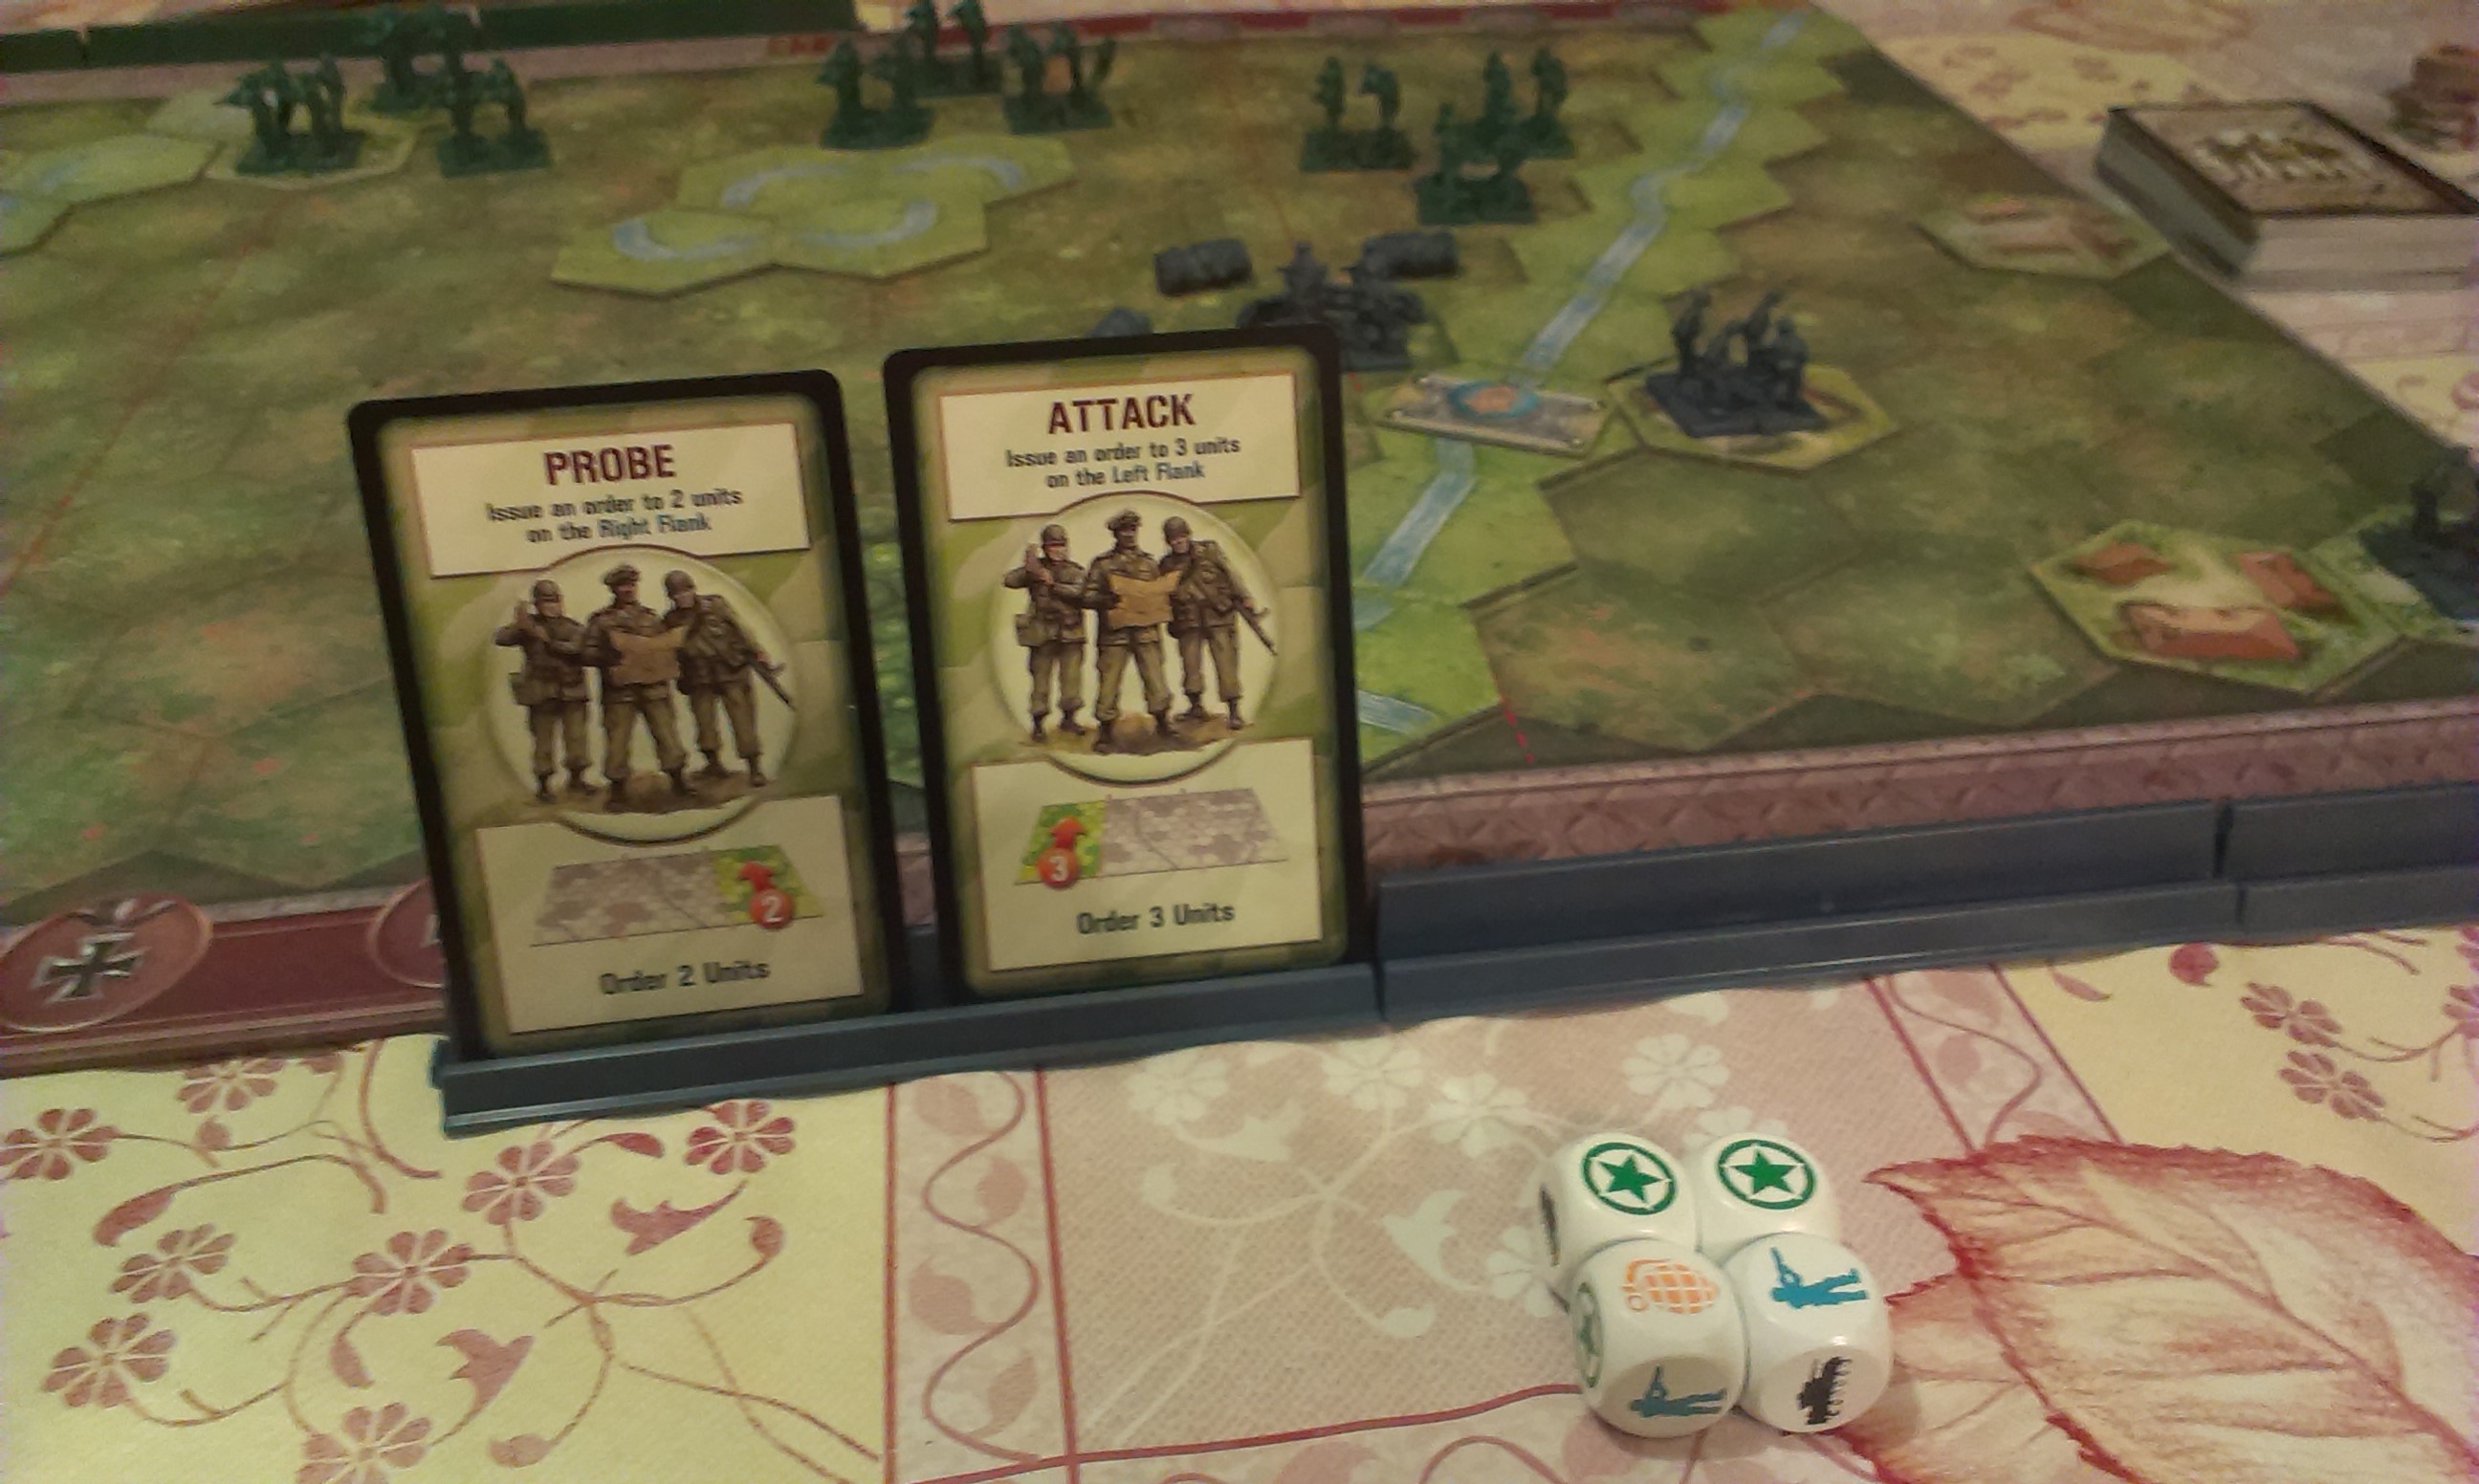
The Command Cards contain an array of things a player can do on their turn, standard orders or special commands. These mostly look like this:
an example of the Command Cards most commonly in play
The special command cards look like this, but are all different:
A special command card
Winning The Game:
There is no time limit to the scenarios, players continue taking turns until someone manages to destroy enough enemy units to fulfill the victory conditions for the scenario. Then the board is reset and players switch sides. A note is kept of the score from the first round, for example, if the victory condition was that someone needed to have completely destroyed 4 of their enemy units and the other player had destroyed 2 when this happened you would then make a note, and at the end of the following round the victorious players score would have to be the highest total number of units destroyed.
Strategy:
We realized fairly early into the playing stages of this that the scenarios are usually relatively heavily weighted towards one player, they may have an advantage in the number of Command Cards they have, or in having bunkers or sandbags. But despite this, if you play reasonably tactically, all the scenarios we’ve played so far could go either way.
We started out just playing the most obviously useful card we had in our hand at the start of each turn, and seeing where it got us. Because the destruction of a unit is determined by a combination of the card you played, the position of your units, the terrain around you and the rolling of battle dice it can be unreasonably hard, on occasion, to annihilate a unit that should have been wiped out the first time you attack it. This is both true to the slightly unpredictable nature of a battle, and completely inaccurate as an Armour unit fighting Infantry at what is more or less to be considered point-blank range should not somehow manage to miss all of them. But that aside, it is possible, tactically, surround and destroy units, using terrain disadvantages to your advantage.
There is a lot to be said about strategy on this game, but we’ve decided that in the interest of keeping you interested, we’ll go into much more detail on tactics and strategy, as well as historical overview and other exciting things like that as we write about each scenario individually.
History and Interesting Things:
The game was designed to commemorate the men and women of WW2 and the sacrifices they made.
It was published in collaboration with the Mission for the 60th Anniversary of the D-day Landings and Liberation of France.
In 2004 it was awarded the International Gamers Award for the General Strategy: 2-Player category.
There are eleven expansions for this game, all of them require the original to play.
The game can be played with up to six people, playing in teams of three, each commanding a different section of the board.
There is more to write, but we want to look at the history of each scenario in greater detail over the course of the month, as we’re doing with our Strategy section of each post.
To Conclude:
As is evident, we love this game. We hope that over the course of the month these posts will show us gaining a better understanding of the game, and knowledge of the historical associations of each scenario. As well as actually letting us play a game more than once, which will make a nice change to our usual style of review. If you can get a copy of this game and a friend or two who might be interested, do it. Otherwise, stay tuned for our upcoming post of the first scenario of the game Pegasus Bridge!