Spartacus: A Game of Blood and Treachery

NOW SELLING THIS GAME HERE: https://www.ebay.co.uk/itm/Spartacus-A-Game-of-Blood-and-Treachery-Gale-Force-9-Board-Game-Good-Condition/283678724813

4 - 5

Number of Players: 3 – 4

Year of Publication: 2012

Creator: Aaron DillJohn KovaleskiSean Sweigart (Designers) and Charles Woods (Artist)

NO! I’m Spartacus:

Spartacus: A Game of Blood and Treachery is a board game based on the TV series Spartacus: Blood and Sand ( which has a mini series prequel and is followed by Spartacus: Vengeance and Spartacus: War of the Damned and proceeded by a not so good Spartacus: Gods of the Arena). To reflect the style of the TV series this is the only game I’ve come across, to date, that has an age rating on it:

The age rating at the top corner of the box lid.

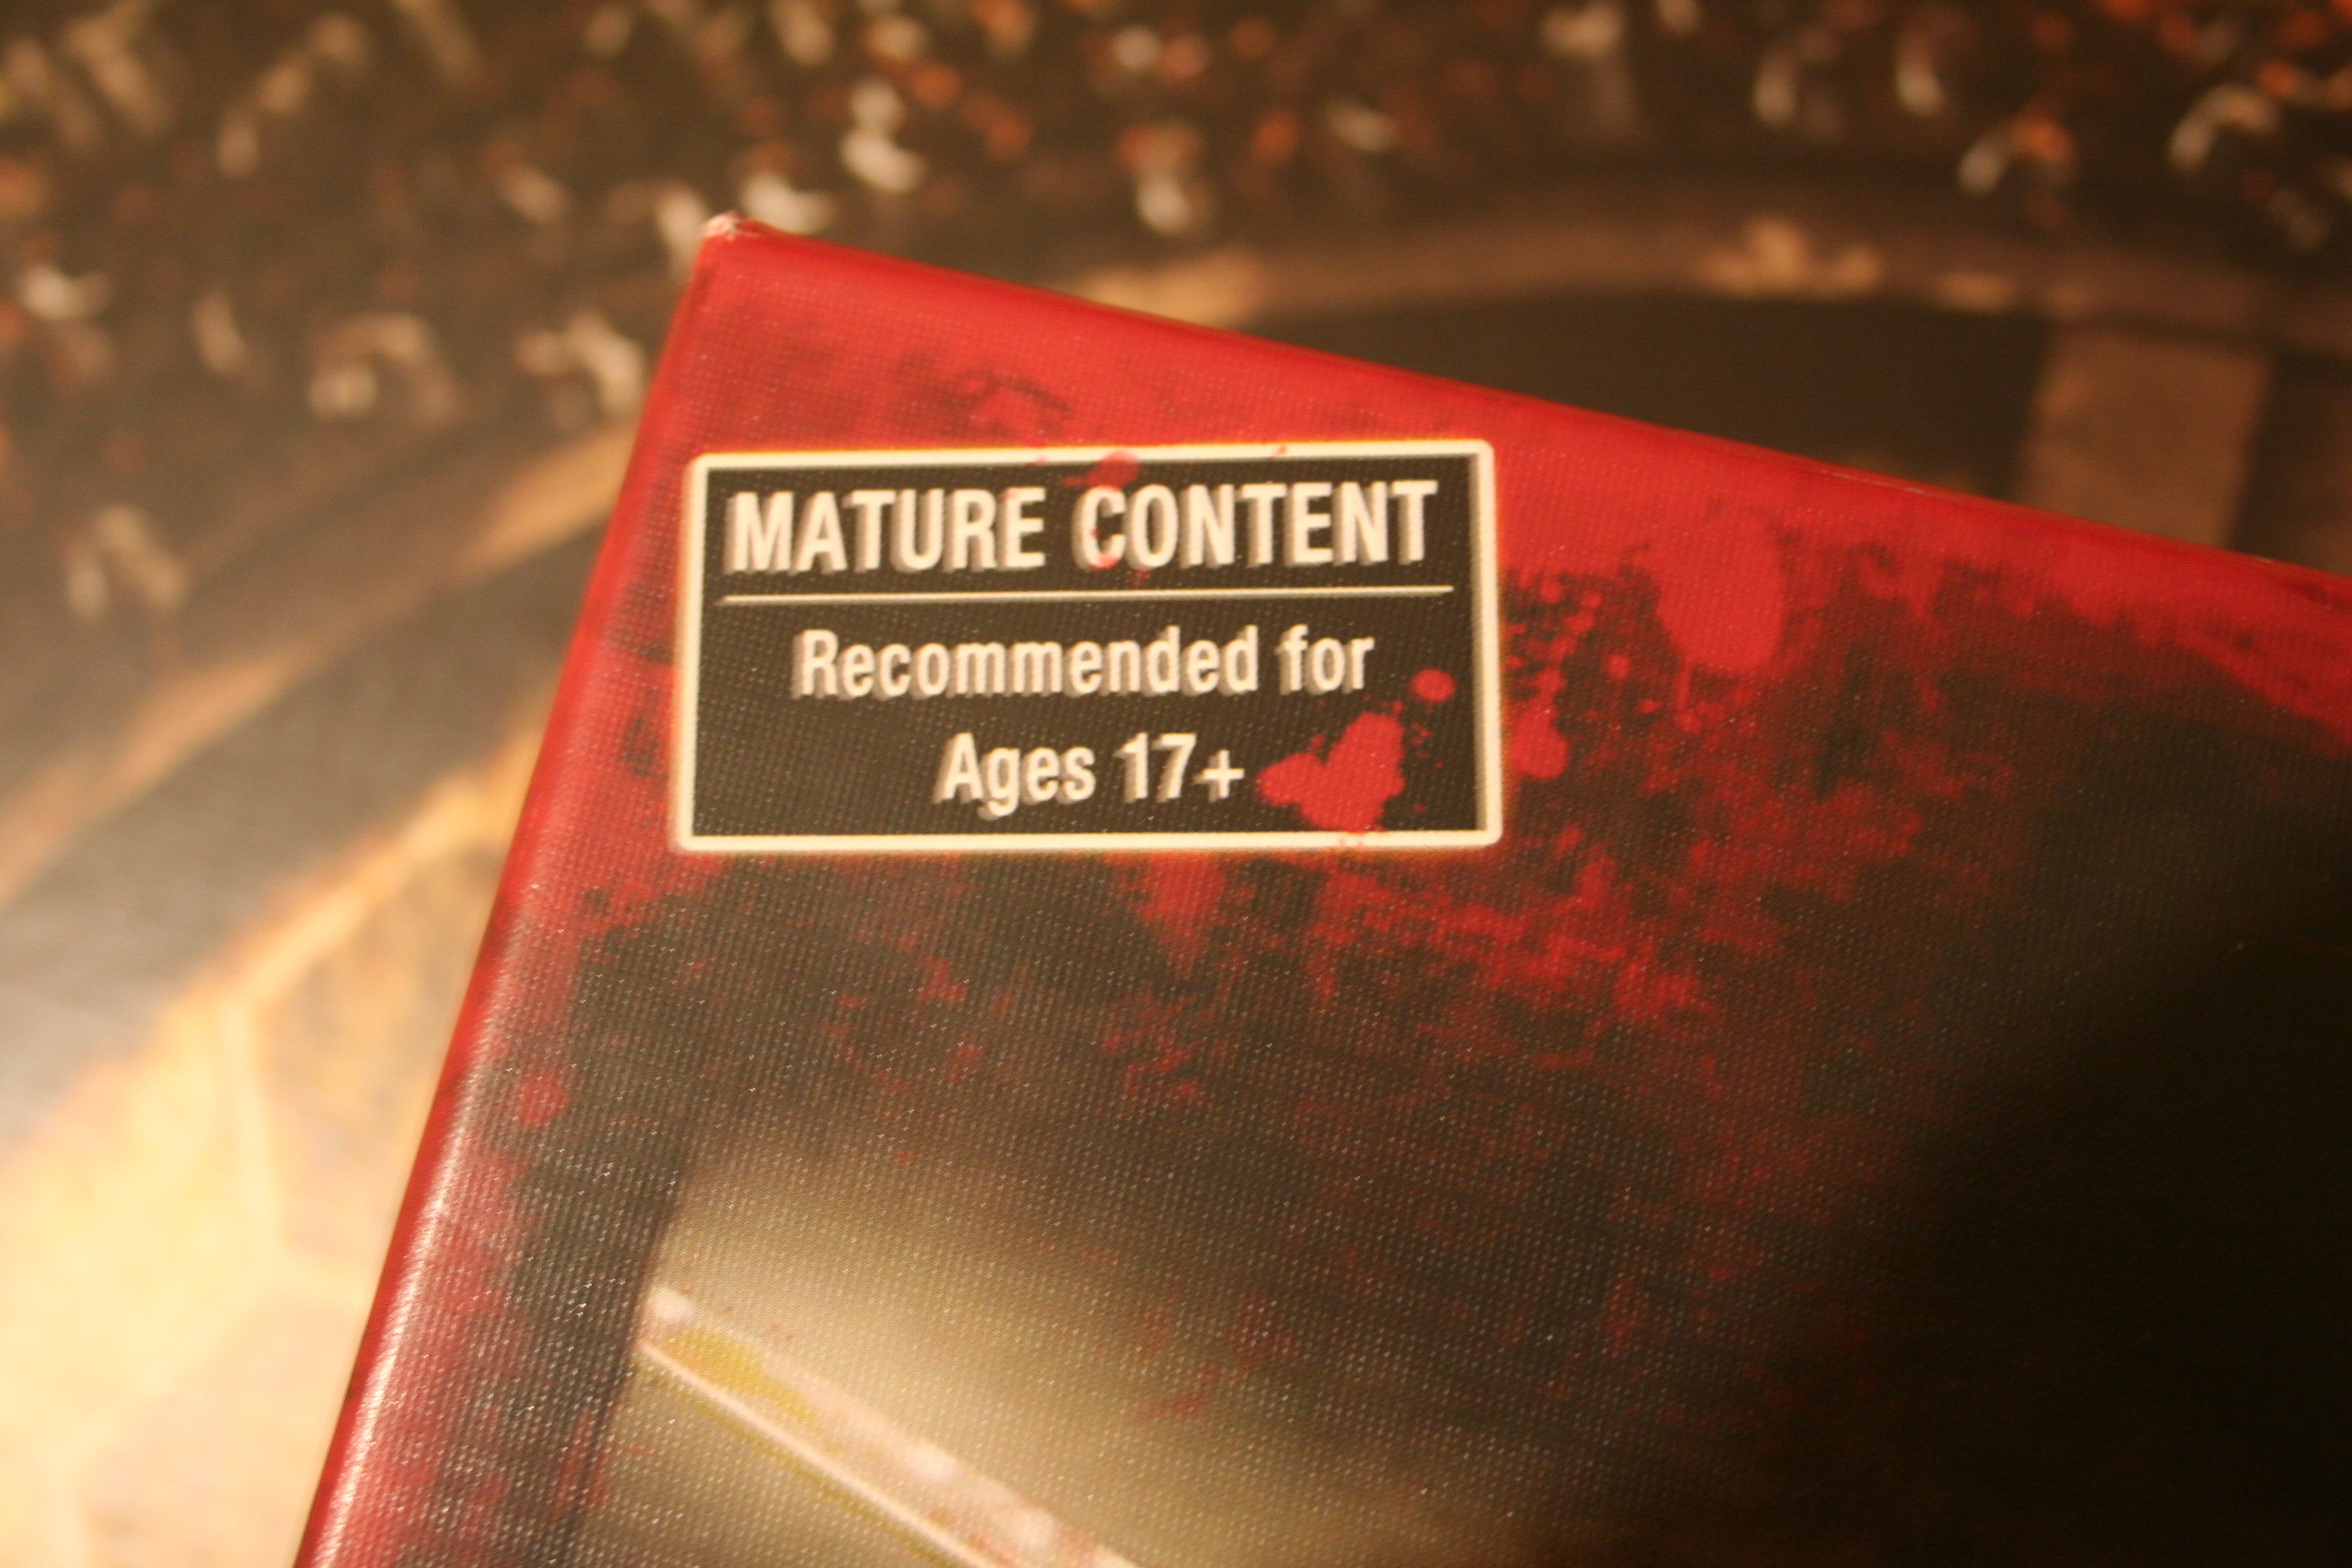
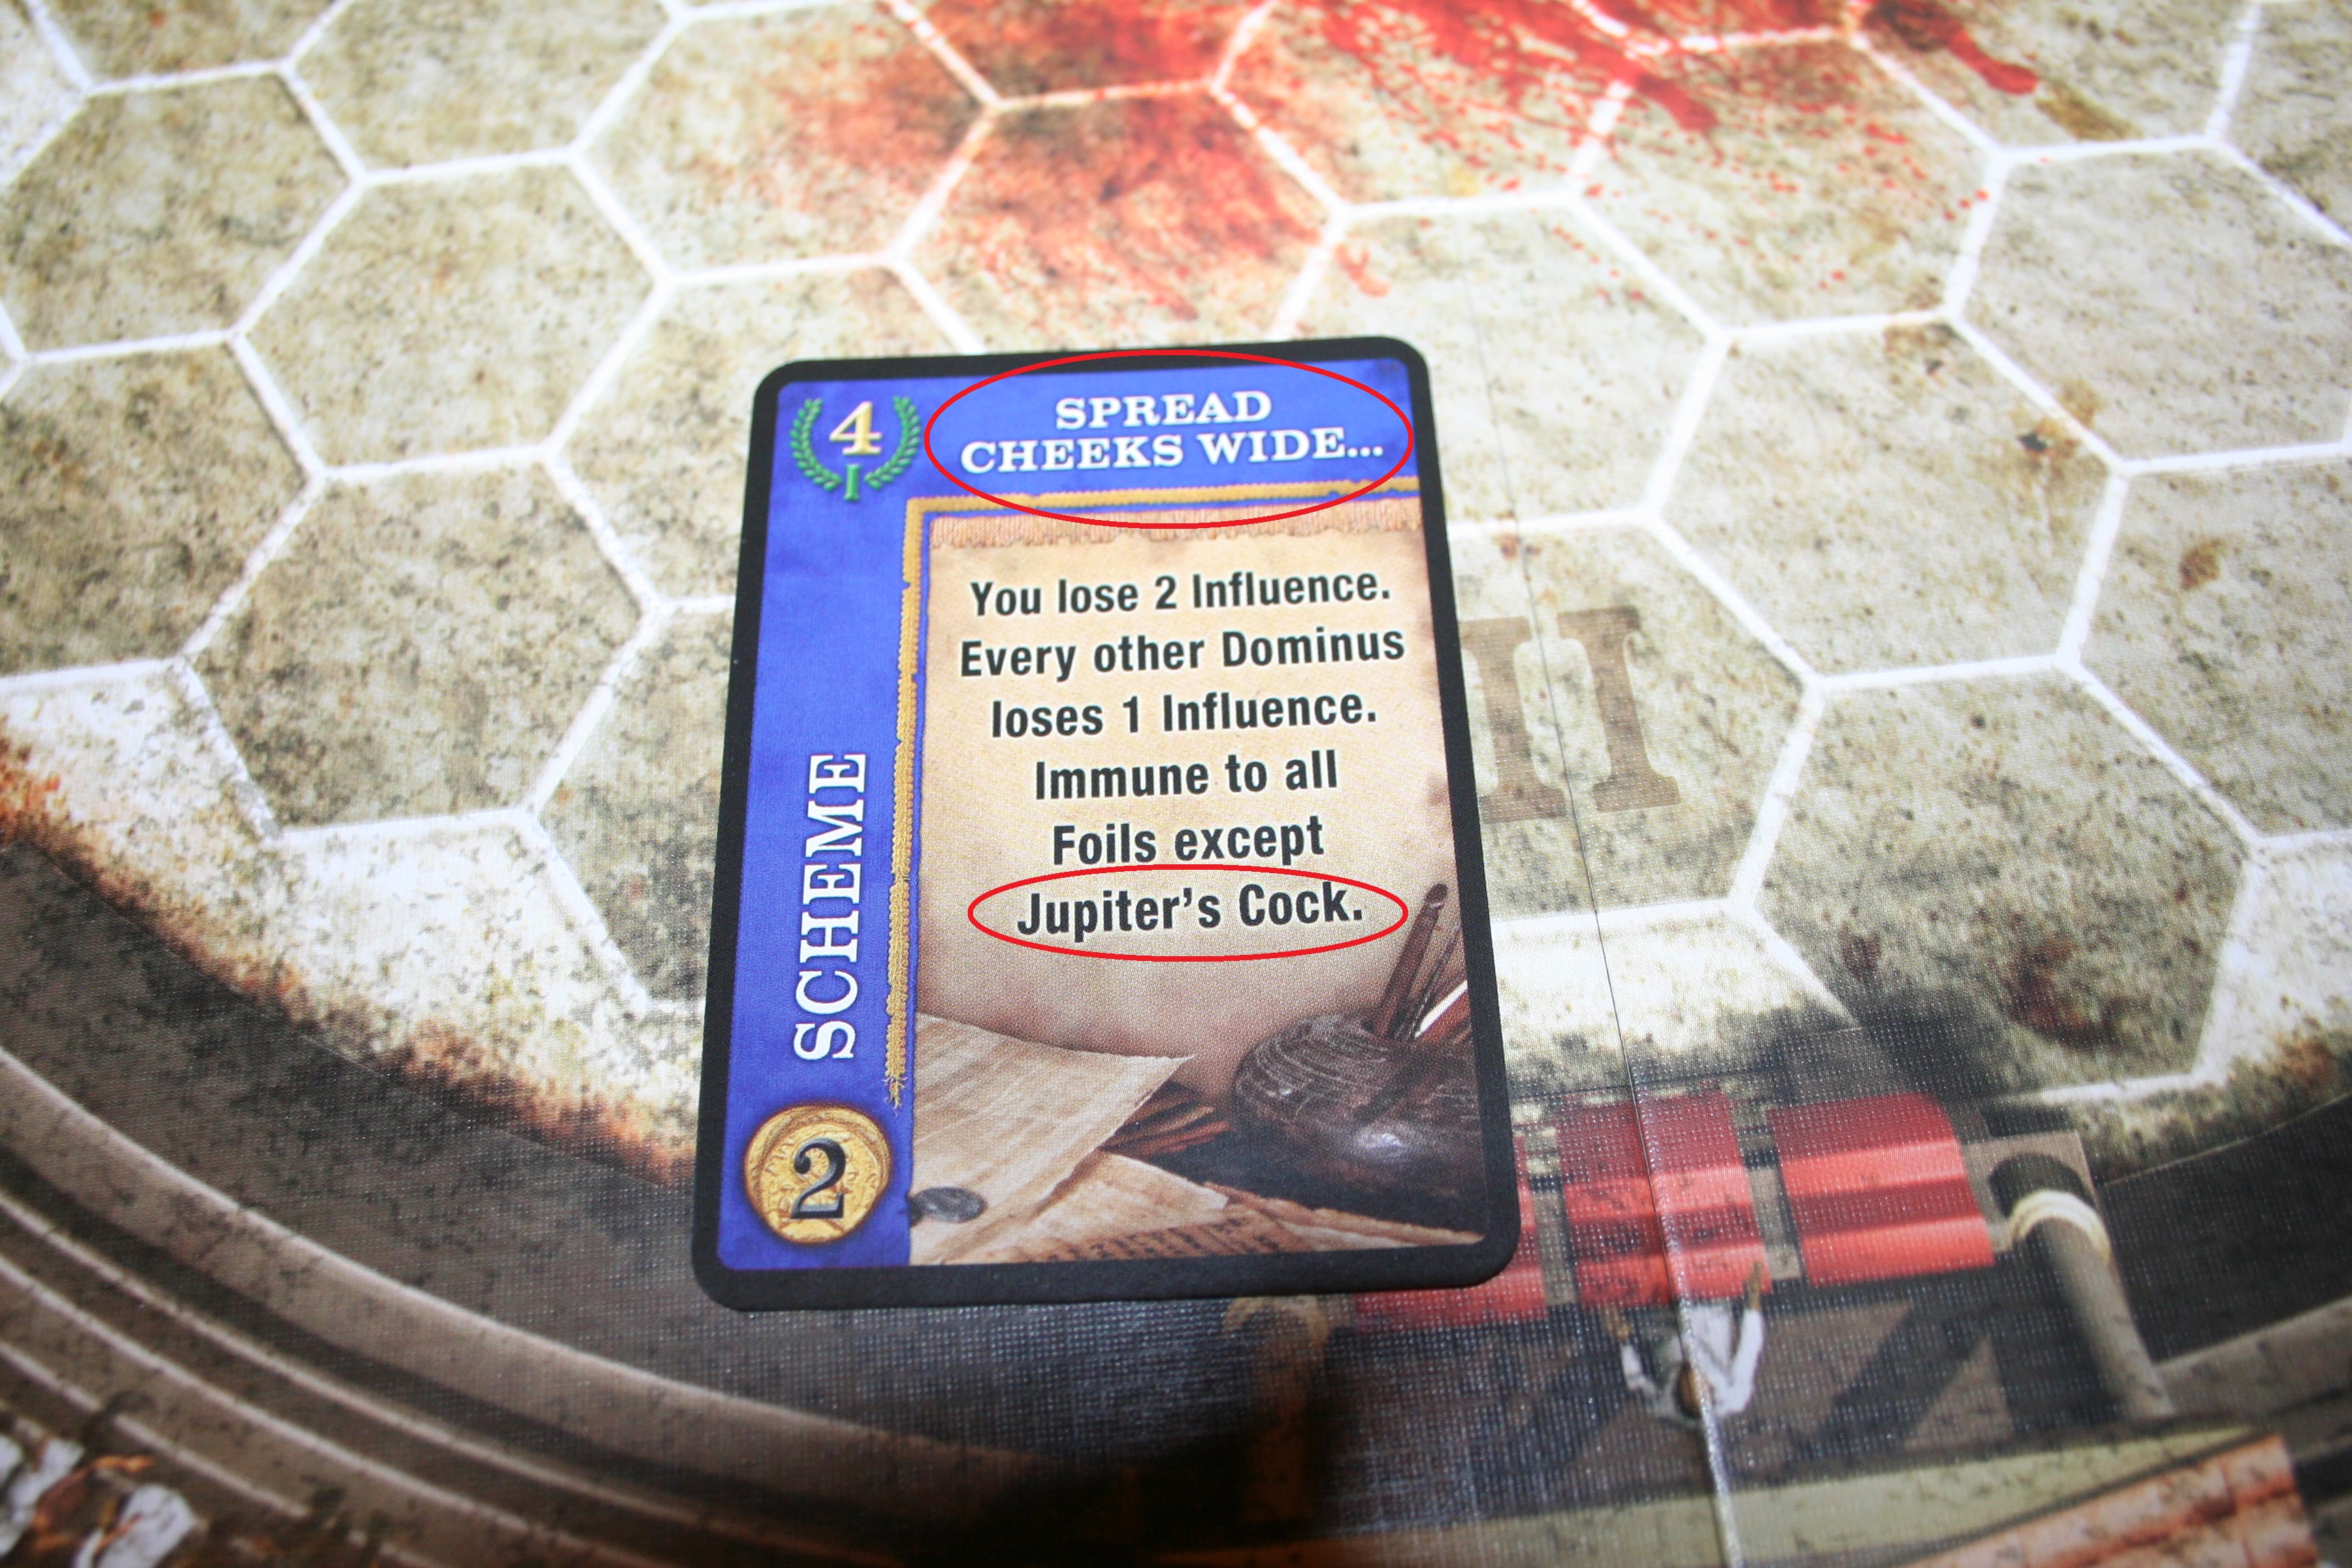
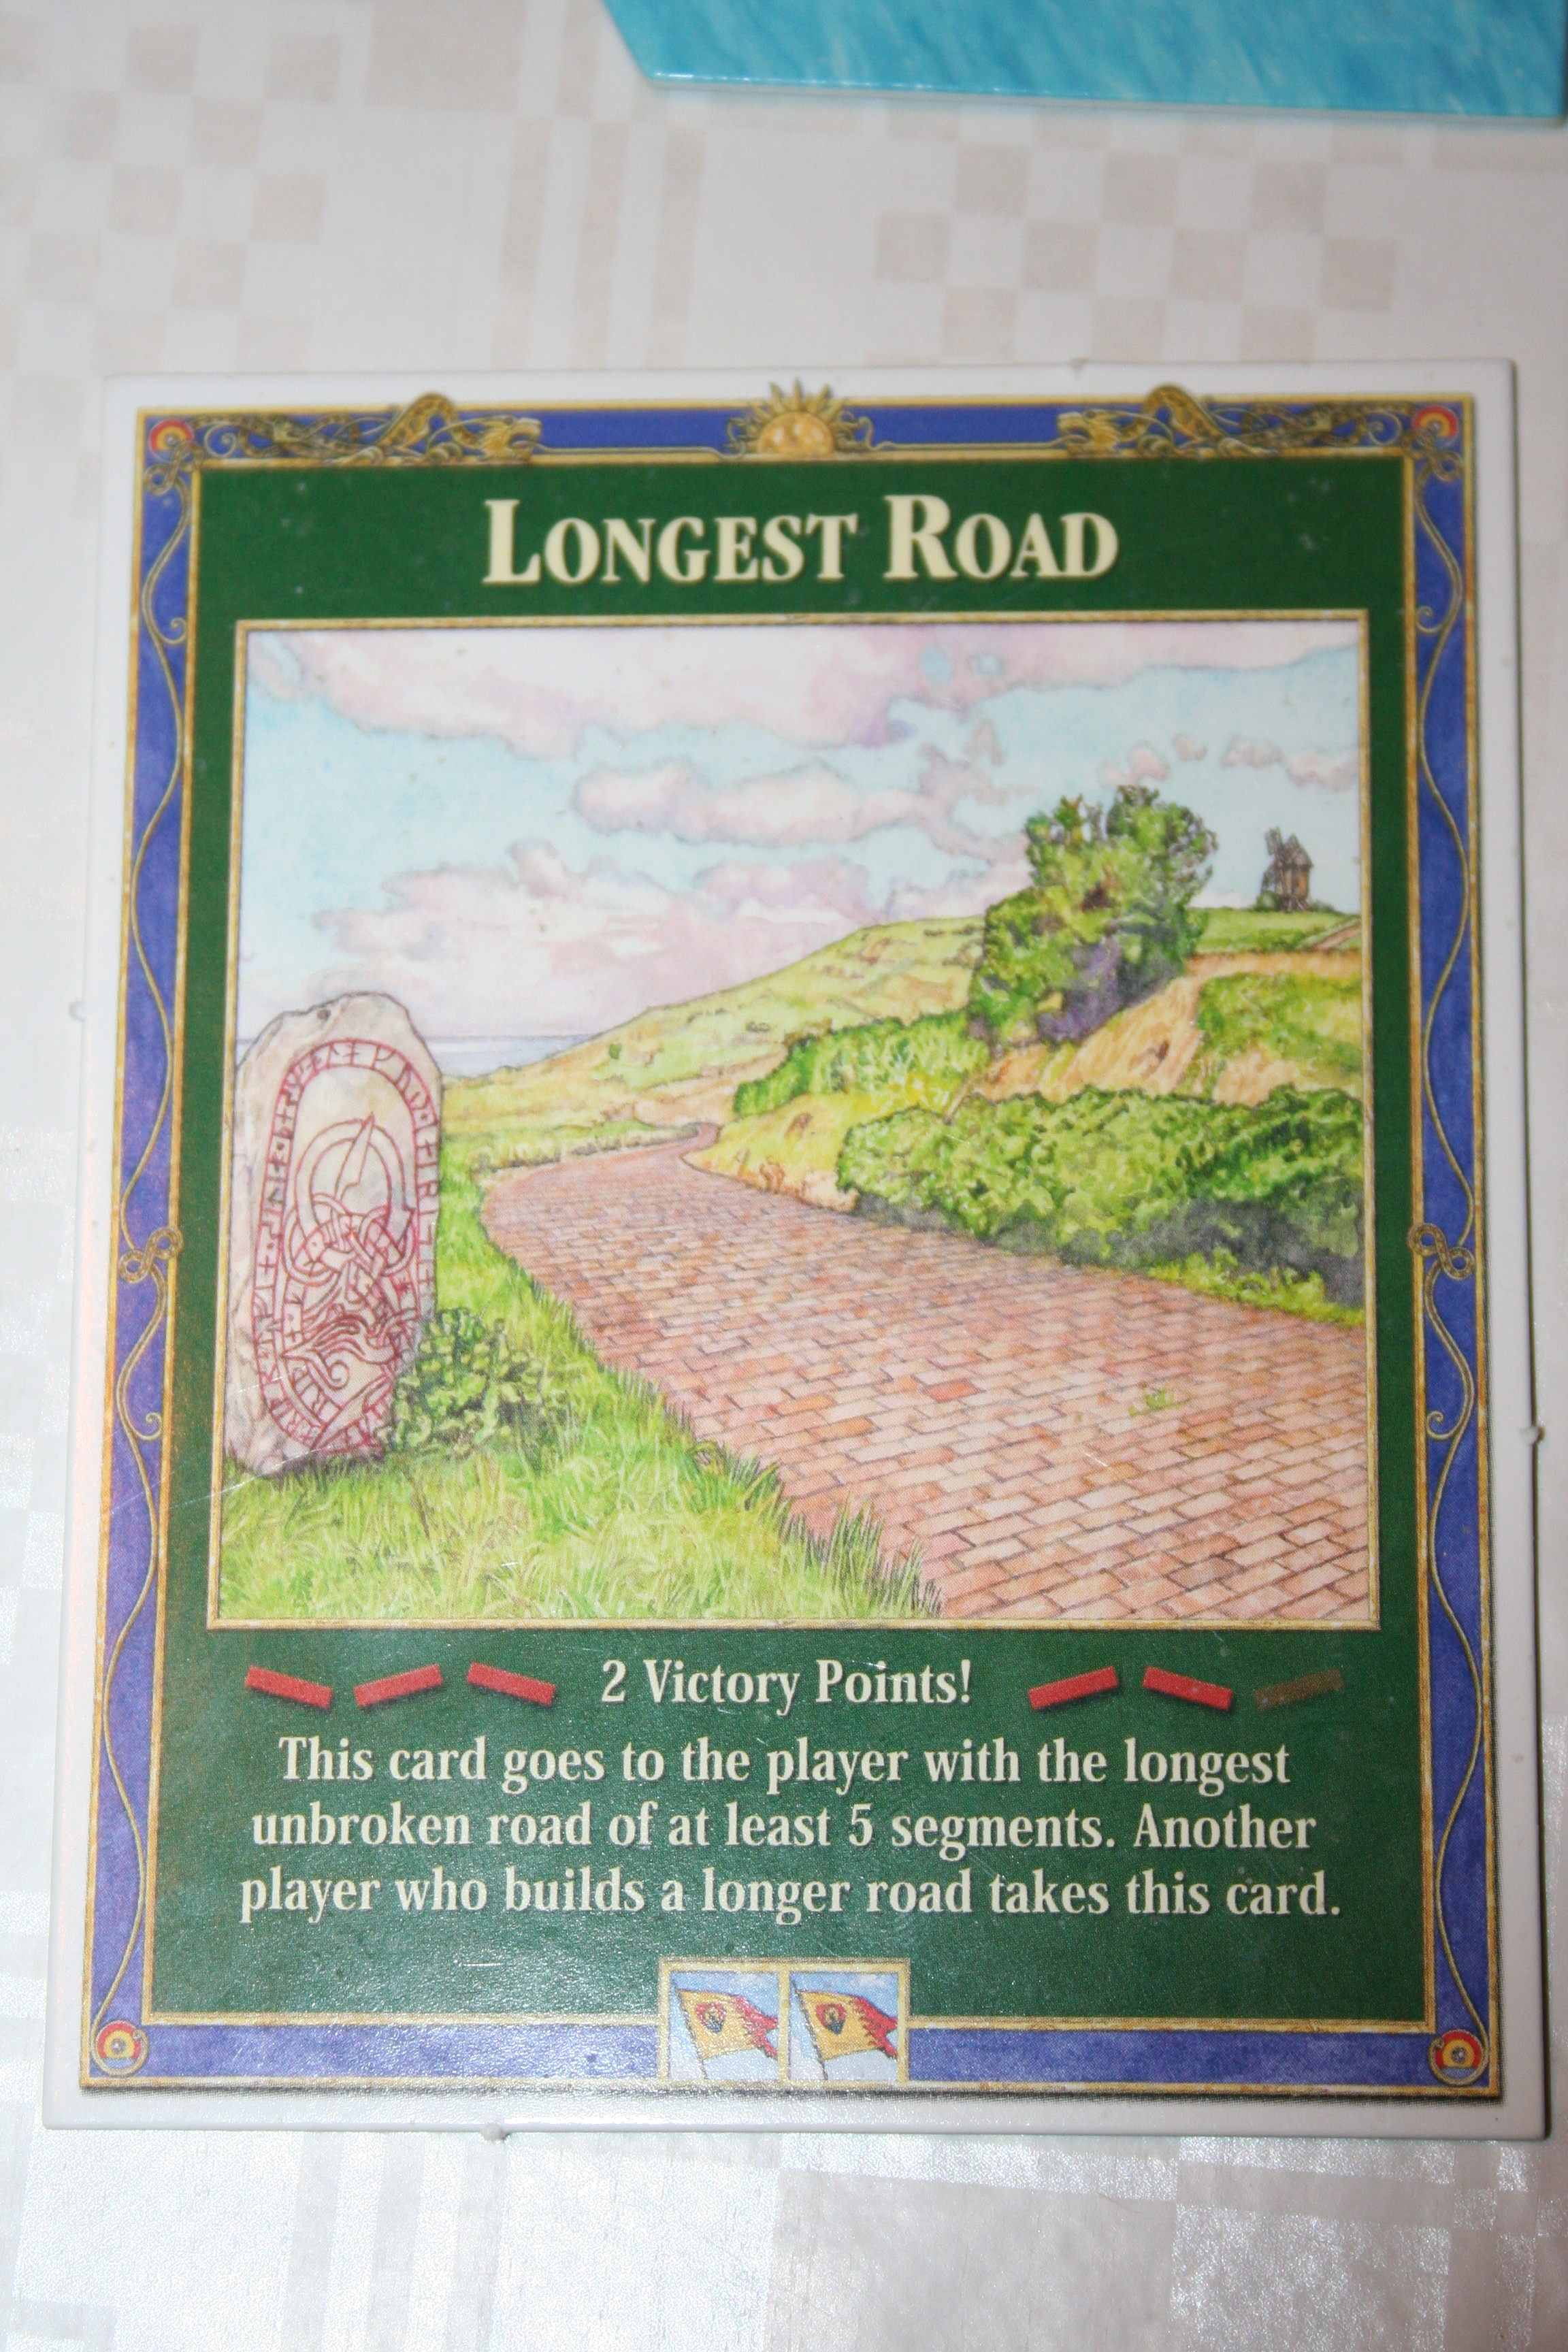
And because of this you get cards with things like this written on them:

This did make us laugh...a lot.
This did make us laugh… A lot.

Now unfortunately, being a big fan of the TV series this review is unlikely to be completely non- biased, I will however do my best to stay objective.

What’s In The Box:

The Stuff!
The Stuff!
  1. Game board
  2. Rules Book
  3. 4 x House cards
  4. 62 x Market Cards
  5. 104 x Intrigue Cards
  6. 10 x Favor/Injured tokens
  7. 4 x Champion tokens
  8. 3 x House betting tokens (per house) and 1 x House marker (per house)
  9. 1 x Host marker
  10. 117 x Gold
  11. 4 x Gladiator figures
  12. 4 x Turn summary cards
  13. A lot of Dice (9 x Red, 9 x Black and 8 x Blue)

Playing The Game:

Objective: Be the first to raise your house influence to 12!

Depending on whether you want to play a Quick, Standard or Advanced game you set the starting amount of influence each house has to a different number:

  • Quick = 7
  • Standard = 4
  • Advanced = 1
Starting favor set to 7 for a quick game and the starting amount of things dealt out.
Starting influence is set to 7 for a quick game and the starting amount of things dealt out.

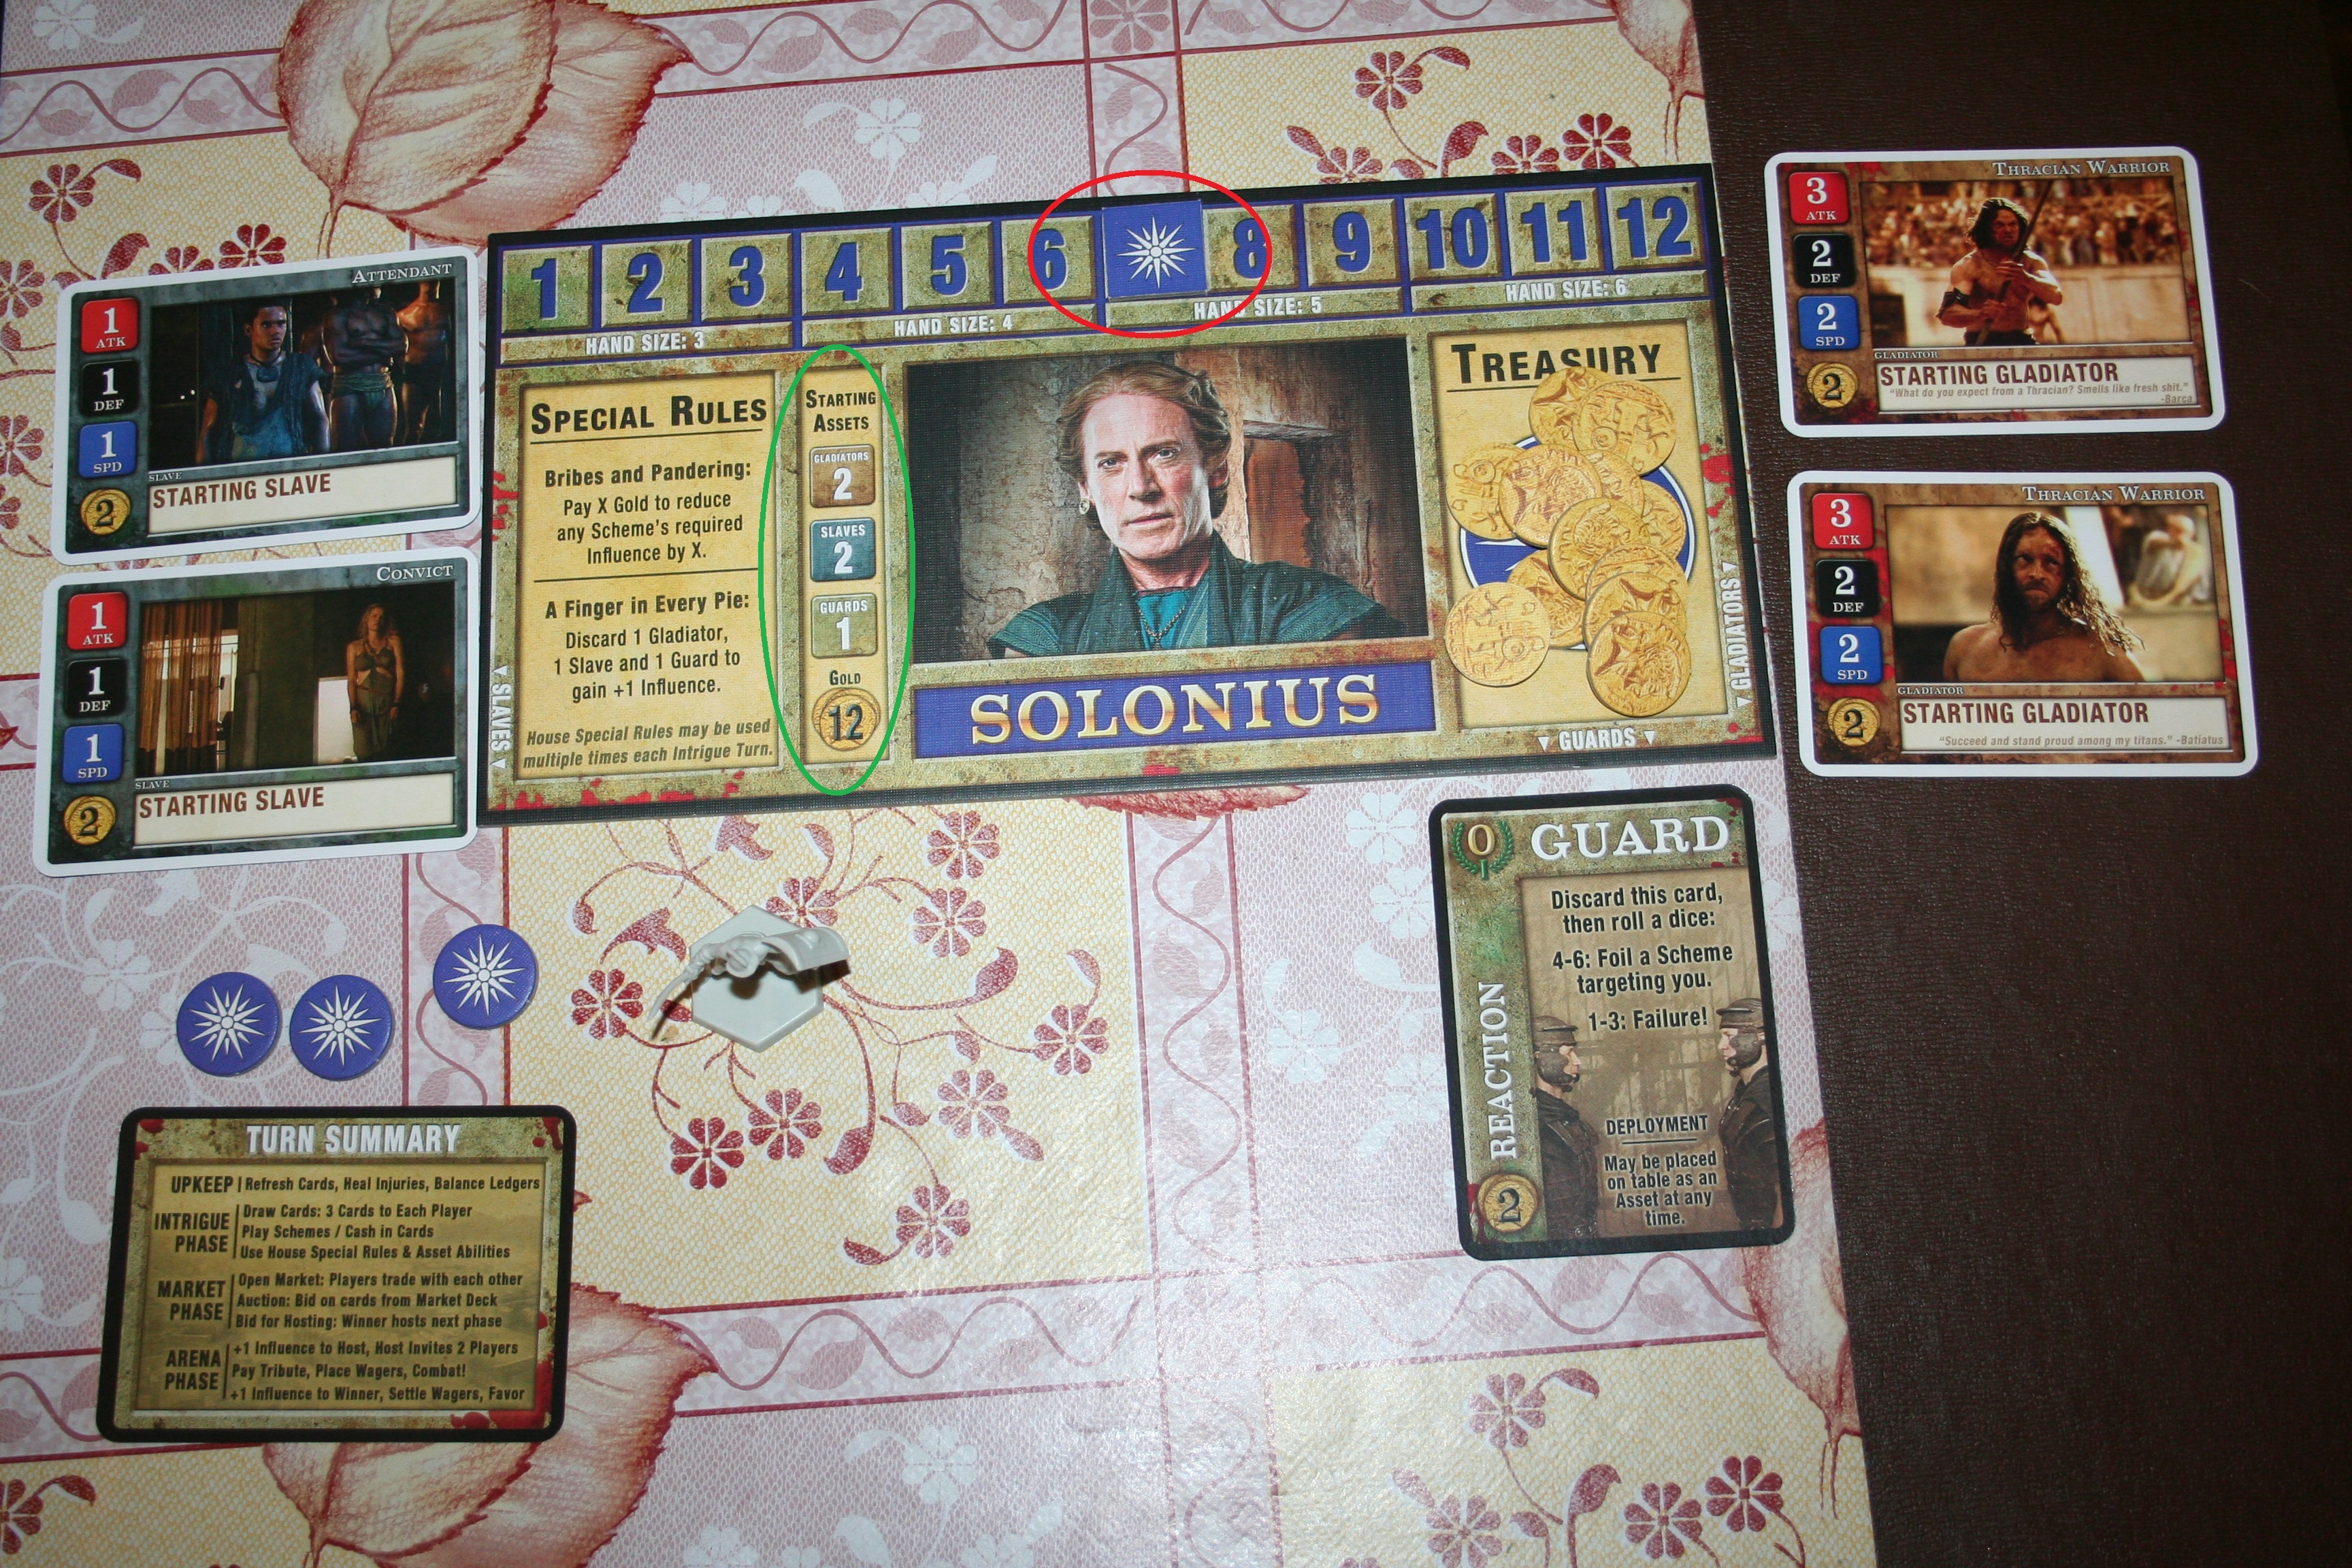
You then get dealt the starting number of items as dictated by your house card (circled green). So for Solonius that’s 2 Gladiators, 2 Slaves, 1 Guard and 12 Gold. Additionally each player gets one gladiator figure, their 3 house betting tokens and a turn summary card.

Now, every turn of play is made up of four sections:

  1. Up Keep
  2. Intrigue Phase
  3. Market Phase
  4. Arena Phase
Up Keep:

Up keep consists of three parts:

  1. Refreshing Cards – Any cards that have been exhausted in the previous round (so are face down) get turn back up so their abilities can be used again.
  2. Healing Injuries – Attempt to heal any injured gladiators or slaves by performing a healing role – on a role of 4 – 6 they are healed anything less and they stay inured.
  3. Balancing the Ledgers – You gain one gold for every ready slave you have and you must pay one gold to the bank for every ready gladiator you have – if you cannot pay (or don’t want to) you must discard the card that’s making you pay.
Intrigue Phase:

Intrigue consists of two parts:

  1. Drawing Cards – At the start of each intrigue phase each player draws three intrigue cards (players all receive three cards simultaneously).

    All Intrigue cards dealt.
    All Intrigue cards dealt.
  2. Playing Schemes/ Foiling Schemes/ Cashing in Cards – Some of the intrigue cards are schemes you can play against another Dominus (Latin word for master), cards that allow you to foil other schemes or get rid of an opponents guards. To play a Scheme you must have the right amount of influence  to play it (as listed on the card), if you don’t you can pair with another Dominus to play it by adding your influence together but beware; deals that are made can be easily broken. If someone plays a scheme against you you can foil it by using your guards and performing a dice role or you can play a scheme foiling card that are reactions to schemes and also require that you have the right amount of influence to play it. Finally if you don’t want some of you cards or can’t keep them (as your had size is dictated by the amount of influence you have) you can cash in cards for the amount written on them from the bank.
Market Phase:

This phase is made up of three parts:

  1. Open Market – At this point anything can be traded for anything for anything else. Except Intrigue cards, which cannot be sold.
  2. Auction – After open market is over each player conceals their gold in their hand and cards equal to the amount of players playing are drawn face down on to the board. The first card is flipped up; each player decides how much they want to bid for that card and hide it in their hand and hold it out over the board, then together they revel how much they have bid, highest bidder wins. Someone who bids nothing is ignored, but if everyone bids nothing the card is discarded. If there is a tie the two players who are tied place the amount they have already bid on the board and repeat the procedure until one player is victorious. This is then repeated with each card until all cards are sold or discarded.
  3. Bid for Hosting – This is done in the same way as the bidding for the cards. The person who wins the host bidding gets the Host token and it marks that they control the next phase of the game and choose who will fight who.
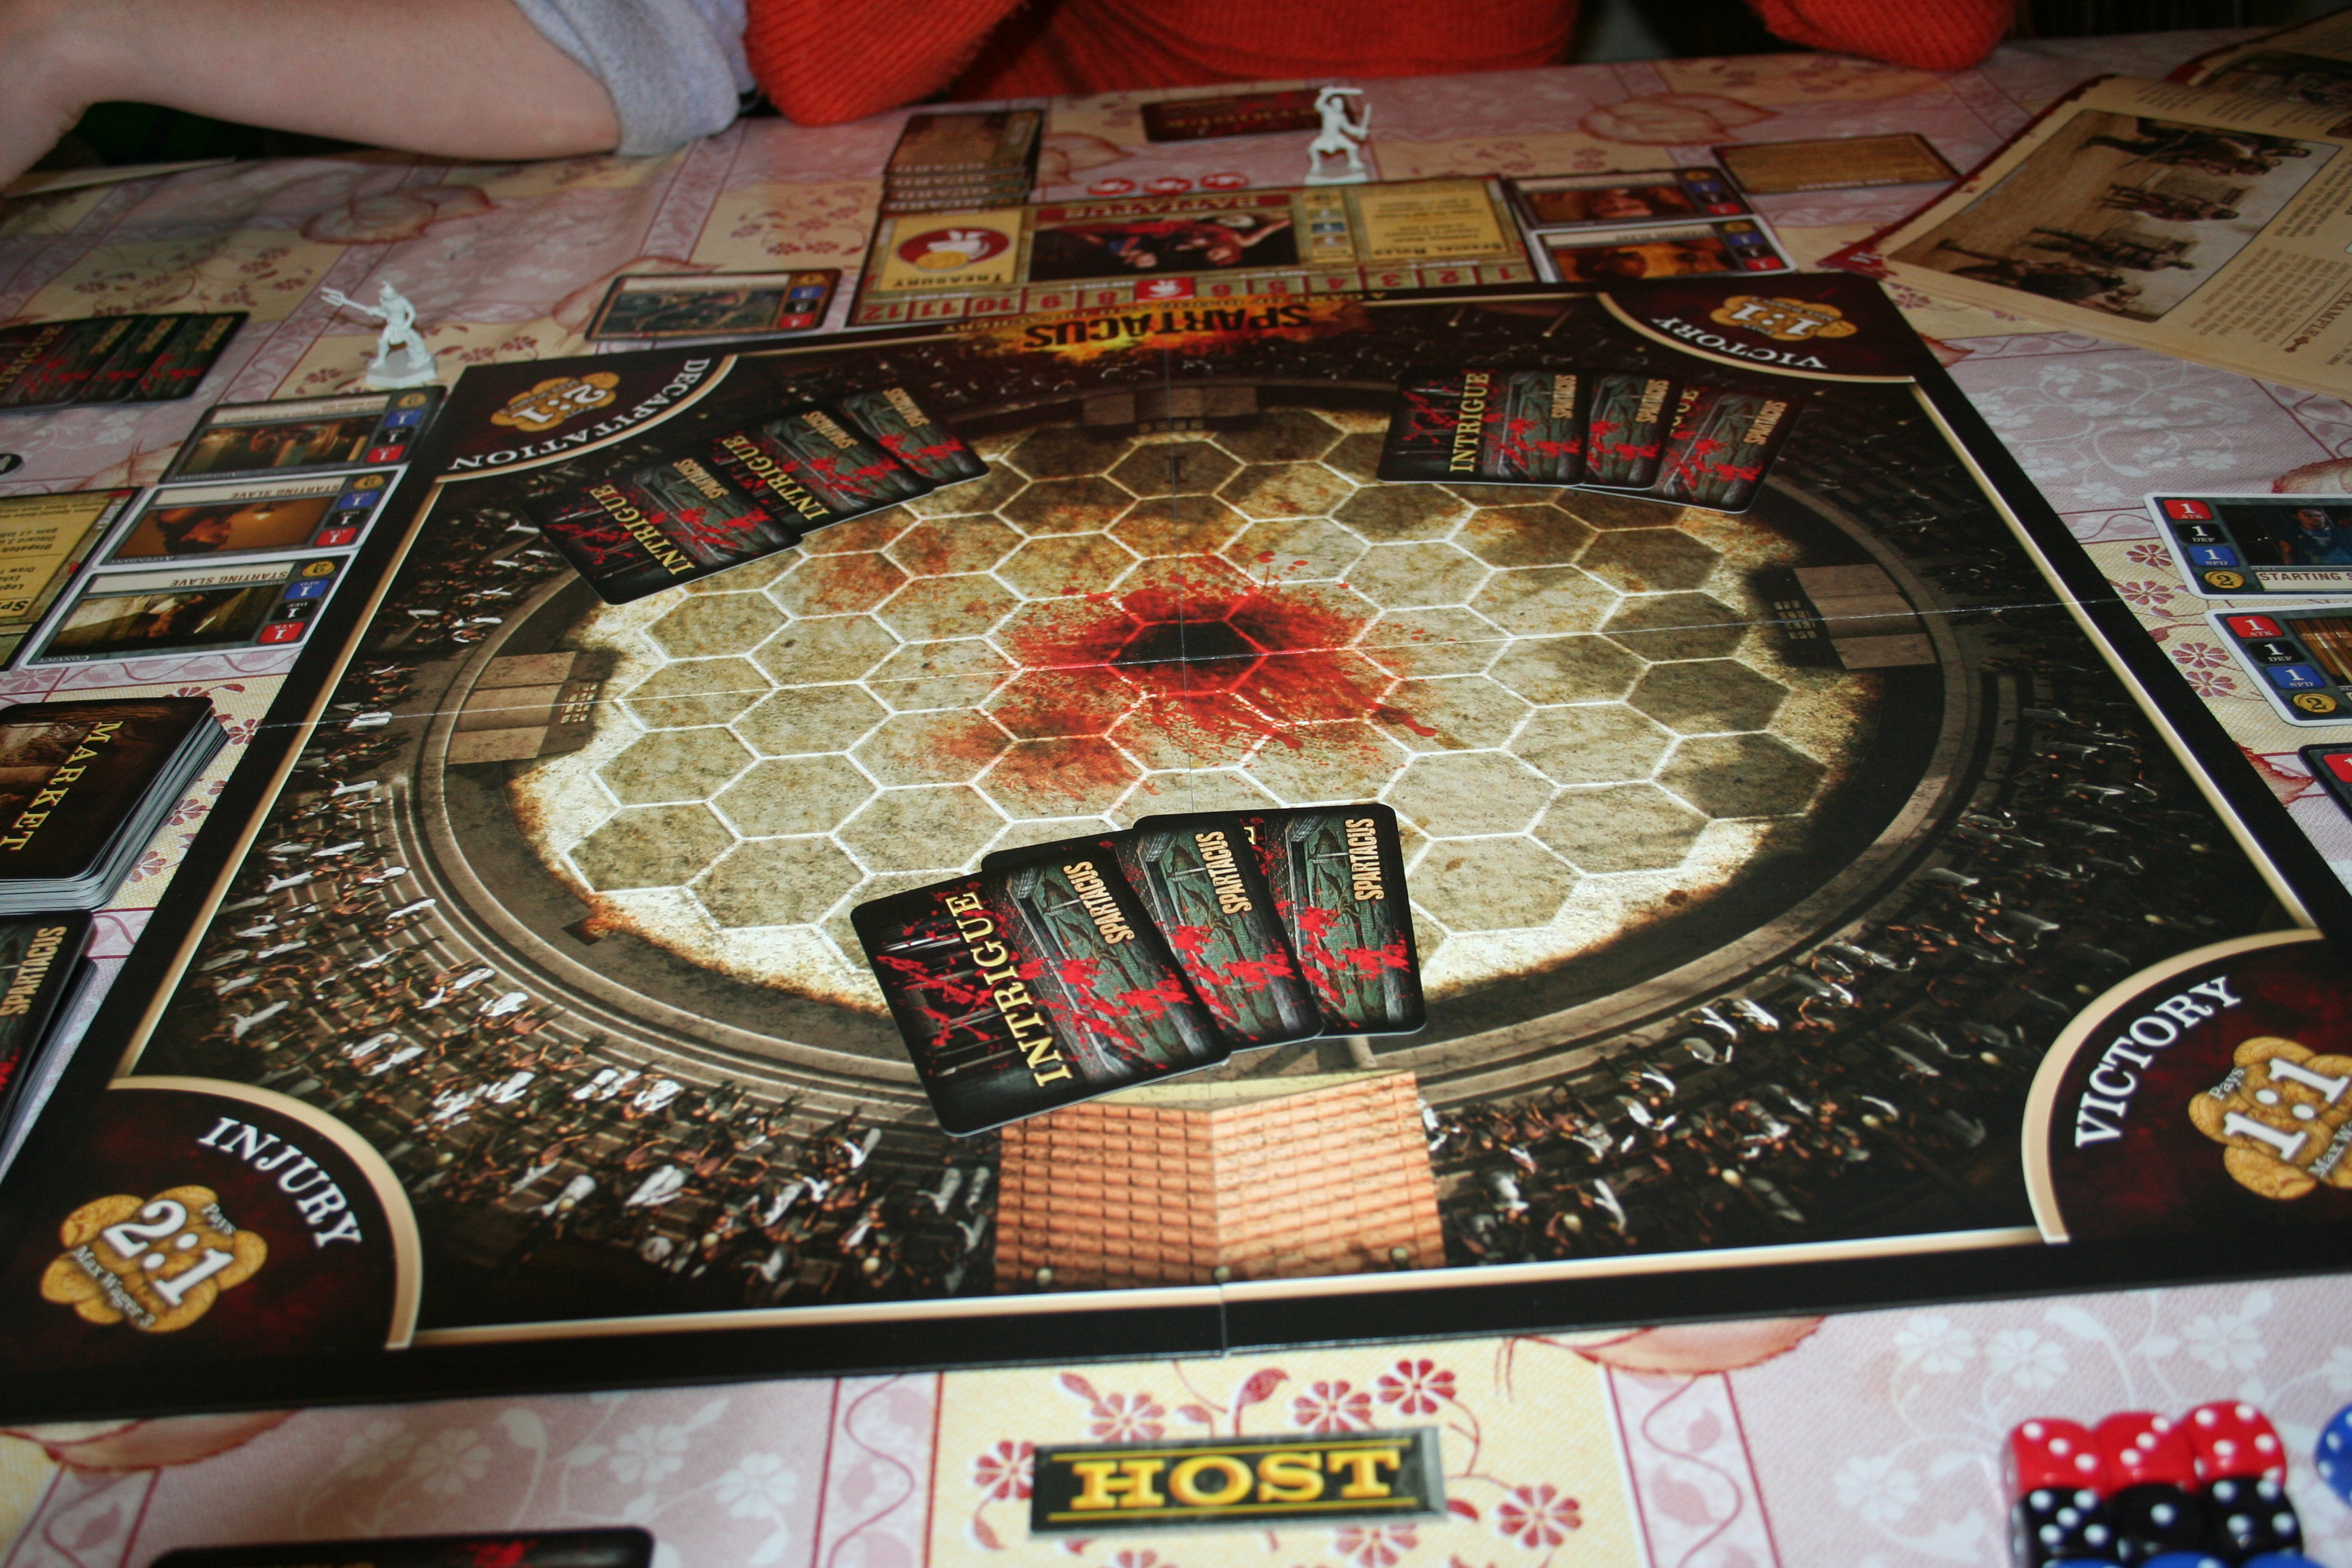
Arena Phase:

This phase is made up of six parts:

  1. Honour to the Host – The player that won the hosting rights in the auction gets +1 influence.
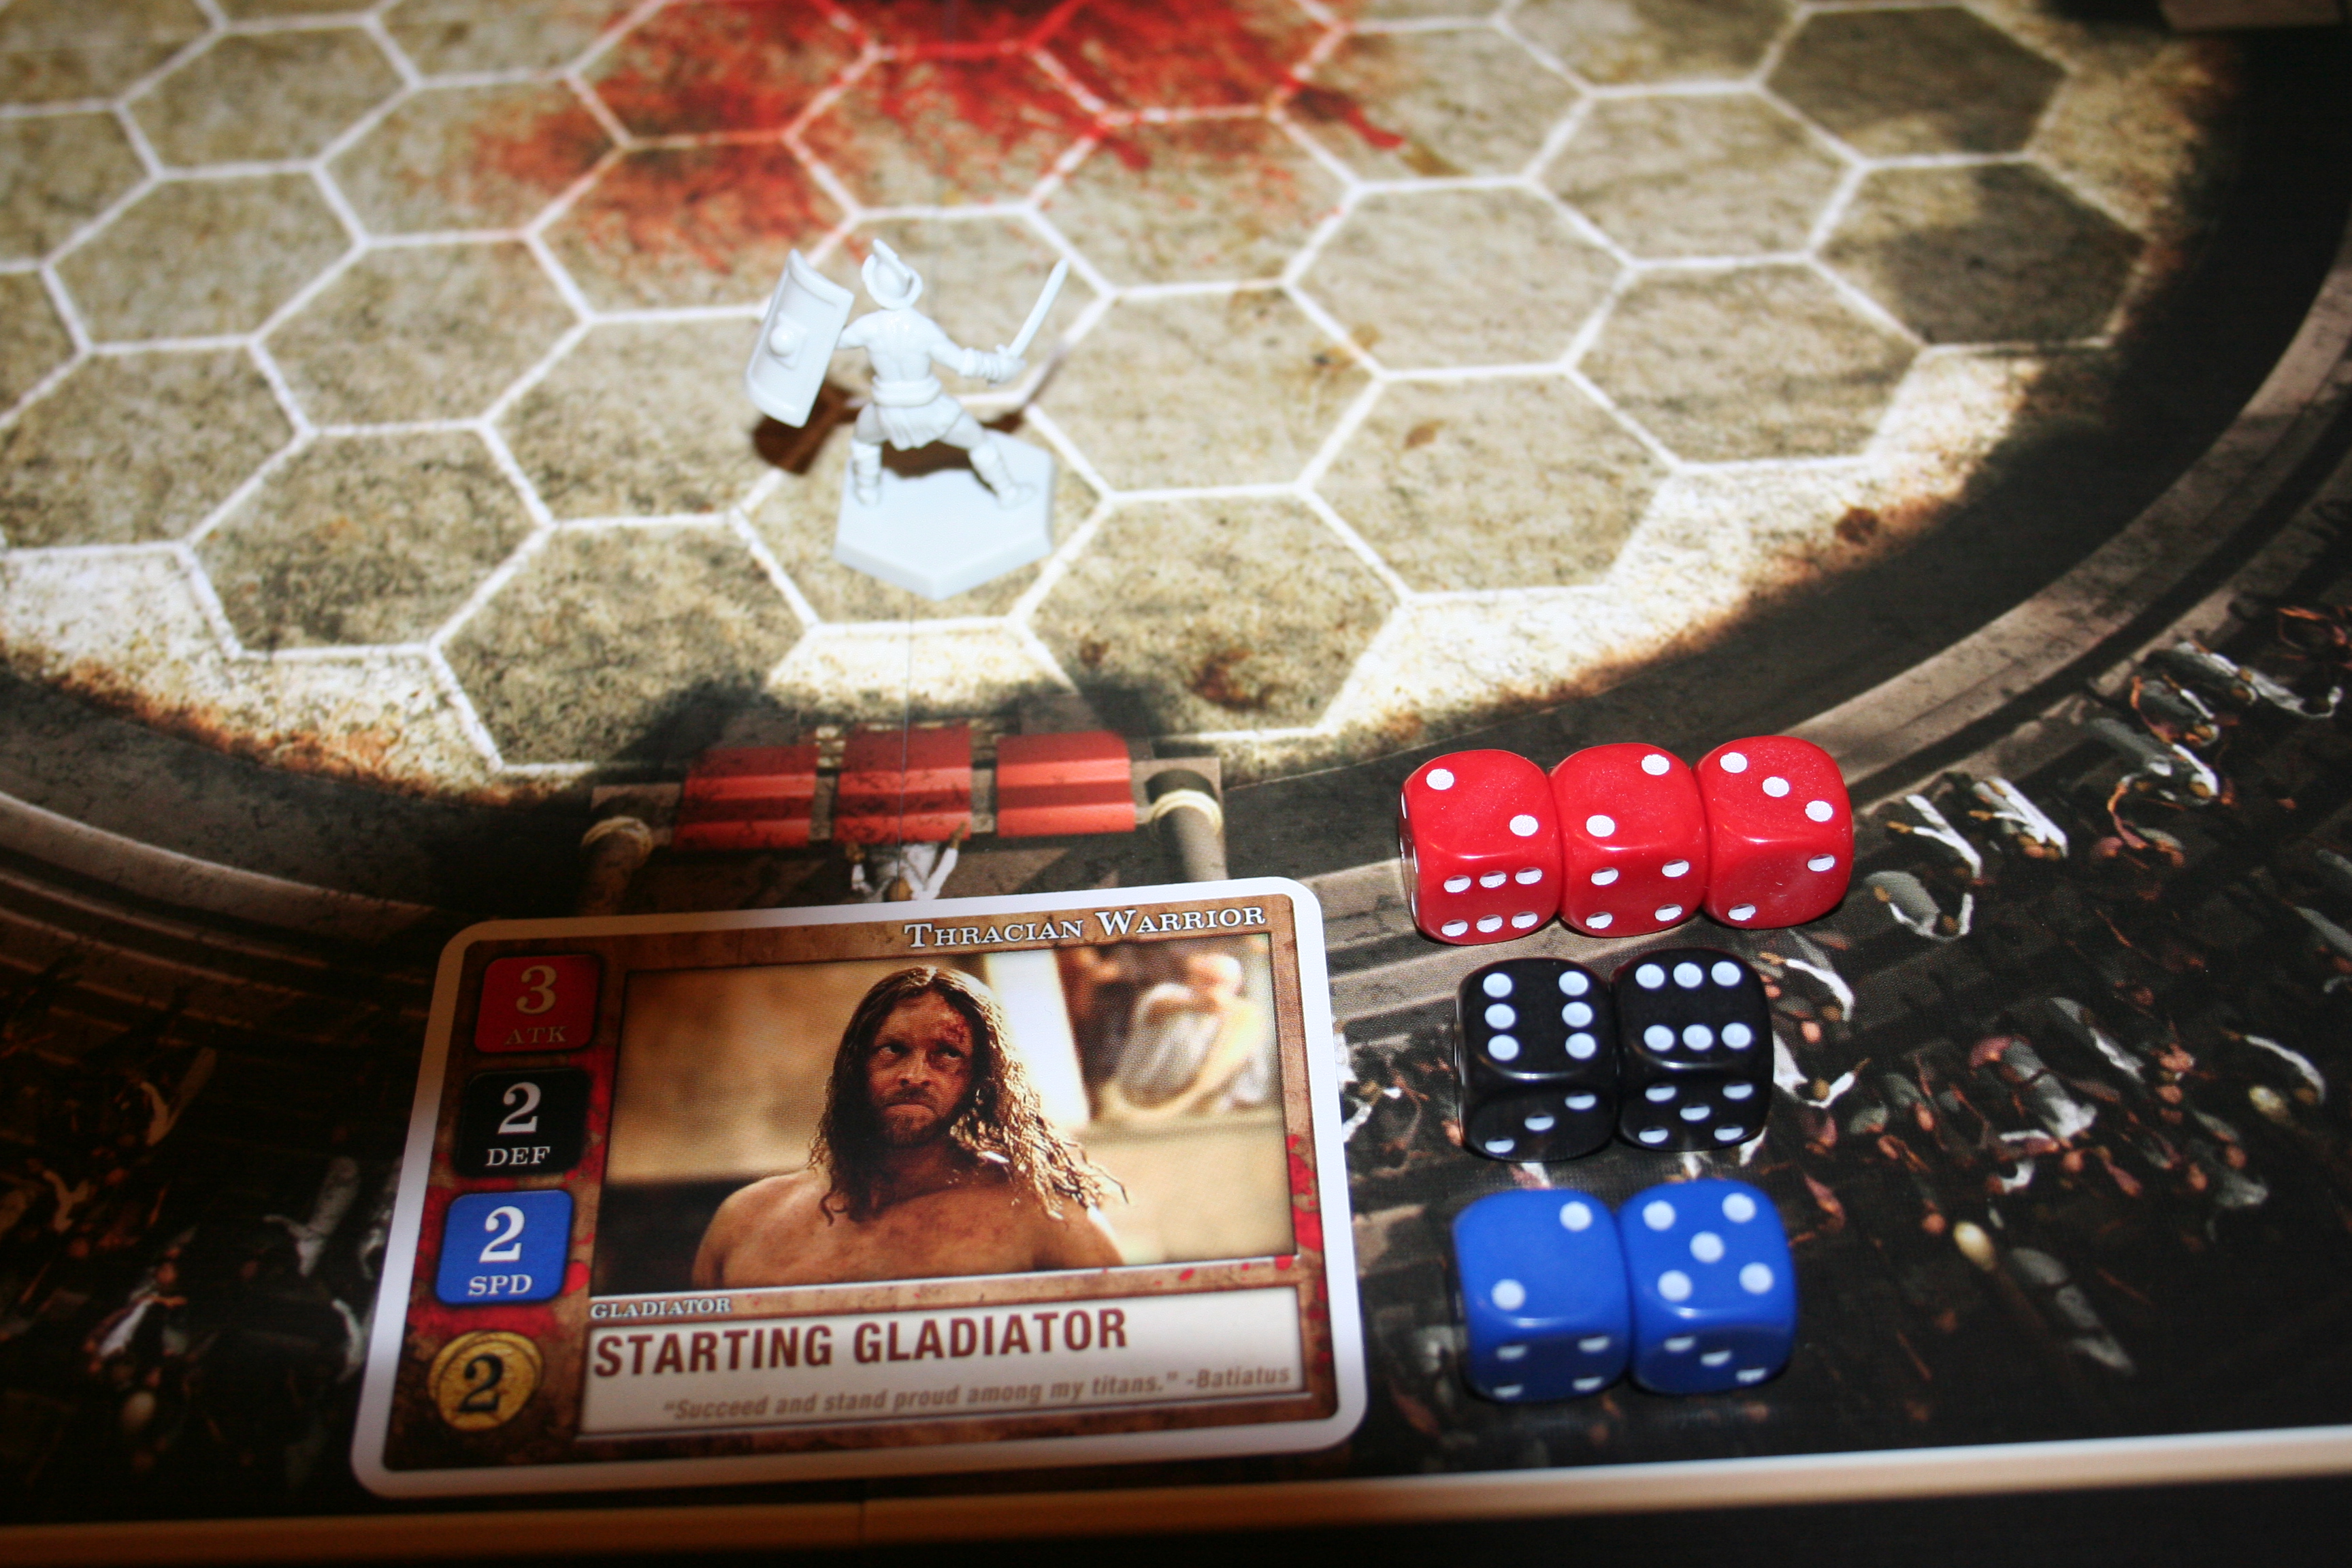
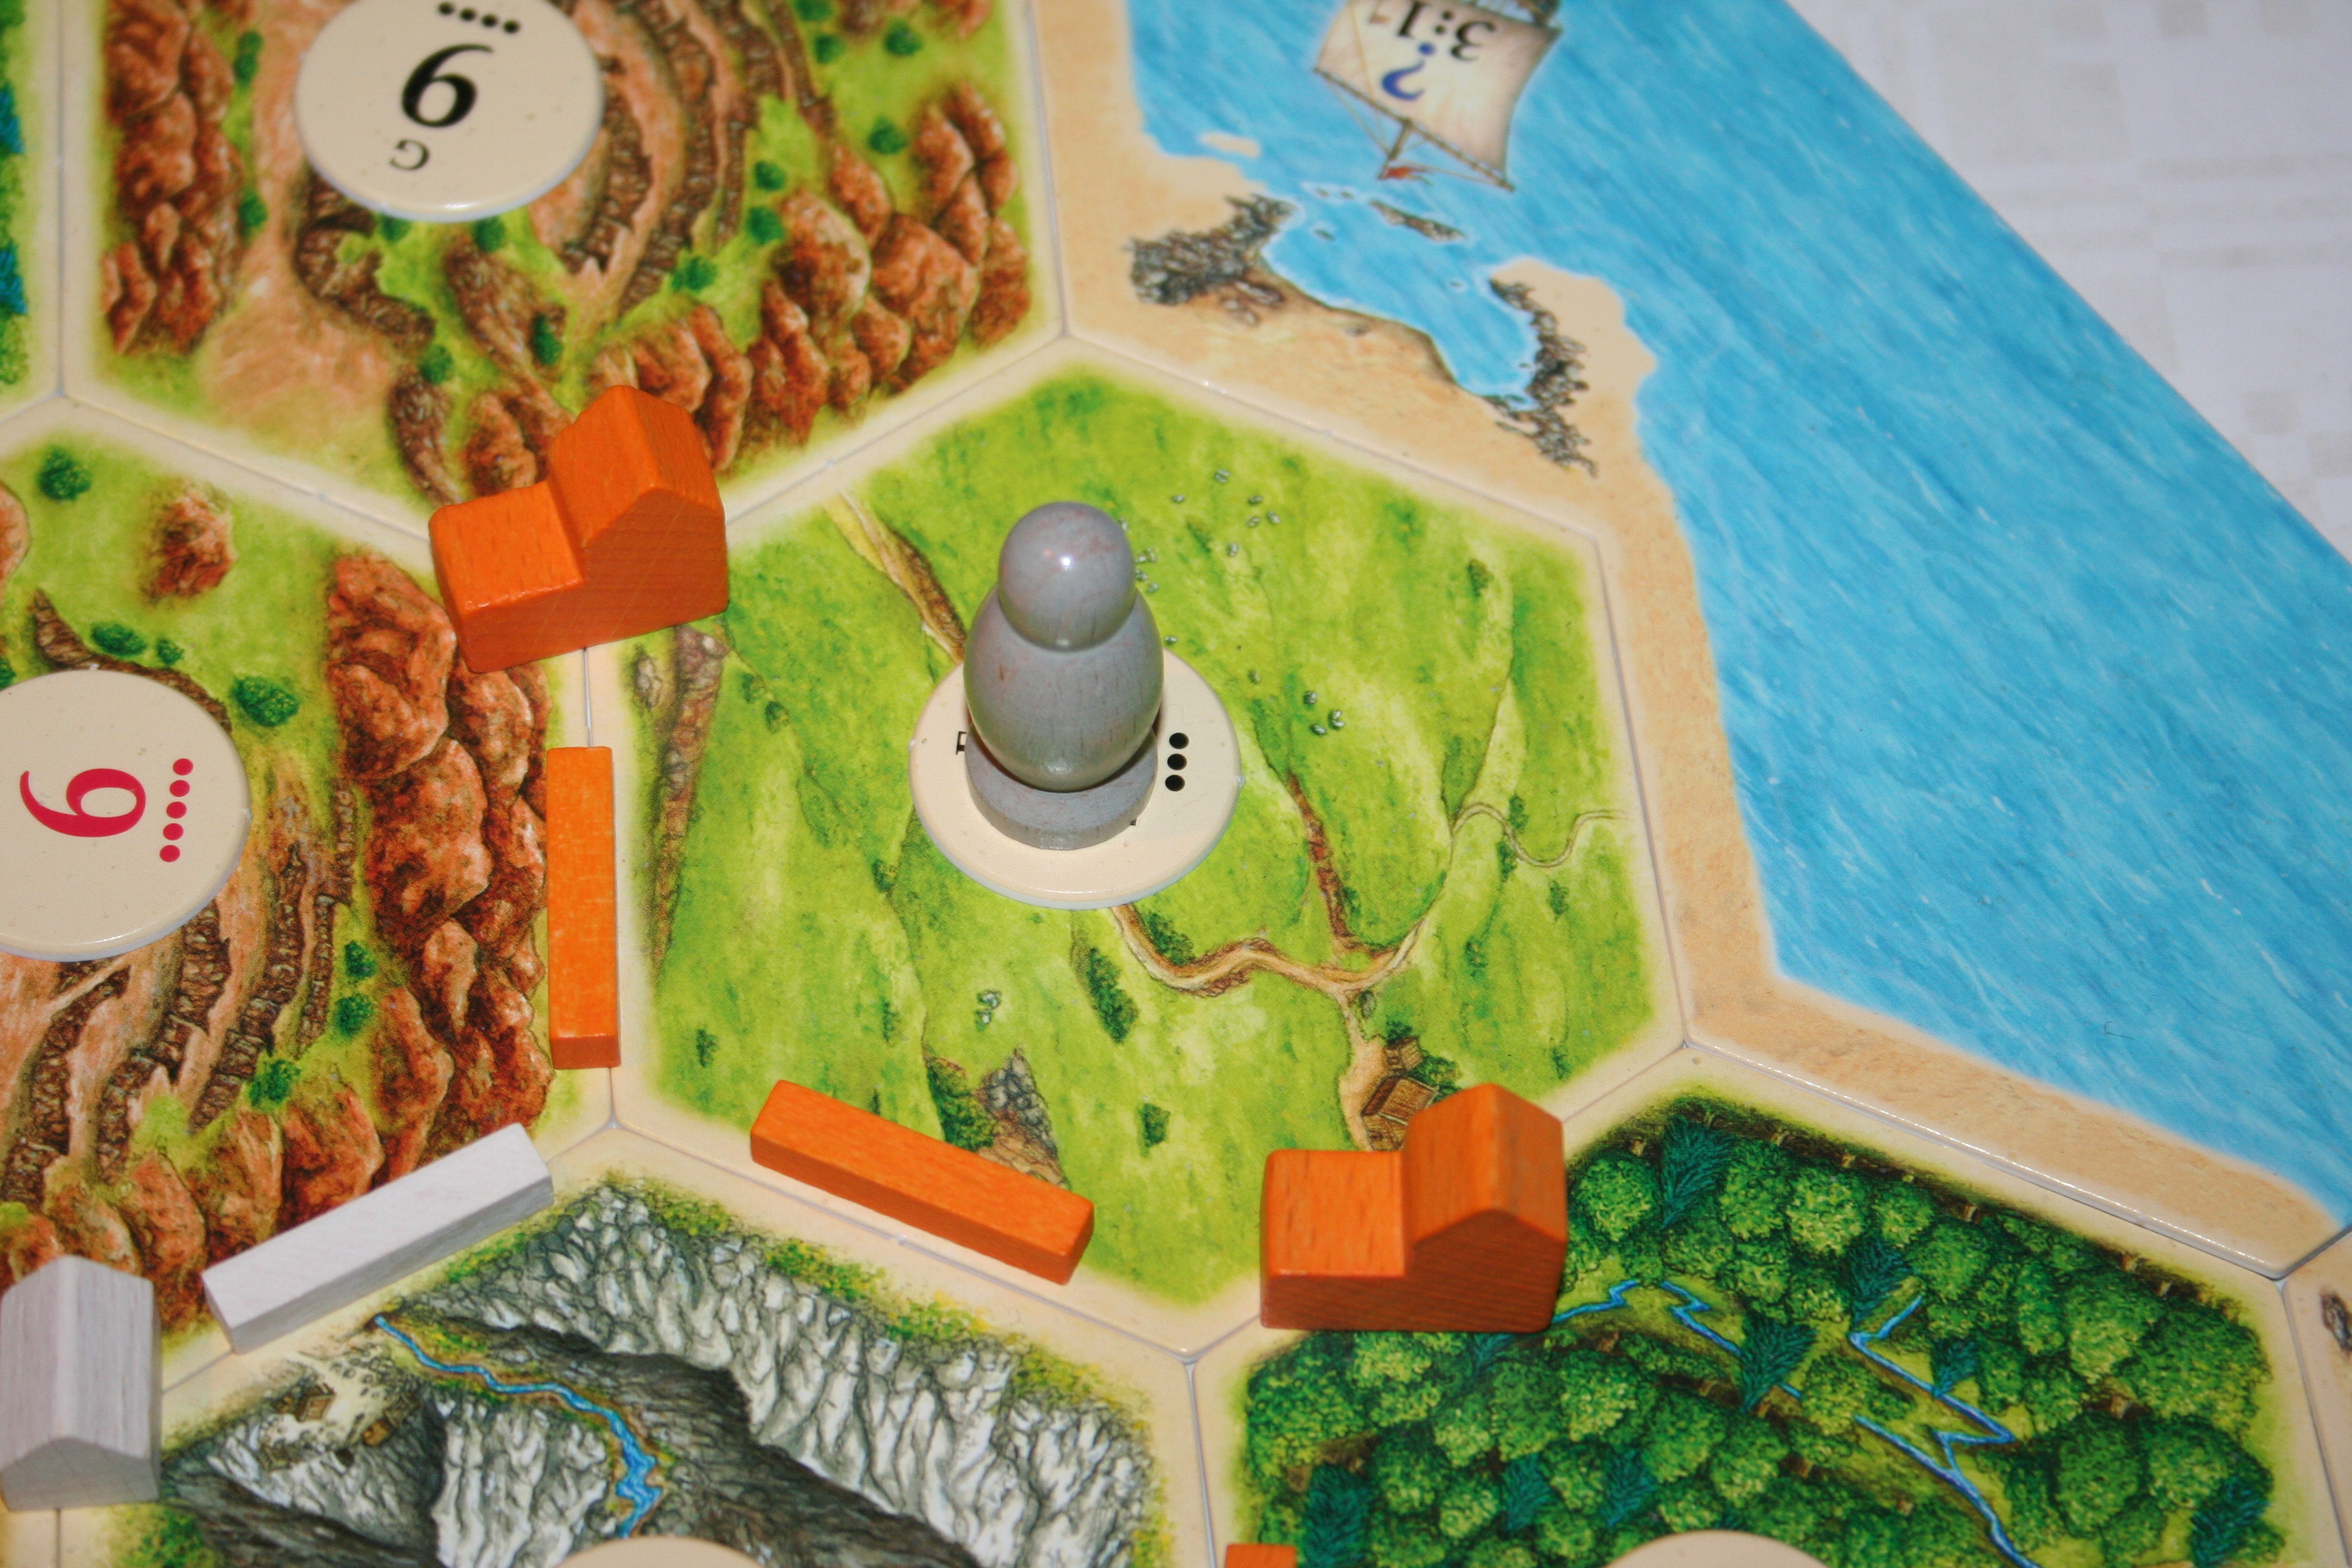
  2. Hosting the Event – The host then invites two players to take part in the games (they can invite themselves).  If a player declines they lose one influence. If they accept they place their gladiator figure in the arena in the starting position then place the card of the gladiator they are fighting, along with any Weapons or Armour they are also using.

    IMG_0564
    A starting gladiator ready to battle.
  3. Tribute – The owners of the gladiators are then paid tribute if their gladiators have favour or are champions – +2 gold for each favour token and +6 gold if they are a champion. If they don’t have any favour and are not champions they get nothing.
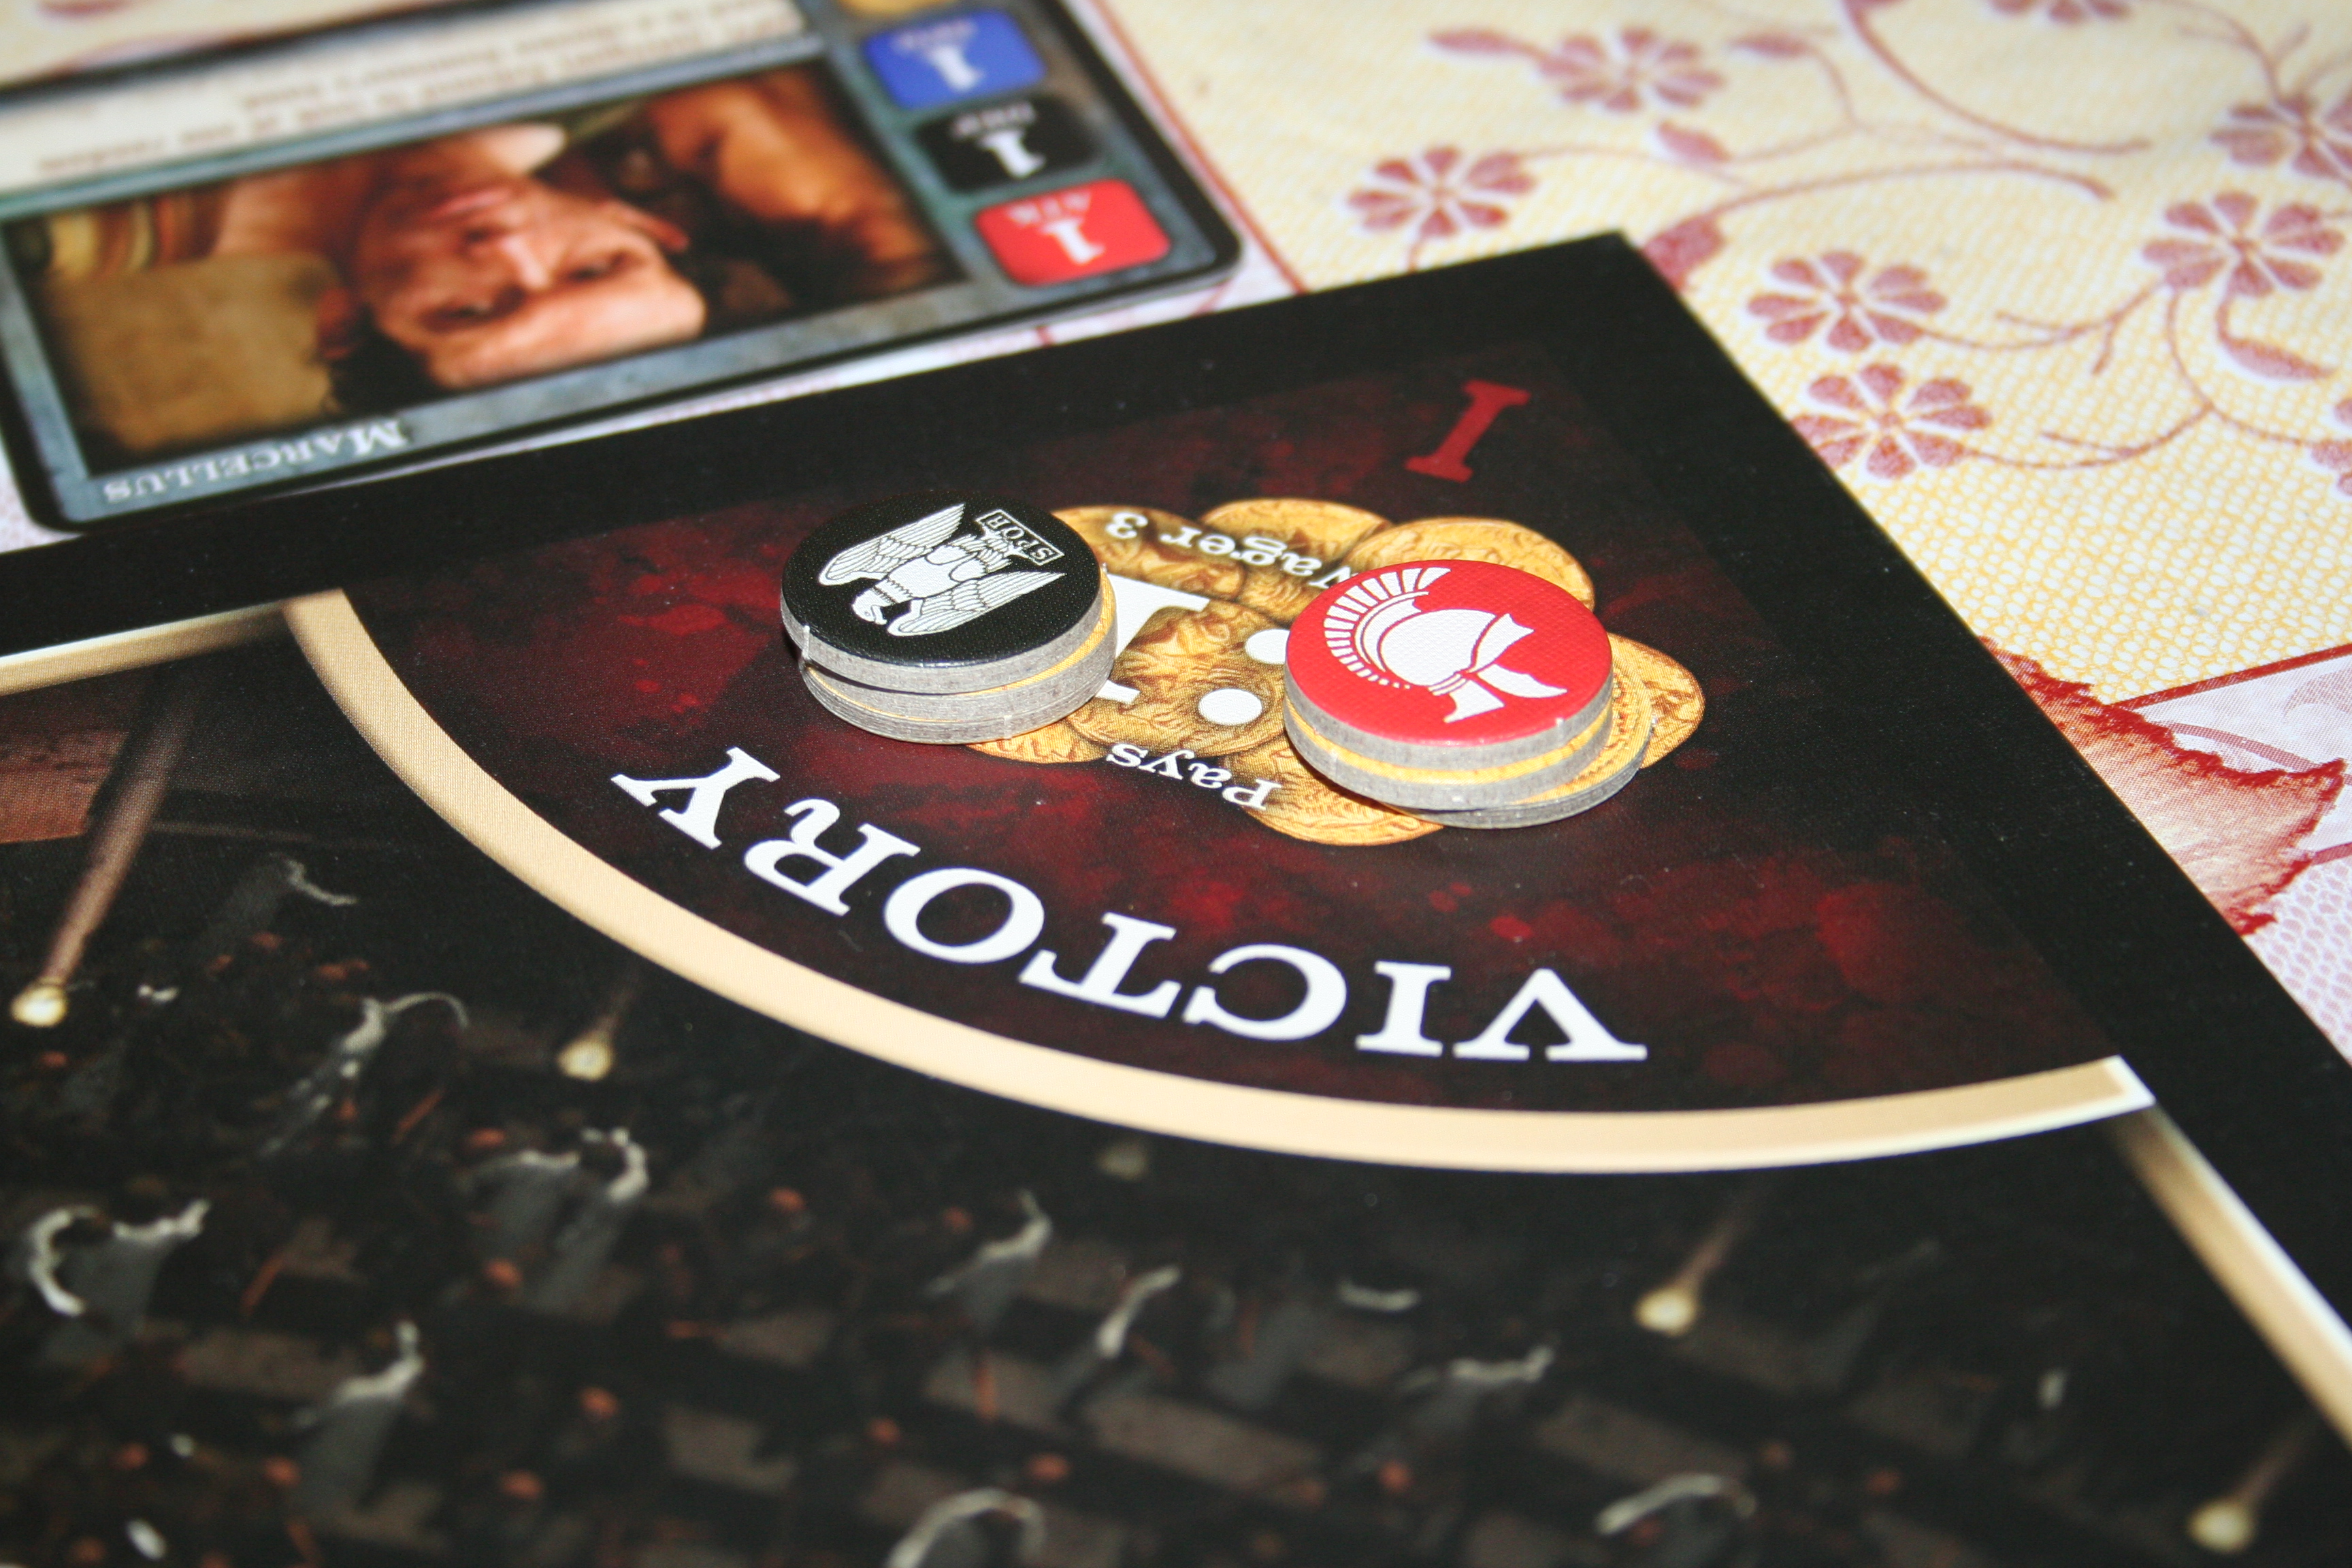
  4. Place Wagers – It’s then time to place wagers, you can wager on who will win (competing players can’t wager against themselves) and how they will win (injury or decapitation). Three is the maximum wager on any one wager and the wagers you place are marked by putting you house wager tokens on top of your pile of gold on the wager you have made.
    So a bet on players combatant one to win returns 1:1 odds so you can double your money.
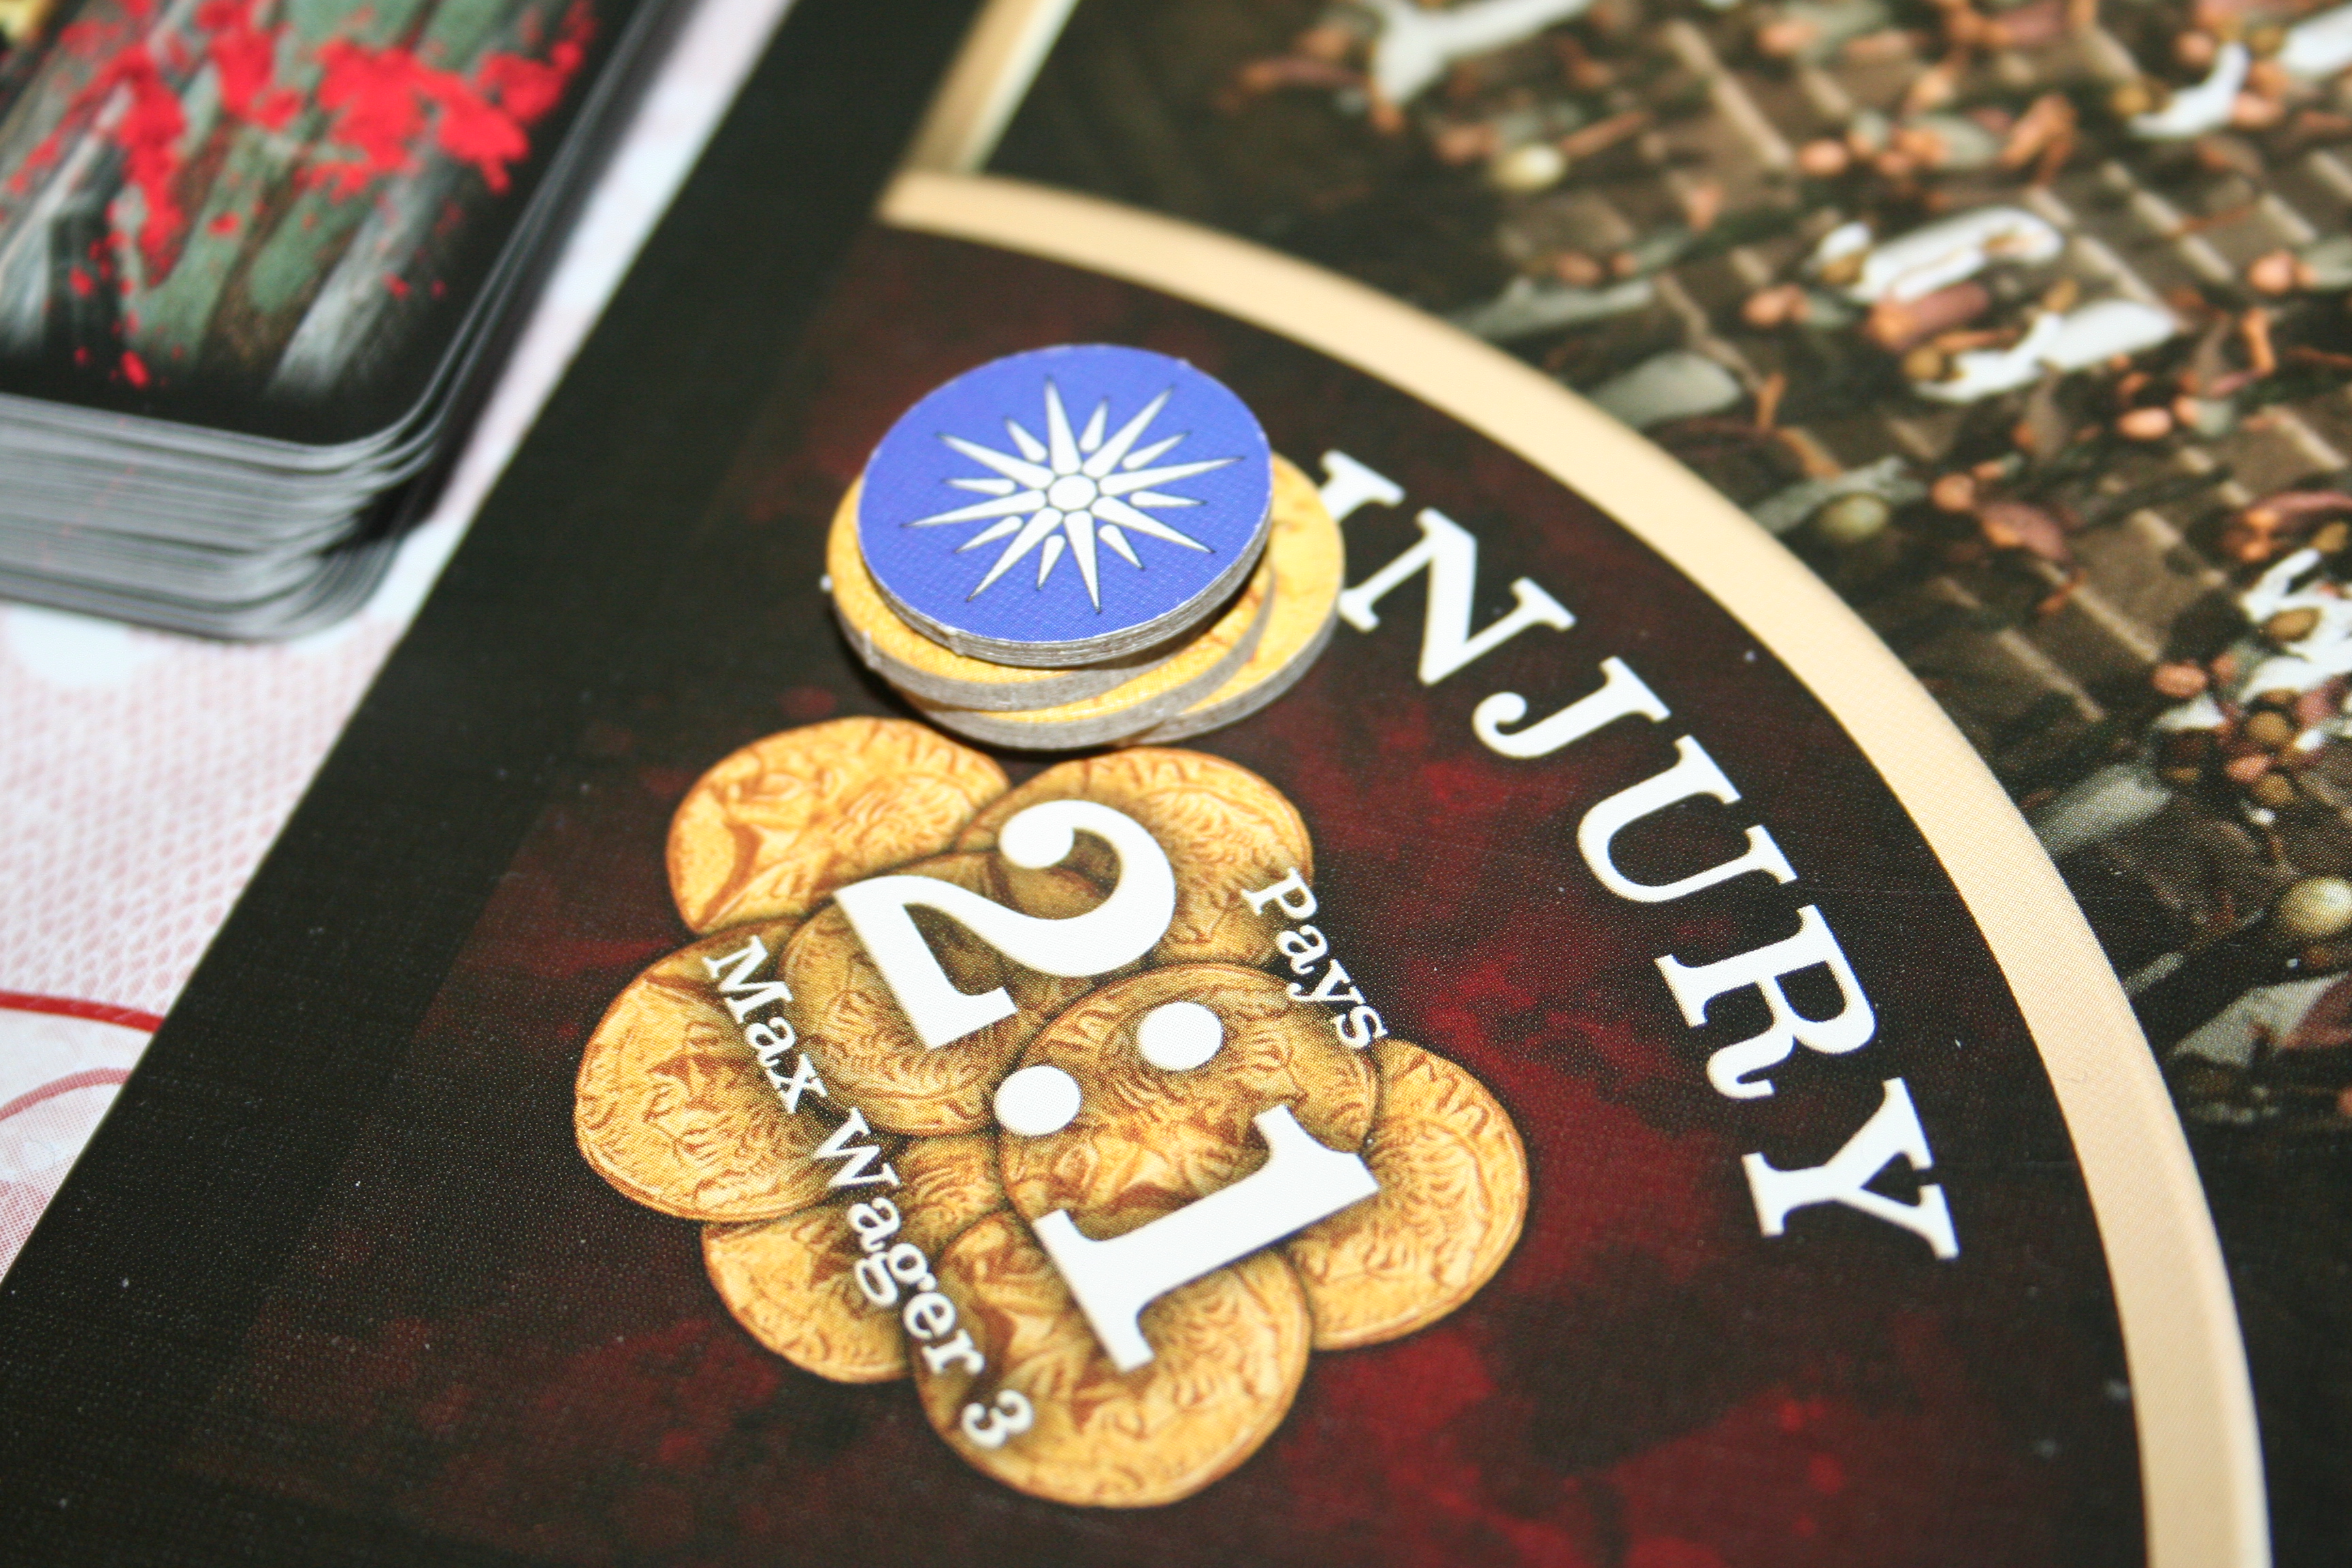
    So a bet on combatant one to win returns 1:1 odds so you can double your money.

    A bet on the fight ending in injury returns 2:1 odd so you triple your money.
    A bet on the fight ending in injury returns 2:1 odds so you triple your money.
  5. Combat! – Now the fight begins. Each fighting gladiator has statistics for Attack, Defence and Speed. They are given as many red dice as their attack statistic, as many black dice as their defence statistic and as many blue dice as their speed statistic:
    IMG_0564
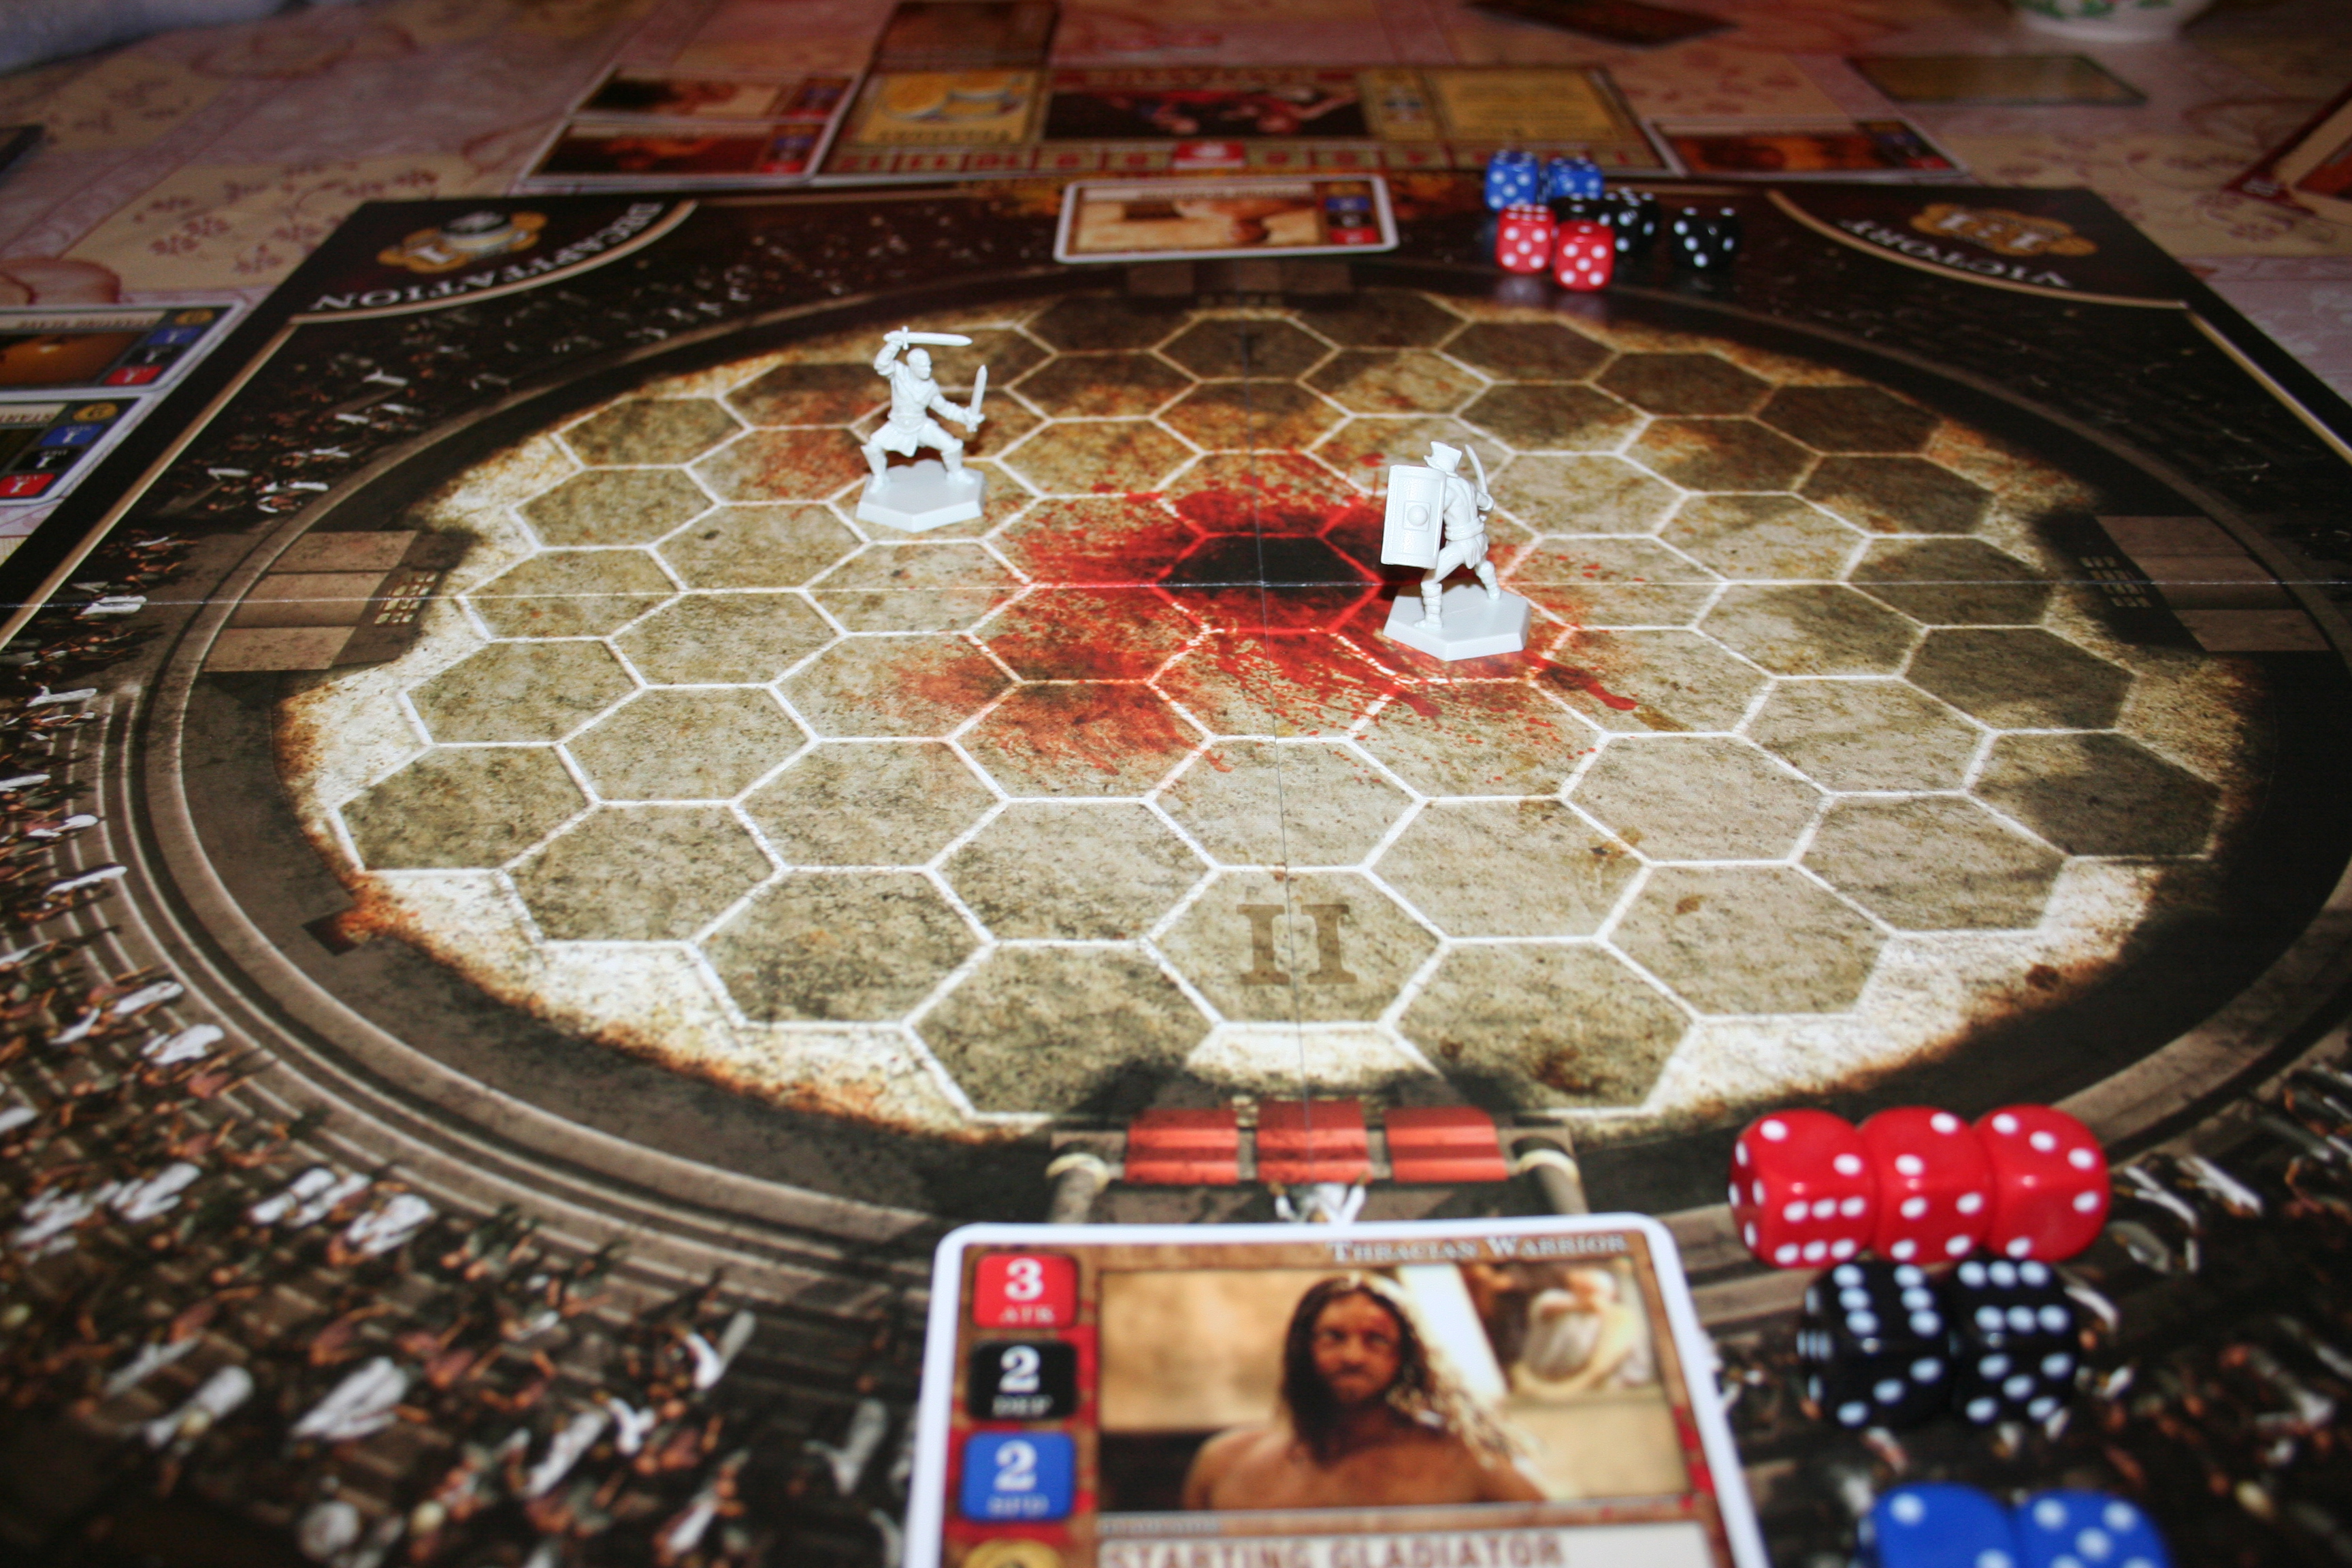
    3 Attack = 3 red dice, 2 Defence = 2 black dice and 2 Speed = 2 blue dice.

    Each player then roles their total amount of speed dice to determine who moves first, the player with the highest total wins and decides who moves first. Your total number of speed dice dictates how many spaces you can move; so if you have two dice you can move two spaces. You can chose to move and then attack or if you’re already adjacent to your enemy you can attack and then move away. Once adjacent you attack by rolling your attack dice while the defender roles their defence dice. You then line the dice up from highest to lowest, opposite each other. Any place where one attack dice is a higher number than the defence dice is a hit and any place where a defence dice is higher than the attack dice is successfully defended. If they’re equal it’s also a successful defence. Where attack die outnumber defence dice any additional roles that have no matching dice count as a hit so long as they are three or above.

    Two warriors ready for combat.
    Two warriors ready for combat.

    The dice are your health; so for each hit that is obtained the taker of the hit decides which dice to get rid of, lowering their attack, defence or speed for the next move. All attributes must be reduced to 1 before any can be completely removed. If one is completely removed then the player has yielded, if two are reduced to zero in one attack the player is wounded and if all three are reduced to zero in one attack the player is decapitated.

  6. Victory and Defeat – The winning Dominus gains one influence. The winning gladiator revives one favour token, if it’s his third favour token he becomes a Champion. Wagers are then settled with the bank. If the loser was not decapitated the host of the games decides if he lives or dies with the thumbs up or down signal. To kill a loser who has favour will cost the hosting Dominus 1 influence per favour token and champions cannot be killed.

After all this the turn phases are repeated unless one player has a full 12 influence at this point, then they’re the winner! If they have reached 12 influence before this point they are not yet the winner as they can still lose influence before the turn of play is over.

Strategy:

  1. MONEY IS POWER! Like in real life. If you are a broke Lanista (trainer of Gladiators) then you are a rather useless Lanista.
  2. UNDERSTAND WORTH! Linked to the first point, knowing what/how much to bid for something in this game is everything. Knowing what you need and what’s not worth buying (at that time) will be the key to winning and losing.
  3. HOST THE MOST! Bidding to be the host is always worth it, not only does it automatically give you influence you then have control too.
  4. KNOW YOUR FRIENDS! While this is a rather back stab-y game it’s important to know the people you’re playing with and understand when they’re likely to stick with you and at what point they will abandon you and leave you to be eaten by dogs.
  5. KEEP THINGS IN PERSPECTIVE! With such a large turn phase to the game it’s very easy to get caught up in just one round or one arena match and forget about the bigger picture and larger aim. Everything you do should be in aid of the bigger picture not just to get back at another player or just because you want to see a fight between two cool Gladiators.

History and Interesting Things:

While the board game itself does not have much notable history (at least nothing I can find) the historical events it’s based (very loosely around) do so that’s more what this section is going to contain.

  1. The board game was published in 2012, before the airing of the final season of the TV show, by A1 GamesBattlefront Miniatures LtdGale Force Nine, LLCHeidelberger SpieleverlagMarabunta and Zvezda.
  2. The board game is only based on the first season of the TV show Spartacus: Blood and Sand, it being the only season in which Spartacus is a Gladiator rather than a rebel.
  3. The TV series is a re-imagining of the 1960 film Spartacus directed by Stanley Kubrick and starring Kirk Douglas.
  4. However both the TV show and the film are based (loosely) around the historical Third Servile War of the Roman Republic.
  5. While historical facts on the war are highly debated it is often interpreted as a rebellion of oppressed people rising up against a slave owning oligarchy.
  6. Historically Spartacus (the man) is supposed to have lived from 109 BC – 71 BC. The characters Crixus,OenomausCastus and Gannicus, are also historically verified people who assisted in the uprising.
  7. He was born a Thracian and supposedly died on the Battlefield near to Petelia (modern-day StrongoliCalabria, Italy) as depicted in the TV show and film (probably without the “I’m Spartacus” fiasco).
  8. This being Appian also that his body was never found.
  9. 6000 survivors of the battle where crucified alongside the Appian Way from Rome to Capua as depicted in the final episode of the TV show with the crucifixion of Gannicus.
  10. Andy Whitfield who played Spartacus in the first season Spartacus: Blood and Sand (who’s face should be on the front of the game box rather than his replacements Liam McIntyre) sadly died on September the 11 2011 of on-Hodgkin lymphoma and the series was literally less than half as good without him.
picture lovingly borrowed from http://www.funnyjunk.com/funny_pictures/2600925/RIP.
Picture lovingly borrowed from: http://www.funnyjunk.com/funny_pictures/2600925/RIP.

To Conclude:

While my obvious like for the TV show has made this review at least slightly biased I would still maintain this game is a good game by anyone’s standards. It is, however perhaps a touch complex and drawn out. For example; cancelled down version of just the gladiator battles would have made quite a good game just in itself. So this game is primarily for the patient and those who are naturally enthusiastic about games not for those who think monopoly is the epitome of (board) gaming.

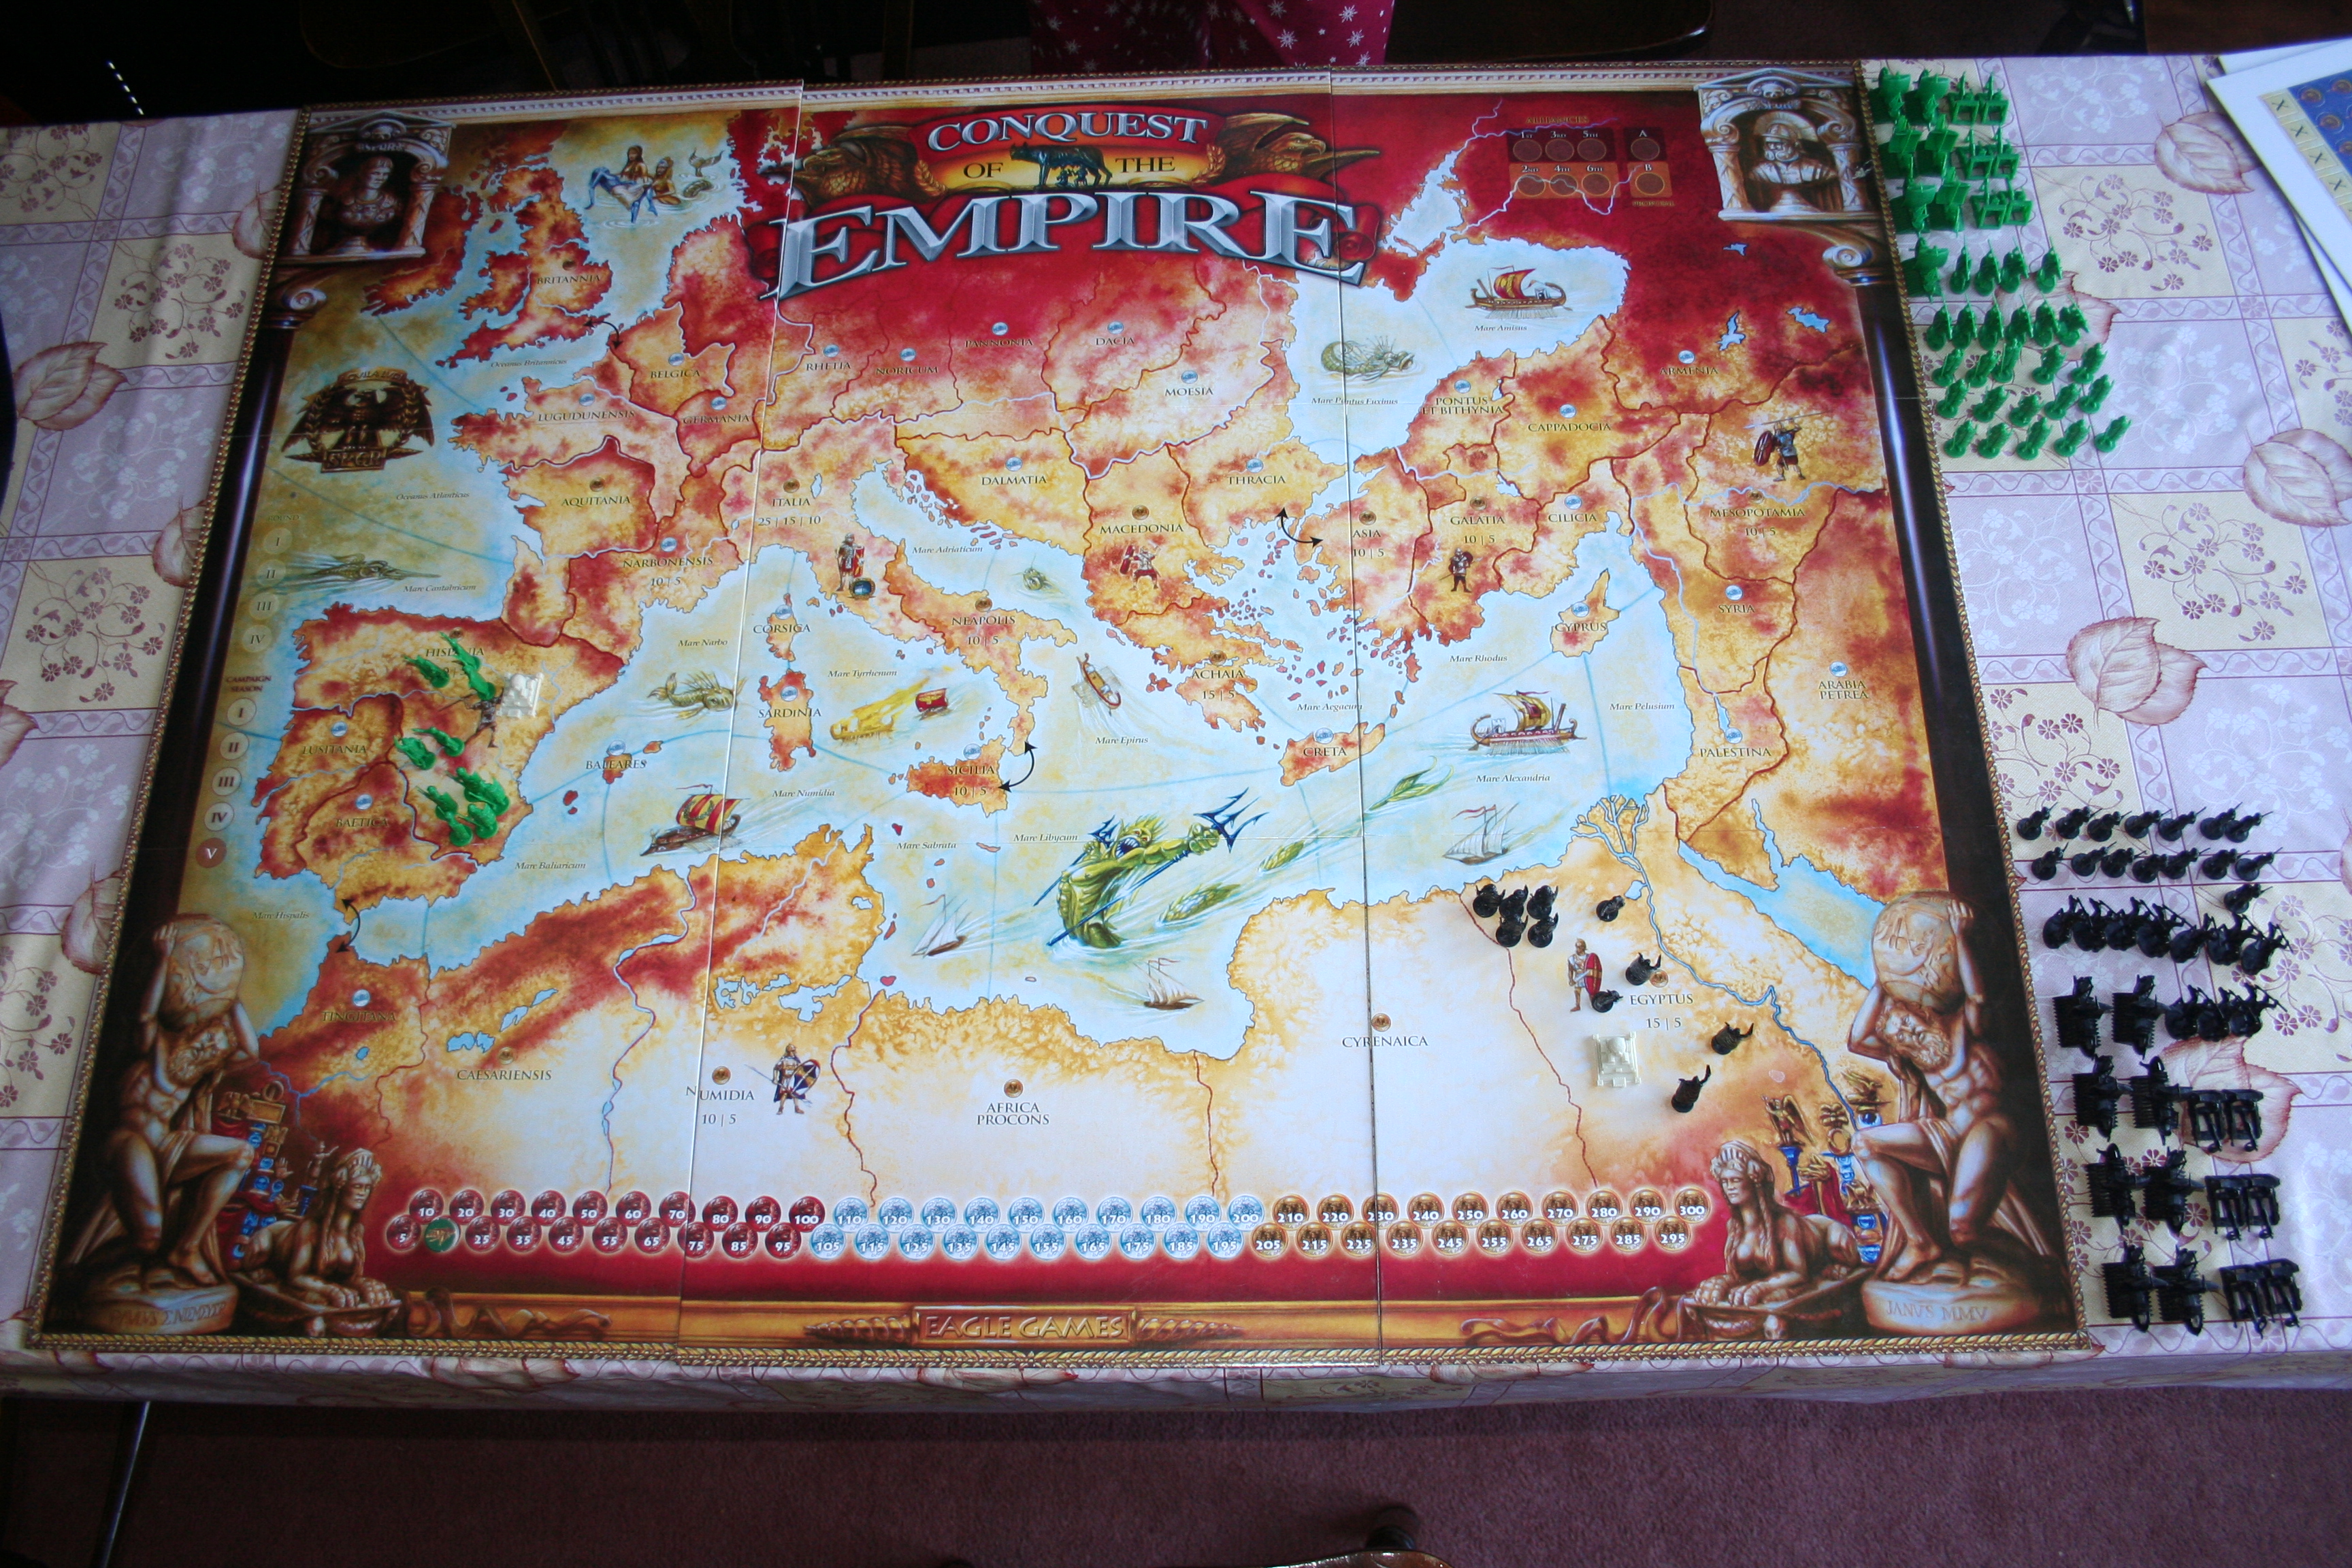
Further more it’s always nice to see a box that’s well designed unlike the Pirate of the Caribbean edition of Buccaneer! and Conquest of the Empire:

I rate this box design 4.5/5! The only thing that would have made it better is a slot for the host marker to sit in.

Yes I do think rate the box is going to have to become a permanent part of our posts.

The Settlers of Catan

5 - 5

Number of Players: 3-4

Year of Publication: 1995

Creator(s): Volkan Baga, Tanja Donner, Pete Fenlon, Jason Hawkins (Artists) and Klaus Teuber (Designer)

Create the Best Civilisation and become King of Catan!

Okay, you don’t actually win the title “King of Catan” if you win the game, but it’d be cool if you did. Instead, you just win the sheer joy of winning, which is almost as good. Settlers of Catan is a brilliant game, primarily for its simplicity and versatility. Because of the way the board gets set up, no two games are ever going to be the same and it’s got so few rules that anyone can learn to play!

What’s In The Box:

The stuff!
The stuff!
  1. 19 Terrain Hexes and 6 Sea Frame pieces – set up in one possible arrangement for play.
  2. 9 Harbour Pieces
  3. 18 Circular Number Tokens (chits)
  4. 95 Resource Cards (19 each of Stone, Sheep, Clay, Wood and Grain)
  5. 25 Development Cards
  6. 4 “Building Costs” Cards
  7. 2 Special Cards
  8. 16 Cities (4 each in Orange, White, Red and Blue)
  9. 25 Settlements (5 each in Orange, White, Red and Blue)
  10. 60 Roads (15 each in Orange, White, Red and Blue)
  11. 2 Dice (one Yellow, one Red)
  12. 1 Robber
  13. 1 Game Rules and Almanac Book

Playing The Game:

Objective: To develop your civilization fastest in order to gain 10 Victory Points and win the game!

Setting up the Board:

To start the game you set up the board so it looks more or less like the photo below. You give a few of the Terrain Hexes to each player. They’re then laid out in that honeycomb kind of pattern, and edged with the Sea Frame pieces. There’s no set layout for the beginning of the game, so the hexes you get given can be placed anywhere. Once the board is set up each player chooses a colour and takes all the Cities, Settlements and Roads for that colour. They also take the Building Costs card of that colour. Then the Circular Number Tokens are placed on the board. These tokens all have both a number and a letter on them, numbering from 2-12, missing only 7, and having the respective letters A-R. One player then chooses a starting tile, and places the Token with A on it. The other tokens are then laid out in alphabetical order moving clockwise around the board. One of the Terrain Hexes is the desert, this is the only Hex which doesn’t have a token placed on it.

Starting set up for the game.

Once that’s been done, the grey Robber figure is placed on the desert Hex, and each player can then place two of their Settlements, and two Roads on the board. Settlements (and later Cities) are always placed on the corners of the Hexes, so your Settlement will be on the point on a Hex where two or three Hexes meet. Roads must be placed on the edges of Hexes and connected to a Settlement or City of their colour. To start, your Settlements can be placed anywhere on the board, but following this they must always be connected to a previously existing Settlement by a road. To start each player collects one Resource card for the tiles they have Settlements on, for example, at the start of the game above, White would receive two Stone cards, one Clay, one Wood and one Crops.

Turns:

A players turn is divided up into the following phases:

  1. Rolling the dice, moving the Robber and collecting Resources
  2. Trading Resources with other players or the bank
  3. Building Roads or Settlements, upgrading to Cities and buying Development Cards

Rolling the dice always happens first, and the number rolled reflects which Resources will be produced on that turn. There are two Number Tokens for each number that can be rolled, apart from 12, once the dice are rolled, find these, and anyone with a Settlement on the corner of the corresponding piece receives one Resource card for that tile. On a roll of 7 no Resources are produced, and the Robber’s moved. The player that rolled the dice can now put the Robber wherever they like. If placed on a tile, the Robber prevents any Resources being produced for this tile until someone else rolls a 7 and moves him, so he can be a huge inconvenience to your opponents.

Like this:

Here the Robber was preventing me from receiving any Sheep Resources

Next you can trade Resources. This is done verbally and with the exchange of cards. One player simply states which Resources they need, and what they’re prepared to offer for them, and other players may accept or decline. Or haggle, if they feel so inclined. if a player has a lot of one Resource they can trade five of one Resource in to the bank, in exchange for one different Resource of their choice. If a player rolls a 7 all players must also count how many cards are in their hand, if they’ve got more than 7 Resource cards in their hand they must discard half of them, in the case of an odd number, for example, 9, you round down, so you would only discard 4, not 5.

It’s also possible to use the Sea Ports to trade resources, but you have to have a Settlement or City built on one of the three points adjacent to a port to use it.

Finally you can build things, your Building Costs card tells you how much each thing will cost you in Resources, and you discard Resources into the Resource bank to build on the board or buy Development Cards. Settlements or Cities must be connected by at least two roads, so they cannot be on the points next to each other, meaning that only three Settlements can ever be on one Hex. You must also have a connecting road before you can build a Settlement.

Play continues like this until one player has gained 10 Victory Points!

Winning the Game!

Winning the game actually isn’t very difficult, each Settlement you build is worth 1 Victory point and each City is worth 2. So you start the game with 2 Victory points, for your two Settlements placed before game play starts. You can also gain an extra 2 Victory points for having the longest unbroken road, this is one of the Special Cards, and is awarded once a player has a road at least five segments long. However, this card can get passed around a bit, as other players build longer roads. In the game we played, I had the longest road:

I was Orange, my road was 8 segments long

So I got the extra Victory points on the Special Card:

Longest road!
Longest road!

So, the end of our game looked like this:

I win!
I win!

So, ignoring the tea, ice cream and small rubber duck, this is what the game looked like at the end, I had acquired here, Longest Road, Largest Army (which is the other Special Card, Knights can be acquired by buying Development Cards and you get Largest Army once you’ve got three) and then also some Cities and Settlements.

Strategy!

This game can be played strategically, at the start of the game, when the board is being arranged, look for areas where a lot of one resource are concentrated, if you build both your starting Settlements on these and then quickly expand your Roads you can create a monopoly on one resource, forcing other players to trade with you for whatever you demand. Alternatively, try and build you Settlements so that you get as many different resources as possible. Both these are acceptable ways to start the game. One thing I would say to not do is this: unless you’re going for monopoly on something DO NOT BUILD YOU SETTLEMENTS CLOSE TOGETHER TO START. Doing this is going to severely inconvenience you later in the game. It makes getting Longest Road, or heading out to resources on the other side of the board much harder. Also, don’t be too harsh with trading, if you have something another player desperately needs, don’t ask too much for it, as they might get annoyed, and refuse to trade something you really need later in the game. It’s all a question of balance, getting as much as possible out of the trade without being unreasonable.

History and Interesting Things:

  1. One of the first European games to achieve real popularity outside of Europe – it’d sold over 15 million copies by 2009.
  2. There are over 50 Scenarios and Variants now available for this series of games.
  3. There are only four base expansions to this game, which are: Catan: Seafarers, Catan: Cities & Knights, Catan: Traders & Barbarians and Catan: Explorers & Pirates.
  4. Die Siedler von Catan is a novel, set on the island of Catan, written by Rebecca Gablé following the popularity of the initial release of the game.
  5. Settlers has been created and recreated online over the years – it used to be playable over MSN, for everyone out there who remembers when MSN was the going thing!
  6. A series of mini stuffed animals based on the resources produced in the game was released by Mayfair, call Catanimals.
  7. A version of the game to be played on Nintendo DS was announced in 2008, but has yet to be released.

To Conclude:

This game has a rating of 5 because of how versatile it is, and how easy it is to play, the rules have little to no ambiguity in them, the storage space in the box is well laid out and therefore not annoying, and it’s a really, really fun game to play, which takes between an hour and an hour and 40 minutes, more or less. Which I think is an almost perfect running time for a game, long enough to be interesting, without becoming boring! It’s a brilliant family game too, as the simplicity of the rules allows for younger players!

Conquest of the Empire – Classic Rules

3.5 - 5

Number of Players: 2 – 6

Year of Publication: 2005

Creator: Glenn DroverLarry Harris, Jr.Martin Wallace (Designers) and Paul Niemeyer (Artists)

Julius Caesar, The Roman Geezer, Squashed his Wife with a Lemon Squeezer:

So as far I can figure Conquest of the Empire is just a table top version of Rome: Total War and being a huge fan of that game I’m also a huge fan of this game. In many respects it’s cooler; because you’re playing real people you actually feel some sense of victory when you crush them! But on the other hand, it’s obviously far more limited than Rome: Total War. To illustrate my point this is a picture of the Rome: Total War map:

Lovingly borrowed from http://ru.wikipedia.org/wiki/%D0%A4%D0%B0%D0%B9%D0%BB:Rome_total_war_map.jpg

And this is a picture of the Conquest of the Empire board:

IMG_0515
Can you see the similarities?

Now, there are two sets of rules to this game, as I explain in the History and Interesting Facts part of the post but this post is only covering the Classic rules, as we haven’t had the time to play the other rules. Hopefully there will be another post covering the other set of rules before the month is over, so keep an eye out for that.

What’s In The Box:

IMG_0505

IMG_0509

  1. 1  Game board (see picture in introduction of it laid out)
  2. Province tokens
  3. Some of the Chaos tokens (the ‘X’s at the bottom of the other sheet are also Chaos tokens)
  4. Influence/control tokens for each colour (except the bottom row)
  5. 2 Instructions Booklets:
    1. 1 for the Classic rules
    2. 1 for the new Conquest of the Empire 2 rules
  6. Black game pieces consisting of:
    1. 1 Caesar
    2. 4 Generals
    3. 20 Infantry
    4. 10 Cavalry
    5. 6 Catapults
    6. 8 Galleys
  7. Yellow game pieces, the same as black
  8. Blue game pieces, the same as black
  9. Purple game pieces, the same as black
  10. 25 five-talent coins (Silver) 50 ten-talent coins (Gold)
  11. Red game pieces, the same as black
  12. Green game pieces, the same as black
  13. 8 Dice (for some reason ours has 12 but it did come from a charity shop)
  14. 16 Fortifications
  15. 16 Cities
  16. 1 deck of cards
  17. Cards
  18. 20 Roads

Playing The Game:

Objective: To capture the other player(s) Caesar

The aim of the game is ultimately just to capture the other player(s) Caesar, which can lead to a fairly short game if you get lucky and the other person is careless; or if the other person is careful it can be a long complex game of strategy and well thought-out battling.

The board right at the beginning.

You start in one of the six starting provinces, these are shown on the board and the instruction book denotes which are available relative to how many players there are. The tribute scale at the bottom of the board is used to mark your income per-turn and increases if you capture provinces and decreases if you lose them depending on the worth of the province (marked on the board). you start on 15, as you home province is worth 10 but it also has a city in it which adds an additional 5.

The tokens for each player show the amount of money they get each turn.

Each turn is broken up into 6 sections:

  1. Movement
  2. Combat
  3. Collect Tribute
  4. Destroy Cities
  5. Purchase New Pieces
  6. Place New Pieces

So first up is movement, normal pieces can only move when attached to a General/Caesar. When they’re attached they form a legion; a legion may be up to 5 pieces (of any type) and then the General/Caesar to make a legion of six pieces overall. Without roads normal pieces may only move one space (being from one province to another) in a turn, however General/Caesar may move two, so they may move with a legion and then one further turn on their own. However they cannot fight by themselves – but are useful for conquering unoccupied provinces. The exception to this is roads; once on a road a player may move as far along that road as he/she likes. Galleys are the only units that can move without a General/Caesar, they can move up to two sea provinces even with no units in them.

The first move of the game.

The second part of a players turn is combat. Combat occurs when you move your pieces into a province occupied by an enemy and once you have finished all of your moving.

Just before combat.
Just before combat.

Combat is somewhat similar to Battle Cry! (as reviewed here) in that it uses dice with symbols that show which piece have to be removed. You role as many dice as there are piece in your legion (up to 6) and the defender does the same. the relevant pieces are then removed according to the symbols on the dice, and either you fight again or one player retreats. Generals/Caesar are the last pieces to be removed from any legion and can only be captured when the rest of the legion has been destroyed. Captured Generals are kept by the winner and can be bartered with later in the move, if Caesar is captured the person who loses their Caesar has lost the game and is out.

A captured Cesar.
A captured Caesar.

The next phase of a move is to collect tribute, that’s as simple as it sounds, you look at the tribute scale at the bottom of the board and collect the amount of tribute you are due.

A pile of gold!
A pile of gold!

The next phase is to destroy cites, you can do this in provinces you own if they are about to be captured to stop the other player gaining any benefits from them. This phase doesn’t have to be done as you may not be in a situation where its required.

The next phase is to buy pieces. You use your tribute to to buy pieces to build a bigger army. Pieces initially cost:

  1. Infantry – 10
  2. Cavalry – 20
  3. Galleys – 20
  4. Catapult – 30
  5. Fortified City – 50
  6. City – 30
  7. Fortification – 20
  8. Road – 10

However when inflation is trigger the first time (marked by the change in the tribute scale at the bottom of the board) cost doubles, when its triggered again (by the second change in the scale) the cost triples from the original prices.

A newly bought army.

The very last phase of a players move is to places his newly brought pieces. All new combat units must be placed in the home province of the player buying them, ships are placed on the coast of that province, or on the closest coast if you are landlocked. Cities are placed in the relevant province that you want a city in, only one city per-province and only one fortification per-city. Roads can only be built between two cities in adjacent provinces but multiple road sections between multiple cities can be used to make one long road.

Roads!
Roads!

This process is then repeated until there is only one players Caesar remaining.

Strategy:

Now, like most games on this blog I don’t claim to be a master ,but here are a few things I picked up that are important:

  1. DON’T FOR GET ABOUT YOUR CAESAR! That’s how I won the game we played, he was left in a province by himself. Always know where he is and always have him protected away from the action (unless you have no choice but t0 have him in the action.)
  2. MONEY IS POWER!  Conquering provinces is important to generate more tribute so you can buy more units so you can have more power.
  3. DON’T FORGET ABOUT SHIPS! Ships look like they can be a very useful tool to attack your enemy where he/she is not expecting.
  4. DON’T FORGET YOU CAN DESTROY YOUR OWN CITIES! Also destroying a city will destroy a road that runs between it and another city as roads can only exist between two cities. This could help slow a fast enemy advance.
  5. BRUTE FORCE IS KING! Due to the luck/probability of the dice actually being 100% tactical is difficult, so just out manning the other player in all conflicts is advised.

History and Interesting Things:

      1. While I have stated the publication date of the game as 2005, and hyper linked the 2005 game on BoardGameGeek, the original version of the game was released in 1984 by Milton Bradley and it’s sole designer was Larry Harris, Jr.
      2. However the original version of the game’s catapult rules were considered to be “broken” so the 2005 version of the game was issued with two sets of rules, one that was similar to the original rules but with fixed catapult rules (the classic rules, the ones played in this article) and another completely new set that were based on Martin Wallace’s Struggle of Empires (these are Conquest of the Empire II rules).
      3. The original version of the game also had different combat rules and the rules in the 2005 version were changed along with the dice that have images that correspond to the different units.
      4. The game is thought to be very similar to the game Axis & Alliesthis may be because it’s also designed by Larry Harris, Jr. (and because of this Axis & Allies is obviously going on our Games We Want page).
      5. It was a 2006 Golden Geek Best Wargame Nominee
      6. The original version of the game is now completely out of print and therefore a prized collectors piece.
      7. However, that’s what Wikipedia says but you can buy a 1984 original copy from America for around £55 on Ebay here (eBay listing was active at time of publication).
      8. The game is set in the Roman Empire after the death of Marcus Aurelius. So just after this happened:

(This may be from the film Gladiator and therefore may not be historically accurate).

      1. Like I said in my introduction, the game really is a physical version of Rome: Total War, just less complex and in some ways more fun.
      2. It is also the largest game we have played to date, which makes it just a little bit more awesome.


To Conclude:

I like this game, I like it a lot, but I was always going to – as I said in my introduction, it’s just table top RTW. However this version of the rules has quite a lot of ambiguity but with careful reading and a  bit of logic you can think your way through this. There are a few thing I think should be done differently, for example you should be able to build units in places other than your home provinces, other cities would have had barracks and been able to train men etc. Also it just feels wrong to collect your money half way through your turn, everyone knows turns begin with collecting money, it’s true of so many games, both table top and computerized. However I understand the building units one turn and not being able to move the till the next because it represents a training time.

The biggest issue with this game though is this:

Everything thrown in the box!

POOR BOX DESIGN! Now you may say that this is irrelevant to the game in the sense that it doesn’t affect game play. But it does, if you’ve had to spend 20 minutes sorting out pieces because there in a mixed mess you’re not going to have the same amount of fun playing the game as if they were all sorted already in a vacuum-formed tray in the box like 90% of games I’ve played (like Battle Cry!.) The only other game I’ve come across to rival this is the Pirate of the Caribbean edition of Buccaneer! Which you can read my rant about at the end of the post on it here.

But all in all Conquest of the Empire is a good and fun game (perhaps not quite as good/well thought out as Battle Cry! and definitely not as versatile). It’s also very large which for some unknown reason makes it more exciting…

We’ll have to wait and see if the other way of playing it is as good or perhaps better.

P.S. I (Miriam) wouldn’t usually add on to a post like this, but it was more like 2 hours sorting time than 20 minutes which makes this, in my opinion, an epic design flaw… Especially when trying to determine if all the pieces were still there.

They weren’t.

Battle Cry!

4 - 5


Number of Players: 2

Year of Publication: 1999/2010 (Anniversary Edition)

Creator: Richard Borg

Picture lovingly borrowed from http://www.sonofthesouth.net/uncle-sam/uncle-sam-posters.htm

As is self-evident from the name of the game Battle Cry is a strategy war game. It recreates the American Civil War. Players play as the Union or the Confederates, in other words, North or South America and can play through each of 30 scenarios from the war. The board is set up using Terrain Tiles with different images on them to create different parts of the country. Each scenario is defined in the Rule Book and has a pictorial representation of the starting layout of the board. My favourite thing about these descriptions is that there’s a little historical information provided about each scenario, but at the bottom, right after it tells you who originally won that battle it says: “The stage is set, the battle lines are drawn, and you are in command. The rest is history.” And it leaves you to find out who the best strategist is!

Dave and I did initially play the game slightly wrong, because we were in a rush. But this just reinforces our firm belief that you should thoroughly read the rules before starting any game.

Our first attempt at playing this game - we set up the board wrong.
Our first attempt at playing this game – we set up the board wrong.

What’s In The Box:

The stuff. I know the layout of the box looks weird, I have since changed it, but taking another photo was a lot of effort...
The stuff. I know the layout of the box looks weird, I have since changed it, but taking another photo was a lot of effort…
  1. 8 Battle Dice
  2. 9 Double-sided Entrenchment/Fieldwork Tokens
  3. 46 Double-sided Terrain Tiles
  4. 14 Double-sided Flag Tokens
  5. 60 Command Cards
  6. 3 Artillery with Flags and 6 Artillery Crewmembers
  7. 3 Generals with Flags, 3 Cavalry with Flags and 6 Cavalry
  8. 10 Infantry with Flags and 30 Infantry

Plus also (and in a different picture just for fun):

The other stuff.
The other stuff. The stuff that didn’t fit in the first photo.

The Game Board, Terrain Reference Sheet and Game Rule Book.

Playing The Game:

Objective: To capture a given number of your opponents flags before they do yours and win the match!

Although this game has a few scenarios that’re a little time-consuming to set up, it’s actually not all that complicated. Turns consist of five parts: playing a Command Card, giving orders, moving, battling and drawing a new card. I’ve only played two of the available scenarios so far, but both have been really good. The starting set up for the board on the simplest set up is this:

The starting set up for the simplest scenario, called First Bull Run. Blue is Union, Grey is Confederate.

To give you an idea of how simple this set-up is comparatively, here’s a photo of the next one on in the Rule Book:

A slightly more complex (and time consuming) set up.

There’re a fair few men on the board here, but it’s a lot simpler than it appears – the occupants of one hex on the board are a unit and all move together. Infantry can only move 1 hex at a time, Cavalry moves 3 hexes, Artillery moves 1 hex, and a General can move 3 by itself or if it’s in a unit with Cavalry, but can only move one when in a unit with Infantry.

Command Cards:

There are two different kinds of Command Cards; the Section Cards and the Tactic Cards and Dave and I have ranked the Section Cards in terms of usefulness. The least useful are the Scout cards, these allow you to order one of your units in one section of the board, then draw two cards instead of one, and choose which one to keep, discarding the other. Next are Probe cards, you can now give two orders to two of your units in one section of the board. Yet more useful is Attack, you guessed it already, you can now give three orders to three units in one section of the board. But the most useful of these cards are the Assault cards, these allow you to give one order per card you have including the one you’re playing, to units in one section of the board. The section of the board you give orders in is always specified on these cards and can be either Centre, Left Flank, or Right Flank.

A Section Command Card in play.

The Tactic Cards are very different, they allow you to do a whole host of things that the Section Cards don’t, such as placing Fieldwork Tokens on the board, which changes the terrain, and impacts on sight lines, amongst other things. There are, however, a lot of Tactic Cards, so I’m not going to go into any detail about them. But you can have a photo of one!

An example of a Tactic Command Card in play.
Giving Orders and Moving Units:

Once you’ve read out the Command Card you’ve chosen to play you put it face up on the board and announce which units you intend to move. You must order all units before moving any of them. Next you move your units, taking into consideration terrain restrictions and remembering that a unit cannot battle unless it’s been ordered, even if it does not move.

Battling and Retreating:

Now you can battle! Any unit that’s close enough to an enemy unit (or an Artillery unit that was ordered but not moved) can now try to eliminate some of the opposing soldiers. This is done by rolling Battle Dice. Terrain restrictions, distance from target and type of soldier all effect how many dice you roll, and therefore how likely you are to succeed in doing any damage.

For example; if you’re attacking an enemy unit that’s on a hill hex, you roll one less Battle Dice than normal depending on how far away from the target you are, because you’re attacking uphill, which puts you at a disadvantage.

All units have one member that has a flag in them, when fighting an enemy unit, you always remove the flag bearer last. 

I won’t go through how each unit attacks, but I’ll use Cavalry as an example. Every unit has a different range to the others, Infantry can attack enemy units up to four hexes away, Artillery up to five hexes away, and Cavalry must be adjacent to the unit they wish to attack.

Depending on where you are in relation to the unit you’re targeting you roll a certain number of Battle Dice. Cavalry always roll three, unless terrain battle restrictions state otherwise.

Of the three Battle Dice rolled here two were hits. As you can see, the small image on the dice is of a Cavalry figure. When rolling to eliminate opponents you must roll the correct symbols.

These are all six of the sides of the Battle Dice, and each symbol means something different. Infantry, Cavalry and Artillery are fairly self-explanatory – for every one of those symbols rolled, you can capture one of the equivalent enemy pieces if there is one in the unit you’re attacking. The cross sabres are the only symbol that can remove a General from the board, however, if there’s no General in the unit, sabres also remove anything else. The flag is a retreat:

The Battle Dice. As you can see, there are two Infantry symbols showing. This is because there are two sides of each die with the Infantry symbol on them. Making them the easiest units to capture.

A flag rolled means that the unit you’re attacking must retreat one hex, however, it can’t retreat onto an occupied hex, unless that hex has a General on it that’s not attached to a unit, the General then become attached to the unit and must move with it.

Different Kinds of Terrain:

There are hexes on top of the board, these are the Terrain Tiles. In both the scenarios I’ve played so far there are only three kinds on the board: Woods, Hills and Homestead hexes. These alter the course of the game in that they place restrictions on movement, line of sight and accuracy. So can be used to your advantage, or to severely disadvantage your opponent. All of these act as blocks in the line of sight when you want to attack a unit, but the Woods and the Hills can be incredibly useful. From the top of a hill the range of an Artillery unit is increased by 1, whilst the accuracy of an attacking unit is decreased by 1. Likewise, on a Woods hex the attacking units accuracy is decreased by 1, but the unit inside the Woods has no such impediment.

Winning the Game!

One the page in the Rule Book assigned to whichever scenario you’ve chosen to play there will be a small amount of information underneath the picture of the starting set up. This will include the historical background to that particular battle, which General both sides are commanding as, who moves first, and most importantly, how many flags you need to capture to win. The first player to achieve having this number of their opponents flags, immediately wins the match. However, to play a complete match, you’re supposed to reset the board and change sides, and the winner is determined after both matches are complete. This probably often ends with a draw, but I haven’t yet played a complete match in this way. The game we played the first player to capture six flags won:

My victory stand at the end of the game!

Strategy:

This game is tactical, it requires strategic thinking and a little bit of foresight. I’ve found that on the First Bull Run the best way to play is just to push forward in more or less a straight line, going up hills wherever you can, or into woods. If you’ve got possession of the hills and woods you’ve got the advantage, because your enemy is less likely to be able to capture you when they attack.

This isn’t a huge amount of help, as it’s things that’re mostly just common sense, but I’m not particularly strategically minded, so although I’m not bad at this kind of game, I also don’t make plans when I play them. Just take each turn as it comes, kinda thing.

History and Interesting Things:

  1. The first game to be published under this name was published in 1961. The concept of this game was the same as the version we’ve got, but much much simpler. Each side only has 22 pieces, the grid is square, not hexagonal, and there’s only one battle scenario available to play.
  2. An online version of this game was released in November 2008, to GameTableOnline.com and can be played player vs player or player vs computer.
  3. It won the International Gamers Award in 2001 for the General Strategy: 2-Player category.
  4. I don’t have anything else to write about the history of the game, so have some points about the Civil War instead: Before William Tecumseh Sherman became a famous Union General he was demoted for apparent insanity.
  5. More men died in the Civil War than in any other American conflict, and two-thirds of them died of disease.
  6. During the war Robert E. Lee’s Virginia estate was confiscated and turned into a cemetery by the Union.
  7. Robert E. Lee was the bloodiest General of the war.
  8. President Lincoln was shot at, and almost killed, nearly two years before his assassination riding to the Soldiers’ Home (his summer residence) from the White house on an August evening in 1863.
  9. On the Union side, black soldiers refused their pay for 18 months because they were being paid less than their white comrades.
  10. Harriet Tubman led a raid to free slaves during the war, this one raid freed more than 720 slaves – more than 10 times the number she had freed in 10 years on the Underground Railroad.

I read about the history of the war here, and got my game info off of Wikipedia.

To Conclude:

So  this game is great for a few reasons; it’s easy to understand, it’s easy (though time-consuming) to set up, and there are so many different scenarios that it’s going to be a long time before it stops being interesting!

I recommend it to anyone who enjoys a proper sit-down game. It takes about an hour to play a scenario, with around 15 minutes set up time (this’ll probably become less as we get more familiar with the board and different layouts). For anyone with a son or daughter who’s an up-and-coming tactician, this would be a fantastic game to play with them.

If this is a game that’s up your street, go out and get a copy, and have lots of fun re-writing the course of history!

Escape From Atlantis

4.5 - 5

Number of Players: 2 – 4

Year of Publication: 1986

Creator(s): Julian Courtland-Smith

Escape This:

You have to imagine the Jaws music

So I thought I’d open with that just to get your attention. Escape from Atlantis is a game that’s really up there for me, it’s just really good fun. I remember if from when I was a child; I can’t remember exactly where we used to play it, either my Grandma or my Godmother had a copy, but I used to love it. Now, my sister being the wonderful person she is, bought me an original copy of the 1986 publication, complete and in very good condition, off the internet for my birthday. Naturally since then we’ve played it more times than any other game we’ve played recently.

What’s In The Box:

The Stuff.
The Stuff.
  1. A playing board.
  2. A instruction booklet
  3. An Atlantean Swirler
  4. 7 Grey (rock) land tiles
  5. 12 Green (hills) land tiles
  6. 18 Yellow (sand) land tiles
  7. 6 Sea Monster Pieces
  8. 6 Shark Pieces
  9. 6 Octopus Pieces
  10. 6 Dolphin Pieces
  11. 12 Boats
  12. 48 wooded play pieces divided in two twelve set of four colours (Blue, Yellow, Green and Red)

Playing The Game:

Objective: To save more of your Atlanteans than any of the other players by the time one player saves their last surviving piece.

The board at the start of the game.

You start the game by setting up the island in the middle and then taking turns placing your pieces on it. You can only have one piece occupying each yellow space at the beginning of the game. You then each place a boat on a space adjacent to the island.

IMG_0555
The board after all pieces are placed.

Then you start movement, each player can move three spaces per turn. These three spaces can be used on one man, or split across any combination. They can also be used to move un-manned boats or boats you have control of. You have control of a boat if there are more of your men in the boat than any other players, you share control if you both have one piece in it; meaning you both can move it. If you only have one piece to another players two you cannot then move the boat. Men who’re in the water (not in a boat) can only move one space per turn but three moves still apply so you can use the other two to move something else.

Yellow has control as there's only one red piece in the boat.
Yellow has control as there’s only one red piece in the boat.

The next phase of your go after movement is to take a piece of the island away. Each piece of island has a symbol on the underside representing one of the following; A whirlpool which sucks everything on adjacent spaces (that aren’t land pieces or on land pieces) in and destroys them, a sea monster, a shark, an octopus, a dolphin or a boat; these are all created on the uncovered sea space. Any men that were on the removed land tile are moved to the closest available space on the island – unless it’s the last piece, then they’re cast into the sea. The yellow land tiles are removed first followed by the green then the grey.

The symbol is a triangle which means shark, so a shark has been placed in the space the land tile was on.

The last phase of a players move is to spin the Atlantean swirler. This shows either a; sea monster, octopus, shark or dolphin and the numbers 1 -3 and the letter D. This indicates that you can move the relevant sea creature the relevant number of spaces or if it says D (meaning dive) you can move the creature to any unoccupied space on the board. The sea creatures are the fun part of the game, if you move a sea monster onto a space with a boat or swimmers in it will eat the lot, if you move a shark onto a space with swimmers it will eat them but it will not eat boats, octopuses will only destroy boats and make everyone in them swimmers but will let them live and dolphins are friendly and will carry a swimmer to safety at the cost of the player next three moves.

Dolphins save lives!

As the island disintegrates and more monsters appear, more pieces end up in the water and so the game becomes much more fun! The winner is the person with the  MOST pieces on the coral islands in the corners when the first player runs out of pieces either by saving them or having them eaten. Now, while the rules don’t specifically state this, we decided this meant no suicides as it could be beneficial to kill your own men off (by swimming them into sea monster/sharks or the other way around) when you have the most men on the islands. We decided this was not in the spirit of survival and should not be allowed.

The end of the game.

Strategy:

The primary strategy to this game is… DON’T GET EATEN! But there are a few other things to consider; like it’s always useful to make someone else save your pieces by putting it is as a tag along/third man in a boat controlled by someone else. Also dolphins are your friends. The best tactic I think is to remember to move not just to aid your escape but to move to hinder the other persons; move empty boats away from the island, block the escape island entrances with sea creatures (preferably sea monsters) and destroy land pieces that hinder the other players as much as possible.

History and Interesting Things:

  1. The game was originally released under the title Survive! in the USA.

    Original Survive! Picture lovingly borrowed from Wikipedia.
    Original Survive! Picture lovingly borrowed from Wikipedia.
  2. It was released like this in 1982 but was remade with 3D pieces to the addition we own and released in the UK with revised rules in 1986.
  3. In the original game the island was built at random in the middle and pieces where removed at random (as you might be able to see from the picture) which resulted in the island sinking in an less-uniform manor.
  4. From 1987 the game sold in many countries, in many languages including Finnish, Dutch, Spanish, Italian, French and German.
  5. In 2010 Stronghold Games announced they where going to reprint Escape from Atlantis and title it Survive! Escape from Atlantis. Which they did in February 2011.
  6. In June 2012 they then released Survive! Escape from Atlantis – 30th anniversary Edition with revised rules and a slightly altered theme involving the explorers actually finding Atlantis and then having to escape from it.
  7. French publisher Asmodee released the game under the title The Island in 2012.
  8. Stronghold Games released three expansions for the Survive: Escape from Atlantis! – 30th Anniversary Edition in 2013 called: 5-6 Player Mini Expansion Kit plus Dolphins & Dive Dice Expansion Kit and The Giant Squid Expansion Kit and because of these this version of the game and the expansions must be added to our Game we Want page.
  9. The game has won boardgame.ru best family game of the year 2012 as well as “2012 Juego del Ano Finalist” (what ever that means exactly… Some sort of finalist for something)
  10. World sales of Escape from Atlantis now exceed 1.25 million units.

To Conclude:

This game is up there with my favourites, it’s a classic that’s just really, really good fun. I will have to get the new one to compare it, so expect a post on that when I do. However never forget the fallen:

To quote a terrible Star Wars film: "the death toll is catastrophic".
To quote a terrible Star Wars film: “the death toll is catastrophic”.

Update – March 2014

This month is going to be themed Conquest, Survival and Civilization Games. Long have I been a fan of RTS (real time strategy) computer games, basically having been addicted to Red Alert back in the day and it still probably being one of my favorite computer games of all time. So naturally, I quite like the idea of these games, as they’re a table top version of the same thing; additionally I used to be a big fan of Warhammer in my early teens so this a slightly less costly version of that too. However, the first game in this month doesn’t fit quite so nicely with the others but we figured it had to go in somewhere as my amazing sister got it for me for my birthday and its one of our favourite games! Also the last one is a bit of an odd fit but likely you can see how they’re kind of related.

Games for March: – Conquest, Survival and Civilization Games

Monday the 3rd – Escape from Atlantis

Monday the 10th – Battle Cry

Monday the 17th – Conquest of the Empire

Monday the 24th – The Settlers of Catan

Monday the 31st – Spartacus: A Game of Blood and Treachery

Other Things to Note:

  • Ratings system! As I should have mentioned before we’ve taken to rating games out of five, and we’ve even done it in pictures of little chess pieces that can now be seen at the top of our review posts! Additionally, if you actually go to the post rather than viewing it on the home page you’ll see there’s a function to rate it yourself out of 5 stars at the top; if you give it a high rating we’ll assume you’re rating the quality of the post, if you give it a low rating we’ll just assume you’re rating the game and you don’t like it very much.
  • Another point of interest is, to highlight some movements in the games, we started making stop-motion animated gif pictures that are pretty cool and will hopefully get cooler as we get better at it. Check out our first one of The Luggage in the Guards! Guards! post HERE and expect a few more in the coming months.
  • I (David) have also started another blog that’s about freedom, philosophy and just obscure things; it’s called Illusion of Free Will check it out by clicking that hyperlink, it’s full of obscure thoughts that cross my mind.
  • Lastly, we’re thinking of putting a word limit on our posts to try and force us to be concise, is this a good idea? Are our posts too long? How can we make them better? Let us know in the comments.
  • And just because this picture made for twitter to promote our Cripple Mr. Onion post is so cool, here it is again:

CMO

Like us on facebook HERE and follow us on Twitter HERE and more cool pictures will be showing up on your news feeds!