Quarto! is complicated Connect Four and for this review we’ve done a video, our first real video review! The video covers all our normal sections except ‘History and Interesting Things’ so check it out below:
History and Interesting Things:
There are only a couple of notable things about this game and they are:
The game was invented in 1991 by Swiss mathematician Blaise Müller.
Like we say in the video, we like this game a lot! My only issue with it is retaining enough concentration to keep in check all of the eight different piece attributes that could create a line. However I would highly recommend this game and if you like games that range from Connect Four to Chess then you will most probably love this game.
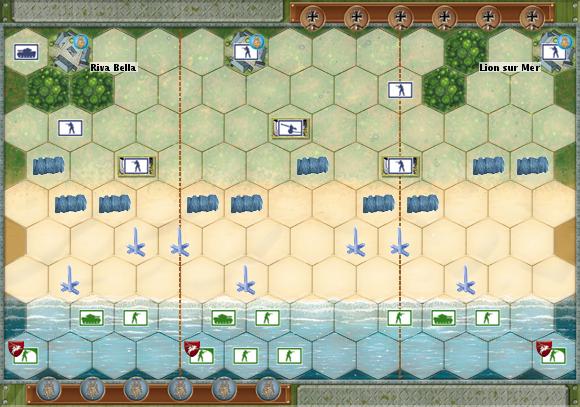
Morning. June 6th. 1944. The 8th Brigade Group of the 3rd British Division, supported by Commandos of the 1st Special Service Brigade and the Sherman tanks of the 13th and 18th Hussars make up the first wave of Allied forces to land on “Sword” beach, near the mouth of the Orne River.
The objective of the day was for the Allied forces to retake the city of Caen, and although the French troops captured the Casino at River Bella, the Allies failed in this objective. The sea was difficult that day, the tanks were supposed to land first and engage the enemy before the infantry landed, however, tanks and infantry ended up landing together. This coupled with the German resistance meant that the inland advance was seriously delayed. The failure to retake Caen was one of the biggest set-backs of D-Day and the consequences were still felt well into July of that year.
Strategy and Tactics:
Axis:
You have a defensive advantage in this scenario. Not only are the Allied forces advancing from the sea, which initially gives them a terrain disadvantage, but some of your forces are also already holed up in bunkers. Bunkers are useful as they give a -2 to tanks and a -1 to infantry when being attacked. You also possess the only artillery unit in this scenario. This is, if you manage to prevent its destruction, probably your most useful unit, as it has the longest attack range.
Despite these advantages you also have fewer troops than your opponent, and your only tank unit starts in a useless position, from which you have to order it twice to get it within attacking range of the Allied forces. You also have one less command card, and move second.
Okay, so that aside, tactically we found that arranging your troops towards the back of the board and then waiting for the Allied forces to come to you was a fairly sound way of playing the scenario. Though it’s definitely worth dragging your tank unit out of the corner early on. I would also generally say that it’s worth keeping the units that are already in the bunkers in them, unless for some dire reason you have to retreat or lose that unit.
Because wood hexes provide a -1 for attacking a unit in the woods it’s also worth trying to position your in Lion Sur Mer in the most forward of the two woods hexes next to it, this moves you closer to the fighting action whilst giving the unit a decent terrain advantage and enabling it to be close enough to try and prevent Allied forces taking the town and claiming the medal there, that contributes to their victory points.
Other than that, I would say, try not to let yourself get surrounded by the Allies, because they’ve got a lot more firepower than you, and also, if possible, knock out their tank units first, as these move further and have a fighting advantage over infantry units as well as needing less hits to destroy a unit.
Allied:
Although you start in the sea, you have an advantage in number units and number of command cards, as well as being the side that starts the scenario. Not only do you have three tank units to the one that your opponent possesses you also have three special forces units available to you, these are able to move up to two hexes and still battle, where regular infantry can either move one and battle, or two and do nothing.
Your first task is to get your units out of the sea, this is slow going because of the terrain restrictions that the sea imposes, but we found that it was tempting just to move either one block of your units out, maybe just from, say, the left flank, or to maybe move one unit from each section of the board, depending on your command cards. This is however, not a good idea. If you move one unit from each section too far from its comrades you make it an easy target, remember that you’re at a disadvantage with the bunkers, not to mention the hedgehogs and barbed wire that’s between you and the Axis forces. And if you only move one block and ignore the others you also make those units targets because if they’re in the sea and they get attacked a retreat roll on the battle dice counts as a hit because you cannot retreat and so must sacrifice one member of your unit for every retreat rolled.
If you start out with any command cards that enable you to annihilate your opponents artillery unit this is a big score early in the game, it levels the playing field a lot. Not only does it have only two pieces to a unit, making it the easiest to destroy in terms of dice rolls needed, but it also makes it much harder for the Axis player to just sit and wait for you, as they can no longer pick off your units from such a distance.
Surrounding bunkers is a good way of destroying a unit completely, if you attack a bunker with three units instead of just one, you’re less effected by the defensive advantage they give to the Axis player.
Lastly, don’t forget about the medals in the three towns at the back of the board. Each one of these counts for one of the five victory points you need to win the scenario if you capture, and hold, the town. They’re worth going after because they mean you need to physically destroy less enemy units.
To Conclude:
I really enjoyed this scenario from both sides. As you can see from the running score we’re keeping – I lost. But it was fairly close both ways round. It was more a lack of useful command cards than any tactical errors made. This scenario is also great because you get artillery and special forces units in play, as well as bunkers, hedgehogs and barbed wire, which adjust the way you have to think about moving around the board. This is great because by this point you’re familiar with the infantry and tank units, and then the game gives you something new to play with. It also starts to pick up the pace of play. Dave mentioned in his last post that he thought it felt a little slow, I agree with him, but I think that this scenario really cranks the game up a bit, making it much more interesting.
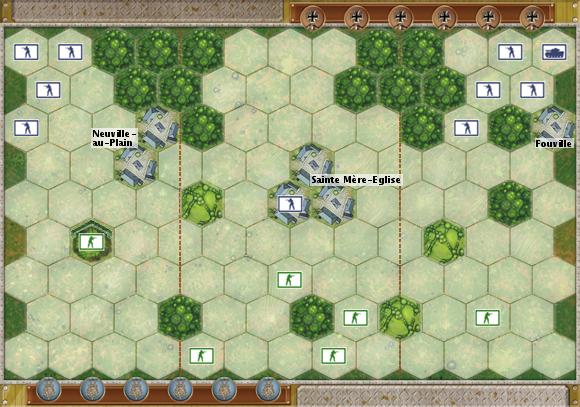
Set in 1944 on the 6th of June this scenario aims to replicate the D-day battle of Sainte-Mère-Eglise. Sainte-Mère-Eglise is a town in Normandy, north-west France. The town is used as the central setting for the board, as can be seen in the layout diagram below. The fight began with Allied paratroopers landing at 0140; this is simulated by the dropping of four units of Allied men onto the board from a height of around 12 inches. If they land on a empty hexagon they become a full unit, however, if they land on a German unit, or off the board, they are considered a failed drop. Many drops failed that night as buildings in the town were on fire. This lit up the sky making the paratroopers easy targets. There were also incidents like that of John Steele who’s parachute got caught on the church tower and he could only observe the battle and there were others who got caught in trees.
The set up.
At around 0500 the town was taken by the 505th parachute infantry regiment, it was then heavily counter attacked by the Germans, but the infantry held until they were reinforced from Utah Beach in the afternoon of June 7th.
Historically speaking this was an Allied victory, however, the success of your parachute drop at the start strongly influences your chances of success or failure.
Strategy and Tactics:
Allied:
The first thing to focus on when playing as the Allies is your parachute drop. You get four units that you have to drop from 12 inches above the board, if they land on an occupied space or off the board they are taken out of play, so you want as many of them to land safely as possible, so drop with care. Additionally, depending on where they land this effects what you do next.
As the Allied player it makes sense to take the Axis unit that holds the town in the center first; depending on your command cards and on your parachute drop this can be quite easy as this unit is cut off from the rest of the Axis forces. Then holding the town and waiting for the Axis player to come to you is a fairly sound strategy as you then have the added bonus of the protection of the town at -1 against infantry and -2 against tanks for dice roll because of obscured line of sight.
What I found while playing is that while the hill on the left side of the board looks like a good position, if you don’t reinforce it you may as well pull out because with the right command cards and a couple of moves that unit will be eliminated with ease.
I also found that the single unit on the right is easily forgotten about by both sides, if it’s left by itself, as, if you’ve enforced the town in the center, the Axis player will move their right had units in towards the center in an attempt to take the town. So to move this unit into the cover of a hedgerow makes sense and, if possible, to reinforce it, depending on where your parachute men dropped.
Axis:
The Axis players are not so lucky as to have anything as fun and useful as the parachute drop, they do have one unit of tanks, but they also get one less command card. Assessment of where the parachute men fell is essential for the Axis player; the thing to keep in mind is that the win criteria is four medals (four completely destroyed enemy units). So seeing where their weakest units are and destroying them speedily makes good sense.
I found that the unit on the left up the hill was most often left by itself so that was a good place to start, even with the -1 for shooting up a hill. Additionally withdrawing your unit from the town in the center to prevent its quick destruction was also a good idea.
If the Allied player were to fill the town in the center it is highly possible to lose more men than it’s worth trying to retake the town; however they cannot hide all of their men in the town and will undoubtedly have some out in the open, here getting your tanks into play and focused on units not in cover is a good move, but to fire tanks into a town is close to a waste of a move as they fire at -2.
Both Sides:
Remember to try to keep units in all sections of the board as it will always be the section of the board you have no units in that you have all the command cards for!
To Conclude:
This is a good scenario with a lot of replay value due to the parachute drop creating a slightly different set up every time. Also being only the second scenario in the rule book it gives a small, basic introduction to tanks with one tank unit in play. It also introduces you to hedgerows and hills and is a well-paced second scenario for people still learning the game.
However it lacks the fun of some of the later scenarios due to its relative simplicity and lack of lots of heavy weaponry!
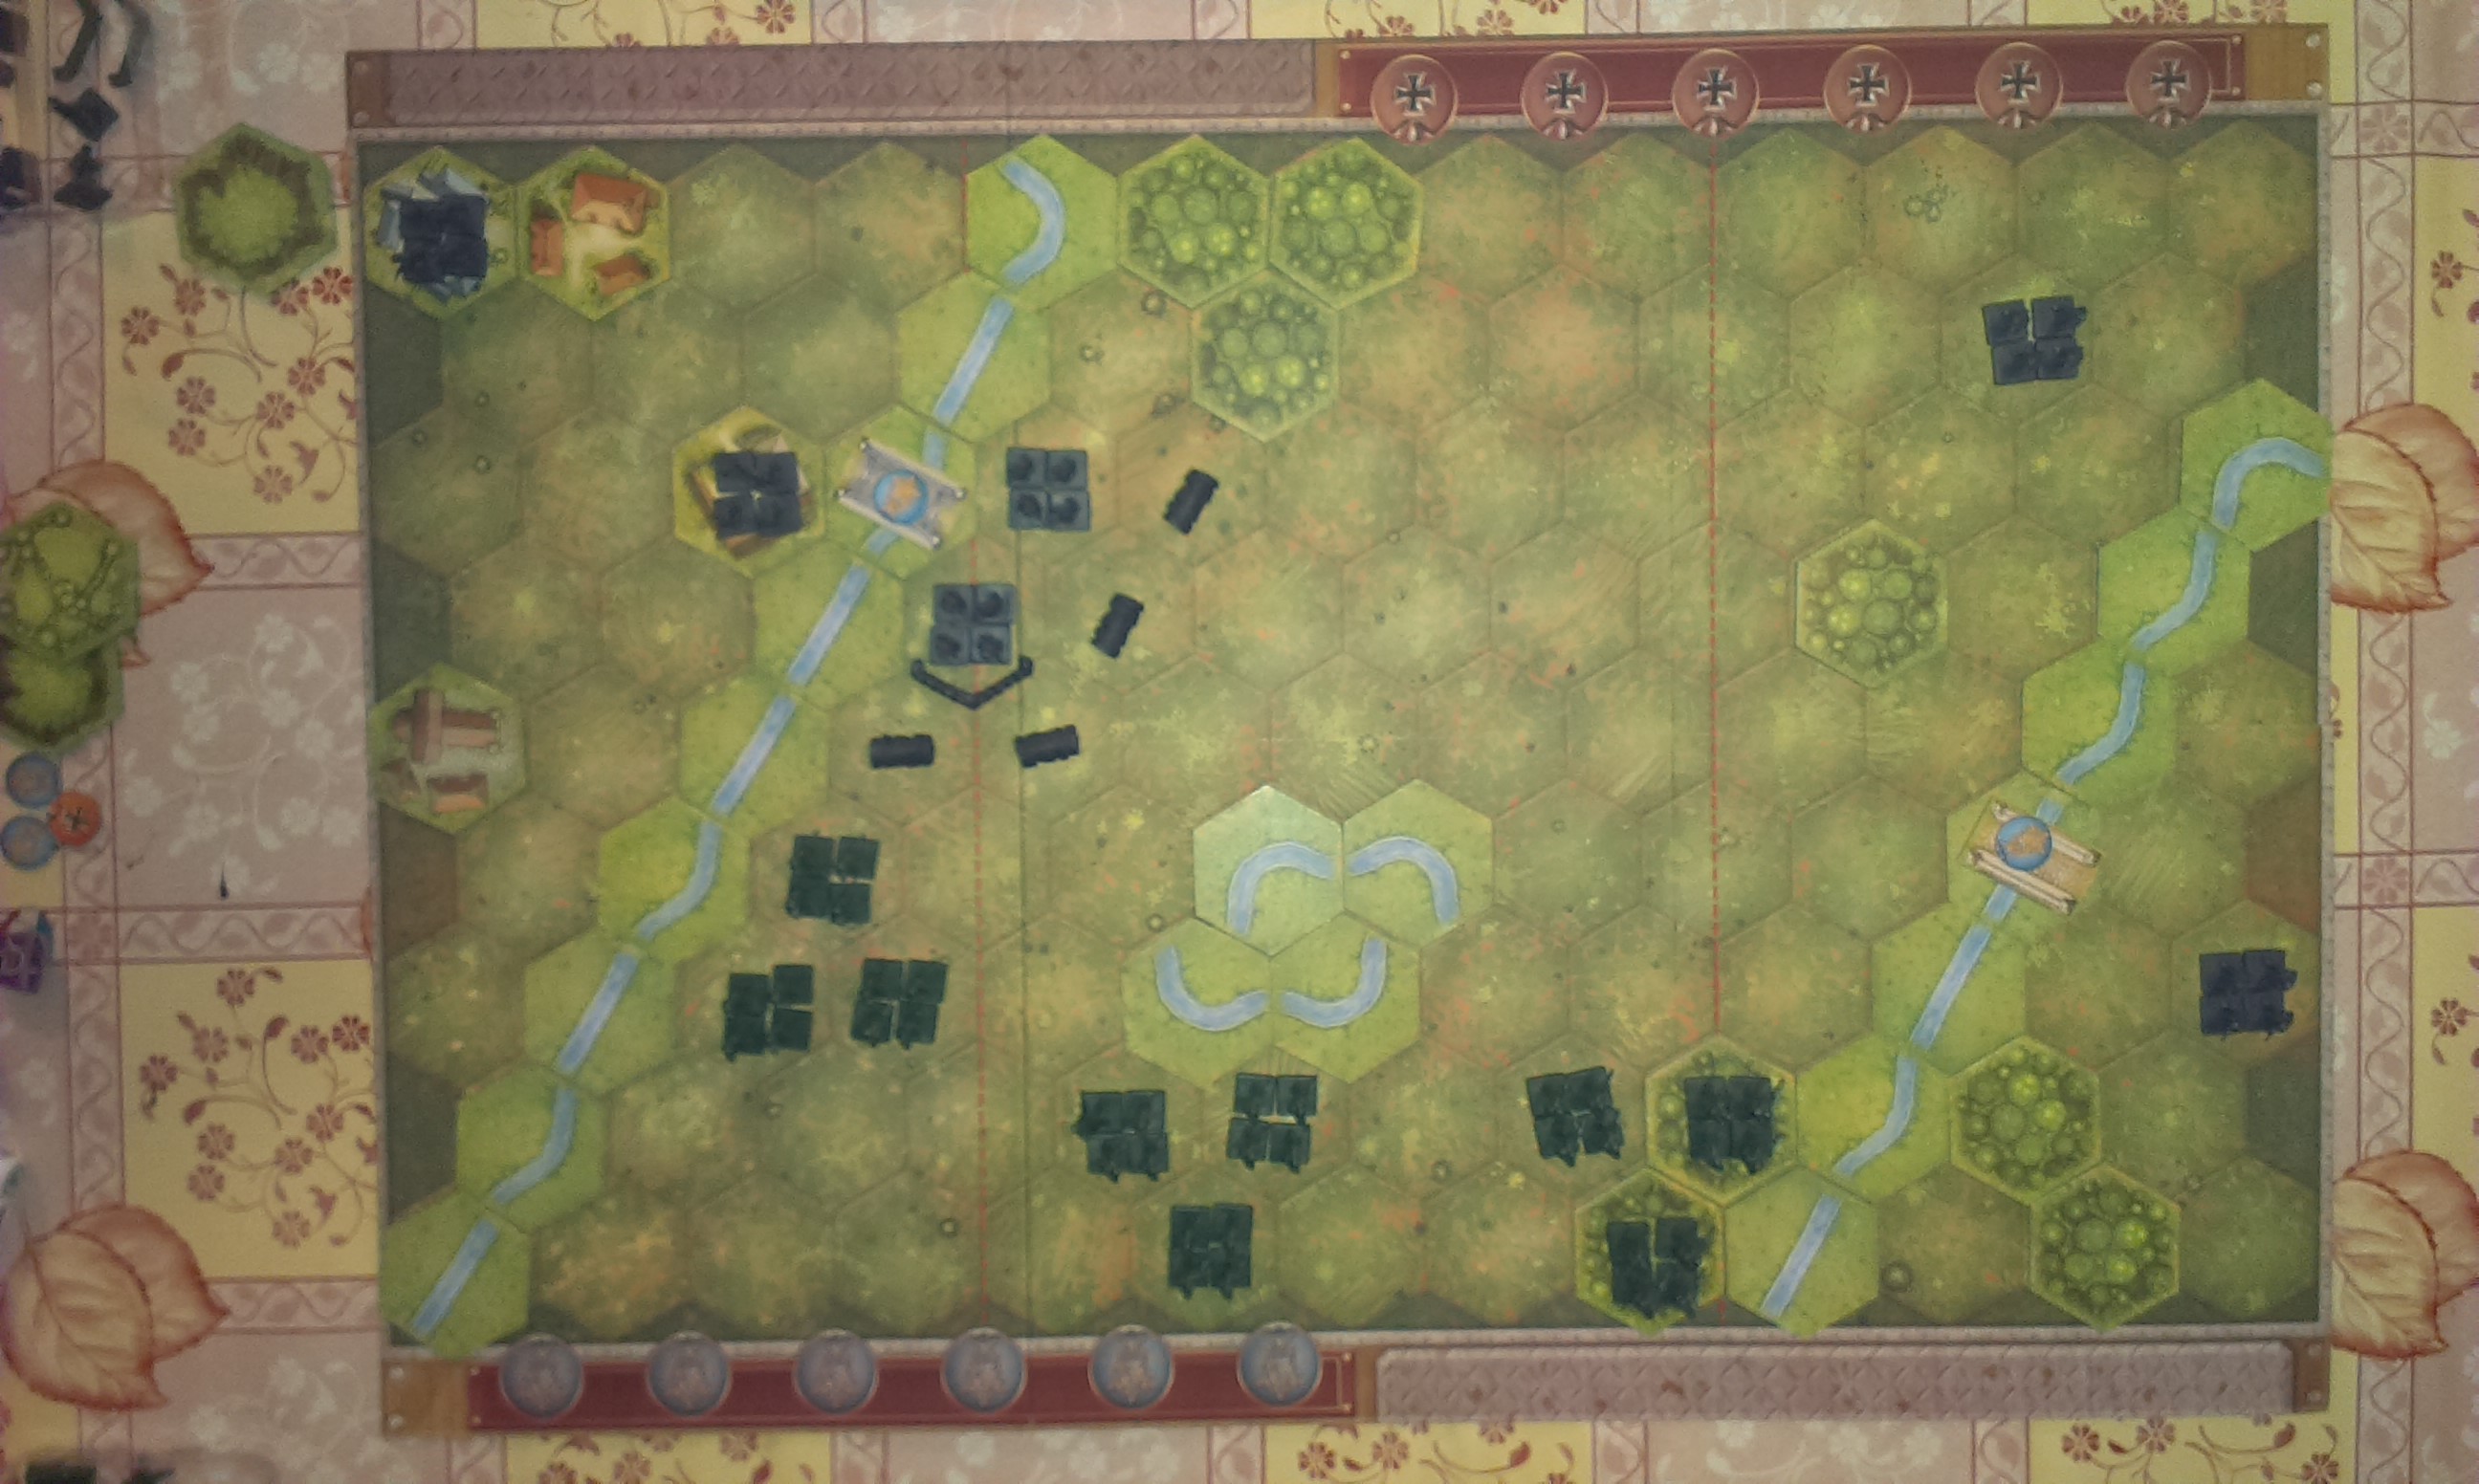
Set on the night of June 5th, 1944 this scenario recreates the brief battle for Pegasus Bridge. Or Bénouville Bridge, as it was known at the time, in Normandy, France. Major John Howard led the men of the Oxford and Buckinghamshire Light Infantry in the first airborne assault of D-Day, his objective being to capture both Pegasus Bridge and Orne Bridge. At a few minutes past midnight the Horsa Gliders land in a patch of field only yards away from their objective. The men stream out of the gliders totally surprising the German forces, there’s a brief and furious fight involving a machine gun in a sandbag nest right by the Pegasus Bridge. The British forces secure the Bridge, and the Orne equally as quickly, losing only two men in the process.
The bulk of British troops here start behind the impassable pond, meaning that they must be maneuvered around it to get involved in the battle. The Allied player has the natural advantage in this scenario; they have more men to begin with, receive more Command Cards, and play first.
Strategy and Tactics:
The Allied player here has the upper hand, but if they play badly that’s going to be completely irrelevant. In this game a certain amount of your success as a player is determined by which Command Cards you draw, as on some occasions you may need to give orders to a section of the board that you don’t have the Command Card for, and so can’t. How quickly and efficiently you kill enemy units is also determined by the roll of the battle dice. So some amount is down to luck and chance. But aside from that we’ve found so far that once you’ve found a decent defensive position (for example in a patch of trees) it’s ideal to stay there for as long as possible, all the while you can fire on your enemy from there you should stay as the woods reduce the chances that you’re going to lose men when the enemy fires on you.
In this scenario the German forces have barbed wire and sandbags. These are inconvenient, for an Infantry unit to be able to remove them they have to move into the space that the barbed wire is in, and then remove it instead of battling. So it can be completely suicidal to remove them as you end up adjacent to you enemies units and unable to attack them. Leaving you as a clear target. It’s also important to remember that the rive does not effect line of sight. You can fire on an enemy unit across a river provided that they are within range and no other terrain restrictions that would prevent you attacking them apply.
I found, when playing as the Allied forces, that trying to take the patch of wood on the right flank of the board, by the Orne Bridge, was a strong position to be in. That bridge is under defended and so the woods is a good position from which to either attack the lone German unit at the top of the board there, or to swoosh down and take the bridge from the other German unit. The blue medals on the two bridges count as victory points if the bridges are held by British forces. Meaning that that player has to destroy less of the Axis units to win the scenario.
For Axis forces it’s tactically ideal to get you lonely unit in the top of the right flank down into the patch of woodland before anyone else can, this is a good defensive position to be in, to prevent anyone trying to take the Orne Bridge. Your second unit there could then be on the bridge, between them they’ll put up a good fight against any optimistic British forces.
When we played this scenario we left the Axis units mostly where they were in the center and on the left flank, only really moving the one in the top left corner to bring it closer to the action. On reflection it would probably have been a good idea to shift the unit in the town right next to Pegasus Bridge further down the river to attack the British, because we didn’t actually use it that much.
To Conclude:
This is the starter scenario, so it’s been simplified from the original battle. The Germans has a machine gun in their sandbag nest by Pegasus Bridge that’s been replaced with regular Infantry in this one. But as starters go it’s very good, it’s an easy board to navigate, and the use of only one type of unit allows you to completely get to grips with how they move and battle. It would’ve rated higher, but that it’s been deliberately simplified for learning purposes, so the scenario doesn’t have as much going for it as some of the later, more complex ones do. It’s well designed as an introduction though, and sets you up in good stead for future scenarios.
We should really include that in all the titles/opening paragraphs for this blog, since I can’t immediately think of any game that we haven’t played wrong at least once. Memoir ’44, as has been stated at least once now, is a fantastic game. I don’t think we’re likely to ever get bored of it. Based on real scenarios from the Second World War it’s not only interesting for its historical accuracy, but also as a strategic game.
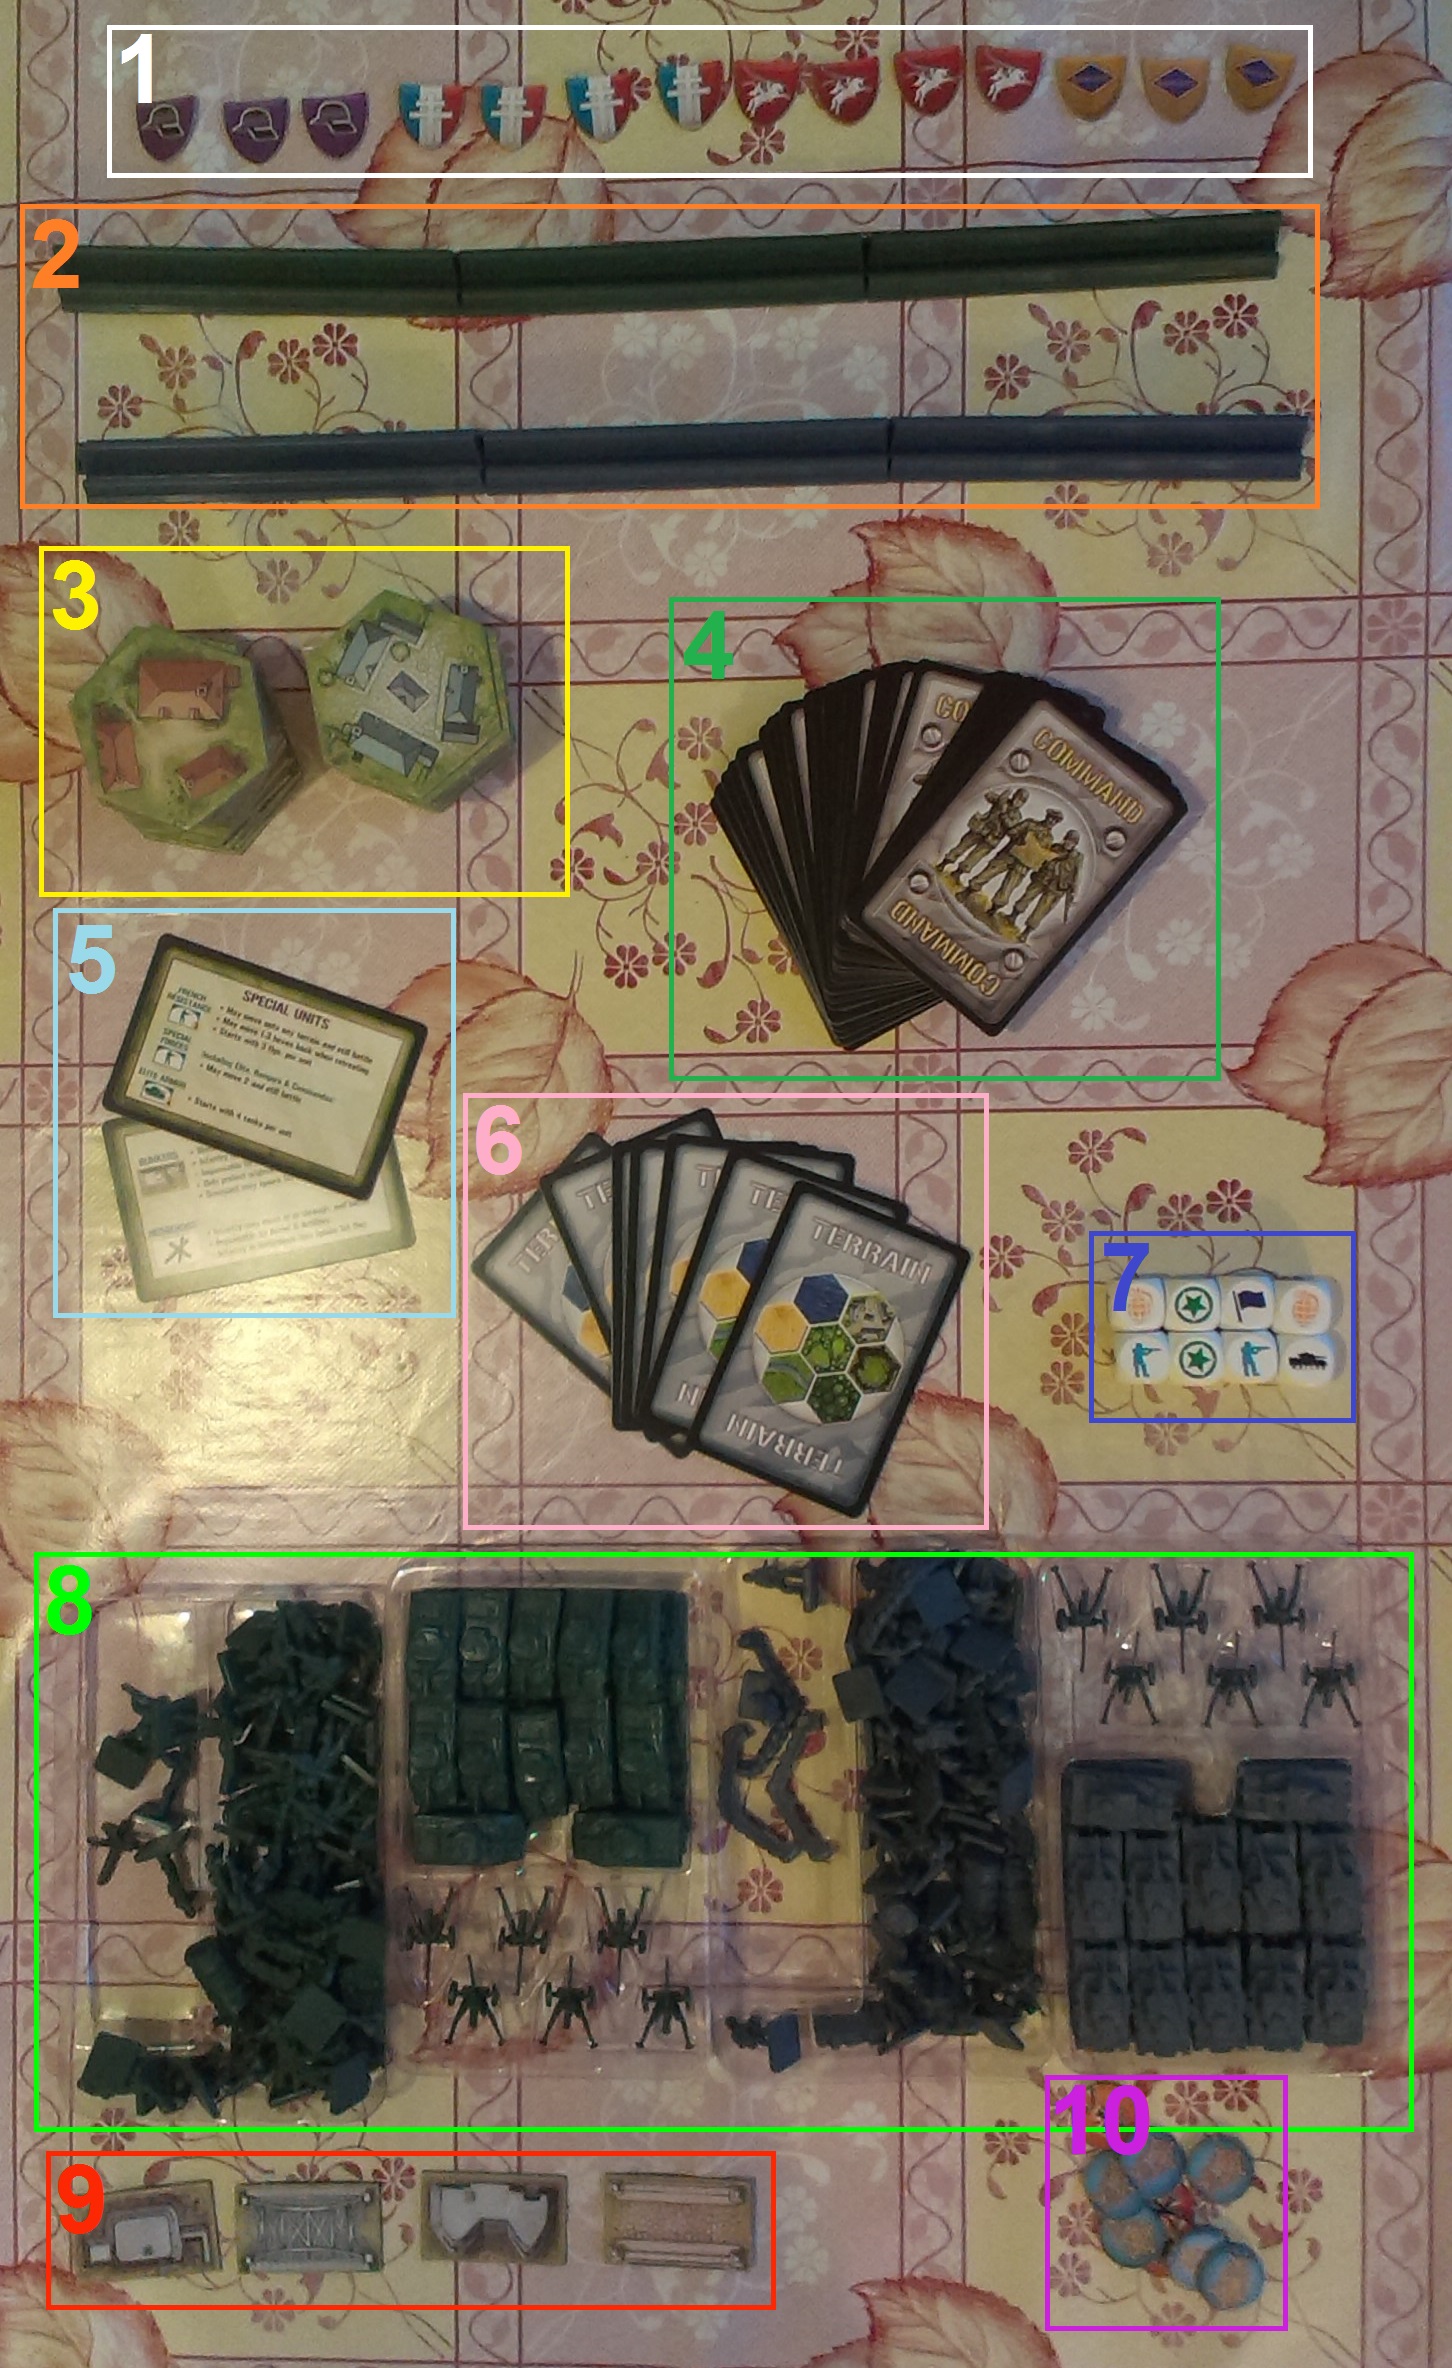
What’s In The Box:
The Stuff
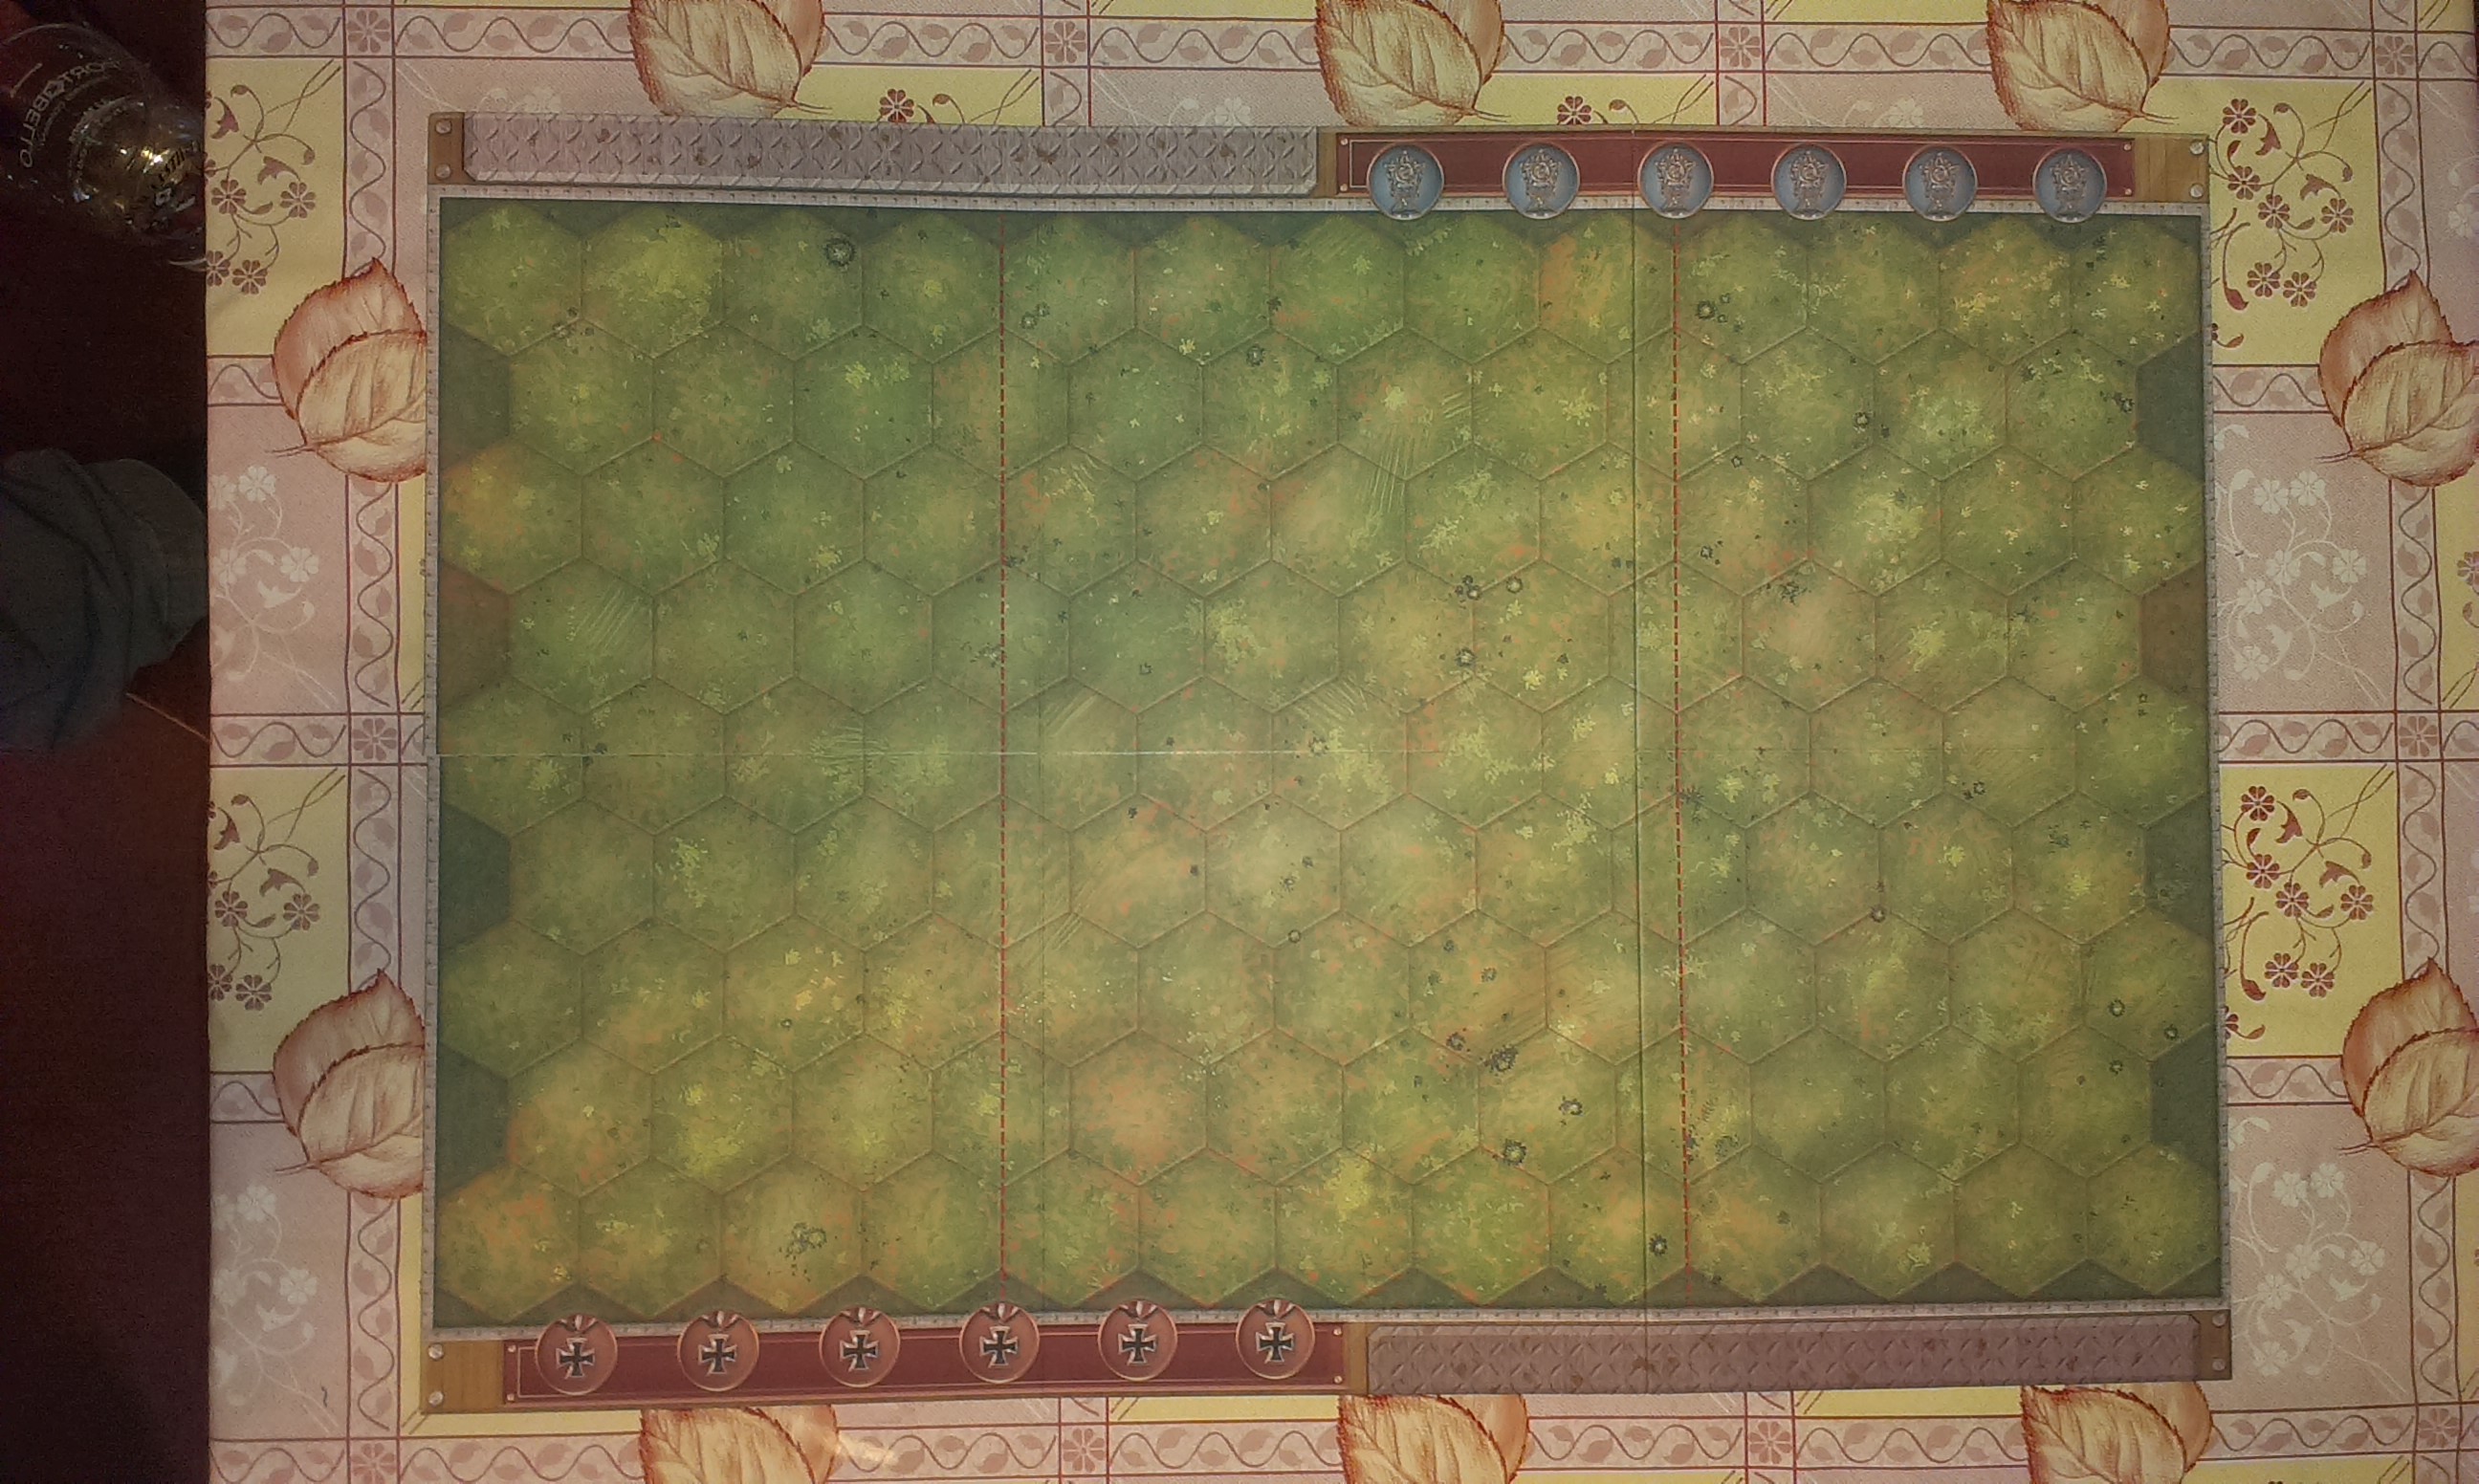
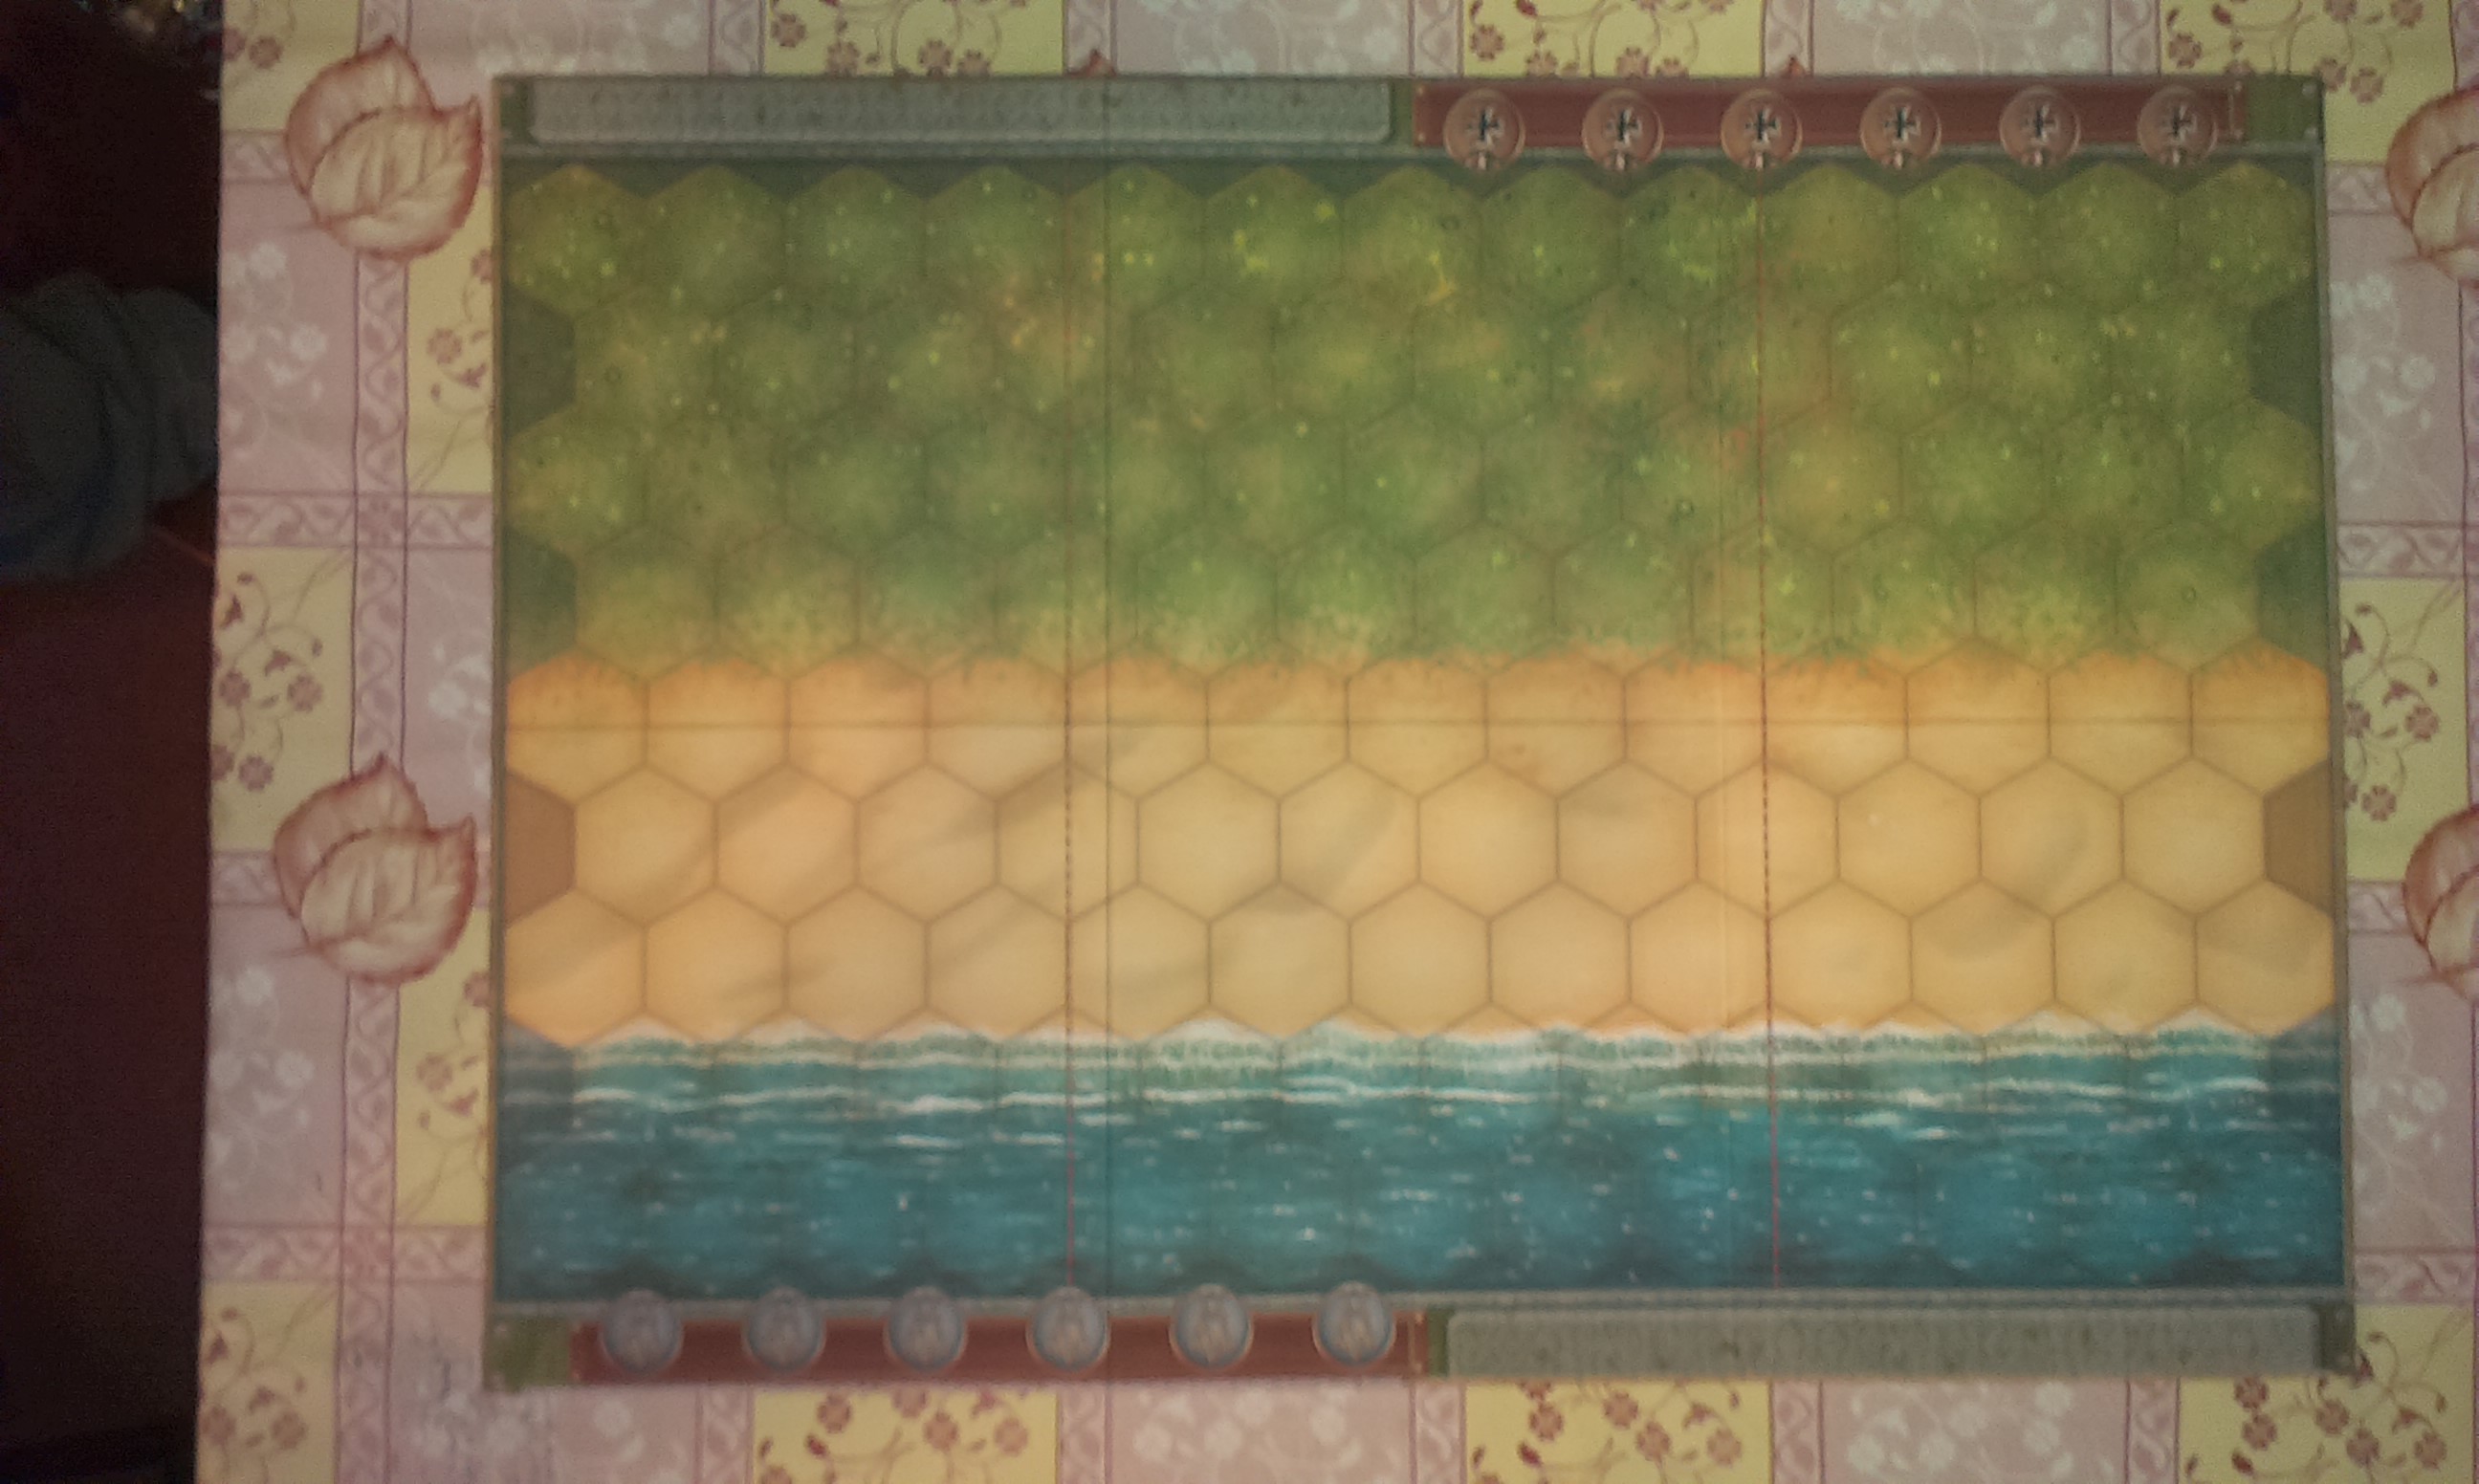
Countryside side of the boardBeach sideThe Rules
14 Special Forces Badges
3 Blue and 3 Green Command Card Holders
44 Double-Sided Terrain Hex Pieces
60 Command Cards
1 Double-Sided Obstacle Summary Card and 1 Double-Sided Unit Summary Card
7 Terrain Cards
8 Battle Dice
2 Sets of Army Miniatures; Green = Allied Forces, Blue-Grey = German/Axis Forces
4 Double-Sided Bunker and Bridge Tiles
10 Double-Sided Victory Medals
1 Double-Sided Battlefield Board Map
1 Rules and Scenario Booklet
Playing The Game:
Objective: To fulfill the scenario’s victory conditions before your opponent and score more points after you’ve switched sides.
When you read the rules for this game you’ll see that the first scenario it recommends you play uses only the Infantry Units available to each side. This is very good, as the game builds you up to a thorough understanding of each of the different types of unit available to you in different scenarios by introducing them one at a time into gameplay.
You start by setting up the board, as directed in the instructions for the scenario you’re playing. You change the look and layout of the board by using the terrain hexes to put in woods, hills, villages, rivers etc.
The starting set up of the first scenario in the rule book
Once you’ve set the board up for the scenario you then decide who’s playing as who. In the rule book the scenario instructions will tell you which side plays first, and how many Command Cards each player is dealt to begin with. Players then take turns. There will be a preset condition for victory in each scenario.
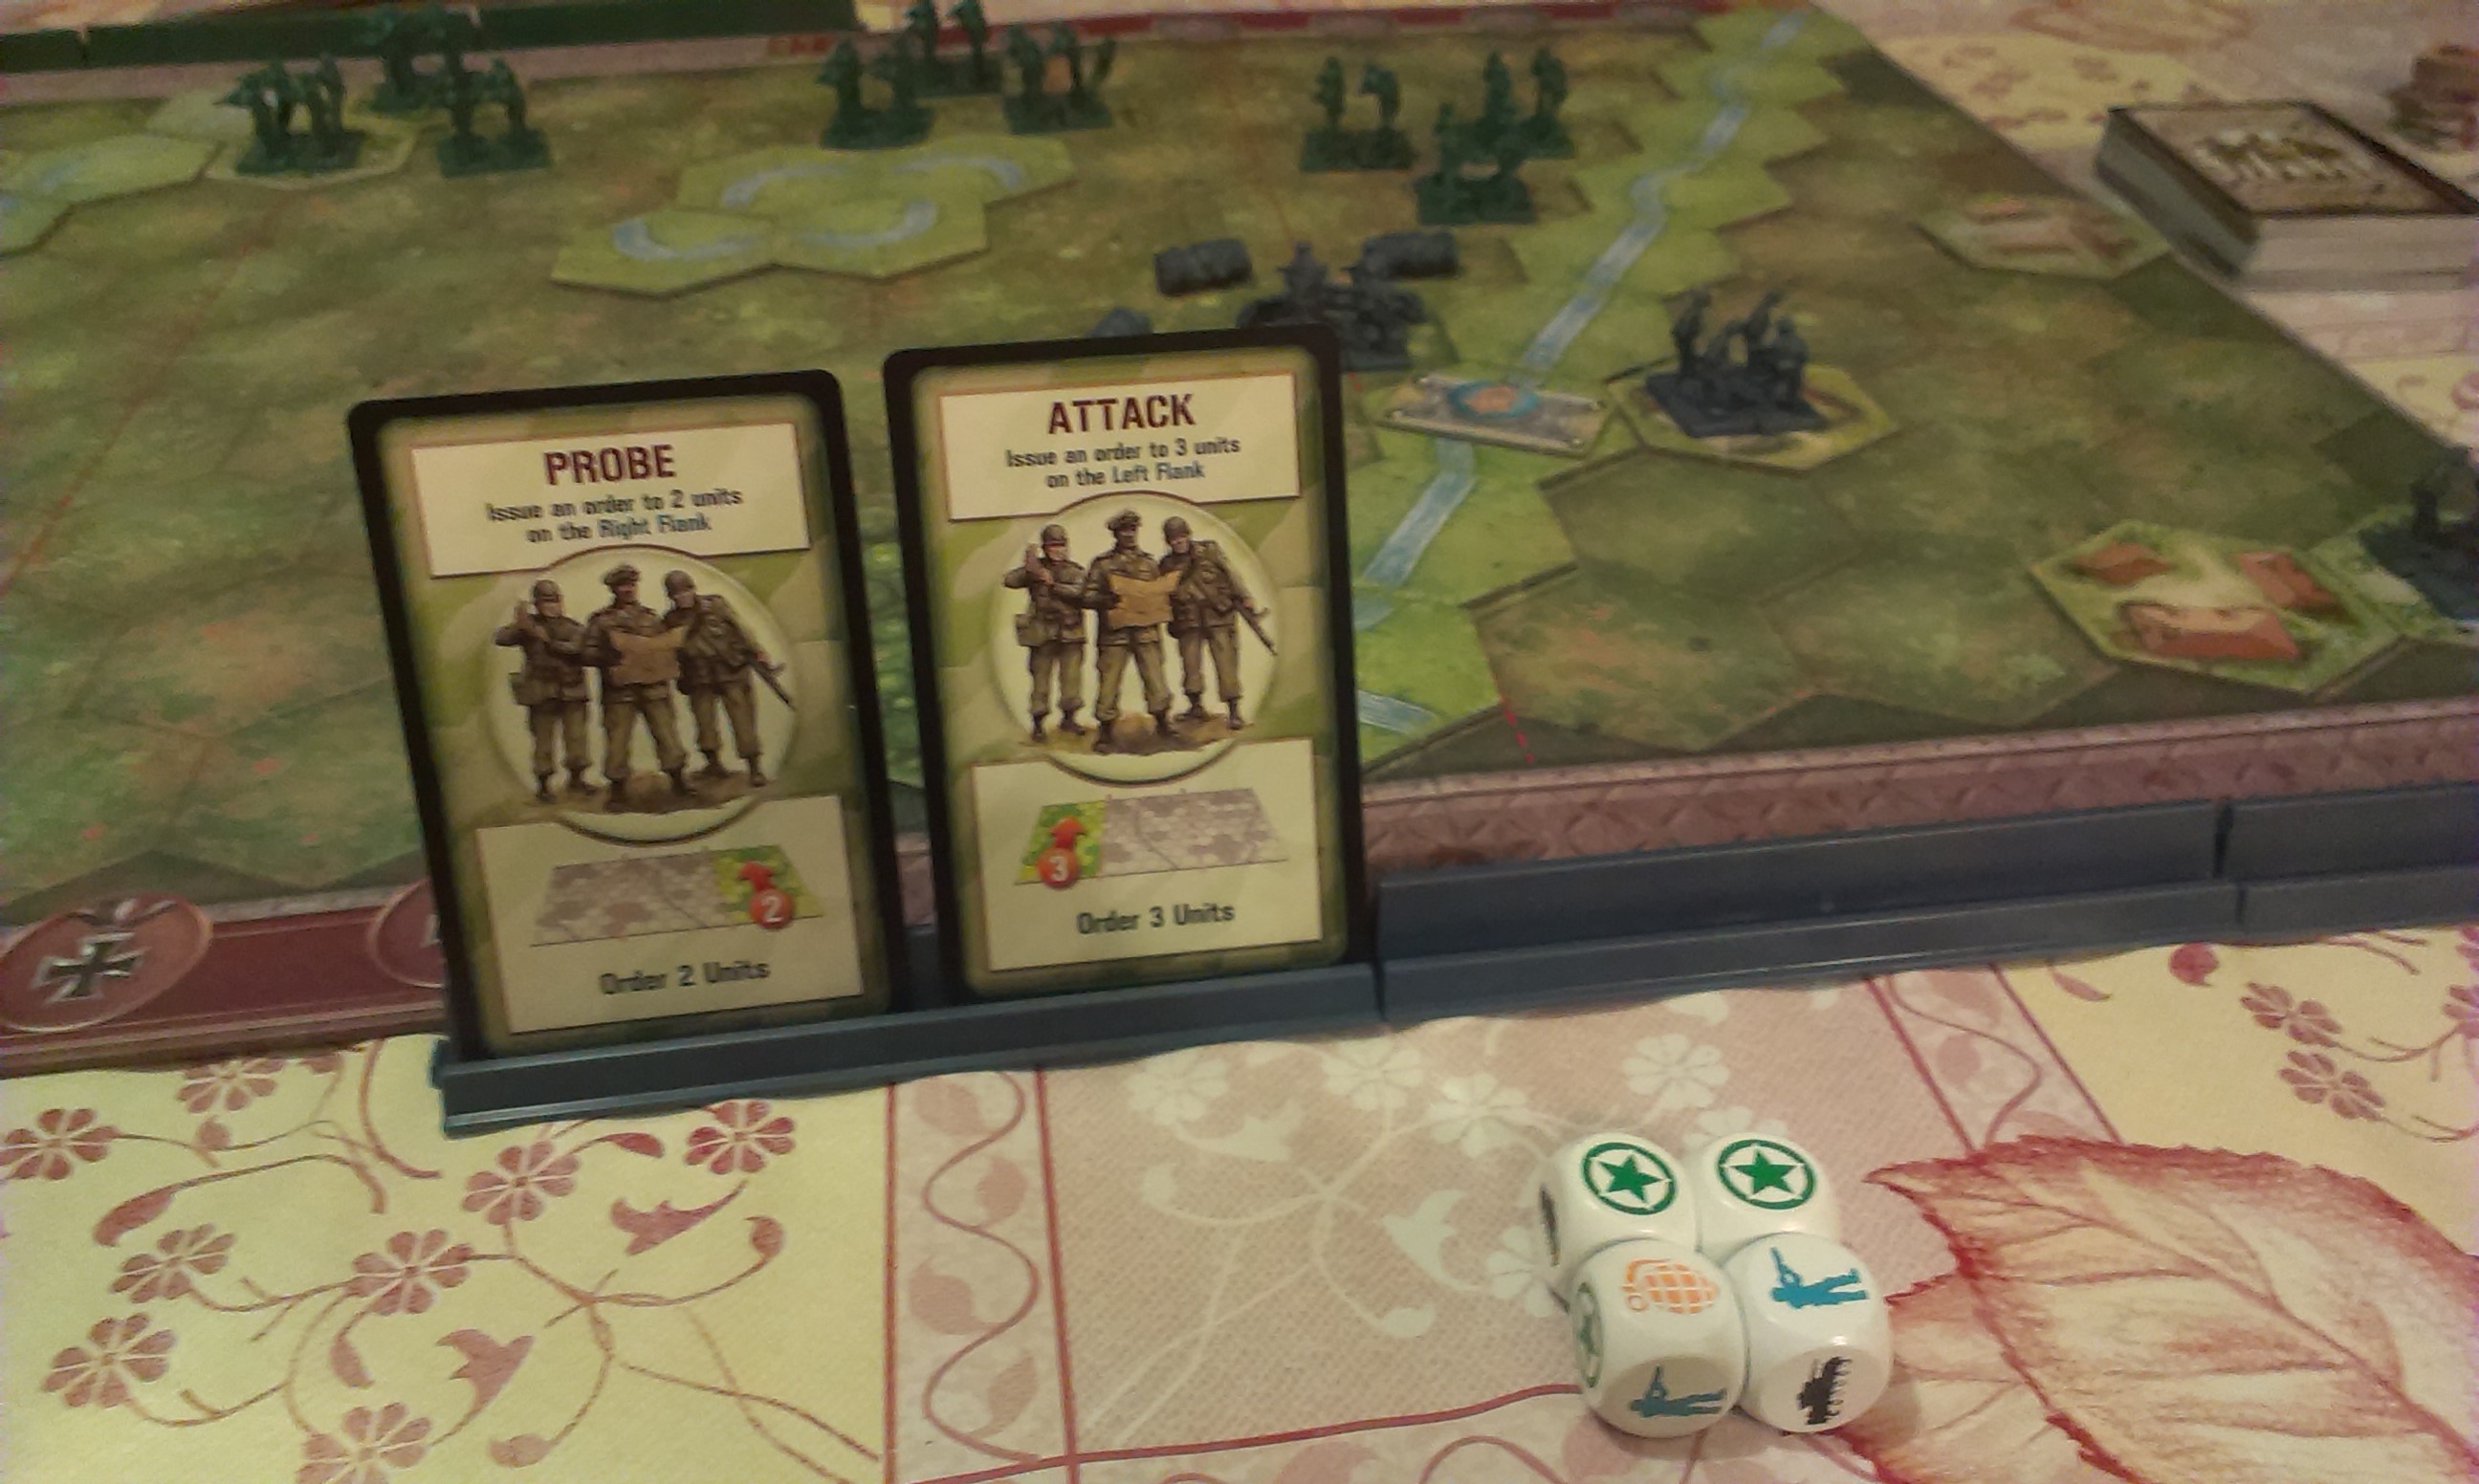
The Command Cards contain an array of things a player can do on their turn, standard orders or special commands. These mostly look like this:
an example of the Command Cards most commonly in play
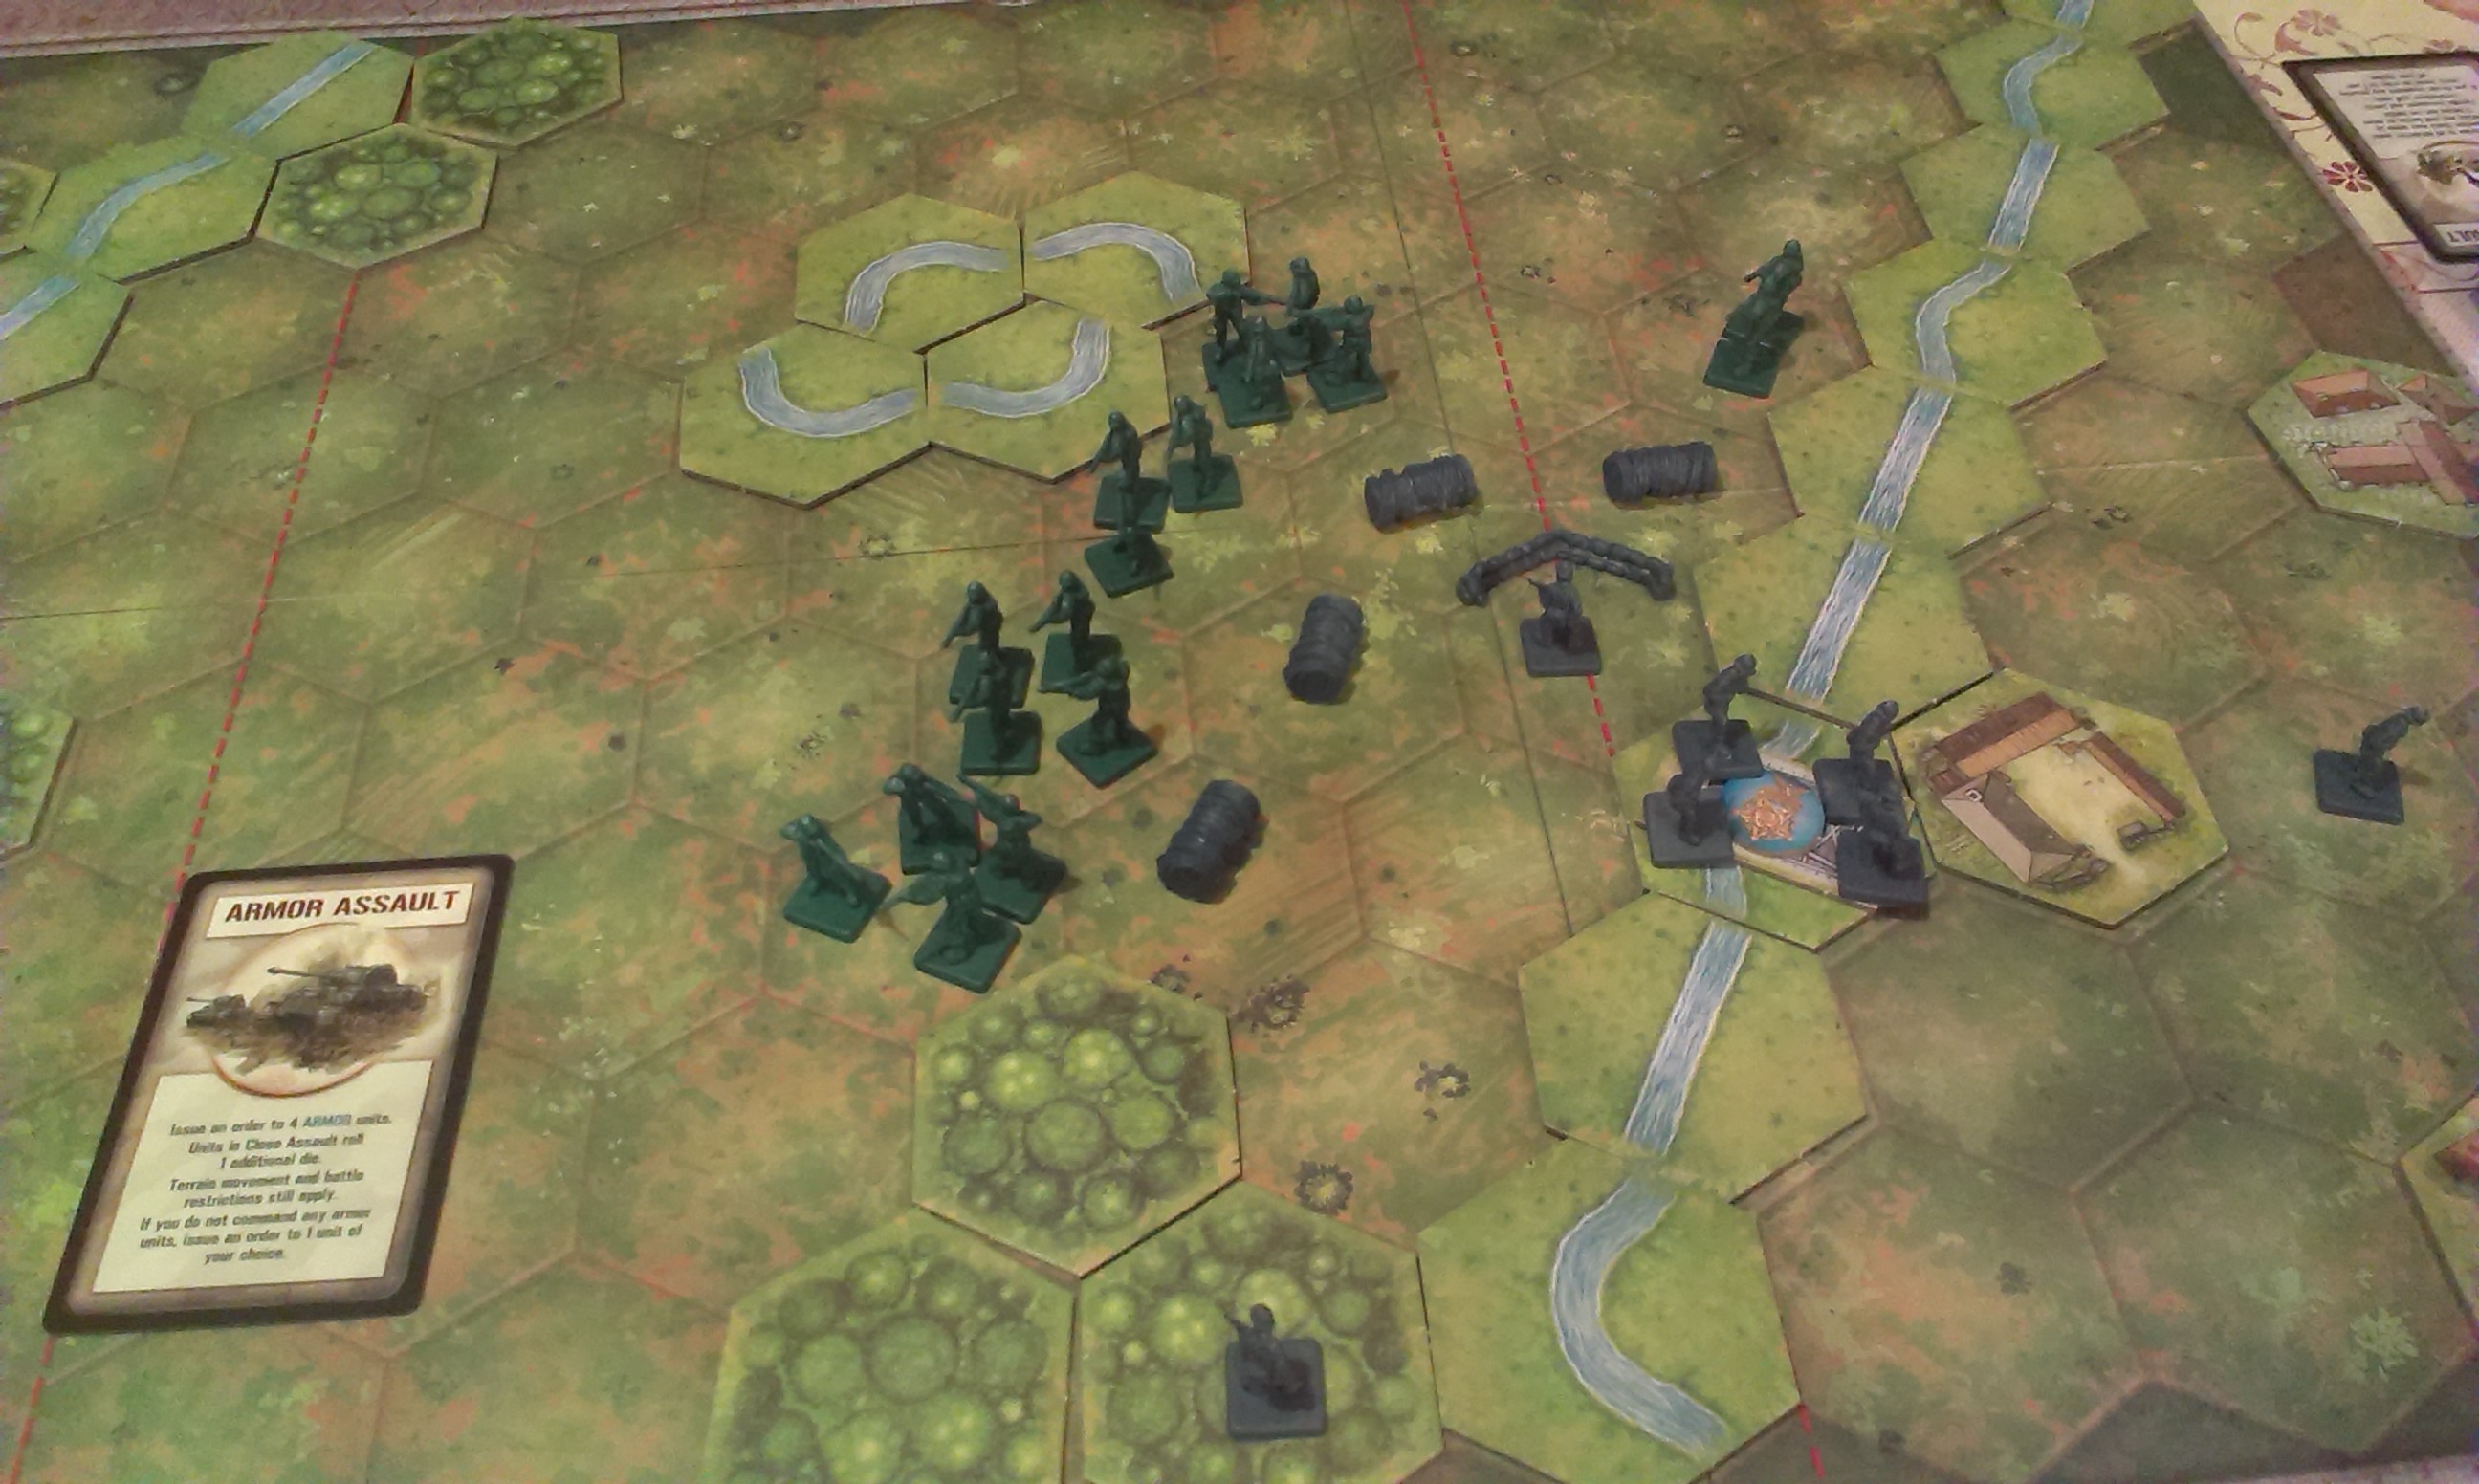
The special command cards look like this, but are all different:
A special command card
Winning The Game:
There is no time limit to the scenarios, players continue taking turns until someone manages to destroy enough enemy units to fulfill the victory conditions for the scenario. Then the board is reset and players switch sides. A note is kept of the score from the first round, for example, if the victory condition was that someone needed to have completely destroyed 4 of their enemy units and the other player had destroyed 2 when this happened you would then make a note, and at the end of the following round the victorious players score would have to be the highest total number of units destroyed.
Strategy:
We realized fairly early into the playing stages of this that the scenarios are usually relatively heavily weighted towards one player, they may have an advantage in the number of Command Cards they have, or in having bunkers or sandbags. But despite this, if you play reasonably tactically, all the scenarios we’ve played so far could go either way.
We started out just playing the most obviously useful card we had in our hand at the start of each turn, and seeing where it got us. Because the destruction of a unit is determined by a combination of the card you played, the position of your units, the terrain around you and the rolling of battle dice it can be unreasonably hard, on occasion, to annihilate a unit that should have been wiped out the first time you attack it. This is both true to the slightly unpredictable nature of a battle, and completely inaccurate as an Armour unit fighting Infantry at what is more or less to be considered point-blank range should not somehow manage to miss all of them. But that aside, it is possible, tactically, surround and destroy units, using terrain disadvantages to your advantage.
There is a lot to be said about strategy on this game, but we’ve decided that in the interest of keeping you interested, we’ll go into much more detail on tactics and strategy, as well as historical overview and other exciting things like that as we write about each scenario individually.
History and Interesting Things:
The game was designed to commemorate the men and women of WW2 and the sacrifices they made.
It was published in collaboration with the Mission for the 60th Anniversary of the D-day Landings and Liberation of France.
In 2004 it was awarded the International Gamers Award for the General Strategy: 2-Player category.
There are eleven expansions for this game, all of them require the original to play.
The game can be played with up to six people, playing in teams of three, each commanding a different section of the board.
There is more to write, but we want to look at the history of each scenario in greater detail over the course of the month, as we’re doing with our Strategy section of each post.
To Conclude:
As is evident, we love this game. We hope that over the course of the month these posts will show us gaining a better understanding of the game, and knowledge of the historical associations of each scenario. As well as actually letting us play a game more than once, which will make a nice change to our usual style of review. If you can get a copy of this game and a friend or two who might be interested, do it. Otherwise, stay tuned for our upcoming post of the first scenario of the game Pegasus Bridge!
So we’re changing our format a touch! Or at least we’re going with what we feel like for now and we will review how well it works later and make changes accordingly. Instead of having a themed month and reviewing four to five games that fit into that theme we’re going to have just the one game for a month. We’re going to play the game multiple times and do one review in the same format as we used to that covers the game in a basic form, then we’re going to play it in different ways or play it in all its scenarios (depending on the format of the game) and review each scenario or form of play individually.
Hopefully this will result in a more in-depth look at the game, leave us with a greater understanding/appreciation for the game and allow us to actually comment on real strategy rather than having to say things like “we’re not sure as we’ve only played it twice but we think this might work <insert vague suggestion here>”.
So on that note, the game that shall start this change in form is the wonderful…
This game we first played at the UK Games Expo in May, you can see us playing a huge expo variation of the game in our Expo video here. We loved it immediately and bought it at the Expo. As some of you will be aware it has the same designer as the game Battle Cry: the almighty Richard Borg. We have already reviewed Battle Cry and that review can be seen here.
So strap in for a whole month of us going on about this game, analyzing every scenario, and even looking at the actual history of the given scenarios. We will also be keeping a running score at the bottom of each scenario post so you can tell which of us is getting better at the game, each of us will get 1 point for a loss, 2 for a draw and 3 for a win. By the end of the month it’ll be probably be clear which of us has the more strategic mind.
Other Things to Note:
We are actually back now and should be back for the foreseeable future.
Hopefully, with this whole month being about Memoir ’44, we should get our first video review up about it, so that should be exciting.
With there being more posts going up than there used to be (there should be at least 18 going up this month because there are 16 scenarios in Memoir ’44 plus this post and the over all review) it will be harder to commit to specific publications dates. We’ll say that Mondays will stay a sure thing, but depending on the game for the month (and how many posts it’ll take) we can’t be sure how regularly the in between posts will be going up.
So as you’re all aware from Dave’s updates, I’ve been out and about in Europe for the last month or so with a friend. But I’m back now and we’re ready to get the blog back on schedule(ish) for the rest of the summer!
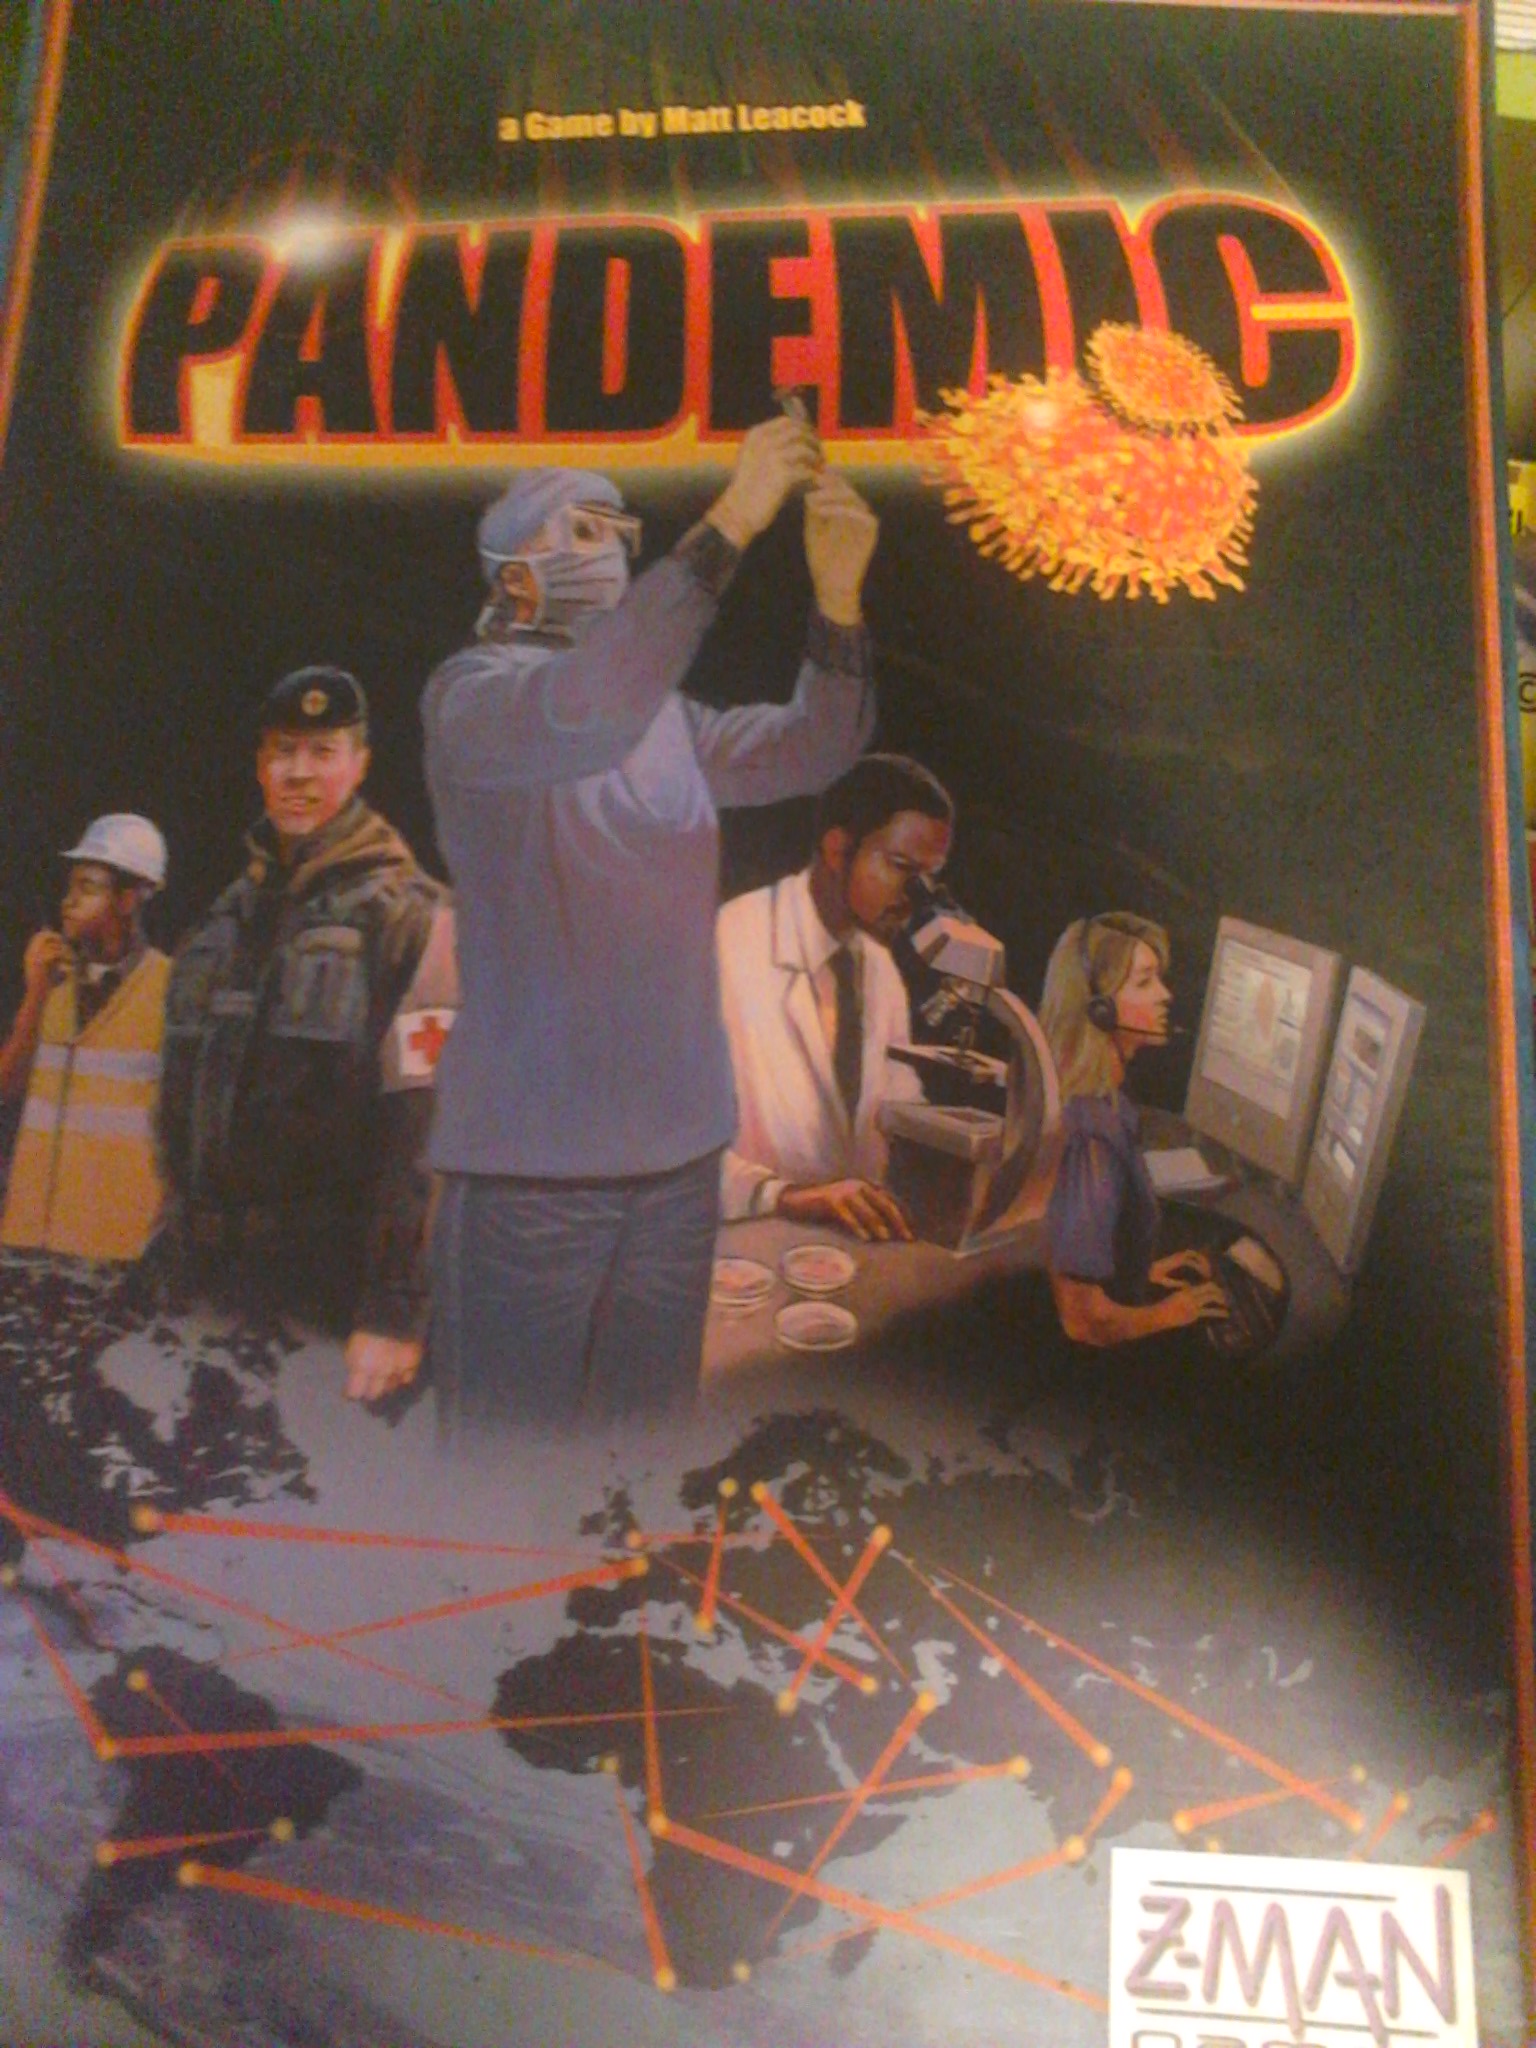
However, whilst on our travels, Rosie and I have come across, and played, many a game. Some that we’ve already reviewed, like Cripple Mr Onion. But other (more interesting games) that we found in hostels we stayed in, such as Pandemic! (Turns out we’re terrible at this game, we’re just too good at destroying all of humanity…) So below are a few photos of the game related things that we did:
This was waiting for us (by my bed) in the hostel in Stockholm, the first city we visited, because we’re both terrible at maths, we didn’t play it.
For some reason, it won’t let me turn it the right way up…
In between Mathable and the next photo we also managed to play English Scrabble with a German Scrabble set. Needless to say scoring was interesting. Unfortunately, we forgot to take photos. 😦
Switzerland appears to have been the best country for board games in the hostels, most of the other places had chess, Copenhagen did have a few other interesting-looking games, but they were mostly in Danish, which neither of us could speak or read.
We found this in the hostel in Zurich:
PANDEMIC! It’s a race to save humanity
We freaked out a few people sharing the common area with us for the five hours that we spent playing this. Apparently we were taking saving the world from four deadly diseases far too seriously…
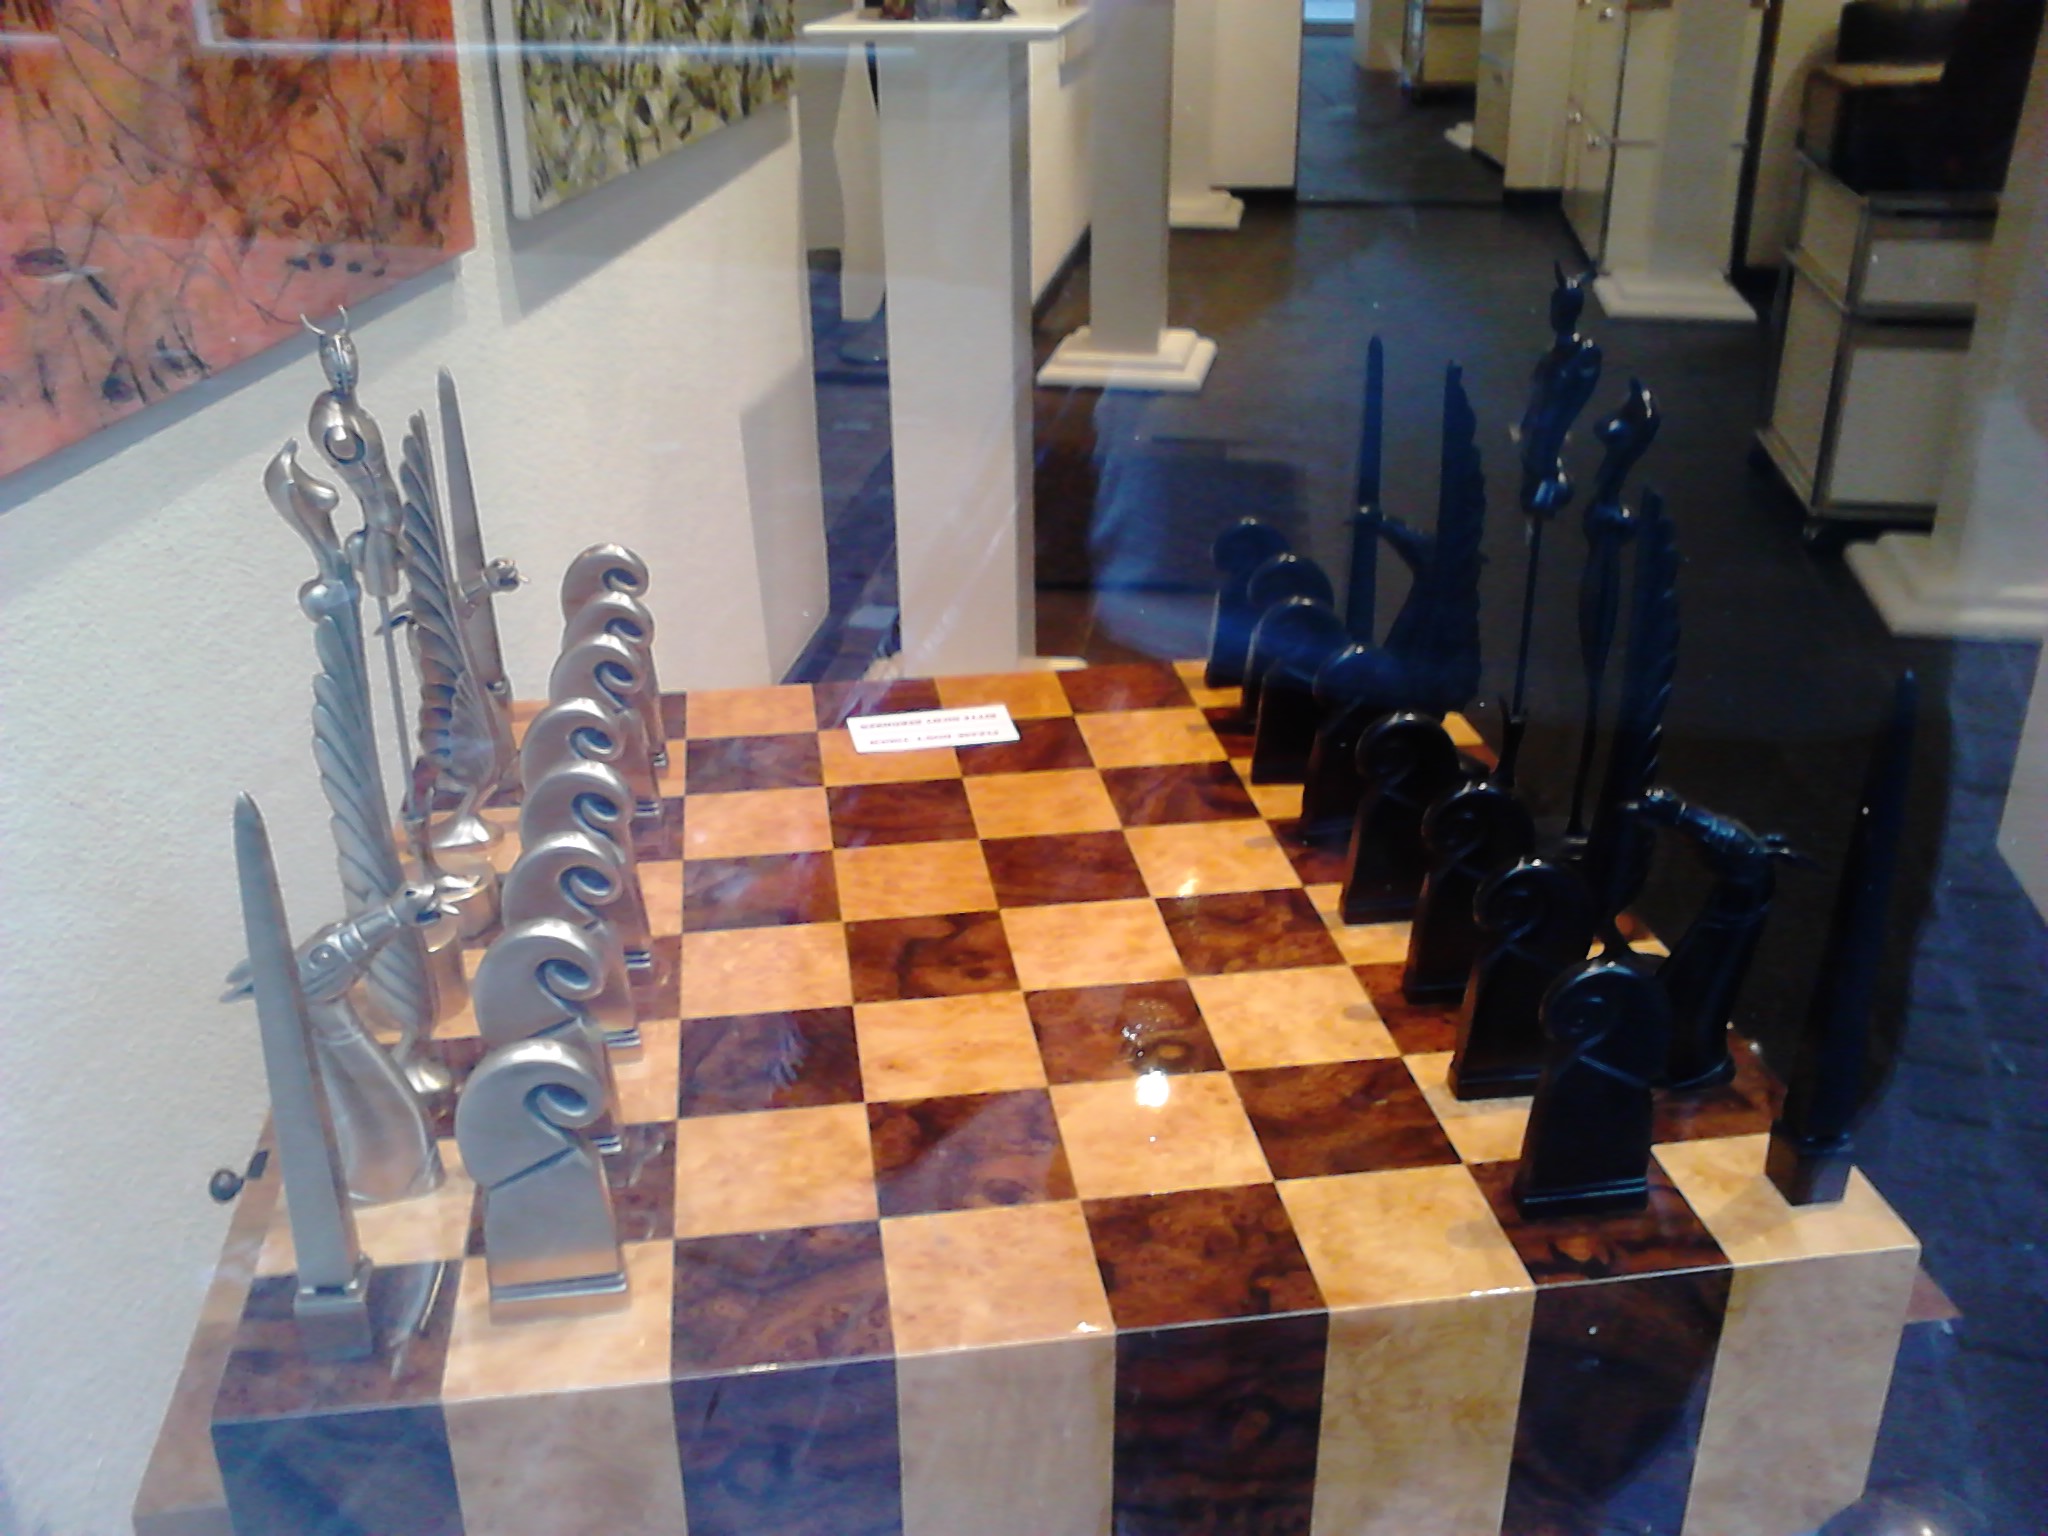
Also in Zurich I wanted to get this for Dave:
Because it’s just beautiful, as chess sets go
But it was a little out of my price range. He got a bar of Toblerone instead.
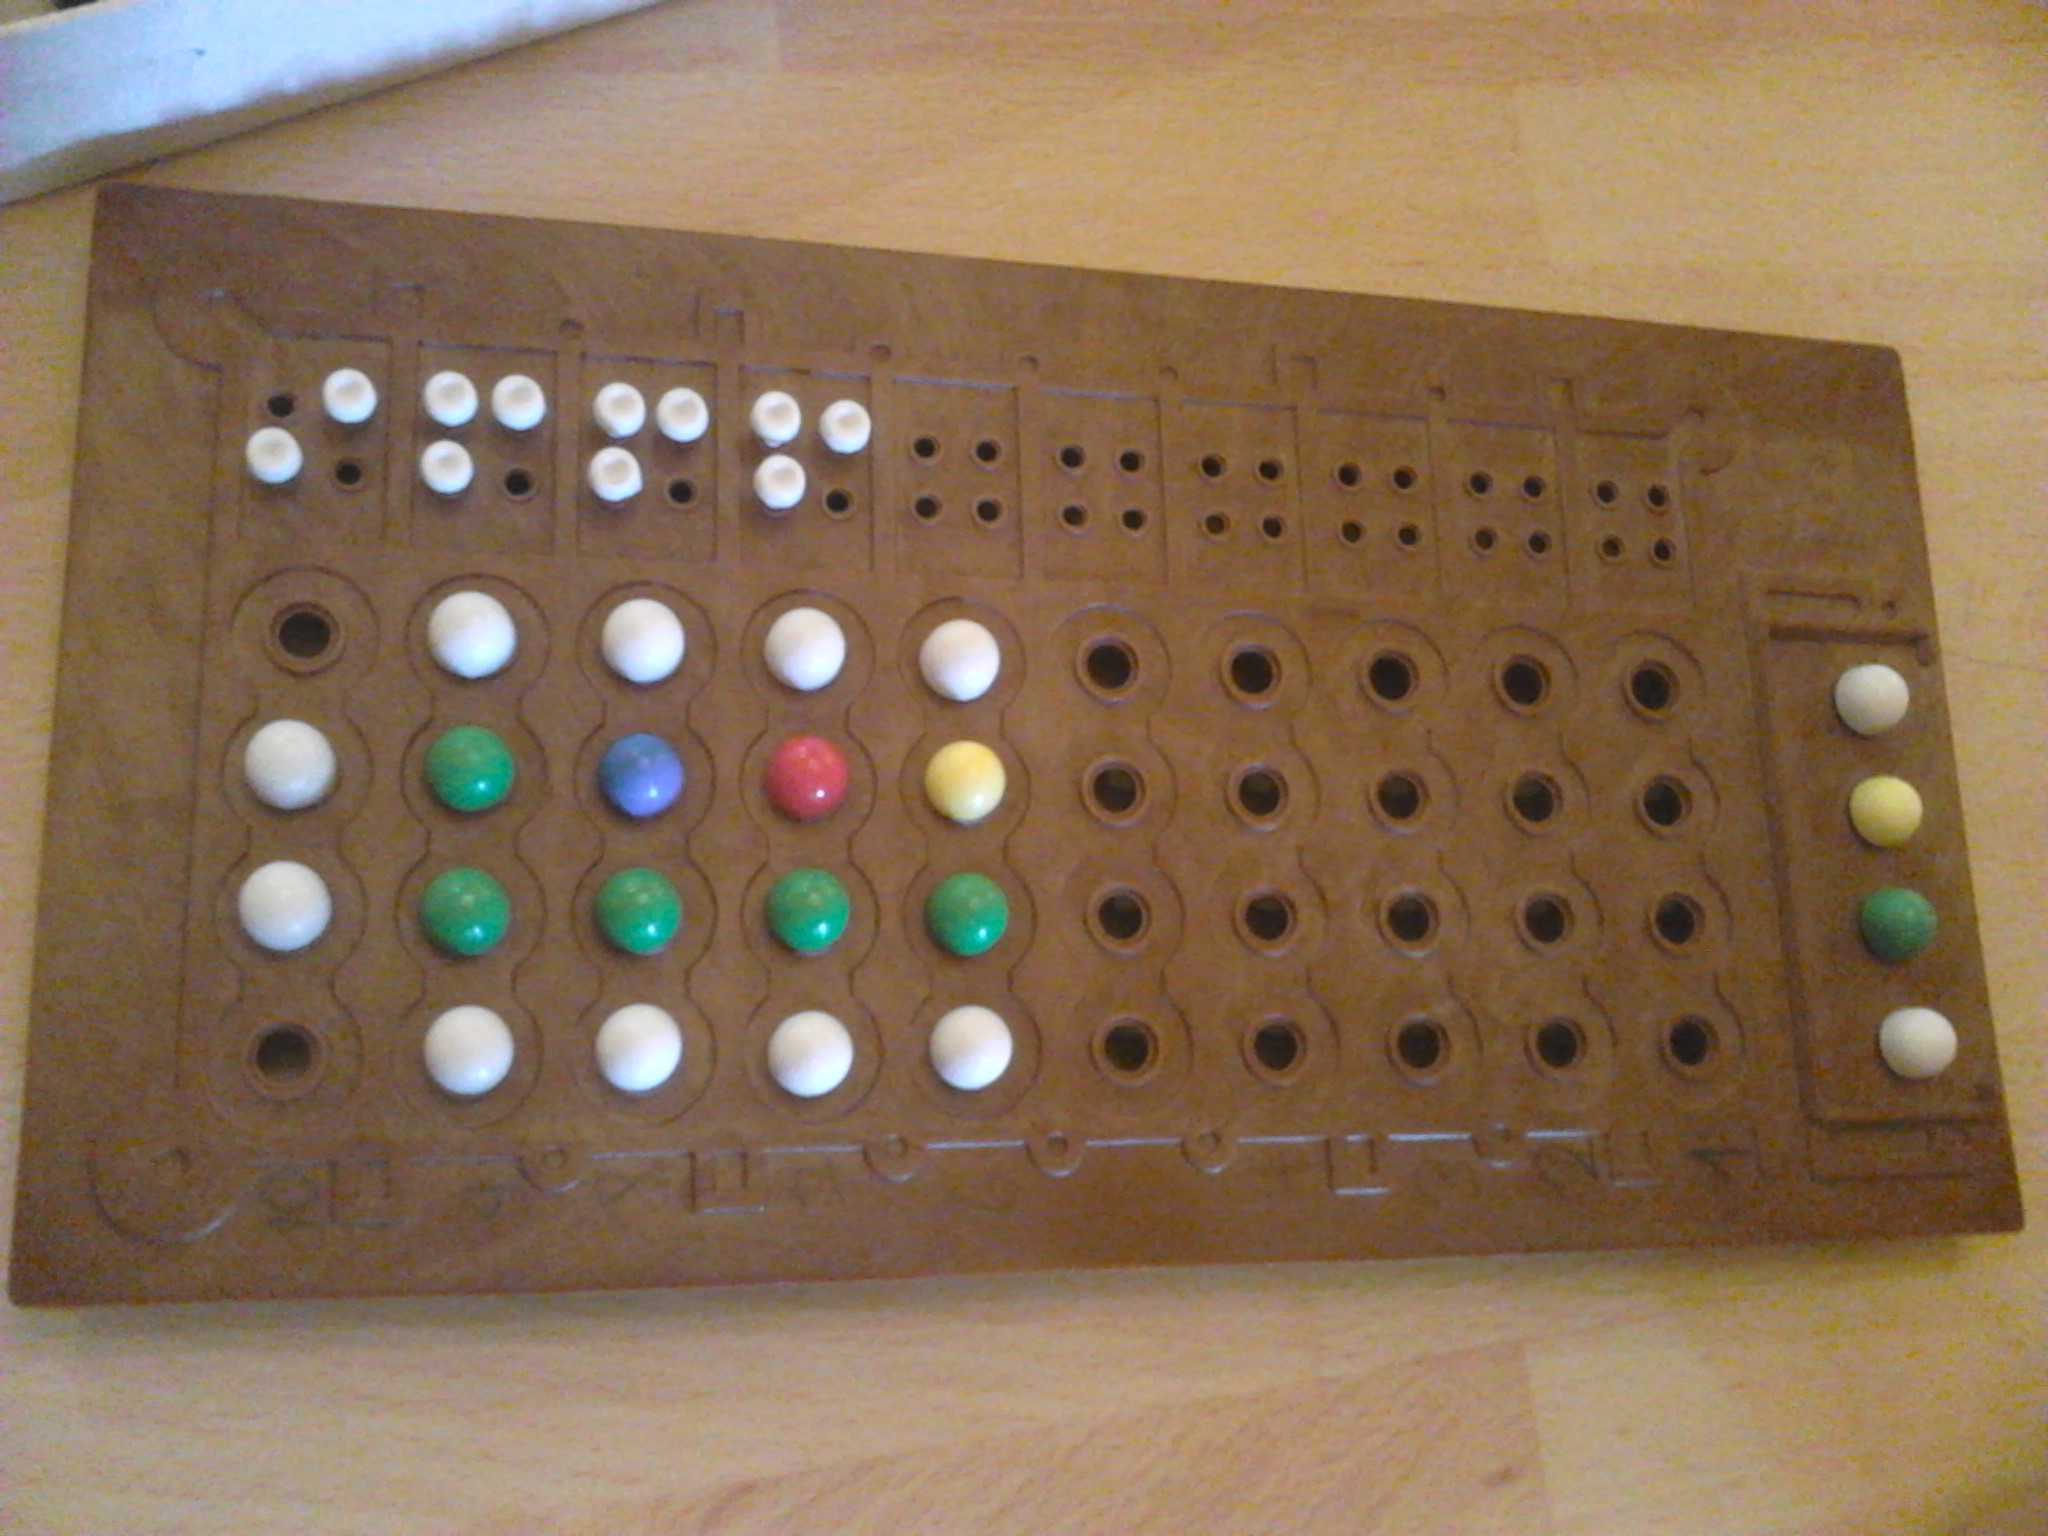
From Zurich we headed to Bern, and in Bern we found (but didn’t get a photo of) a giant Nine Men’s Morris set, an outdoor one, like the chess sets they have in schools and parks. It was awesome. But we also managed to play Mastermind in Bern, albeit, with a set that was missing a few pieces…
Slightly makeshift game of Mastermind
Once again, we apologize for the slightly hiatus in posts, but we’re hoping to be back on track, spamming you all with geeky board game reviews within the next few days!
I’m back (David). Having finished wandering around Wales I’m back and hopefully ready to get back on schedule.
This is what Wales looked like!
Unfortunately my sister is still wandering around Europe somewhere but I should still be able to get us back on track. I will make sure reviews go up on Mondays and hopefully the ones we missed will go up in between. Until then heres a nice video I made of my time in Wales, its mostly just shots of various animals and no games at all. But for people who like that kind of thing should be nice, also for people who like that kind of thing they should check out my girlfriends blog on nature stuff Here!
Due to holidayness we have failed to play enough games to do all the reviews! My sister’s gone wandering across Europe and I’m about to go wandering across Wales. So I must apologise that we will not be able to publish our reviews as promised in the June Update post. But we will review Trivial Pursuitand Know it All in July; as well as the Kids Games month we had planned. But until early-mid July it’s unlikely we’ll achieve anything.
I take great solace in the fact that I doubt anyone really cares but great pride in the fact that probably more anyones care than those that would have cared around 5 months ago!
Anywa;y I hope you all have wonderful holidays planned, with plenty of games and craziness! So this is goodbye for at least two weeks or so… Hopefully less, but I make no promises.
Taboois an absolutely hilarious game, even more so when you play with people you know really well. It’s only kind of a quiz game, in that it’s not actually about how much stuff you know, it’s about your ability to describe.
What’s In The Box:
The Stuff.
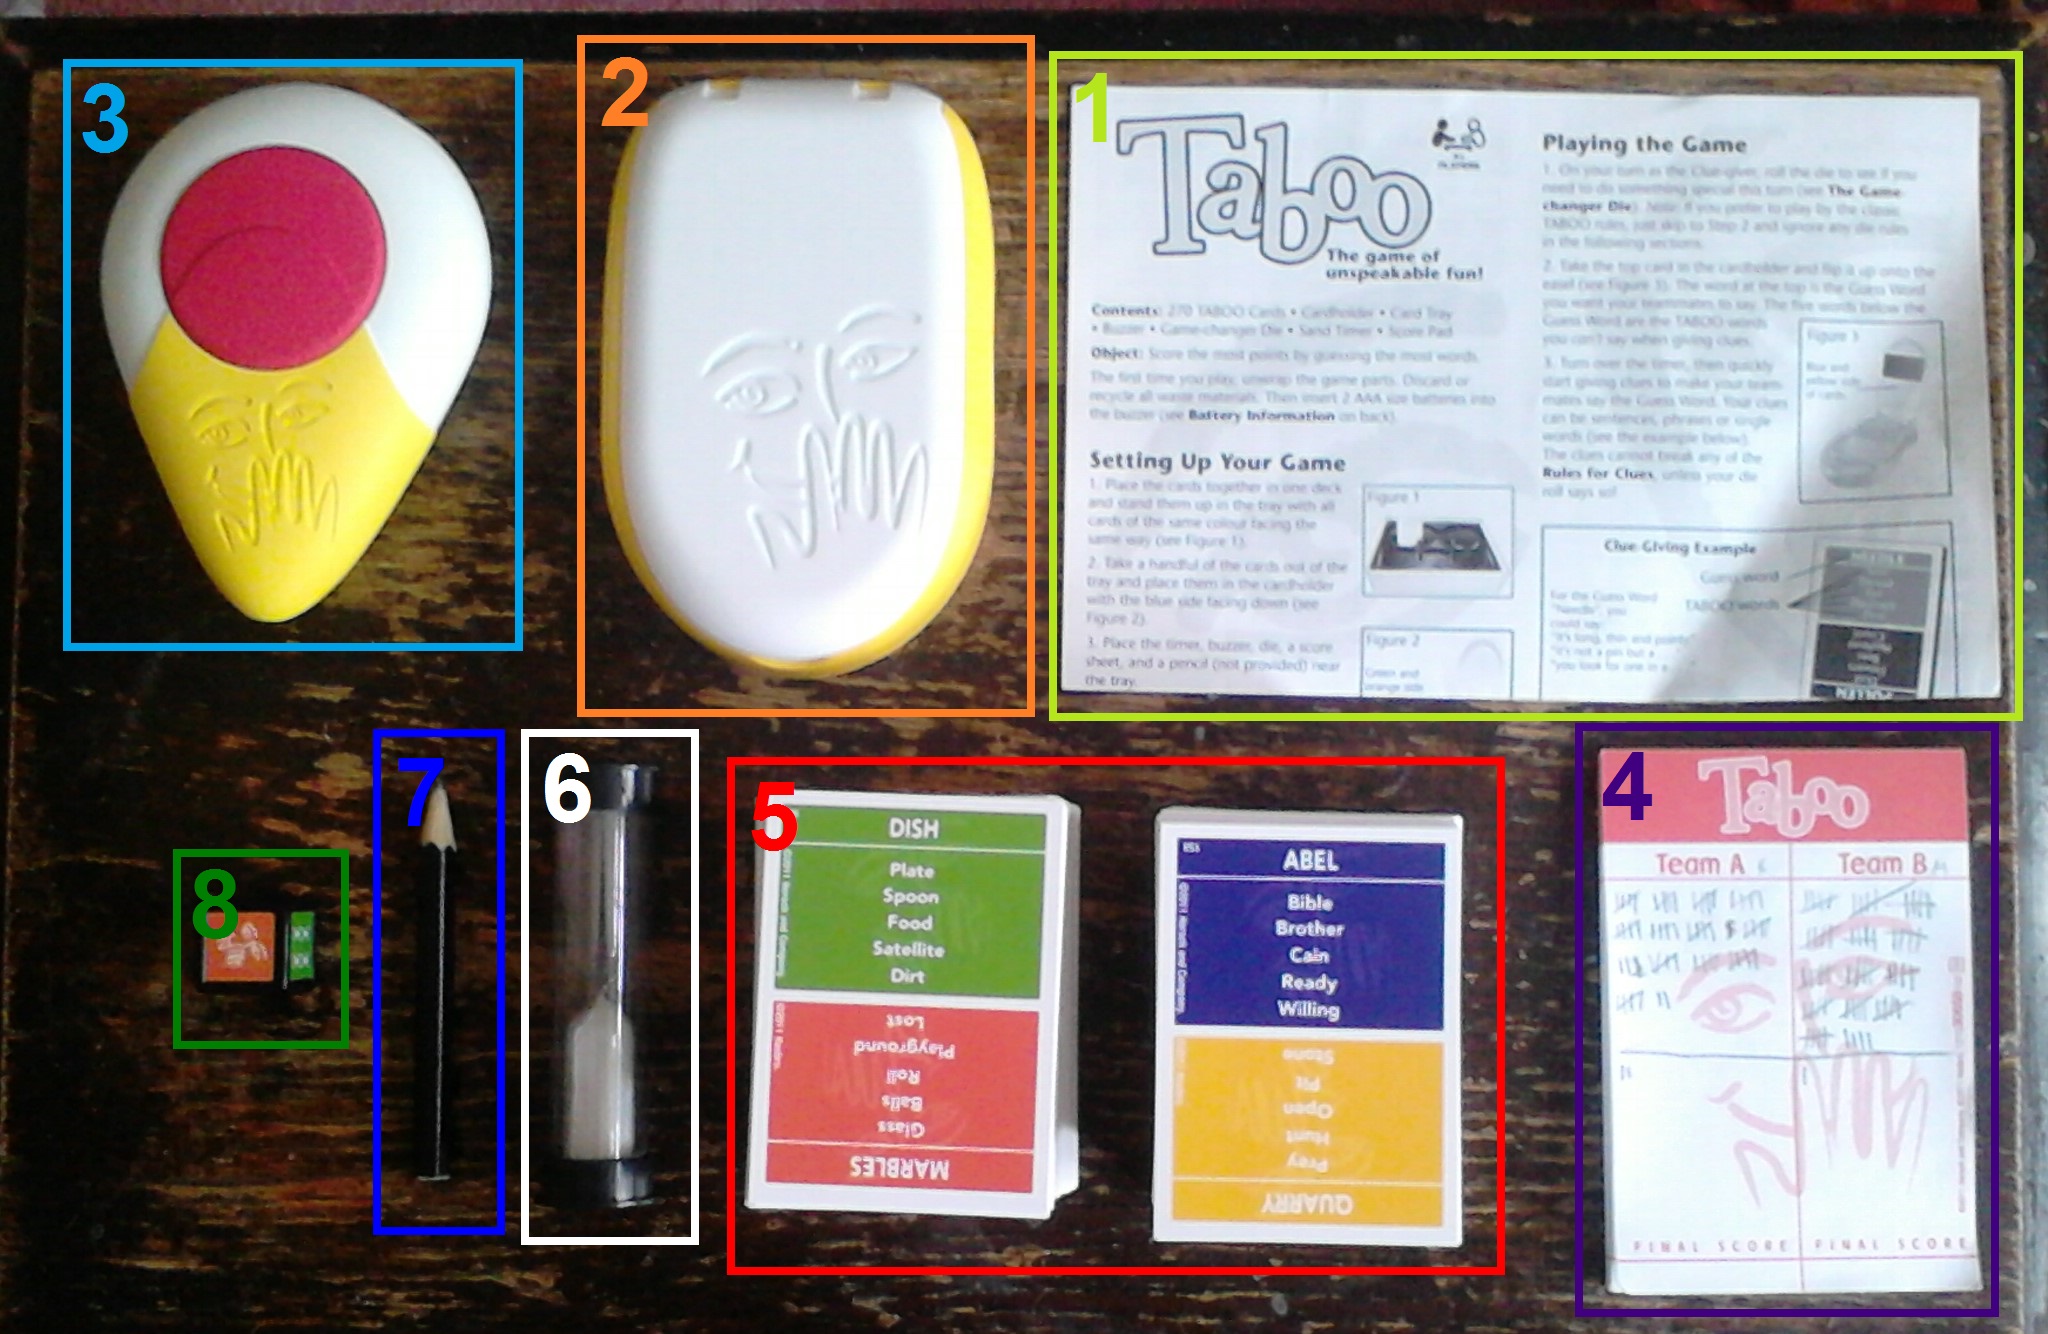
1 Rulebook
1 Taboo Easel
1 Really Annoying “Nuh-Uh” Button
1 Score Pad
2 Reversible Word Decks
1 Timer
1 Pencil
1 Die
Playing The Game:
Objective: To get more points than your opponent by accurately describing more words to your team.
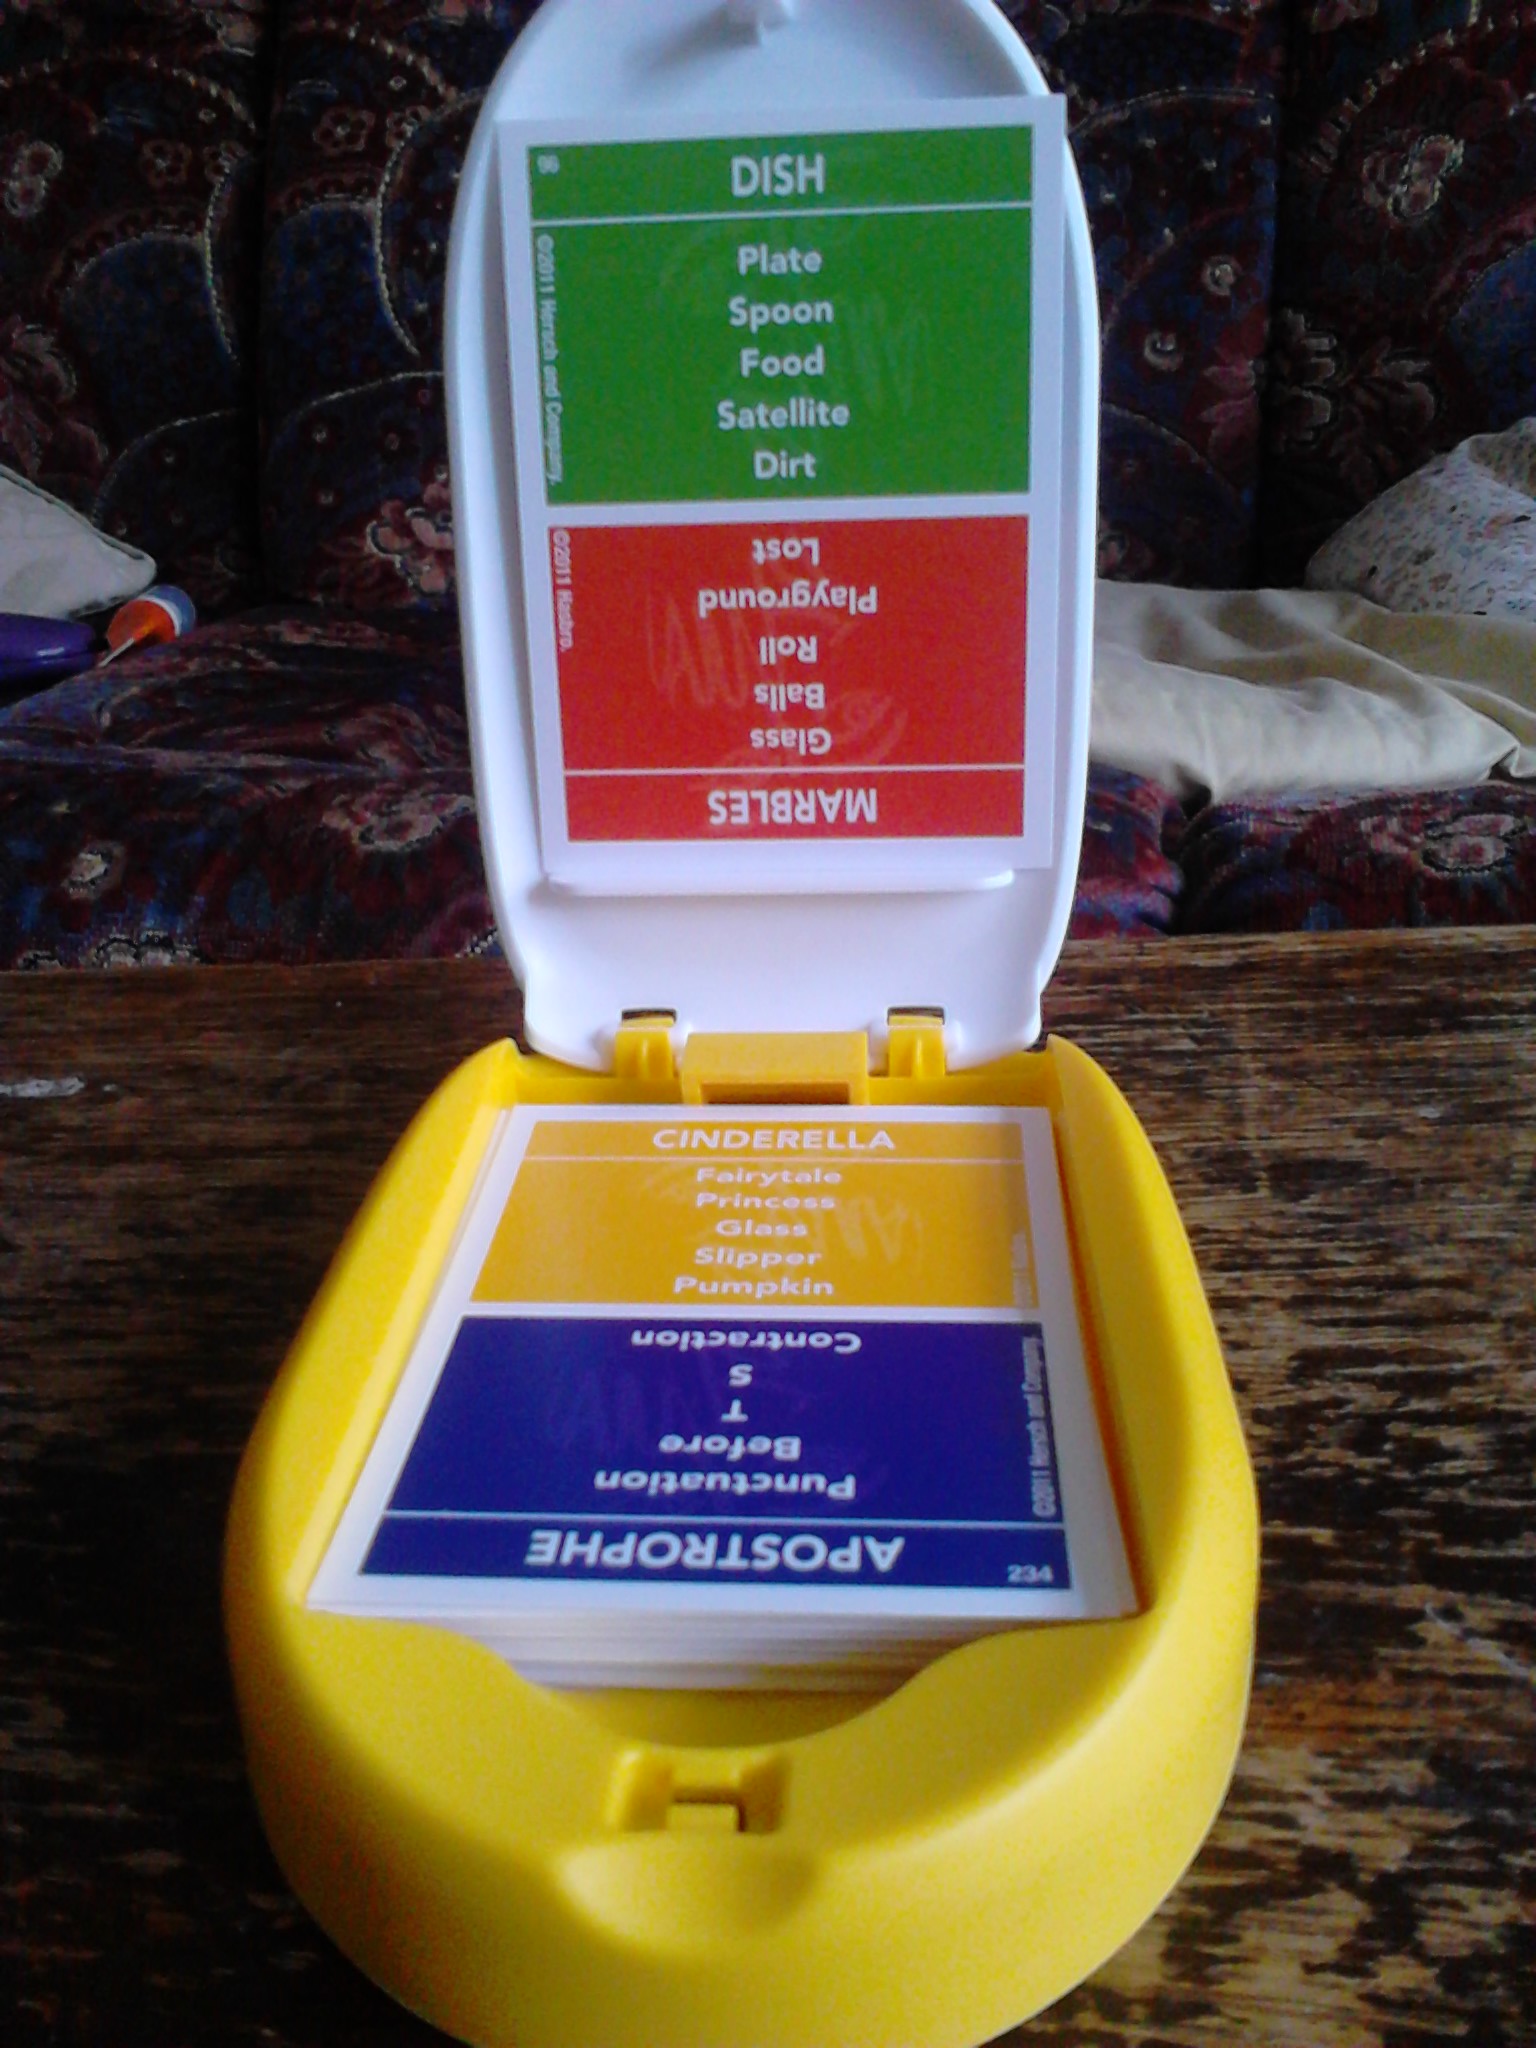
This game’s pretty simple, essentially you just divide up into teams, and then take it in turns to do some describing. You choose one player from your team to describe, and one to guess. The describer then places one card up on the easel, like this:
This is how you put the cards you’re describing.
As you can see, there are four colours on each card, which is great, is allows you to play four different games, and the colours have different kinds of words on them. We were playing to describe the green words, so the deck is placed accordingly face-down inside the easel and only one card at a time is revealed. Once the top card is turned up it’s the job of the describer to describe the word in such a way that their partner can guess it. BUT, they aren’t allowed to say the word on the card, or any of the words underneath it. These are “Taboo” words, and saying any of these causes you to give away a point to your opponents, as does passing because of the difficulty of a word to describe. They’re also not allowed to say the letter that the word begins with, or make explicit gestures.
Whilst you’re doing this you sit with one of the players from the other team; they’re given the annoying “Nuh-Uh” button and if you say anything you shouldn’t, they hit it so everyone knows you’ve made a mistake. For every word your partner guesses correctly, you get one point. Every time you finish a word, either because it’s been correctly guessed, passed or you said a Taboo word, you then flip up another card, trying to get through as many as possible per turn. The timer is used to regulate turns, each team is only allowed to turn it over once per turn and when it runs out your turn is over.
There is a second, slightly different version of this game, wherein the die is used. The only difference this makes is that at the start of each turn the describer has to roll the die, and then slightly different conditions apply. For instance, this side of the die means that the player describing must sit still like a statue:
Sit on your hands! (I also appreciate that the quality of this photo is terrible – Dave’s away so these photos were done on my phone)
The die does make the game slightly more interesting, but can be frustrating if you continually forget to roll or only get that face showing…
Winning The Game:
Points are scored how I said above, players pre-determine how many rounds or sections of the deck are going to be played before play starts. Once that number of cards has run out, the game is over, and the winner is the team left with the most points!
Strategy:
I can’t really figure one for this game, don’t waste your time waving your arms around? Try and partner up with someone who thinks similarly to you, sometimes you get a word that you can make an obscure film or song reference to, to help your partner guess it. But that’s no help if they’ve no idea what you’re on about!
History and Interesting Things:
There was a game show based on Taboo, hosted by Chris Wylde, in 2002.
In 2010, Cassandra Dominguez scored a record of 38 points in a four-round game at the World Board Gamers Convention.
The buzzer for the game featured on the Special Project episode of The Office.
Originally there was a board with the game, like in Tension, but this is no longer in the current editions of the game.
As far as history goes, that’s about it, it was only published in 1989, so not very long ago. It’s been on the radio and appeared in a few different TV shows, but other than that it’s not got much to say for itself.
To Conclude:
Taboo is a great game, a lot of fun, very light hearted and generally very silly. Like most games, it’s more fun with more people. Also, the fact that the rules explicitly say that you’re allowed to burst into song to help your partner guess a word really appeals to our family.