Conquest of the Empire – Classic Rules

3.5 - 5

Number of Players: 2 – 6

Year of Publication: 2005

Creator: Glenn DroverLarry Harris, Jr.Martin Wallace (Designers) and Paul Niemeyer (Artists)

Julius Caesar, The Roman Geezer, Squashed his Wife with a Lemon Squeezer:

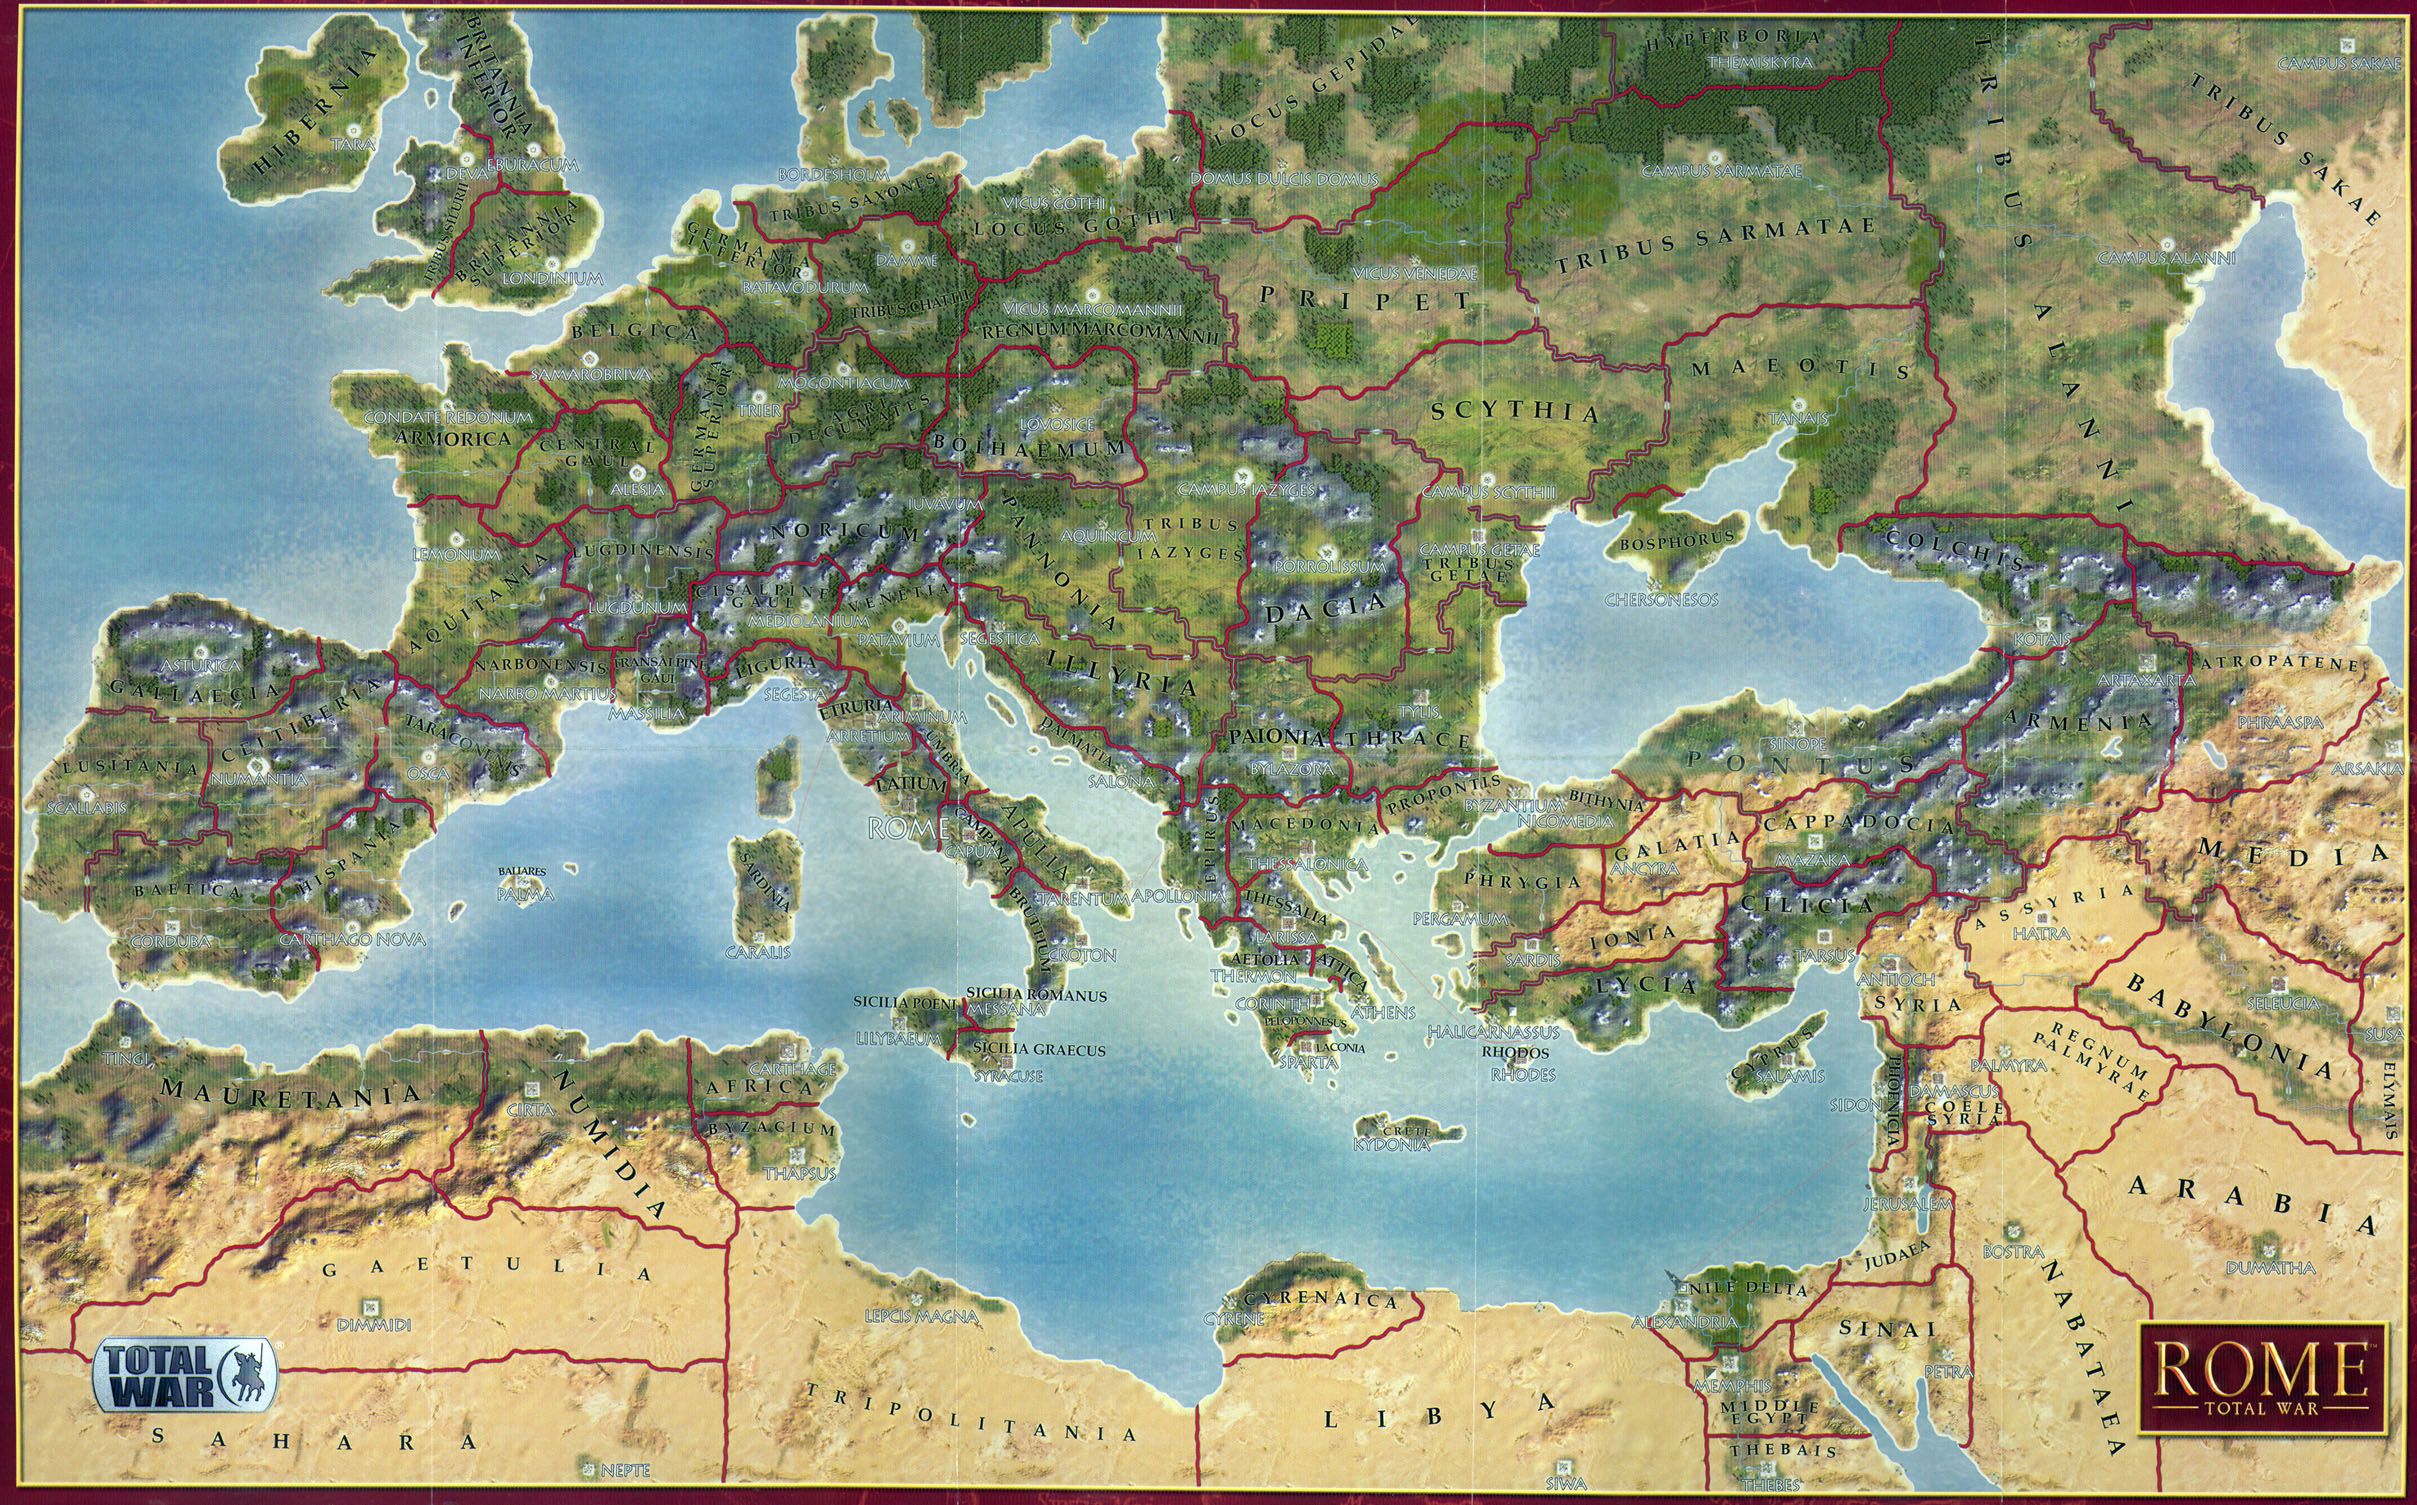
So as far I can figure Conquest of the Empire is just a table top version of Rome: Total War and being a huge fan of that game I’m also a huge fan of this game. In many respects it’s cooler; because you’re playing real people you actually feel some sense of victory when you crush them! But on the other hand, it’s obviously far more limited than Rome: Total War. To illustrate my point this is a picture of the Rome: Total War map:

Lovingly borrowed from http://ru.wikipedia.org/wiki/%D0%A4%D0%B0%D0%B9%D0%BB:Rome_total_war_map.jpg

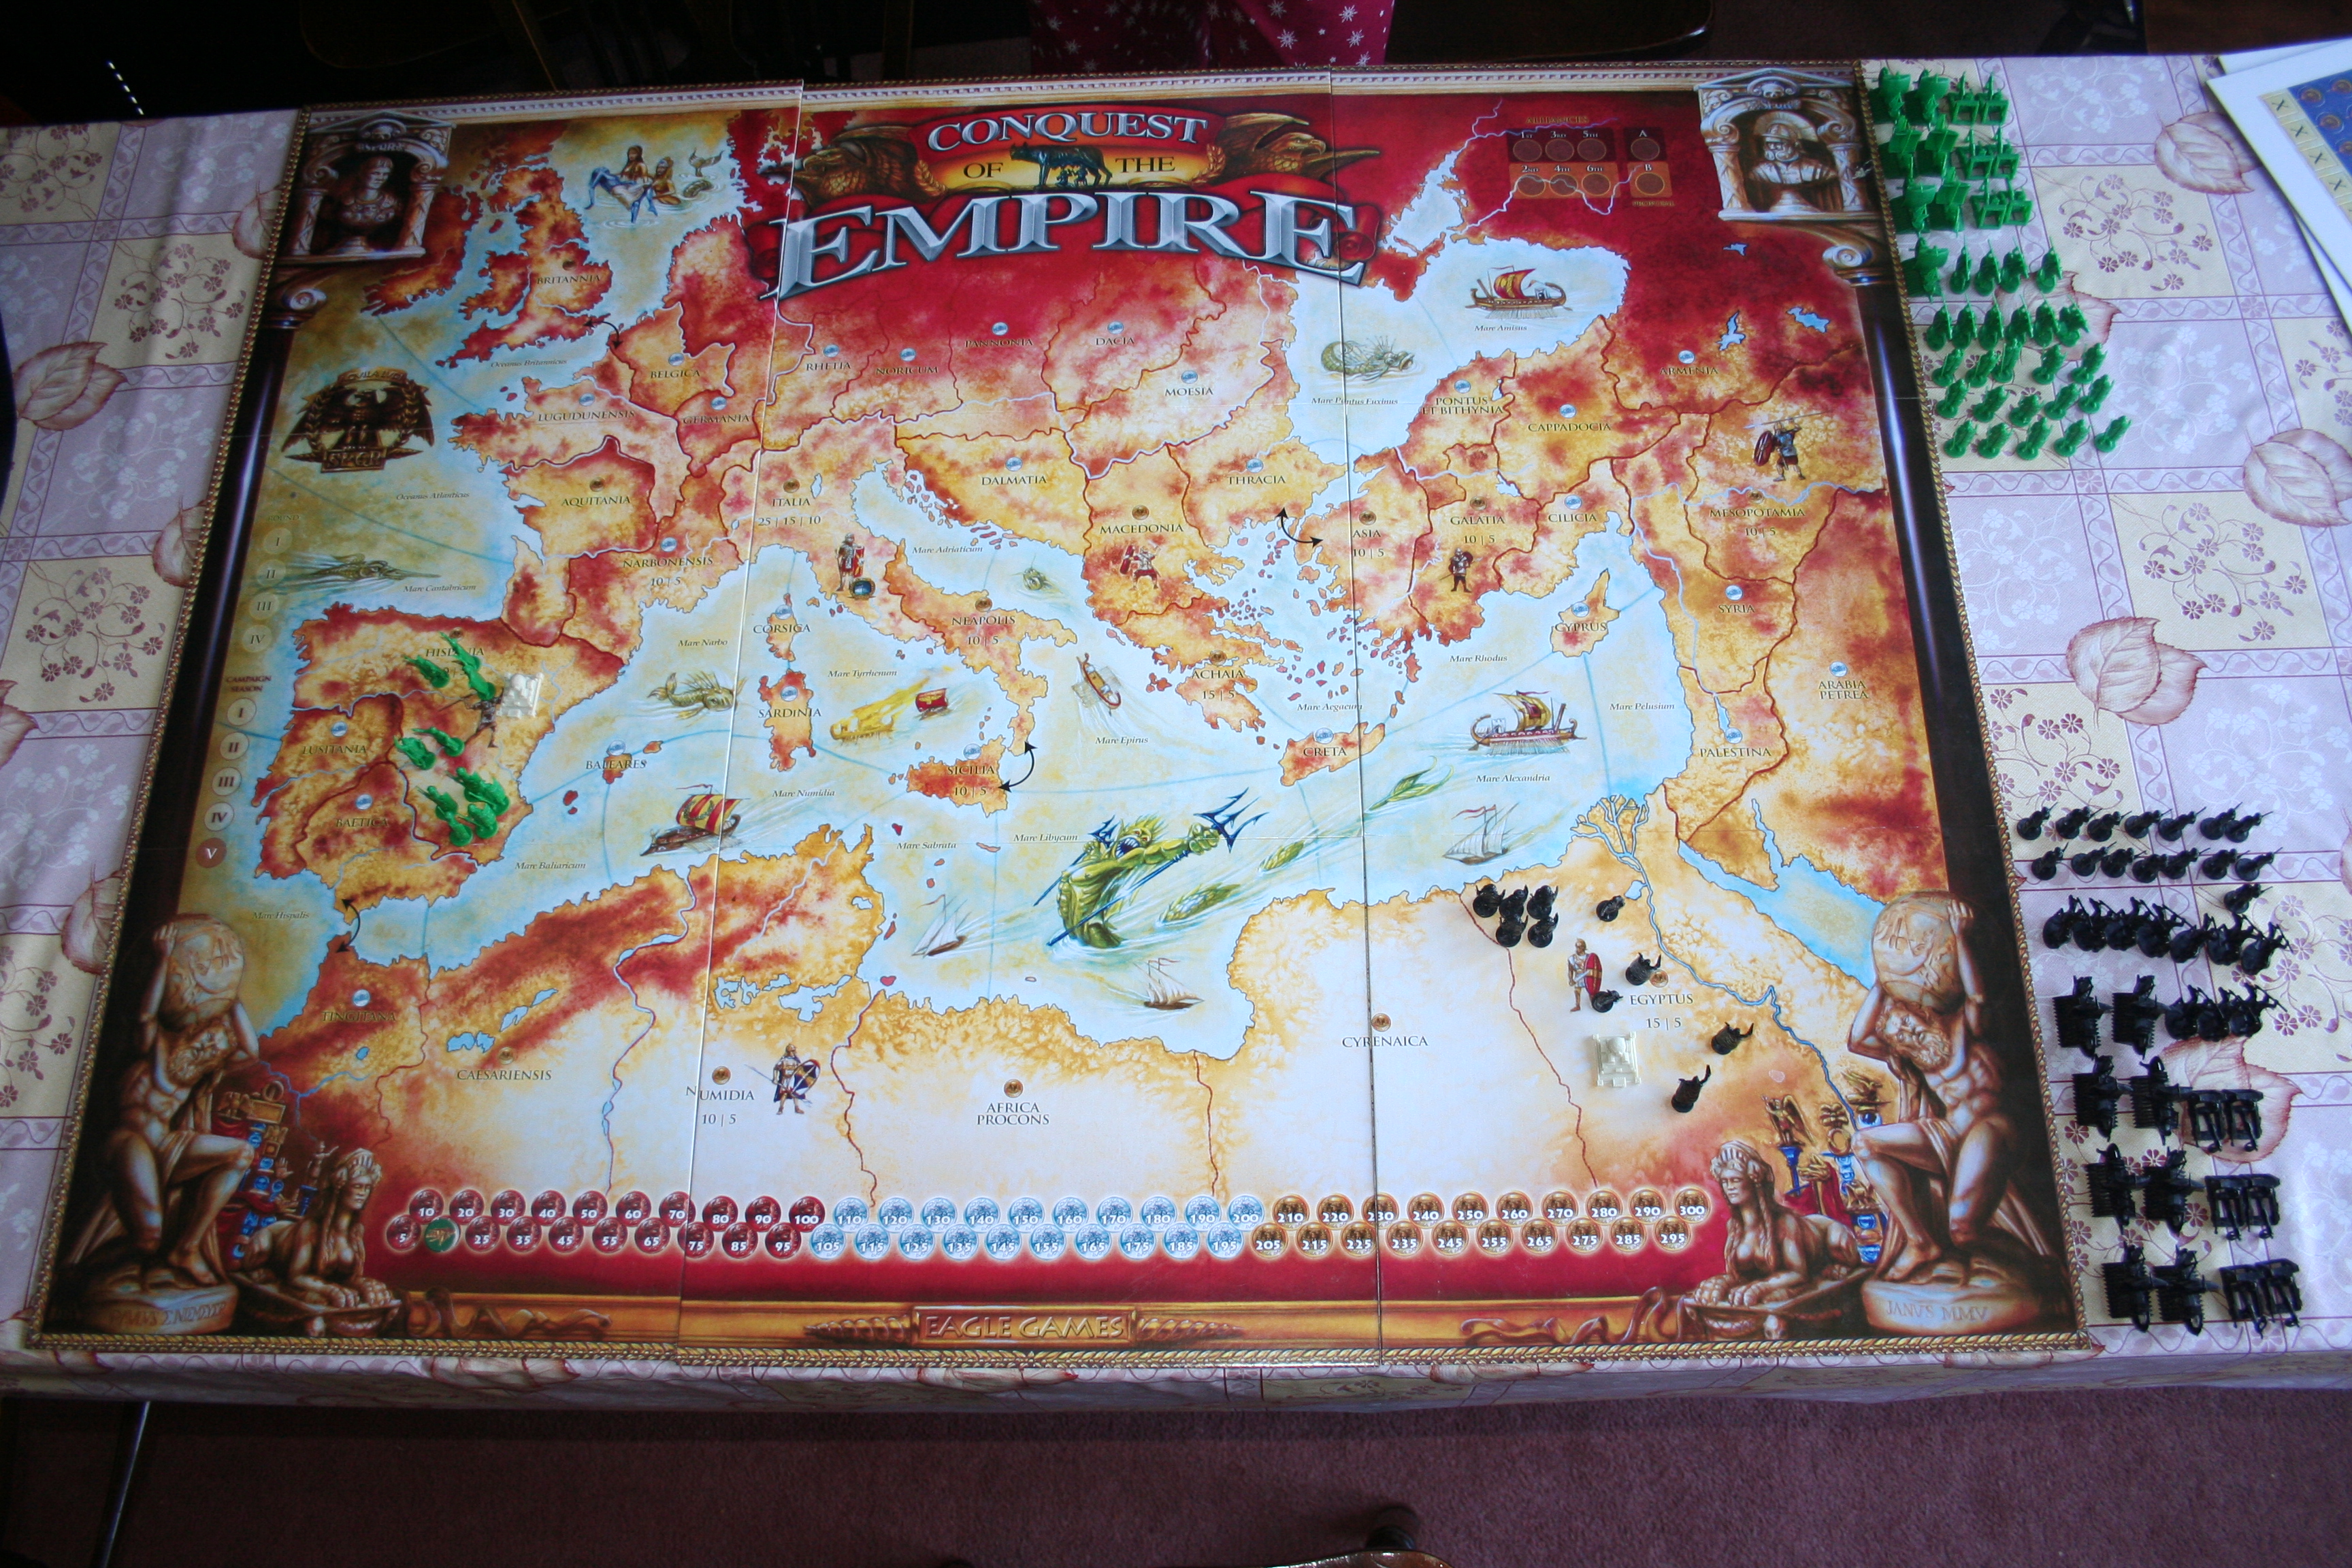
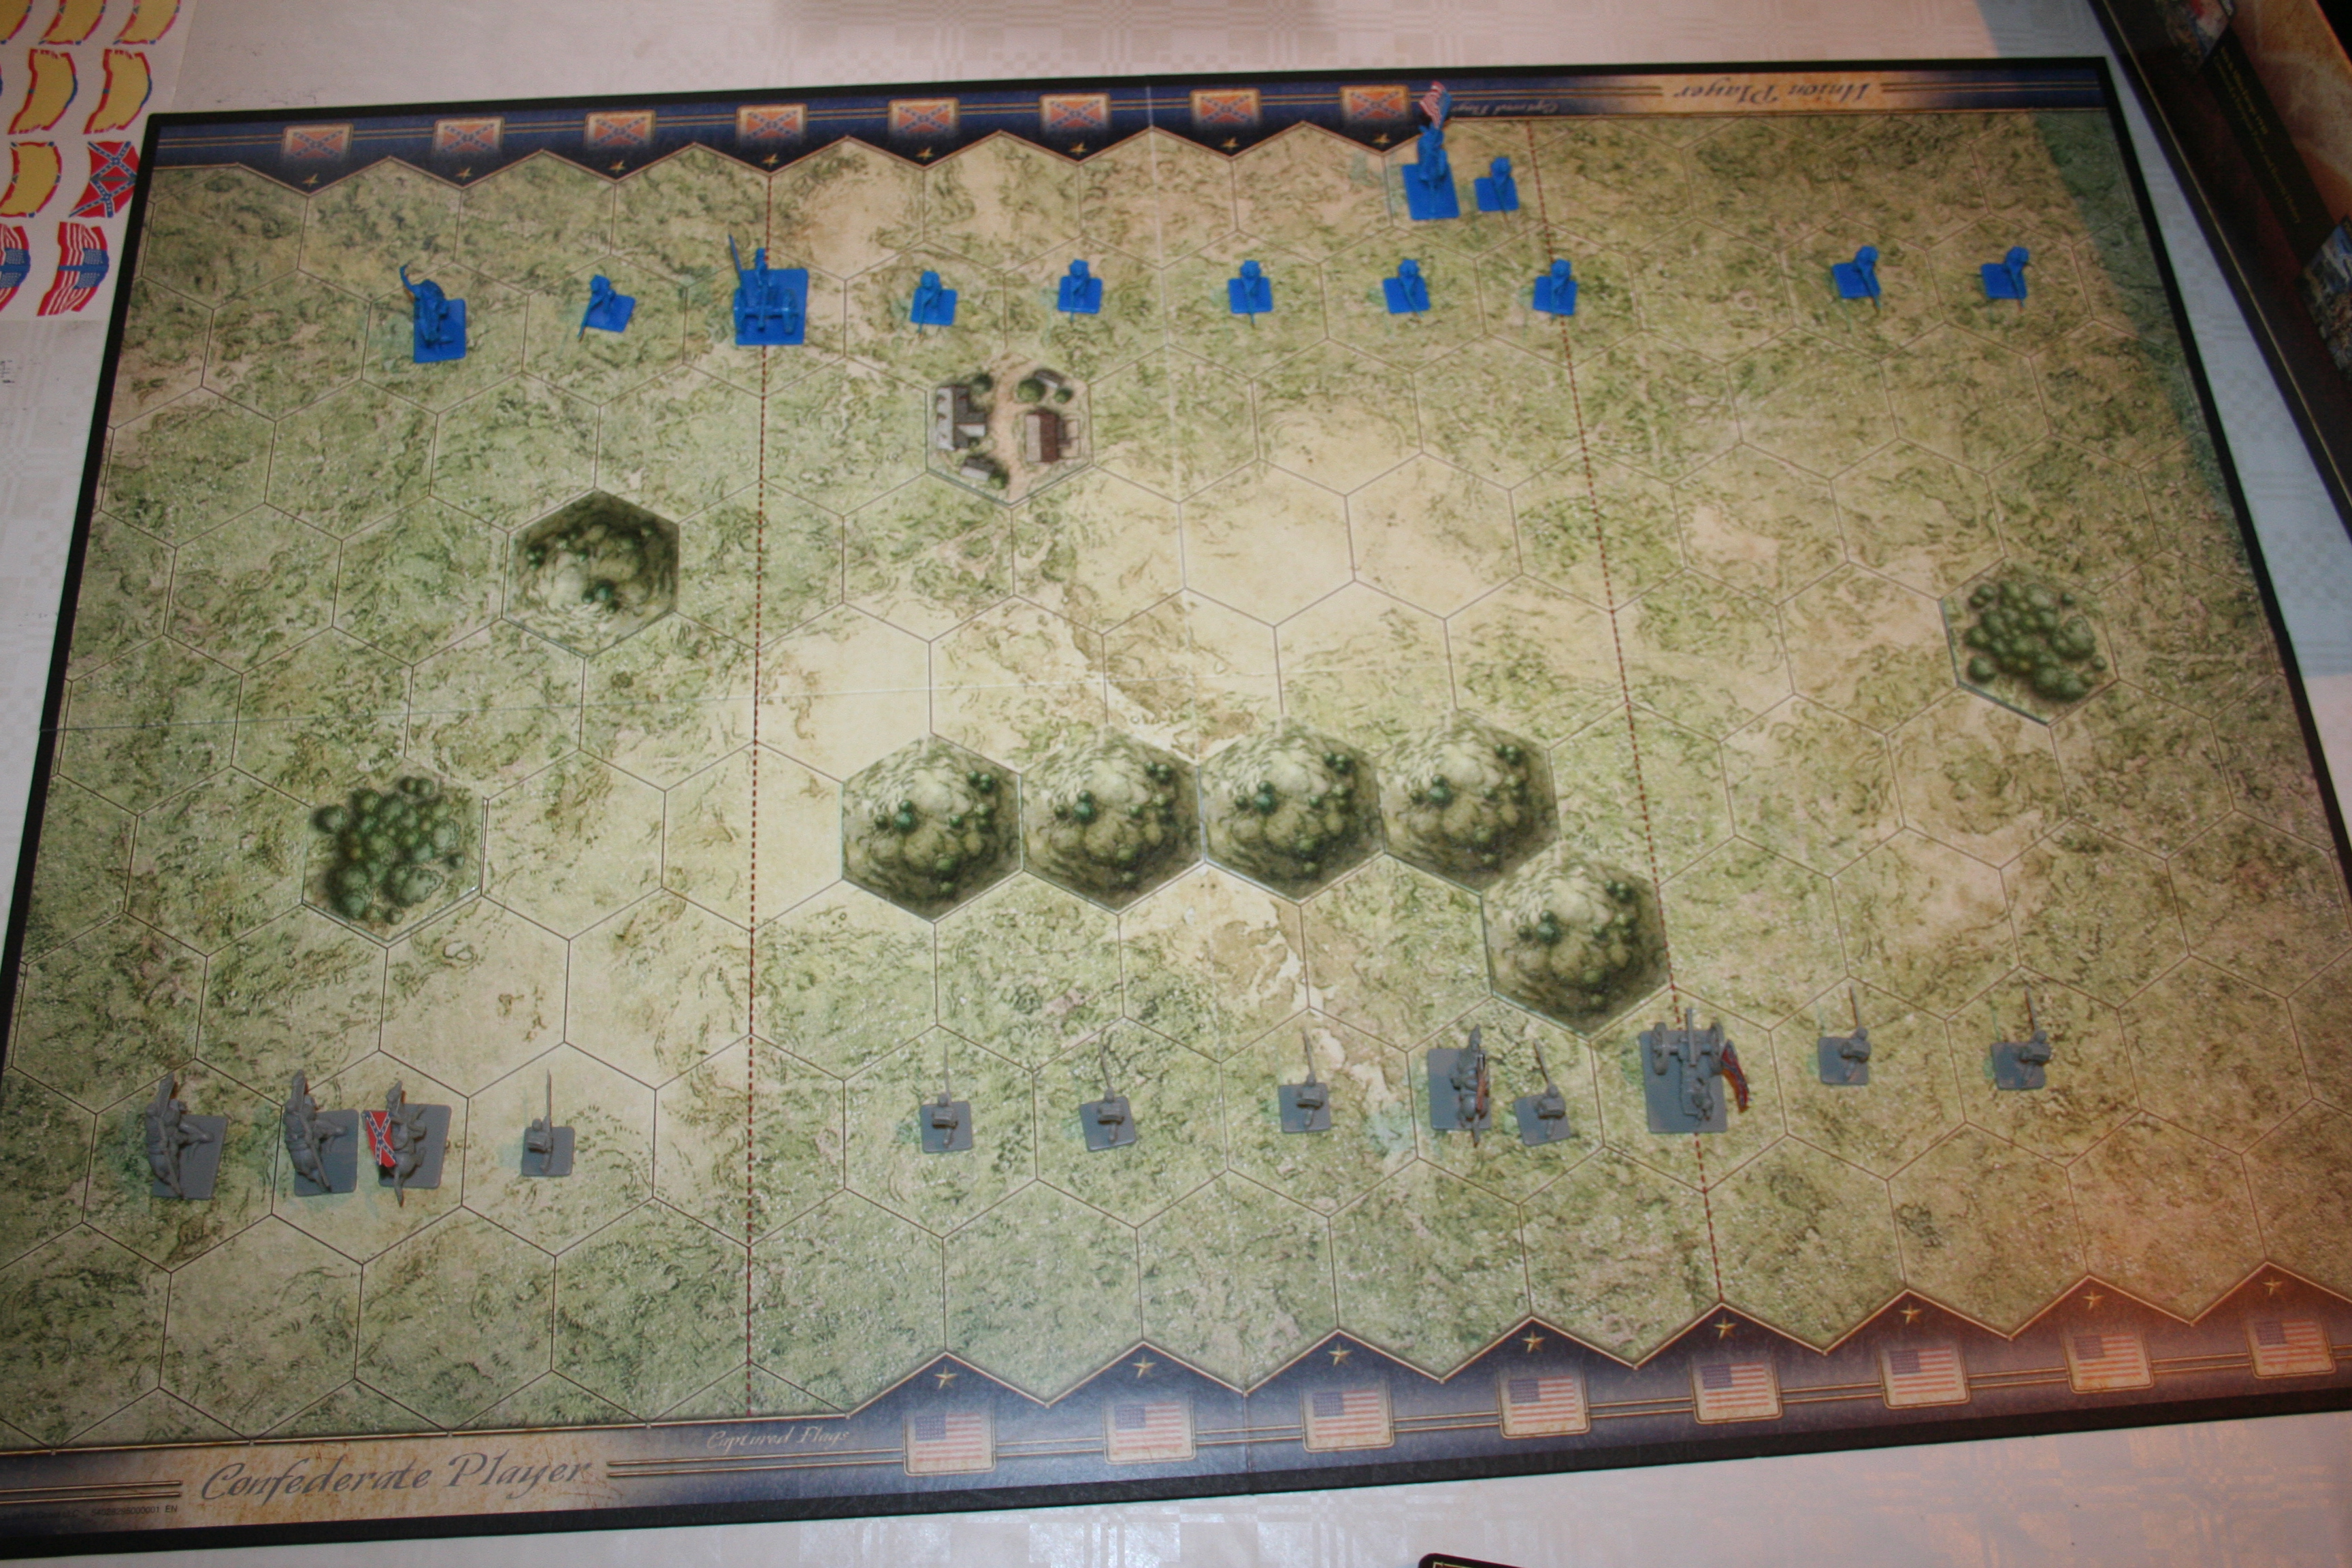
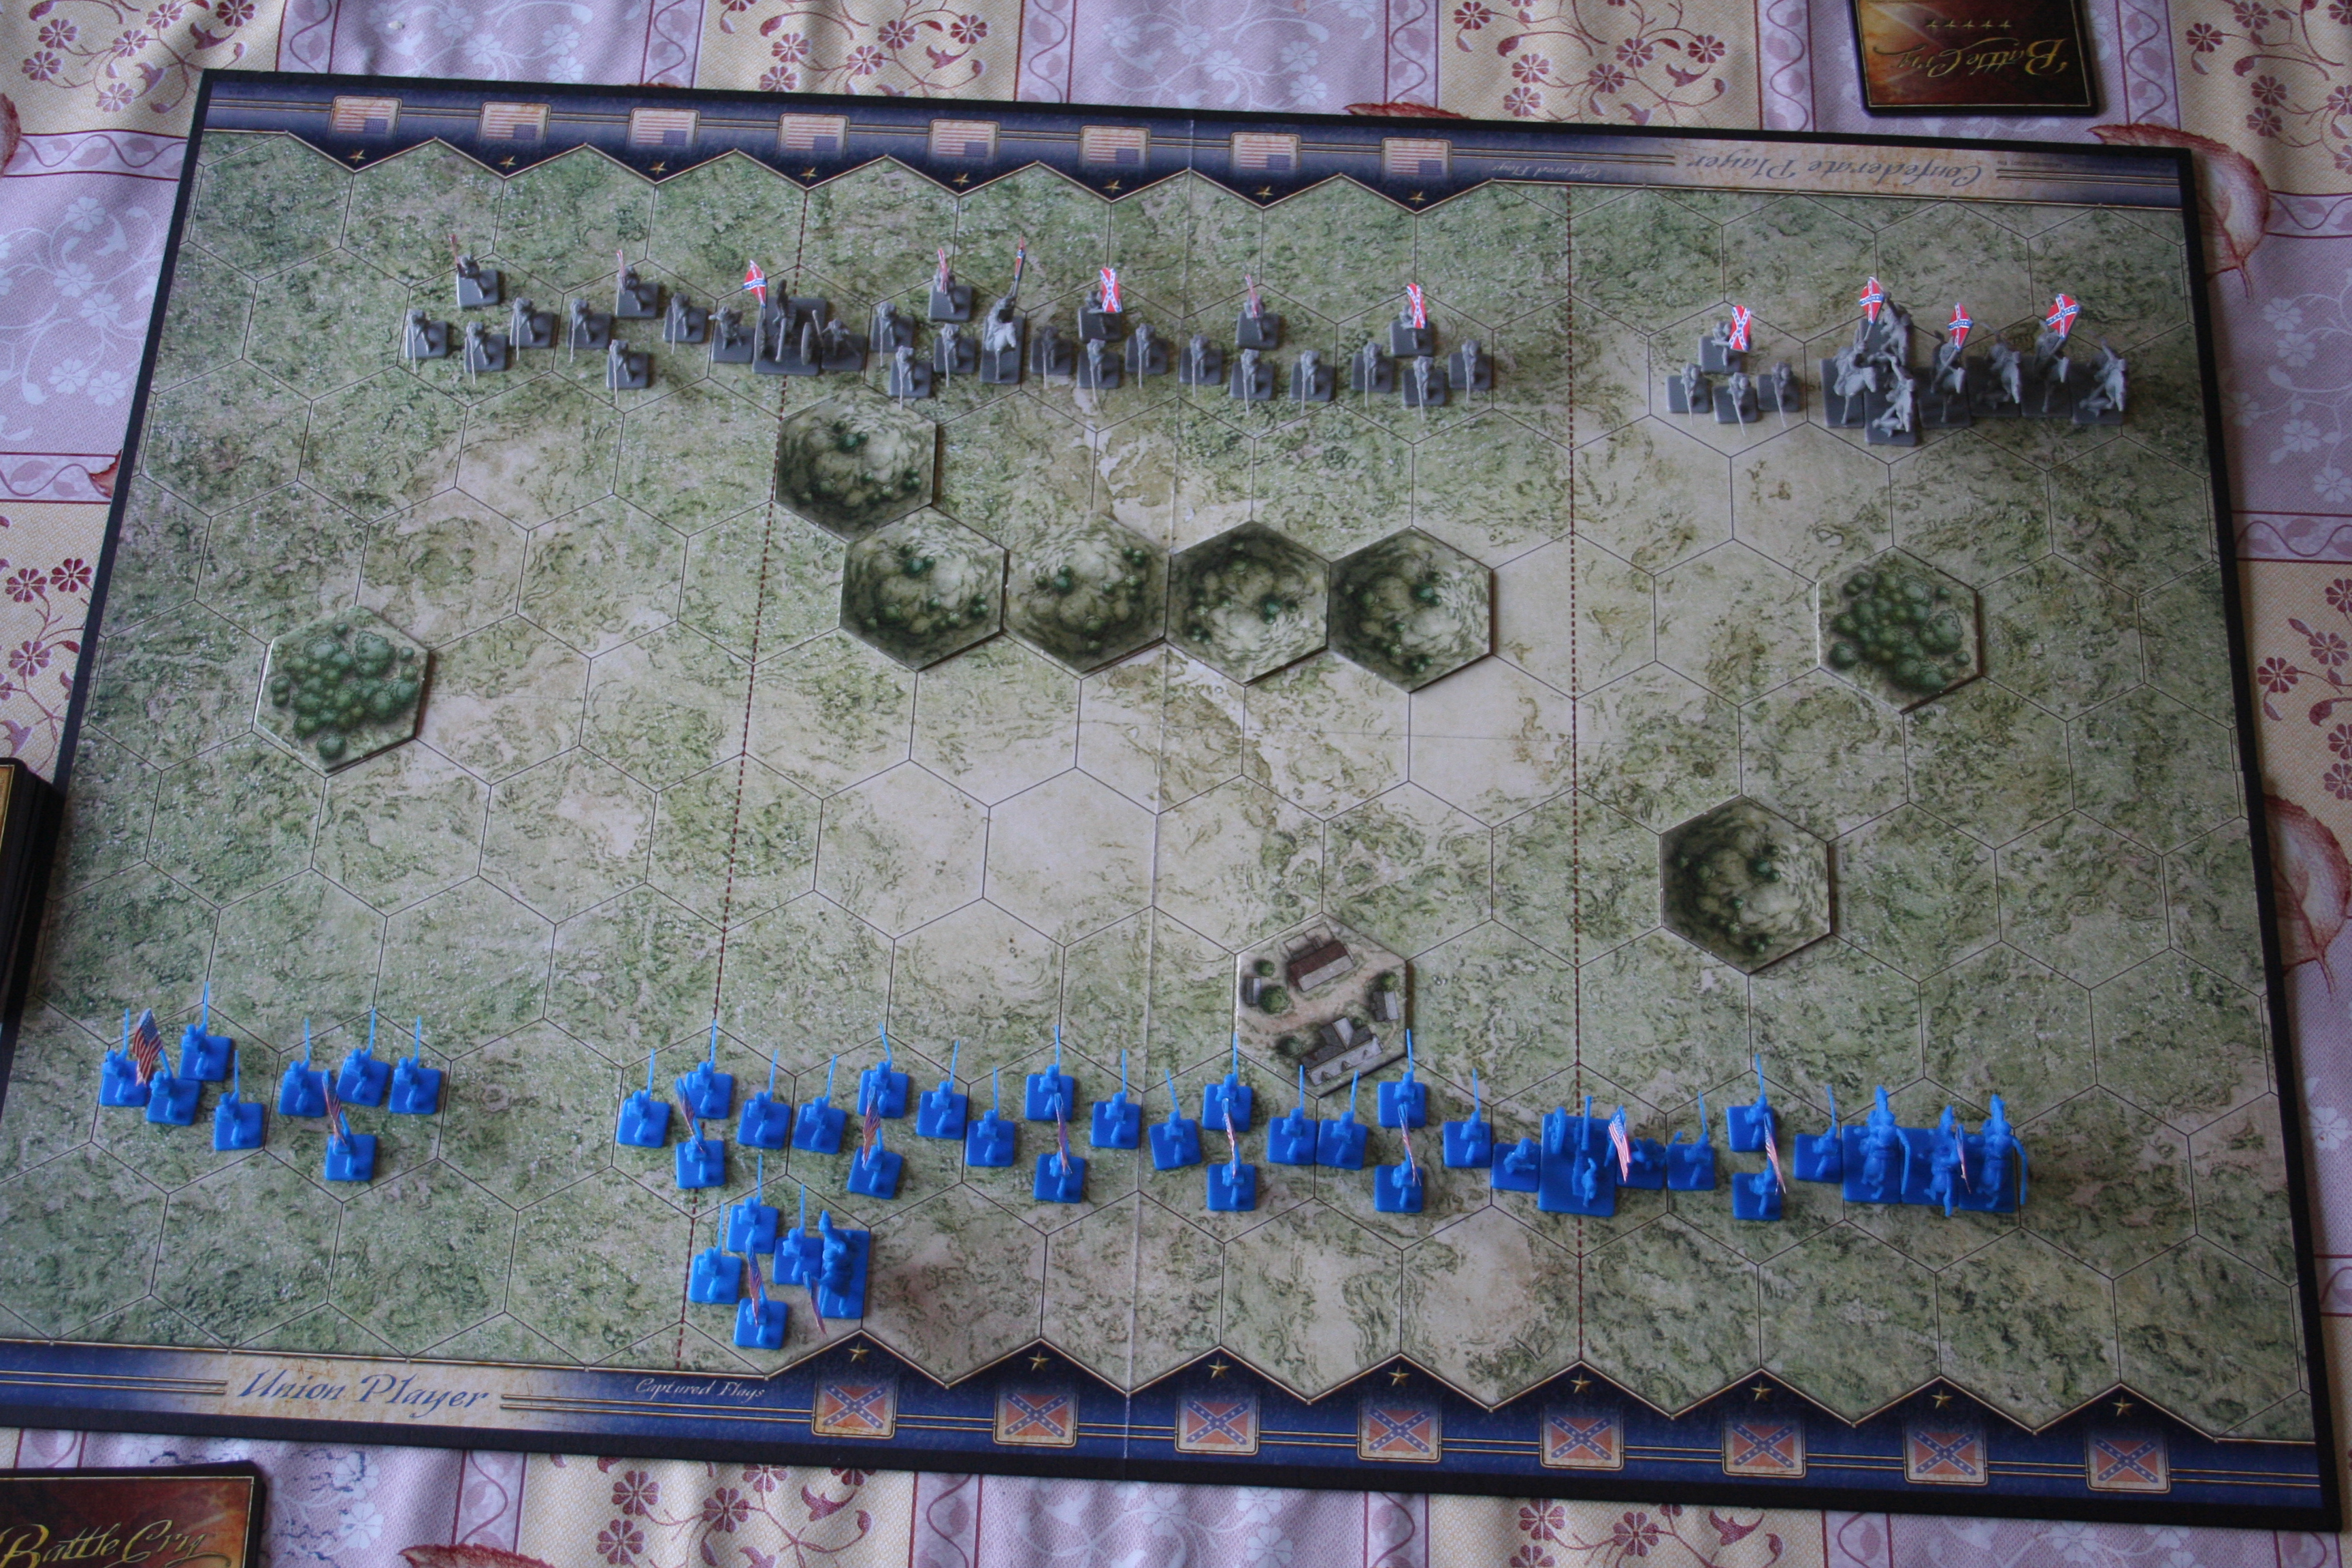
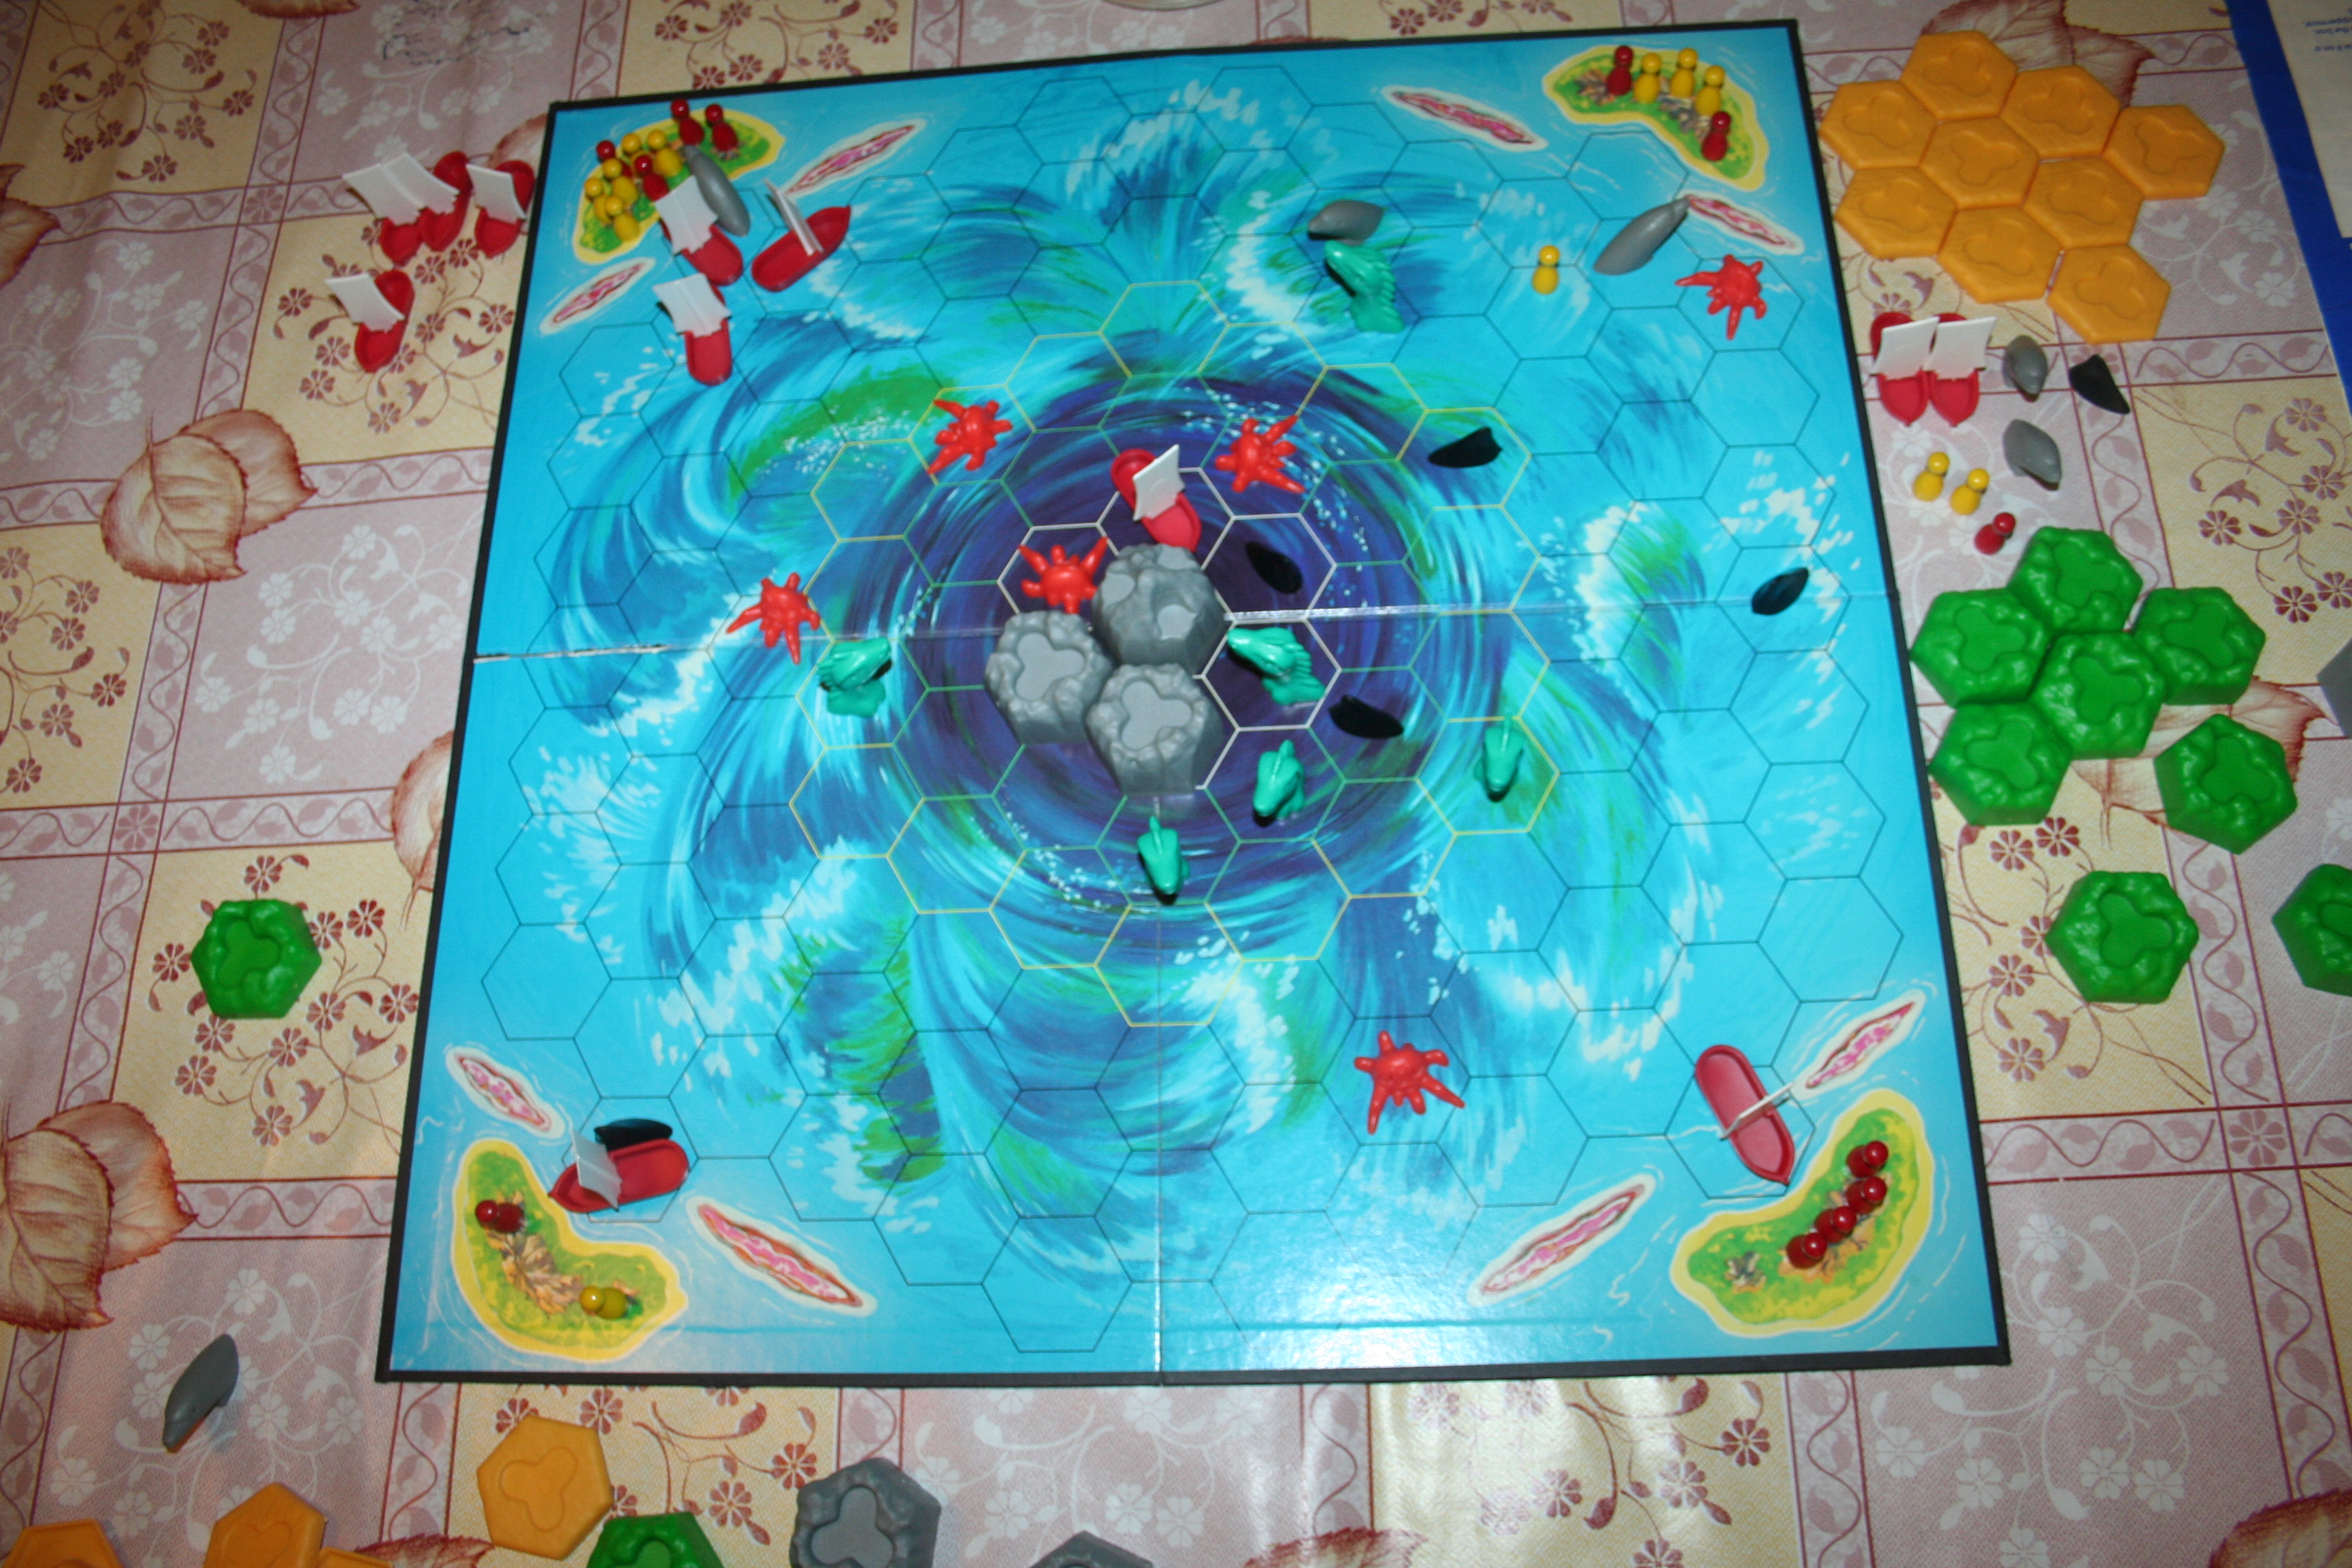
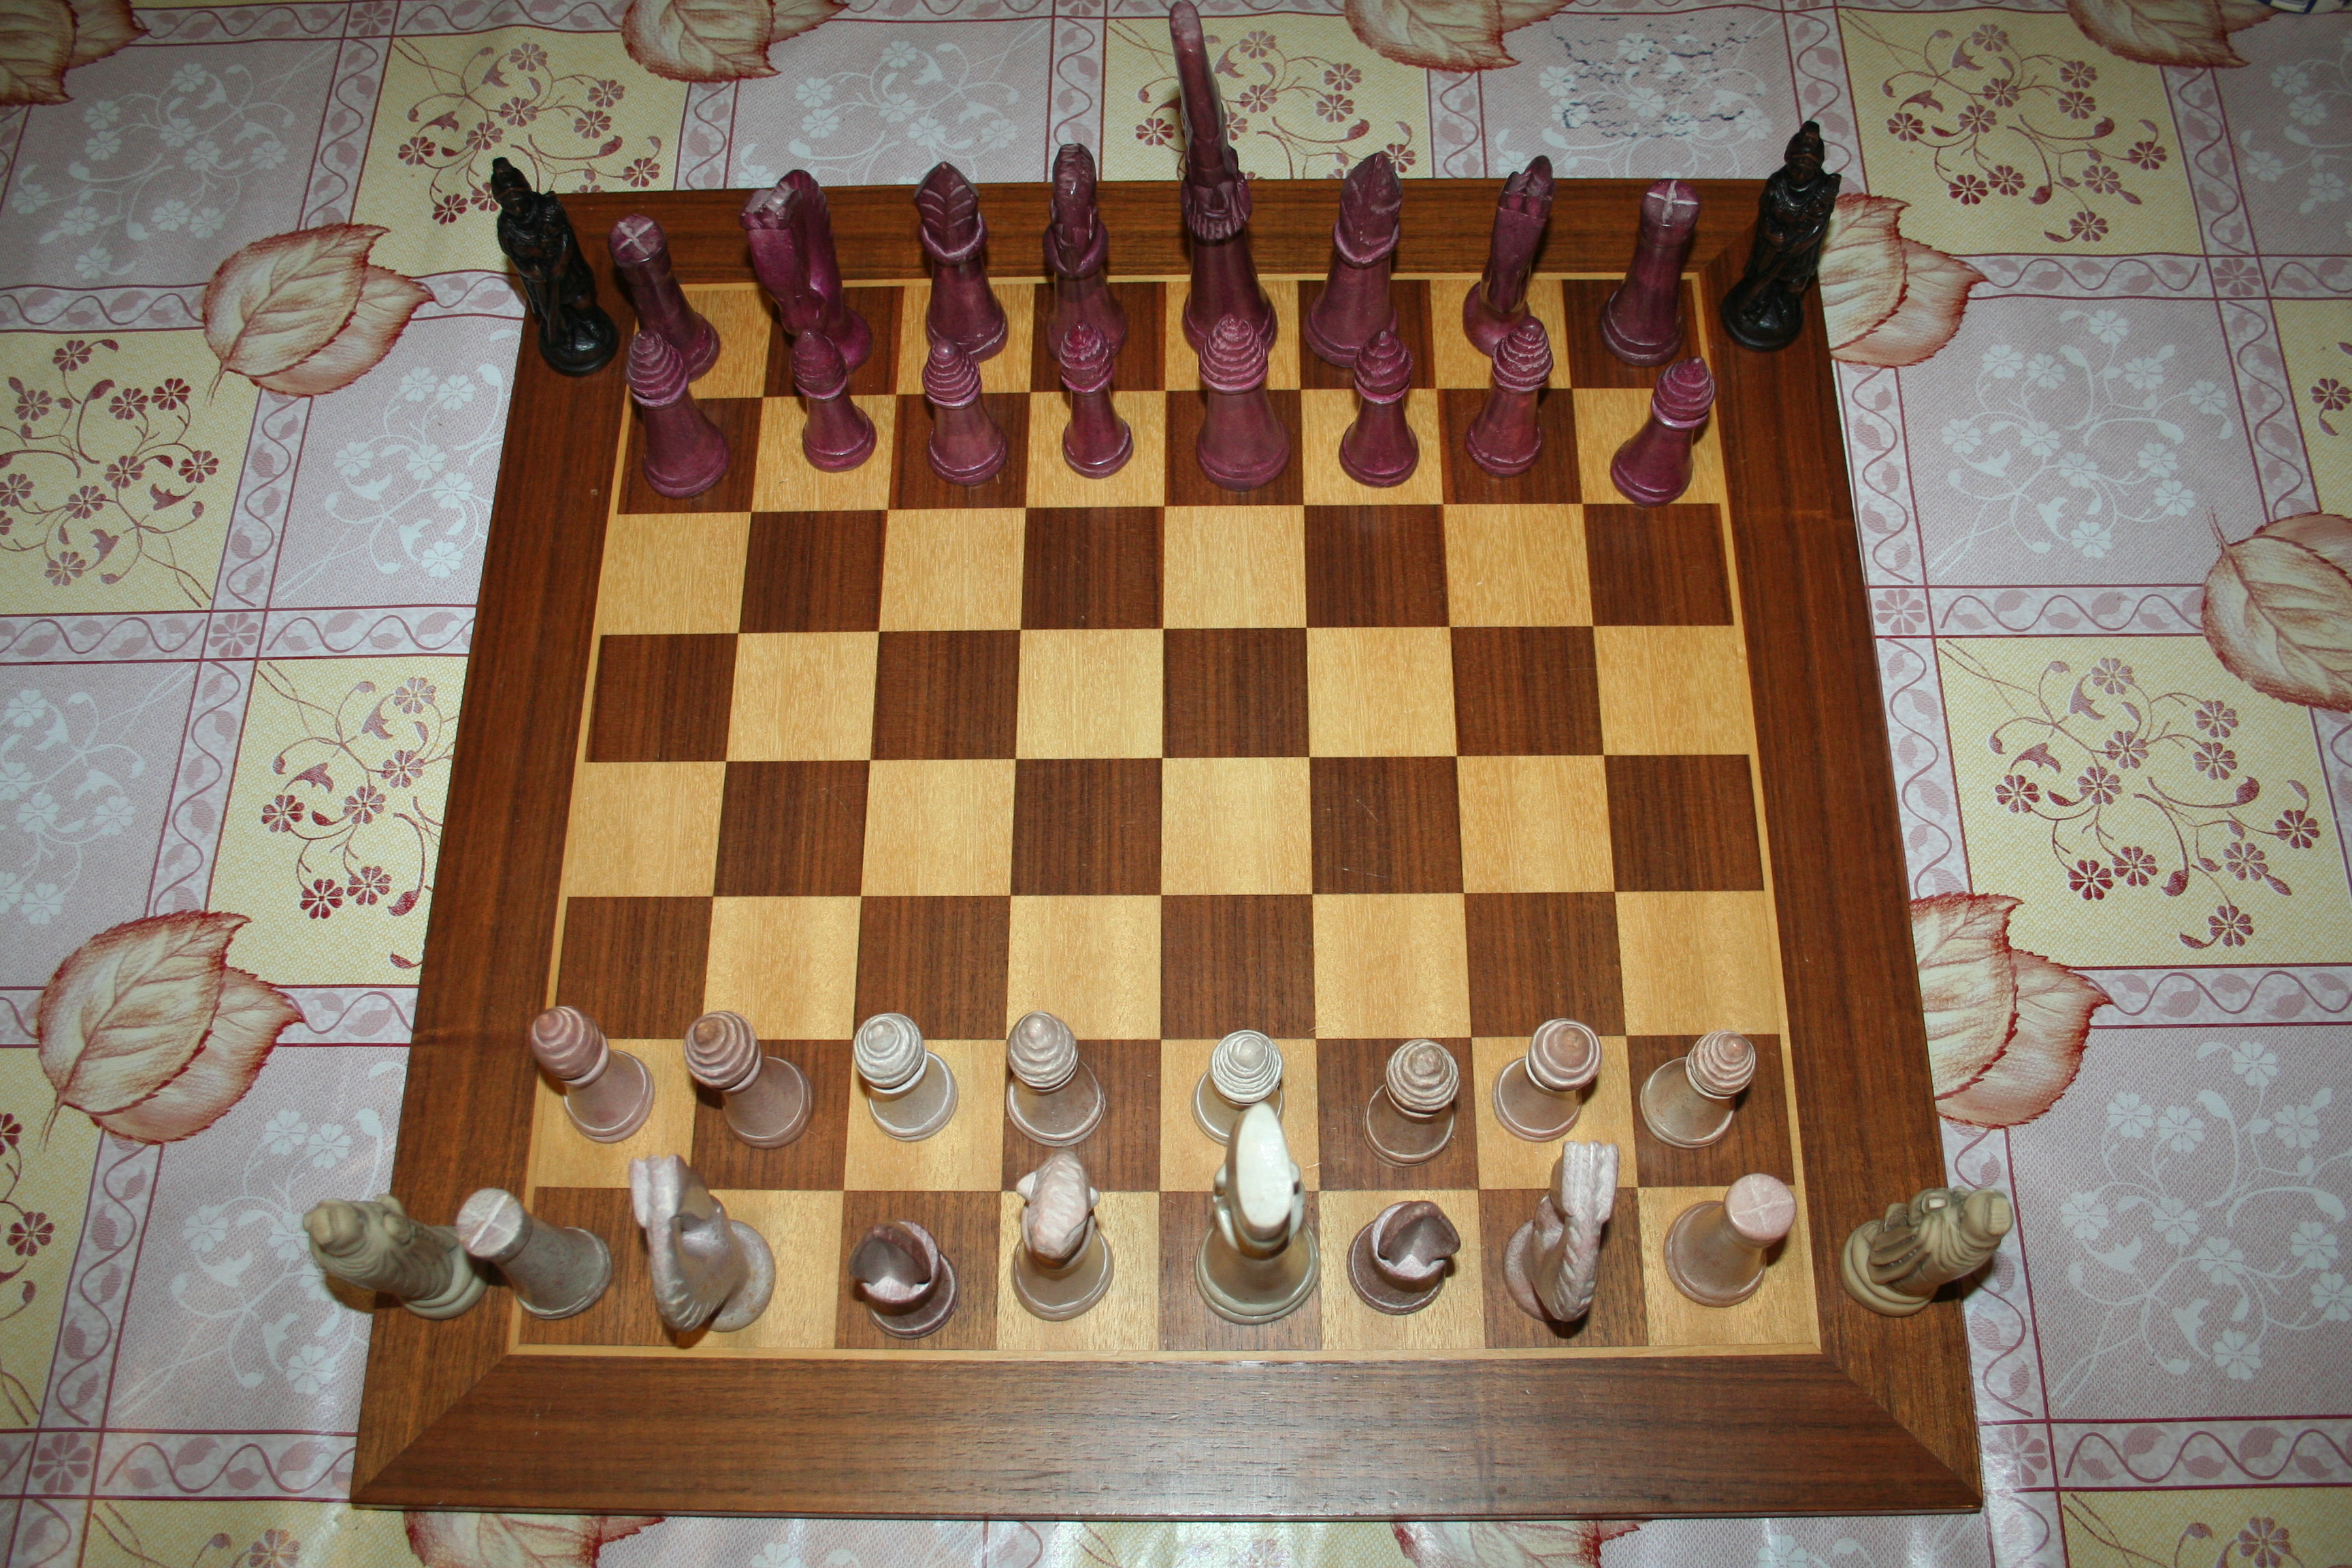
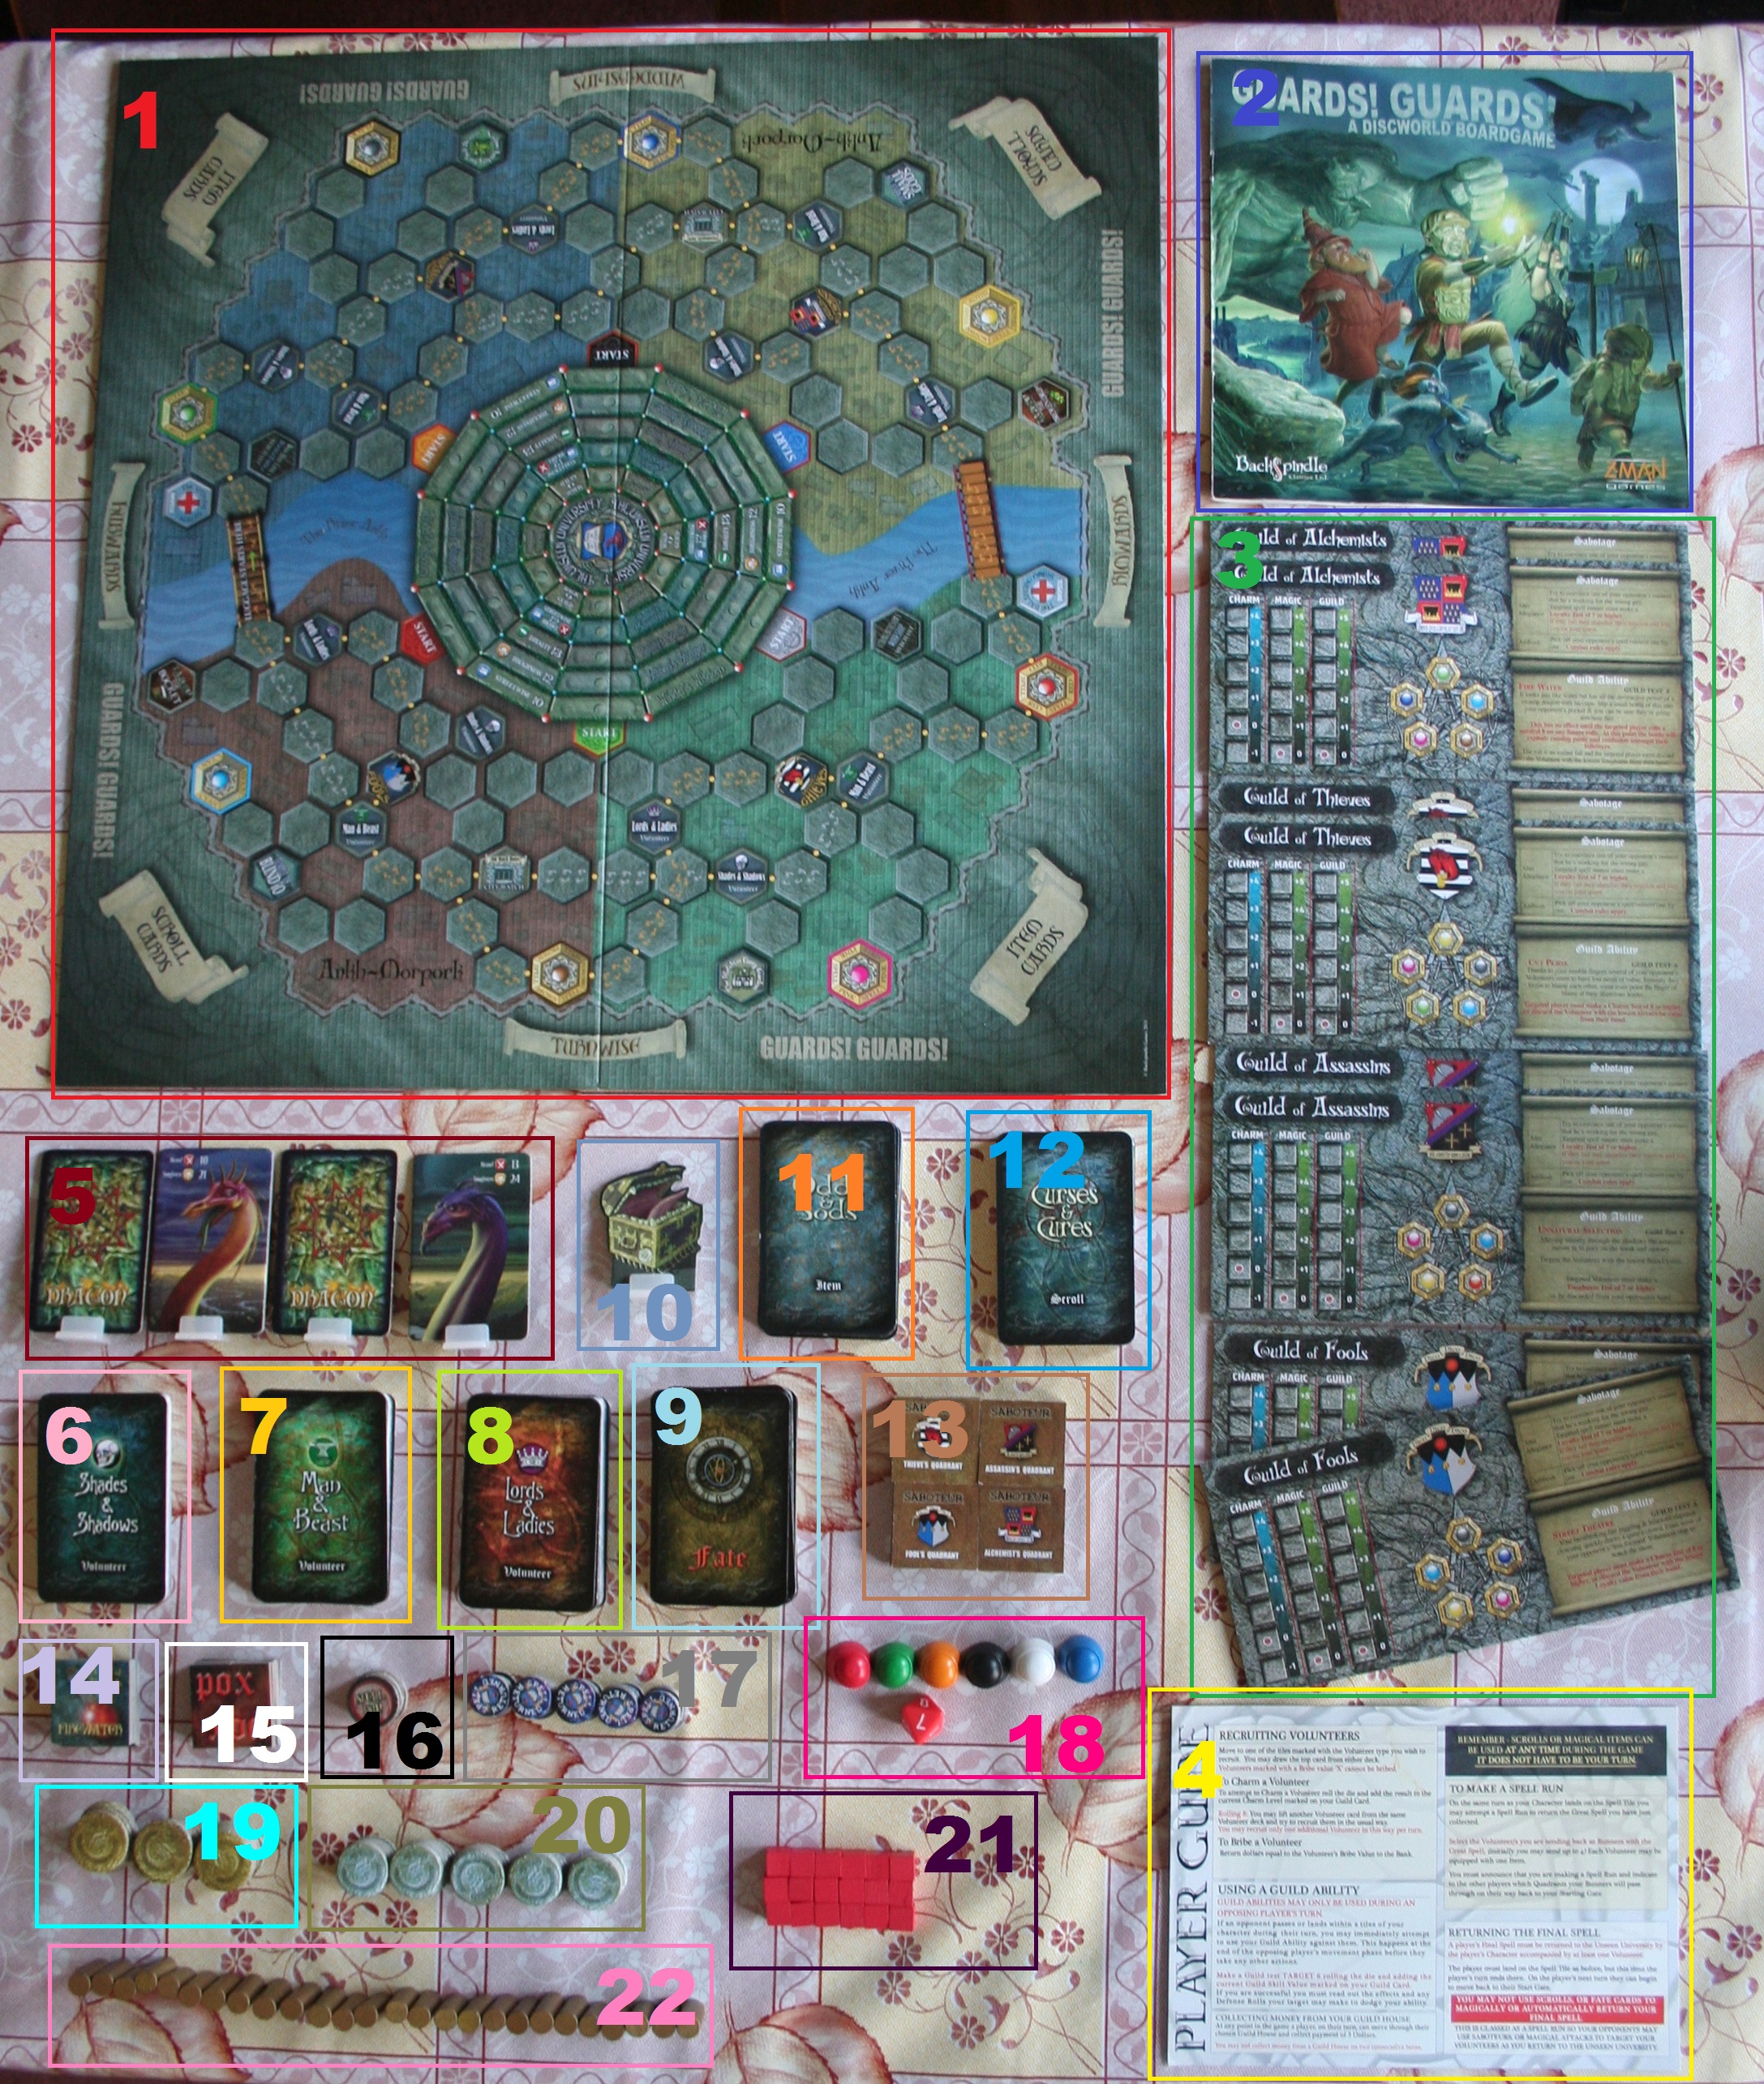
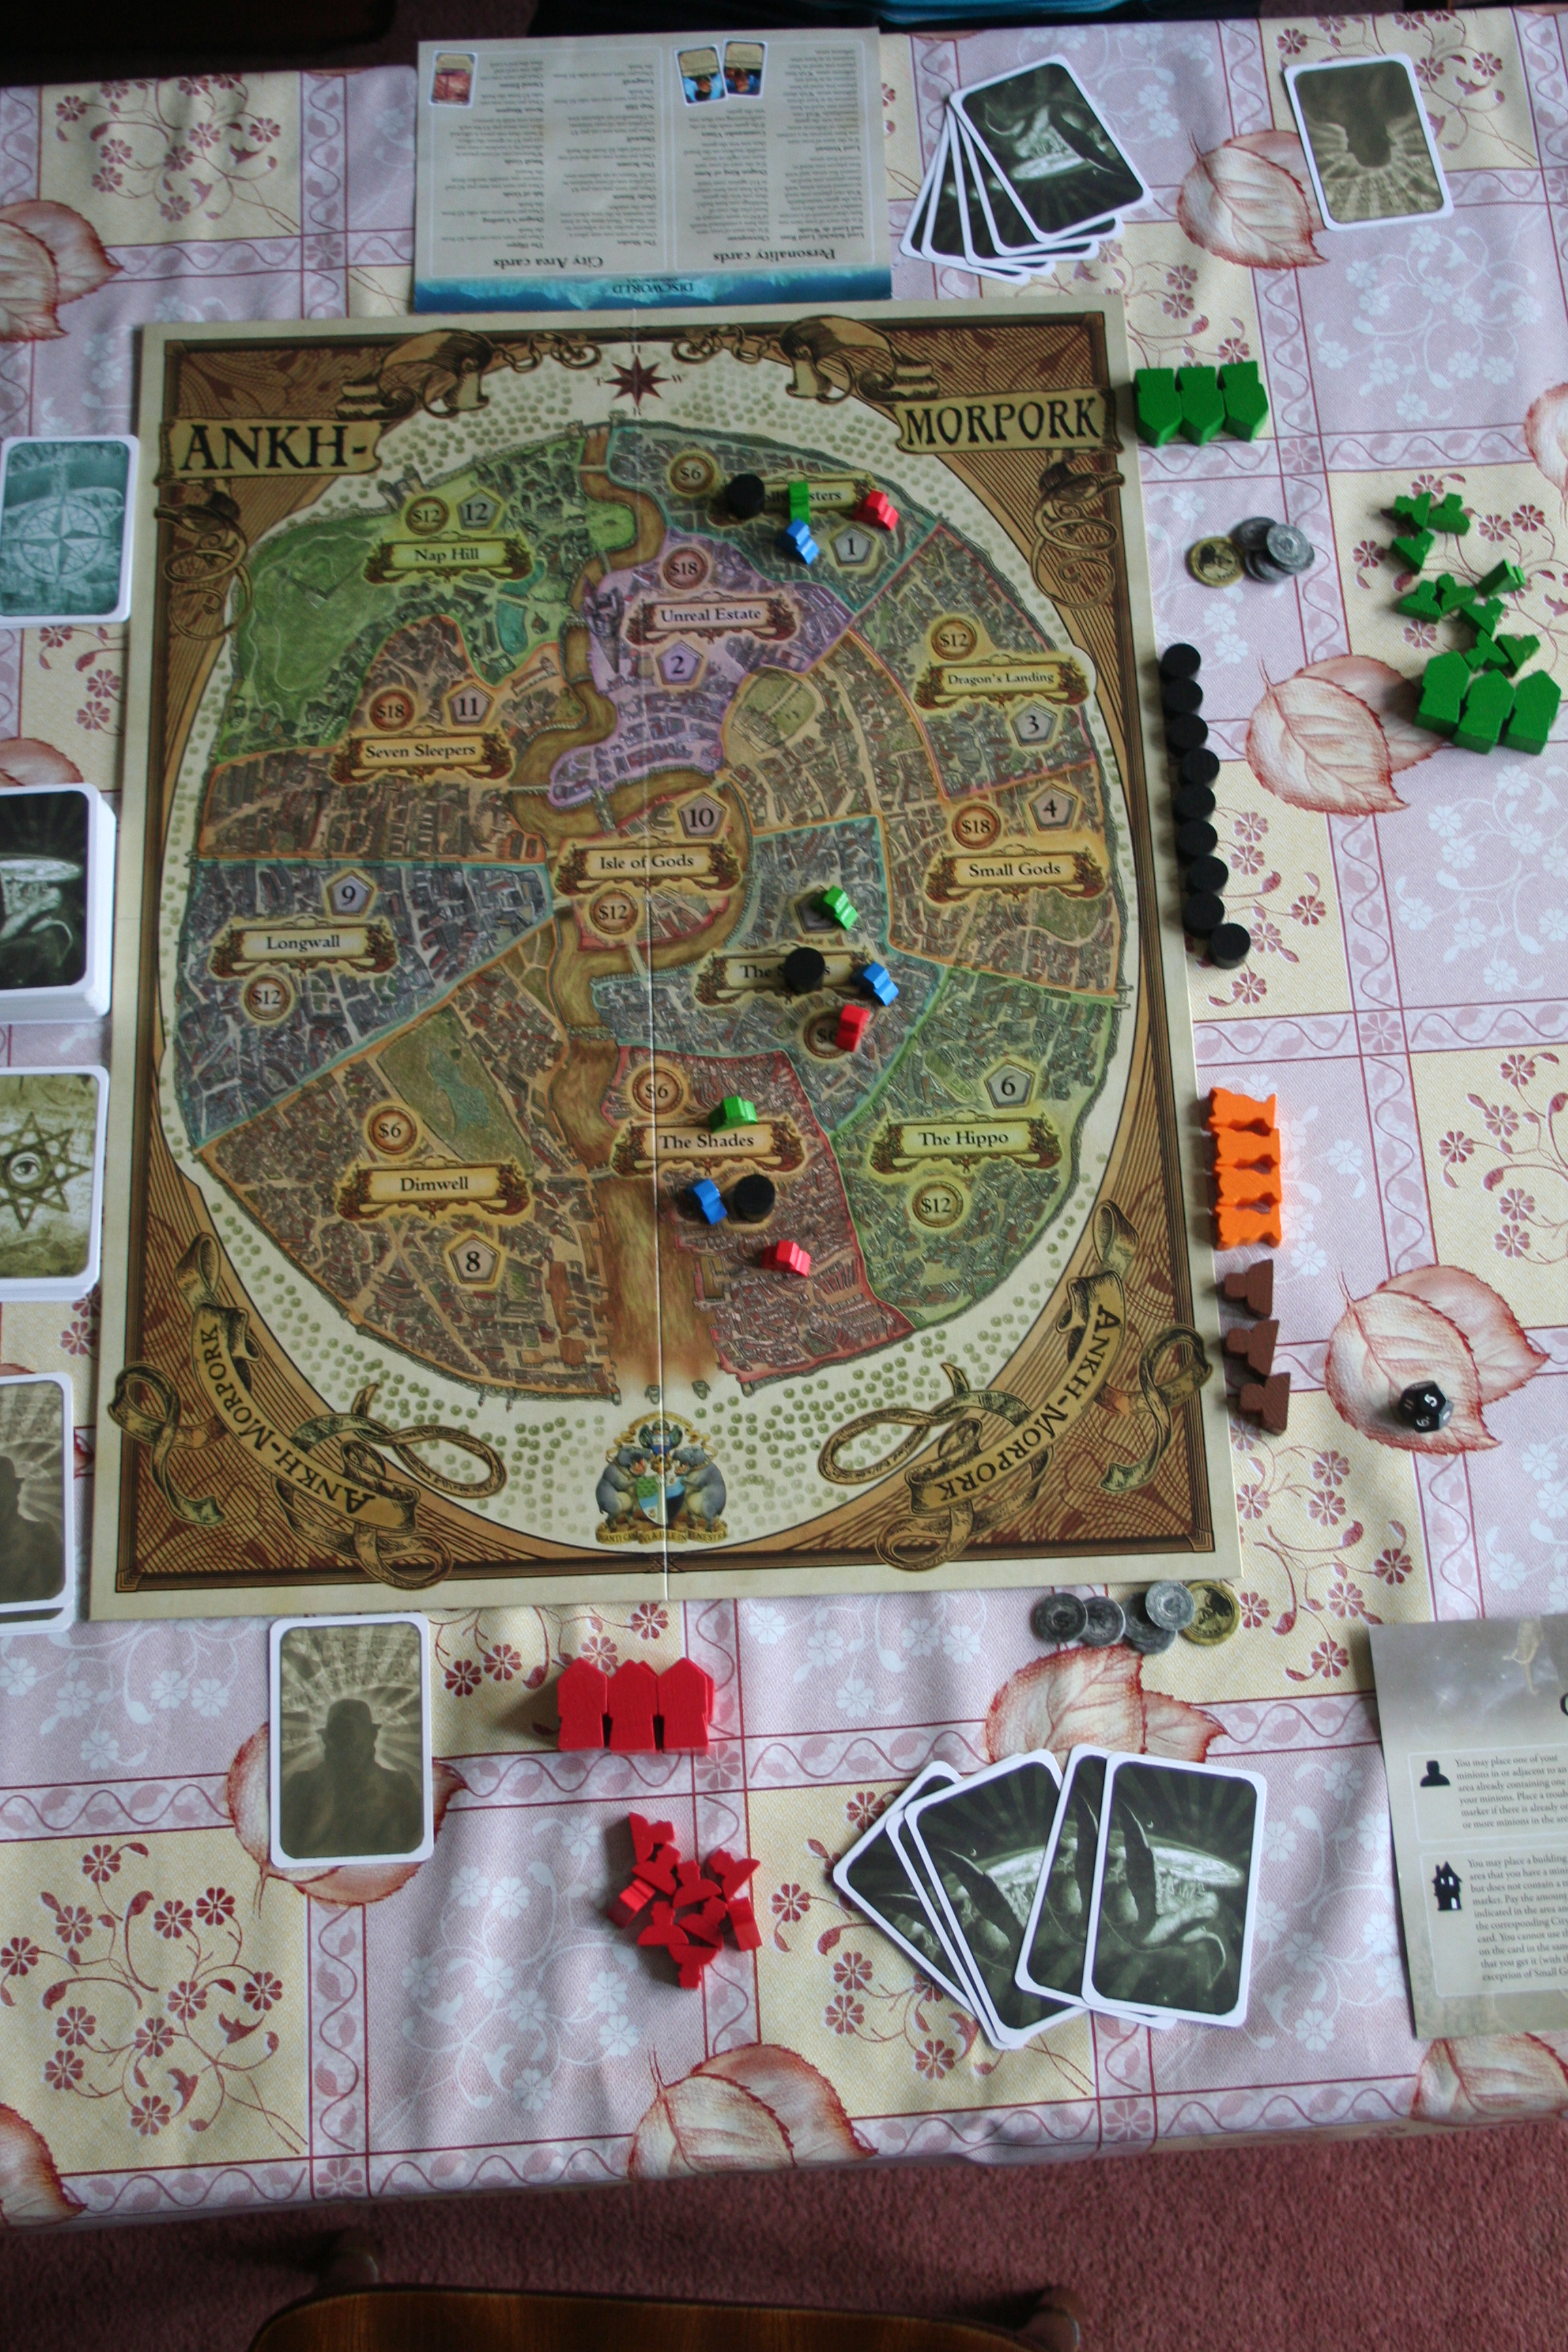
And this is a picture of the Conquest of the Empire board:

IMG_0515
Can you see the similarities?

Now, there are two sets of rules to this game, as I explain in the History and Interesting Facts part of the post but this post is only covering the Classic rules, as we haven’t had the time to play the other rules. Hopefully there will be another post covering the other set of rules before the month is over, so keep an eye out for that.
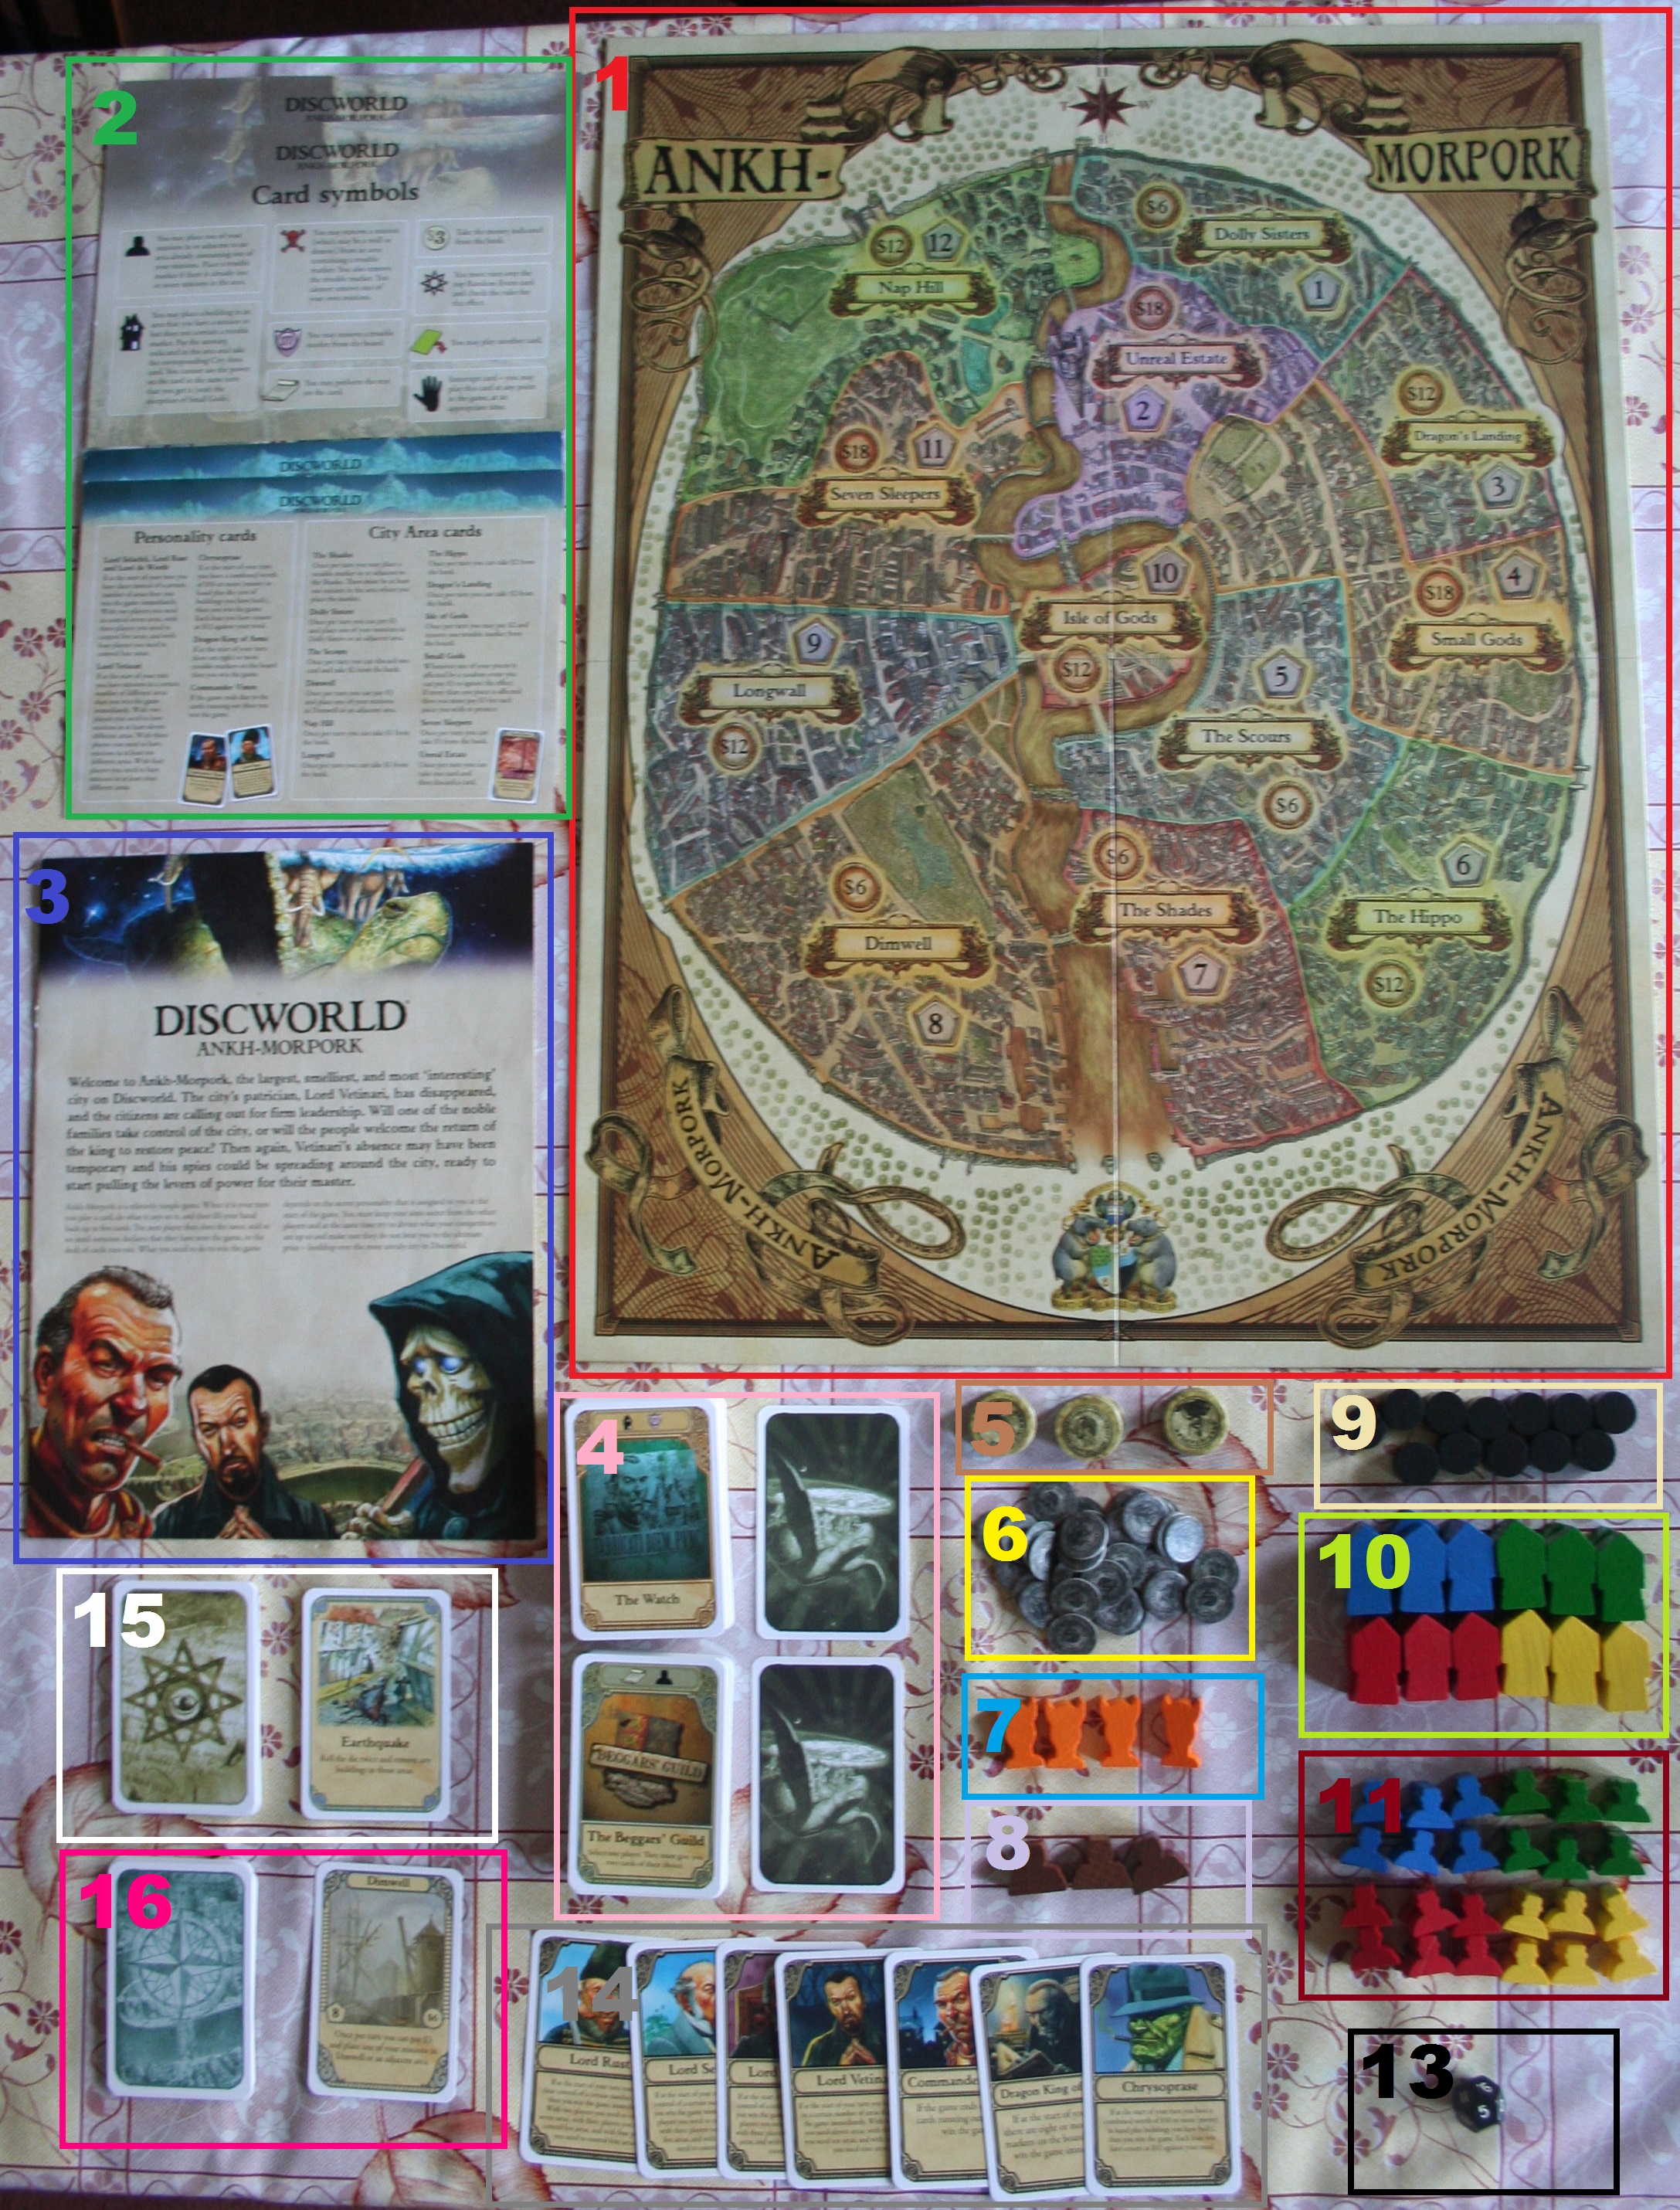
What’s In The Box:

IMG_0505

IMG_0509

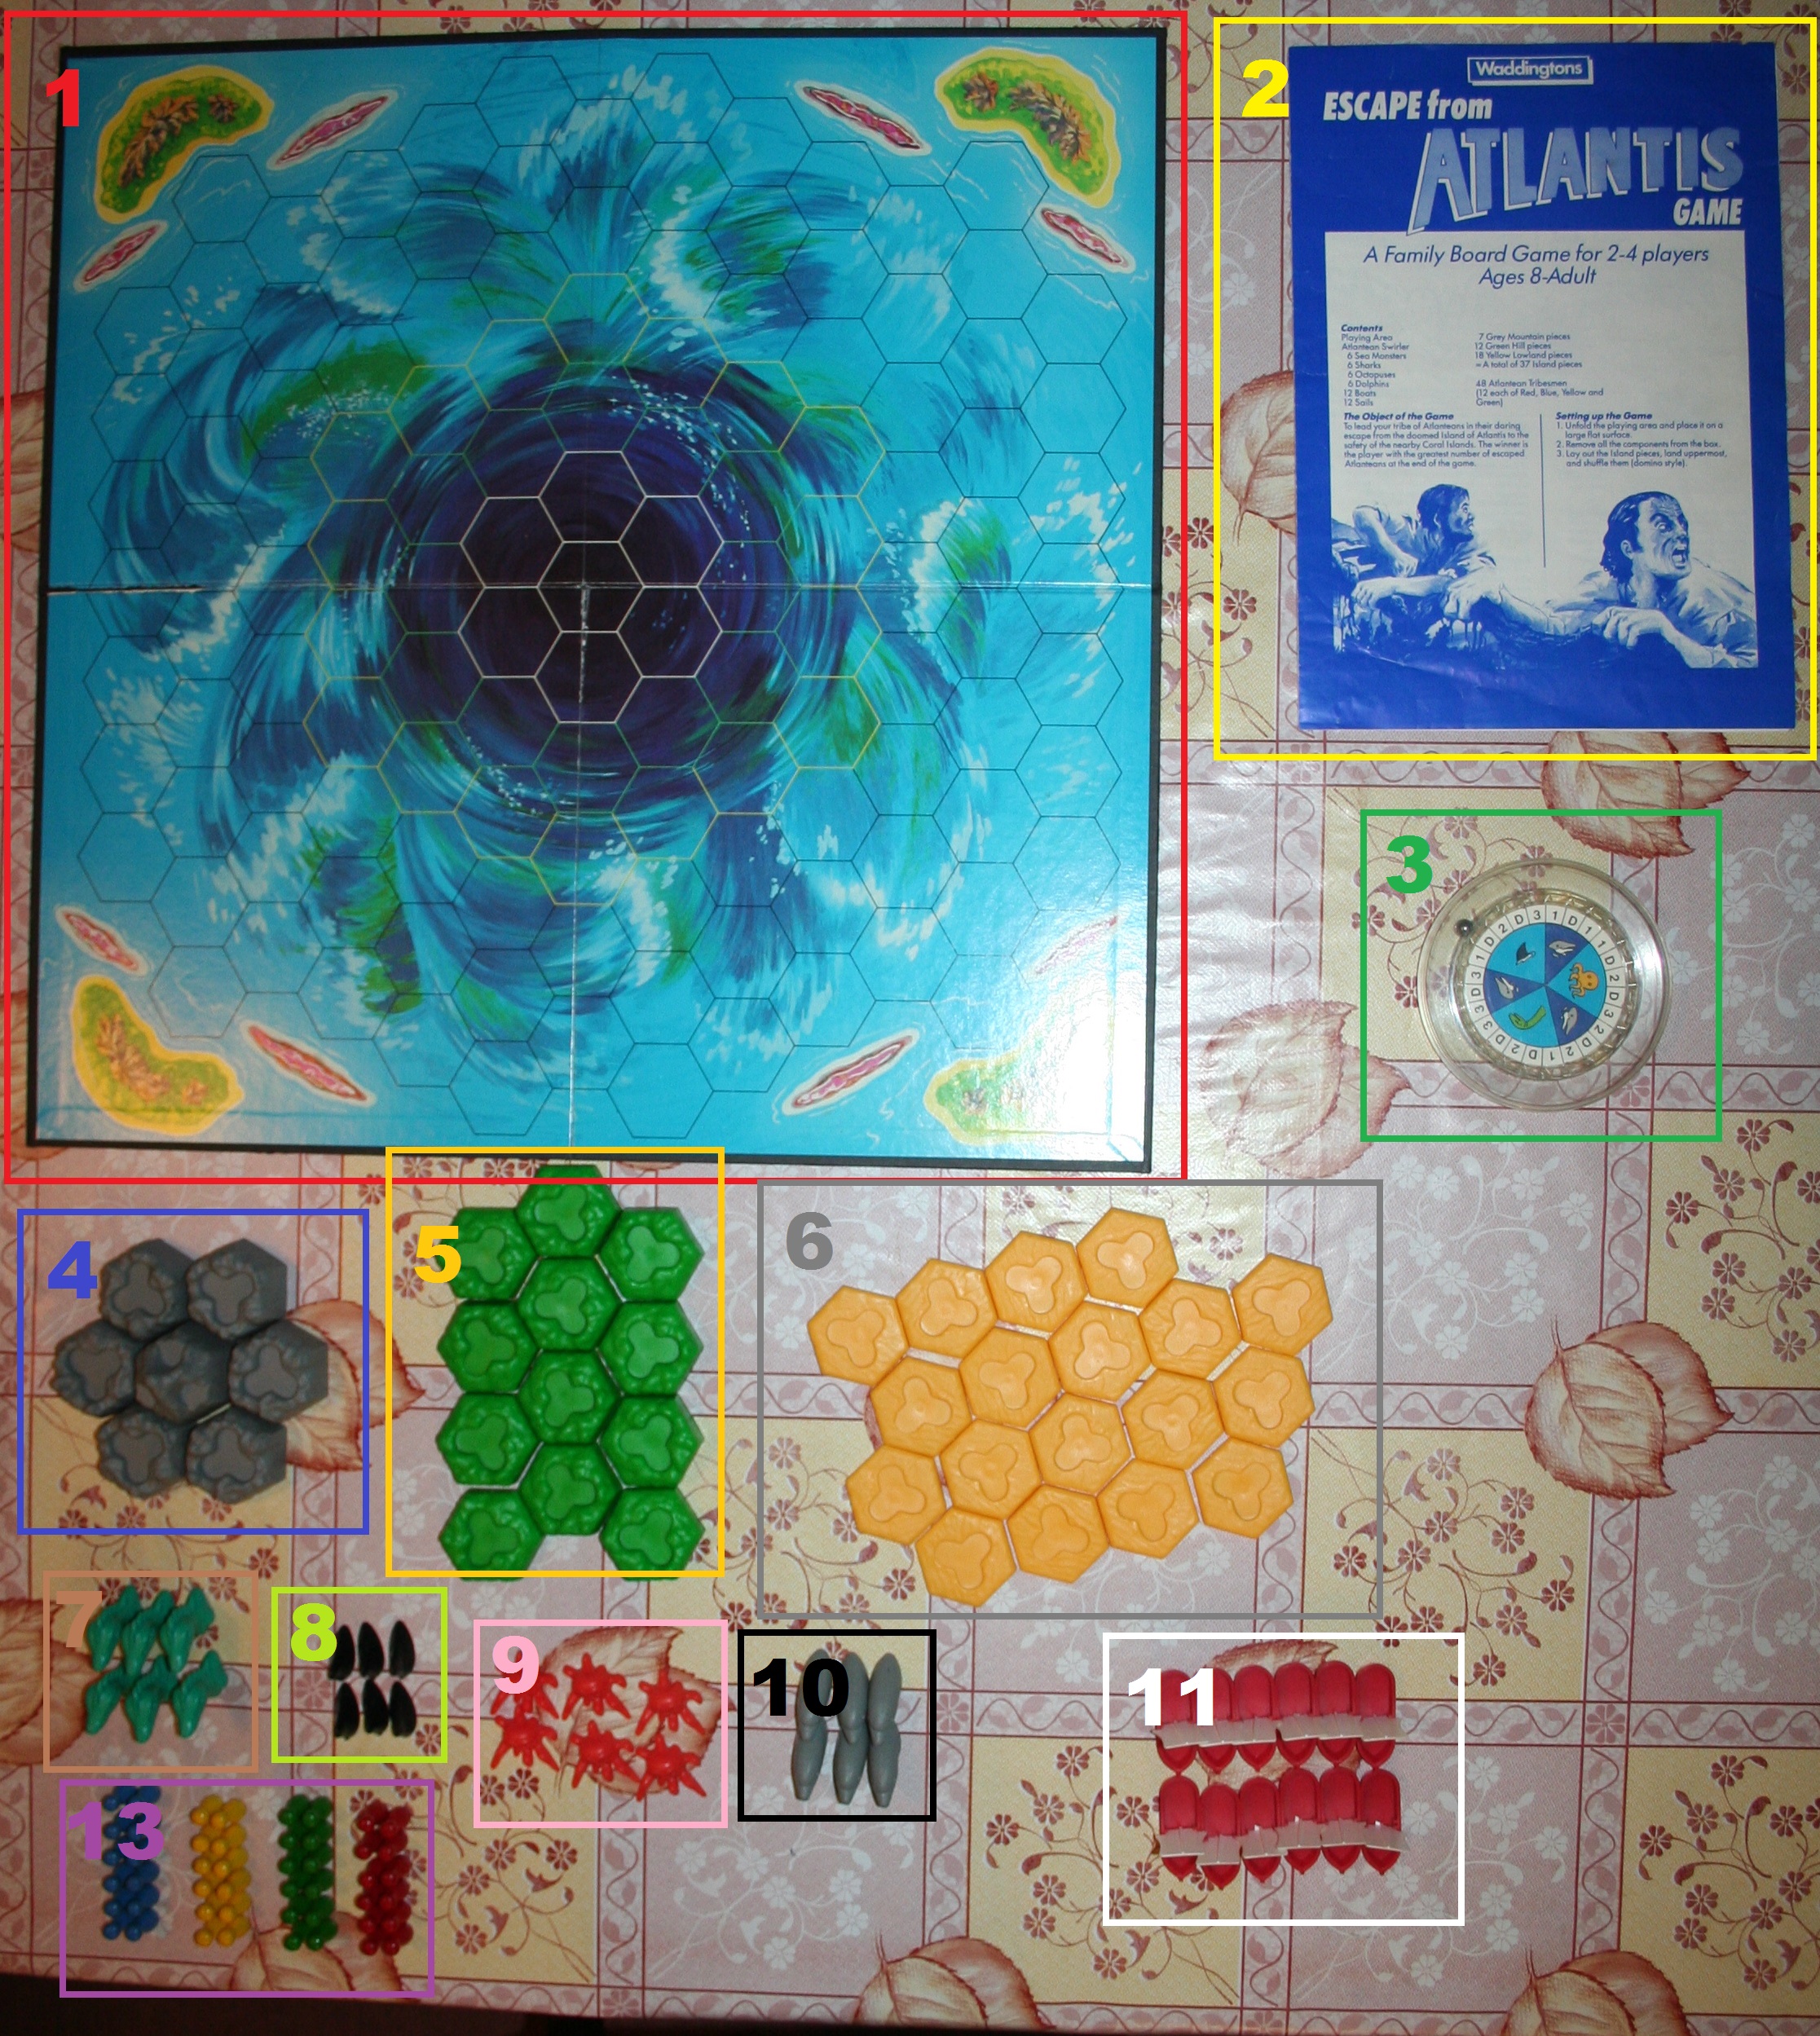
  1. 1  Game board (see picture in introduction of it laid out)
  2. Province tokens
  3. Some of the Chaos tokens (the ‘X’s at the bottom of the other sheet are also Chaos tokens)
  4. Influence/control tokens for each colour (except the bottom row)
  5. 2 Instructions Booklets:
    1. 1 for the Classic rules
    2. 1 for the new Conquest of the Empire 2 rules
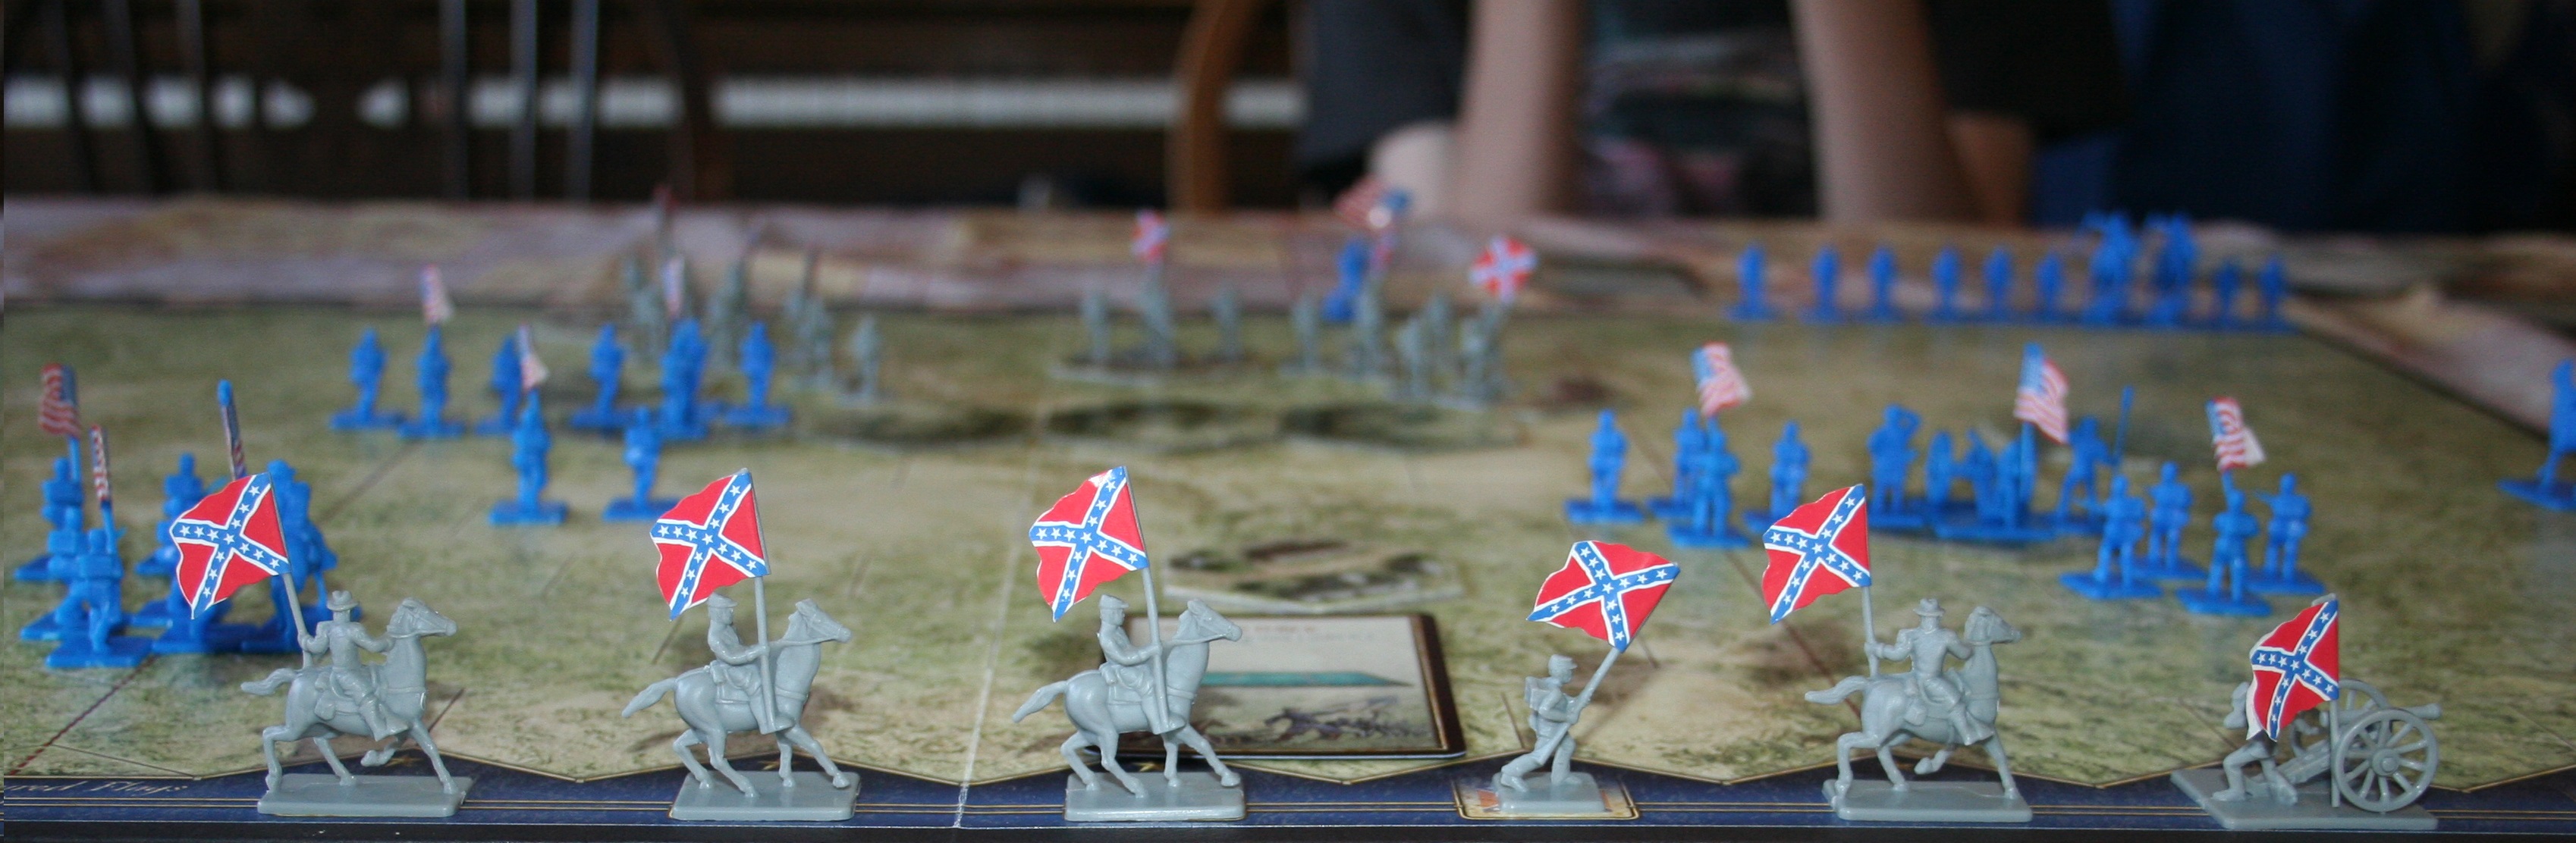
  6. Black game pieces consisting of:
    1. 1 Caesar
    2. 4 Generals
    3. 20 Infantry
    4. 10 Cavalry
    5. 6 Catapults
    6. 8 Galleys
  7. Yellow game pieces, the same as black
  8. Blue game pieces, the same as black
  9. Purple game pieces, the same as black
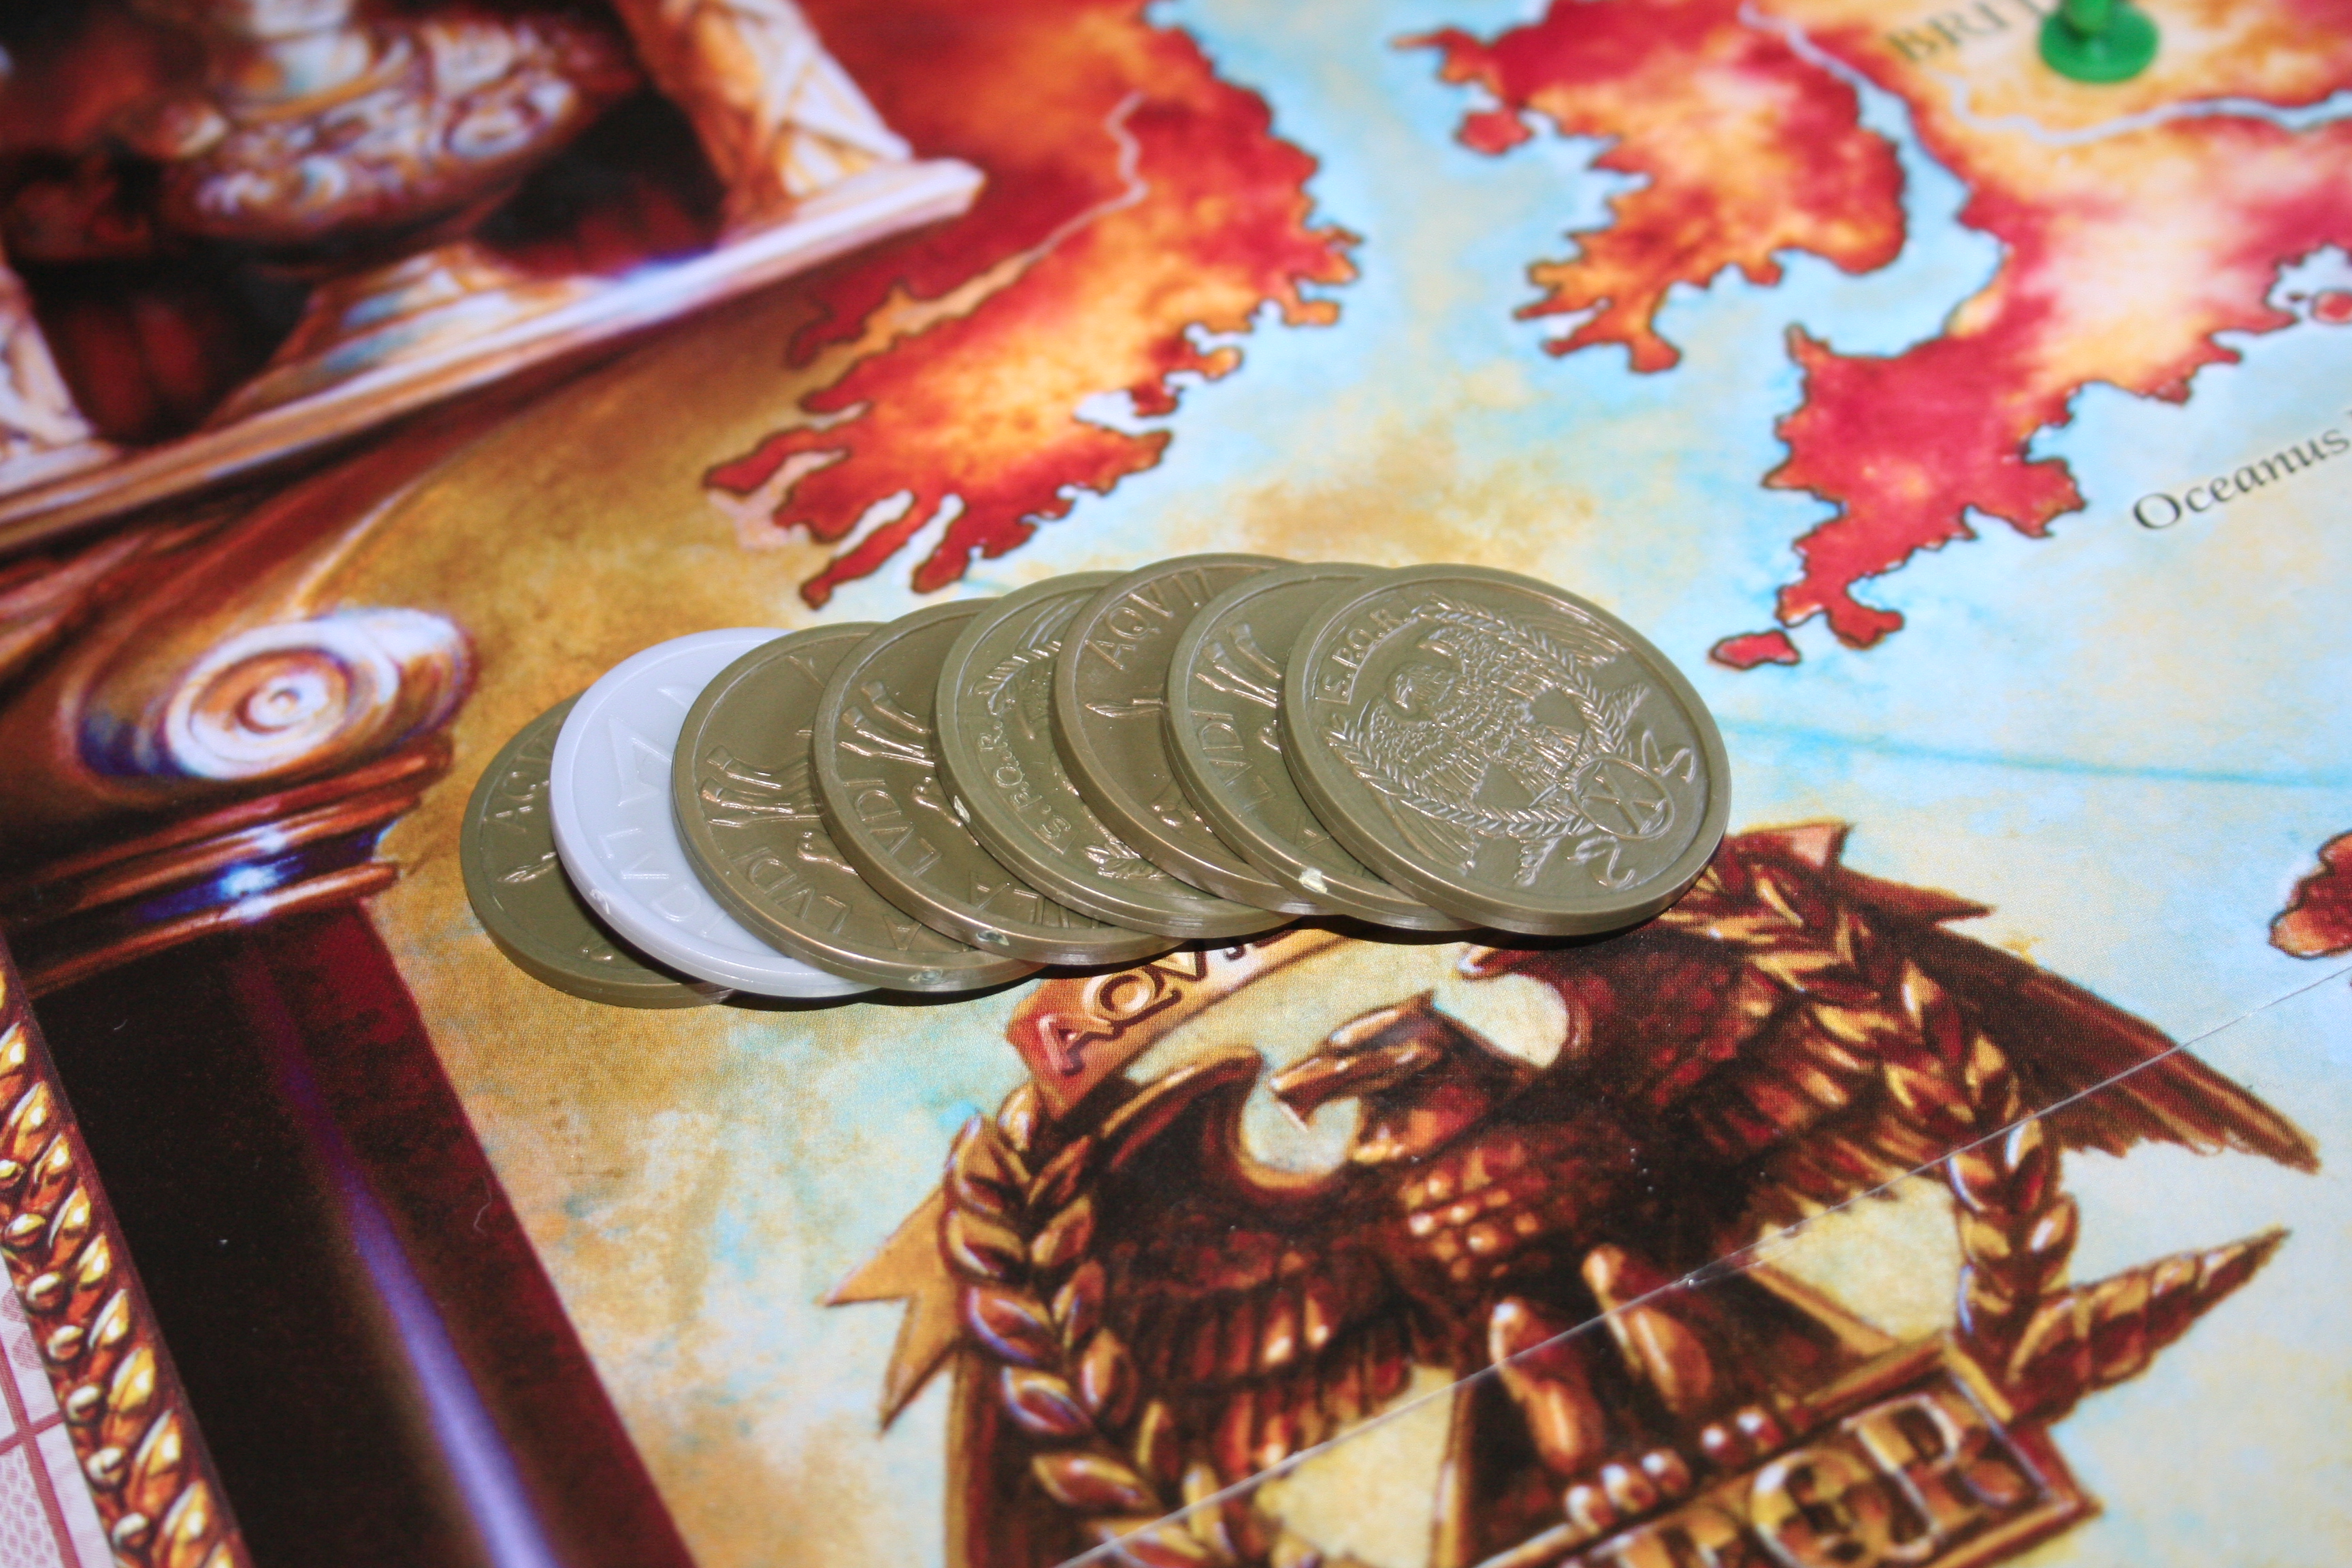
  10. 25 five-talent coins (Silver) 50 ten-talent coins (Gold)
  11. Red game pieces, the same as black
  12. Green game pieces, the same as black
  13. 8 Dice (for some reason ours has 12 but it did come from a charity shop)
  14. 16 Fortifications
  15. 16 Cities
  16. 1 deck of cards
  17. Cards
  18. 20 Roads

Playing The Game:

Objective: To capture the other player(s) Caesar

The aim of the game is ultimately just to capture the other player(s) Caesar, which can lead to a fairly short game if you get lucky and the other person is careless; or if the other person is careful it can be a long complex game of strategy and well thought-out battling.

The board right at the beginning.

You start in one of the six starting provinces, these are shown on the board and the instruction book denotes which are available relative to how many players there are. The tribute scale at the bottom of the board is used to mark your income per-turn and increases if you capture provinces and decreases if you lose them depending on the worth of the province (marked on the board). you start on 15, as you home province is worth 10 but it also has a city in it which adds an additional 5.

The tokens for each player show the amount of money they get each turn.

Each turn is broken up into 6 sections:

  1. Movement
  2. Combat
  3. Collect Tribute
  4. Destroy Cities
  5. Purchase New Pieces
  6. Place New Pieces

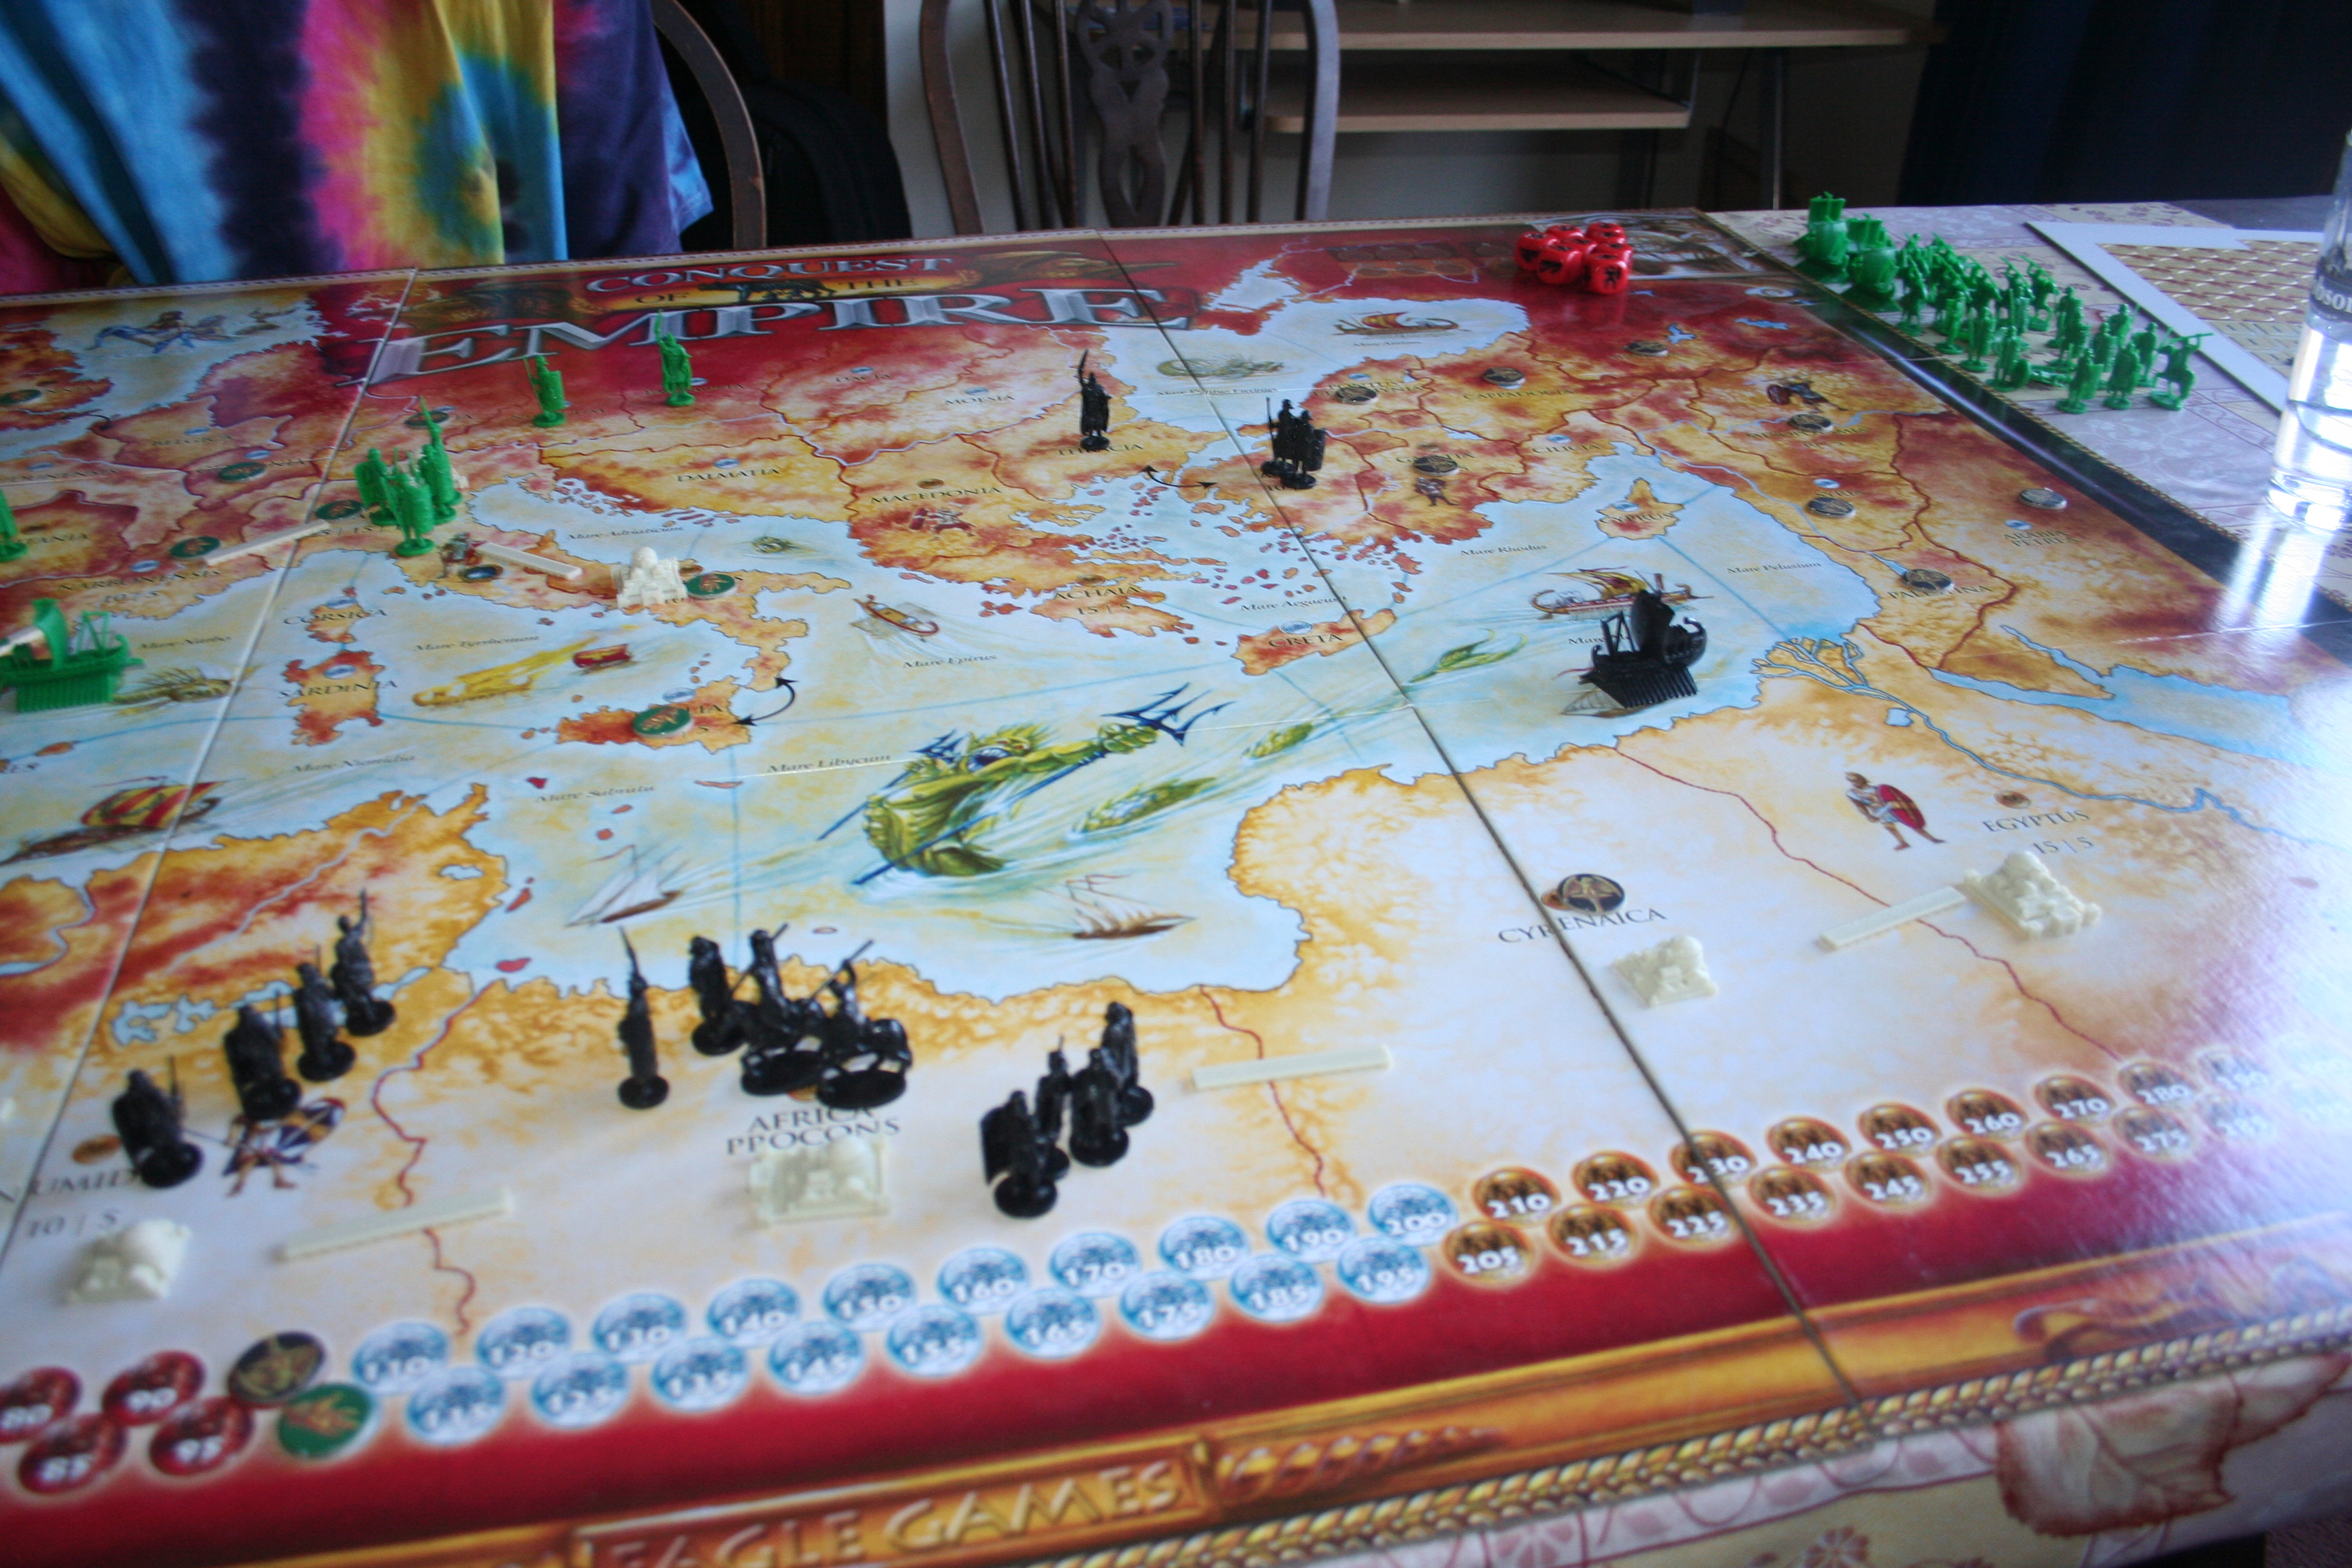
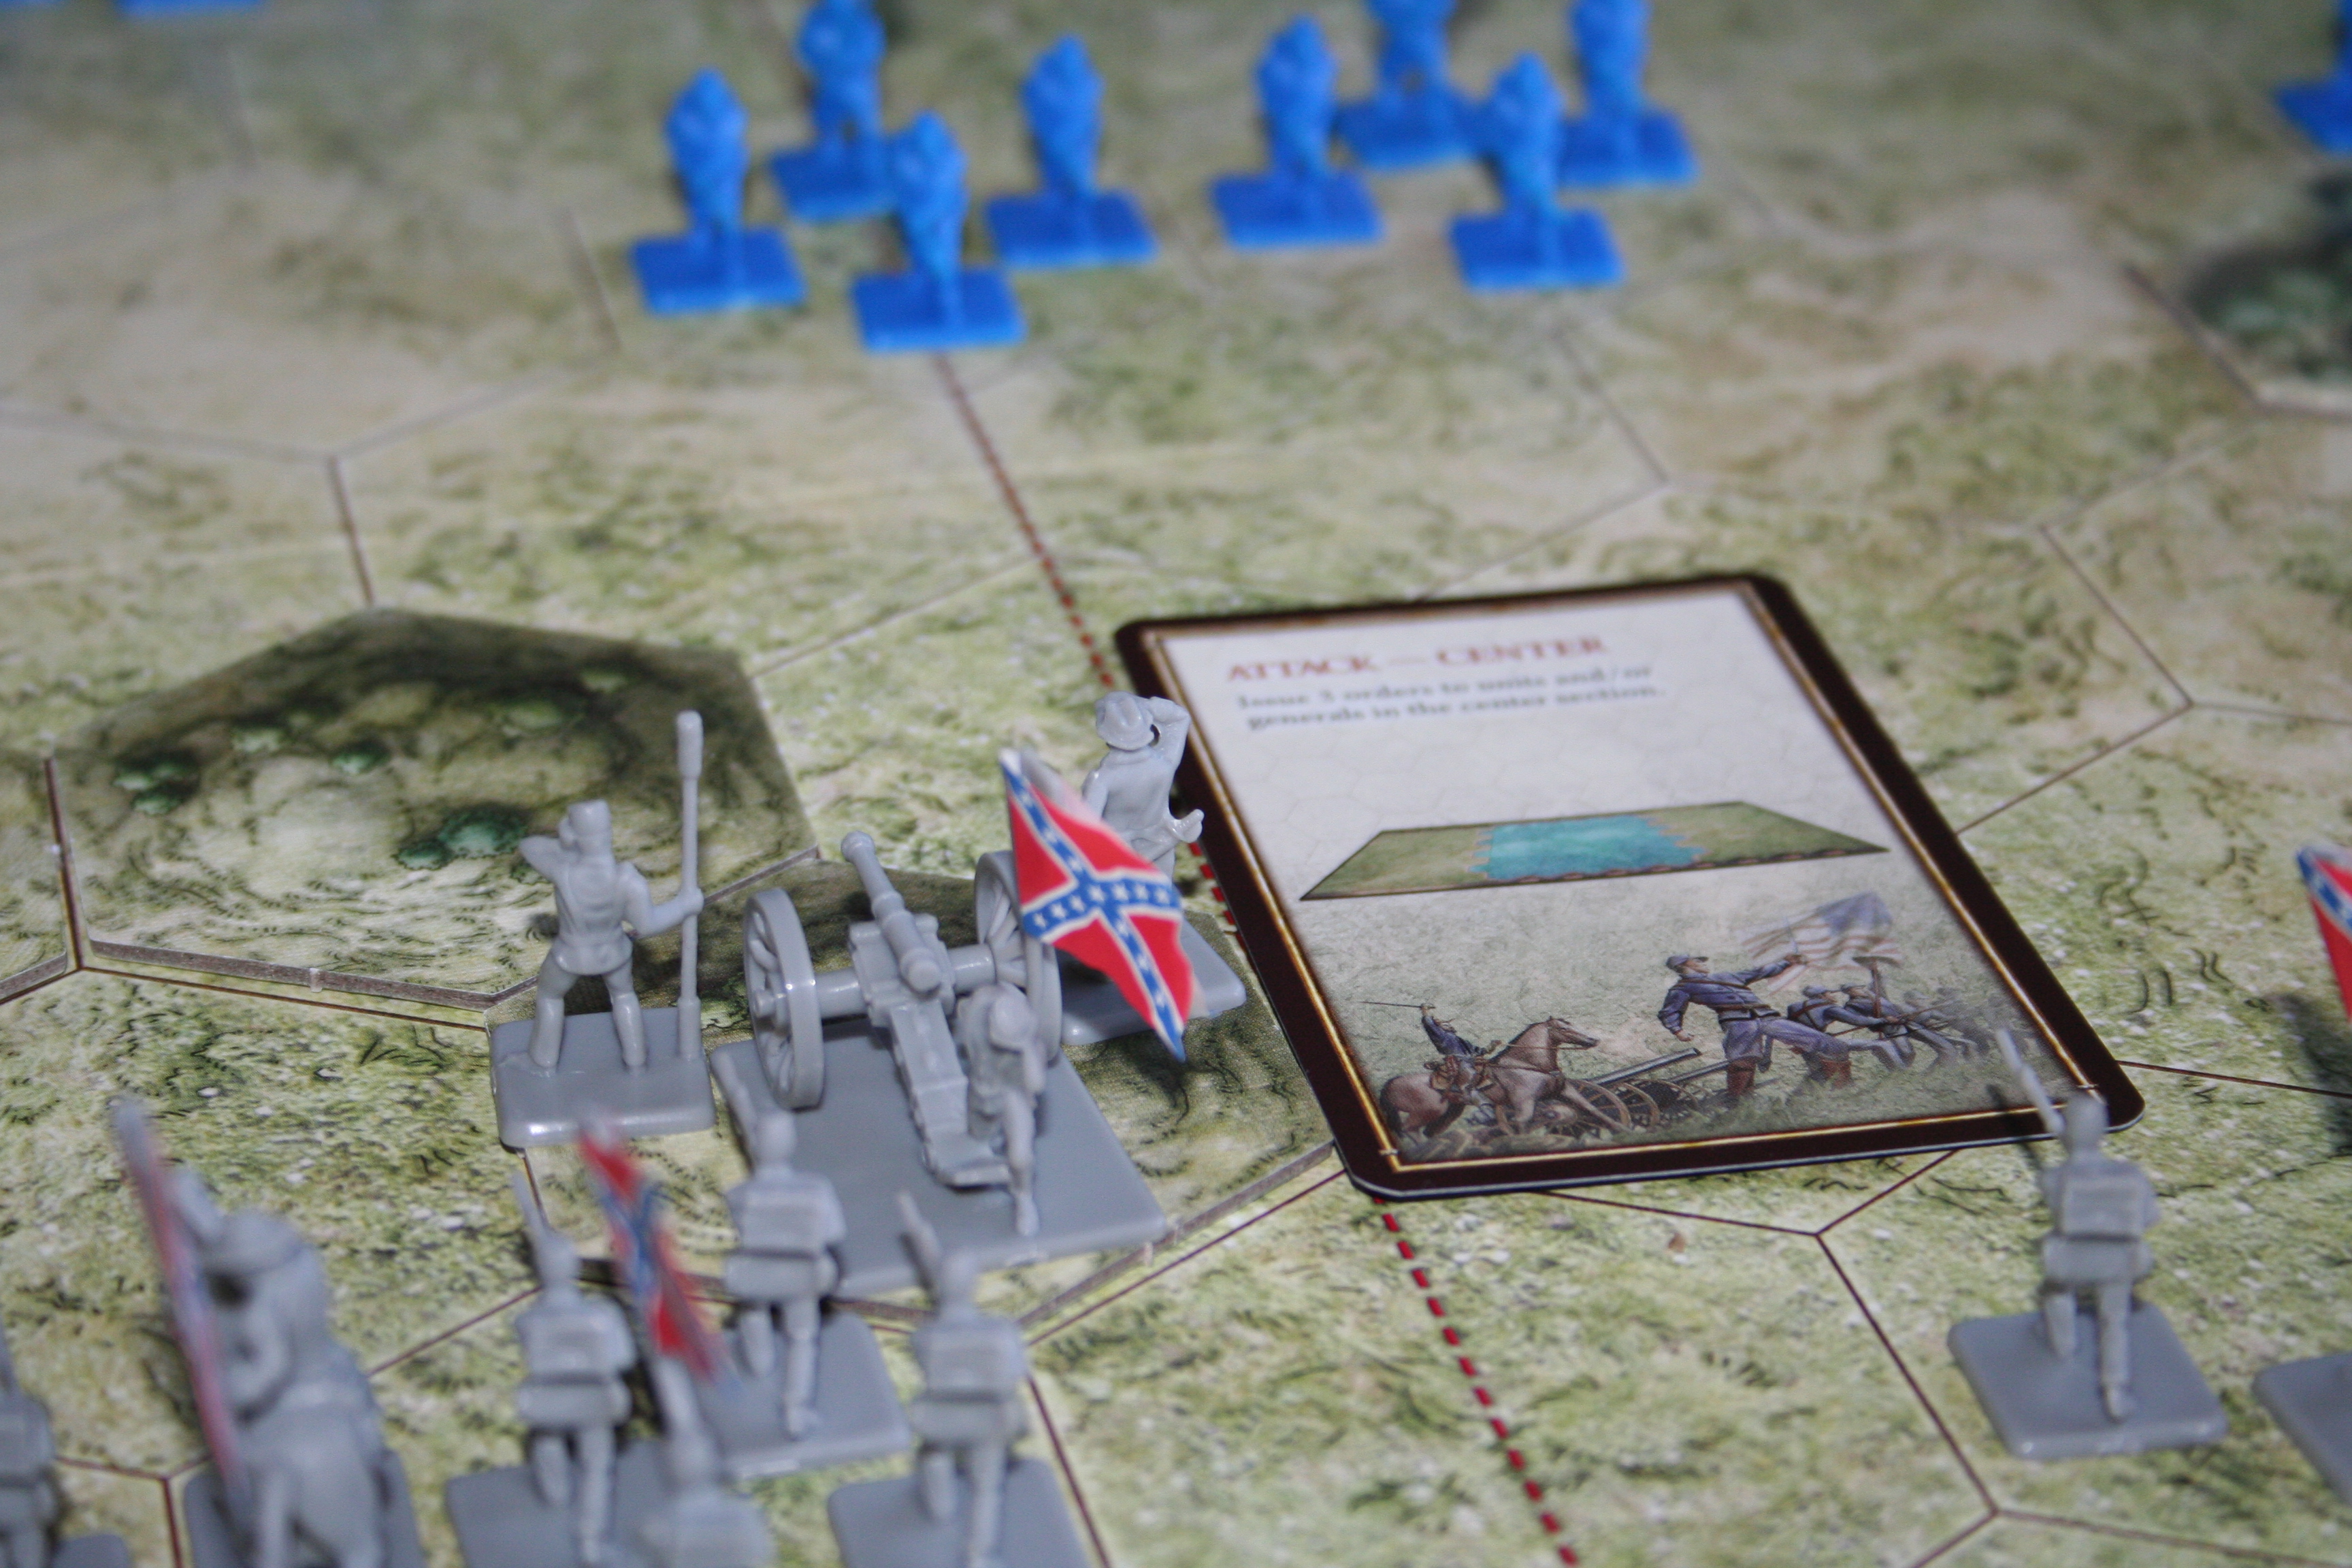
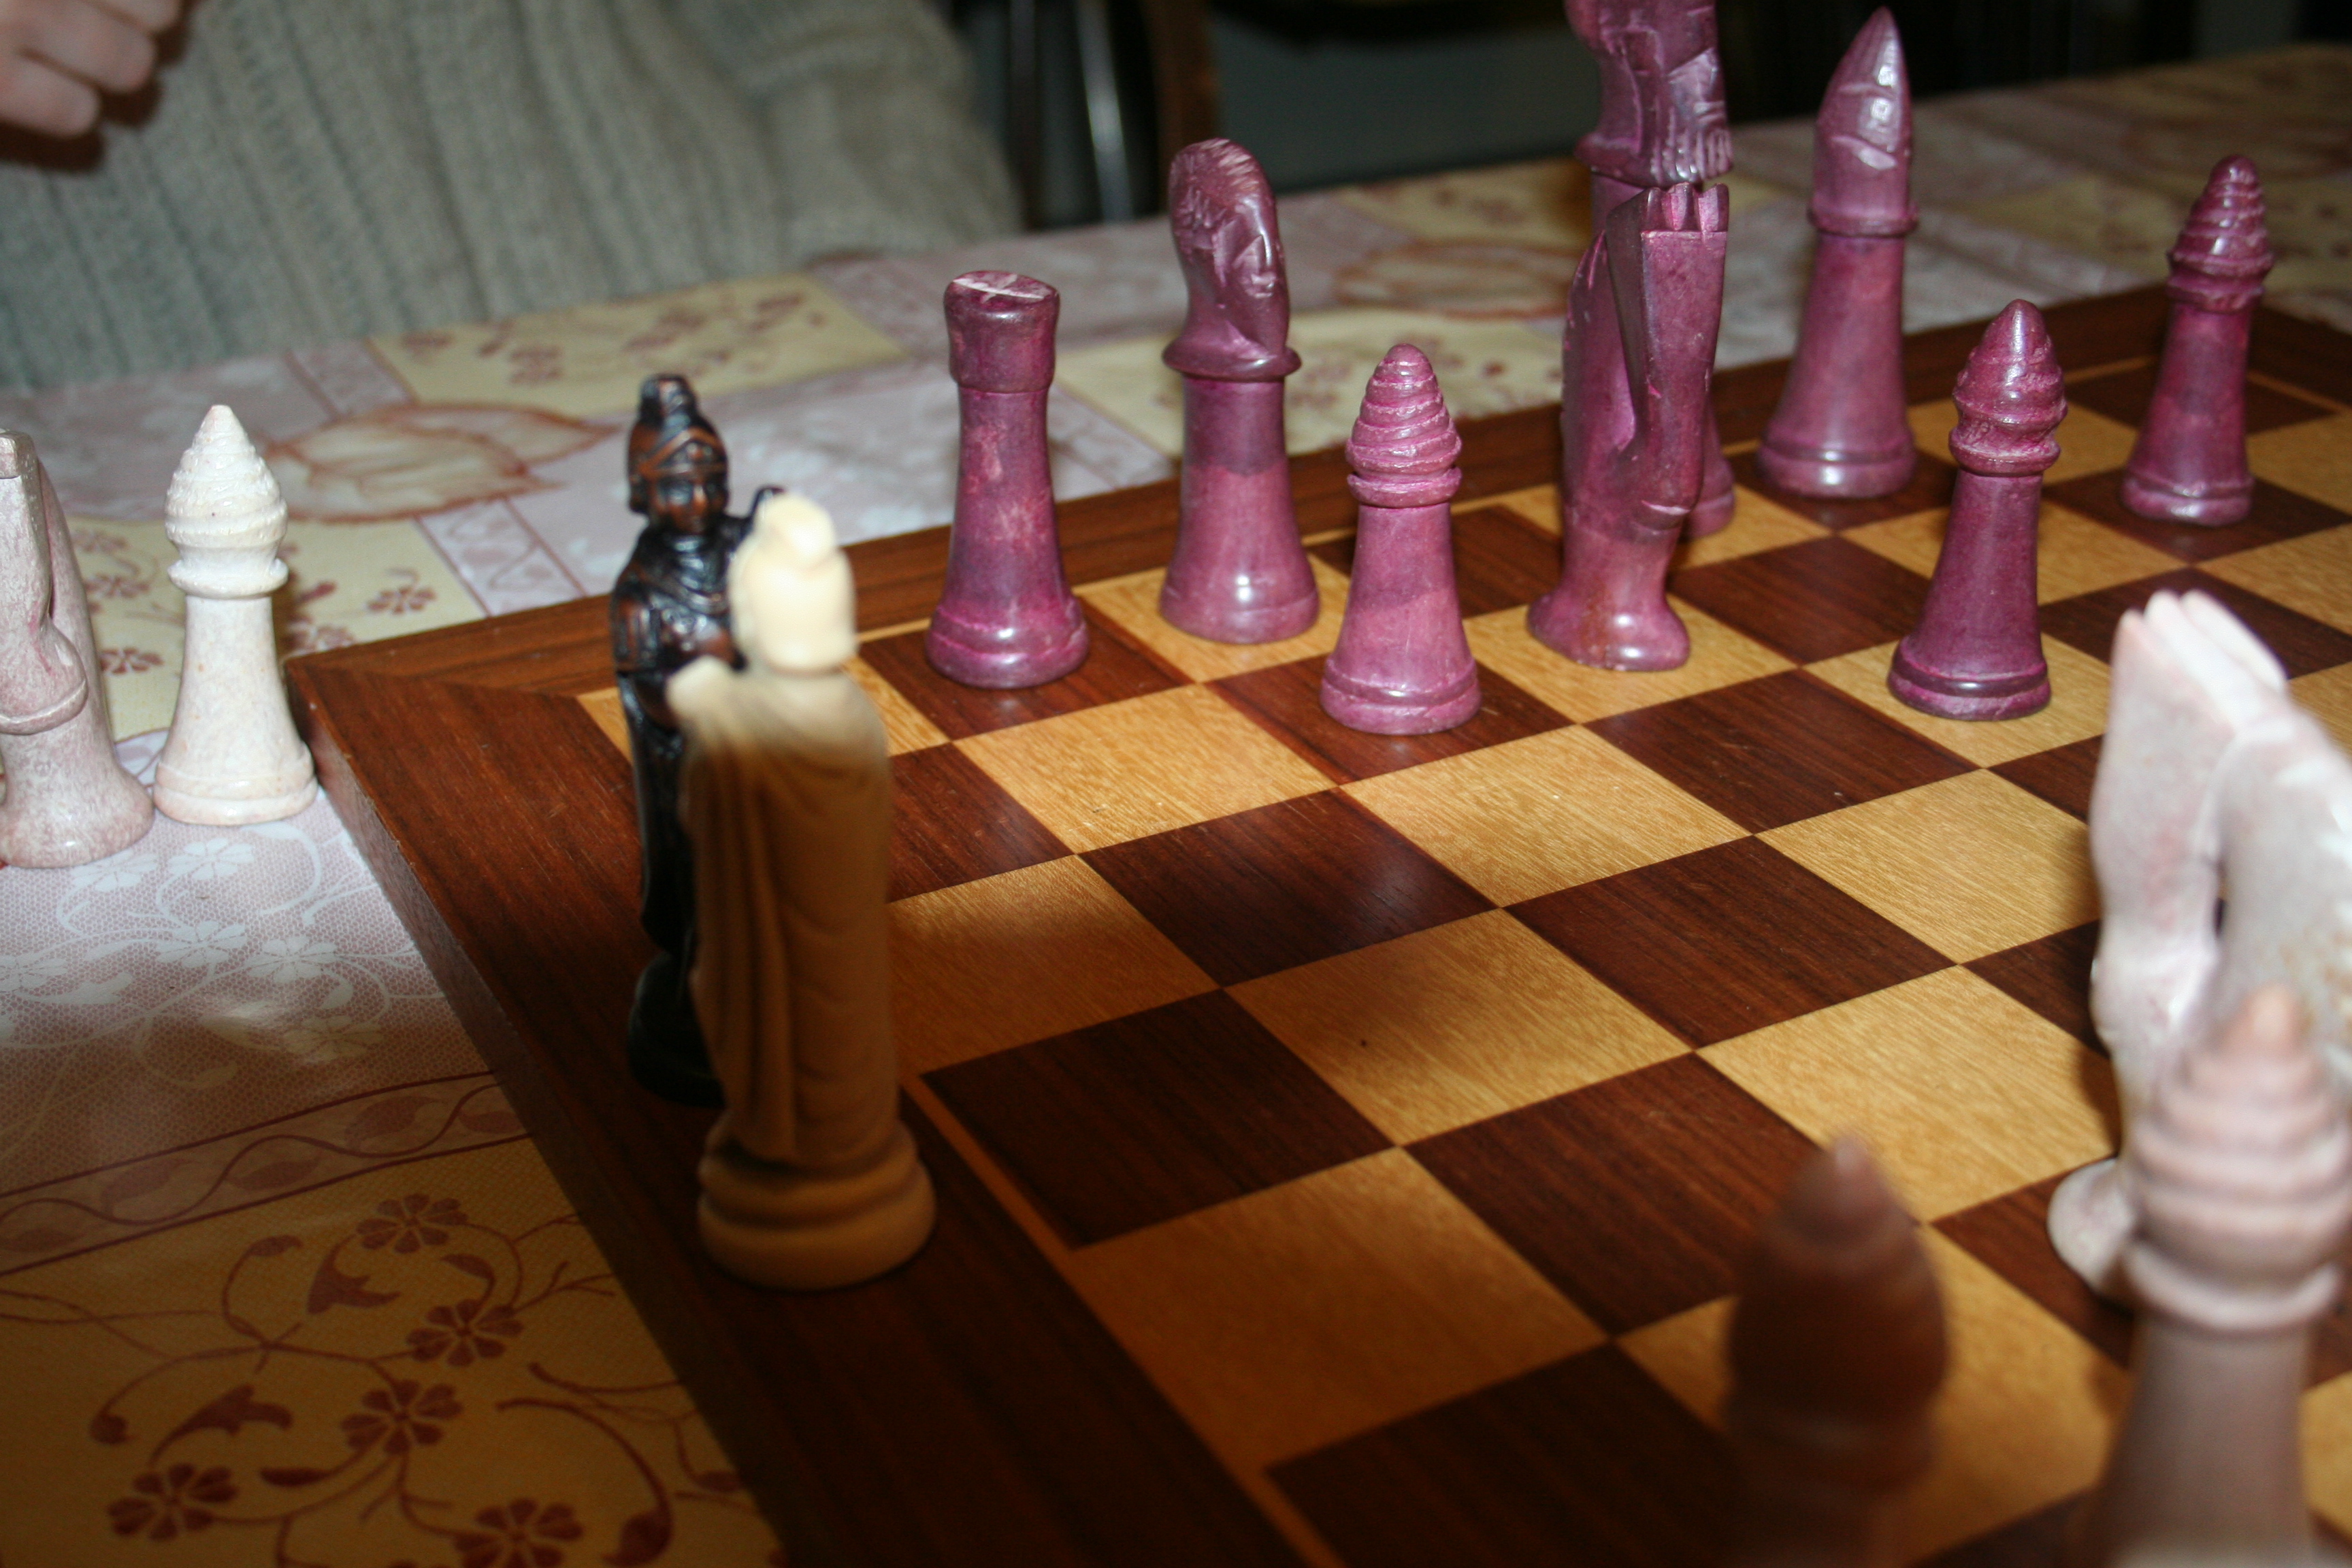
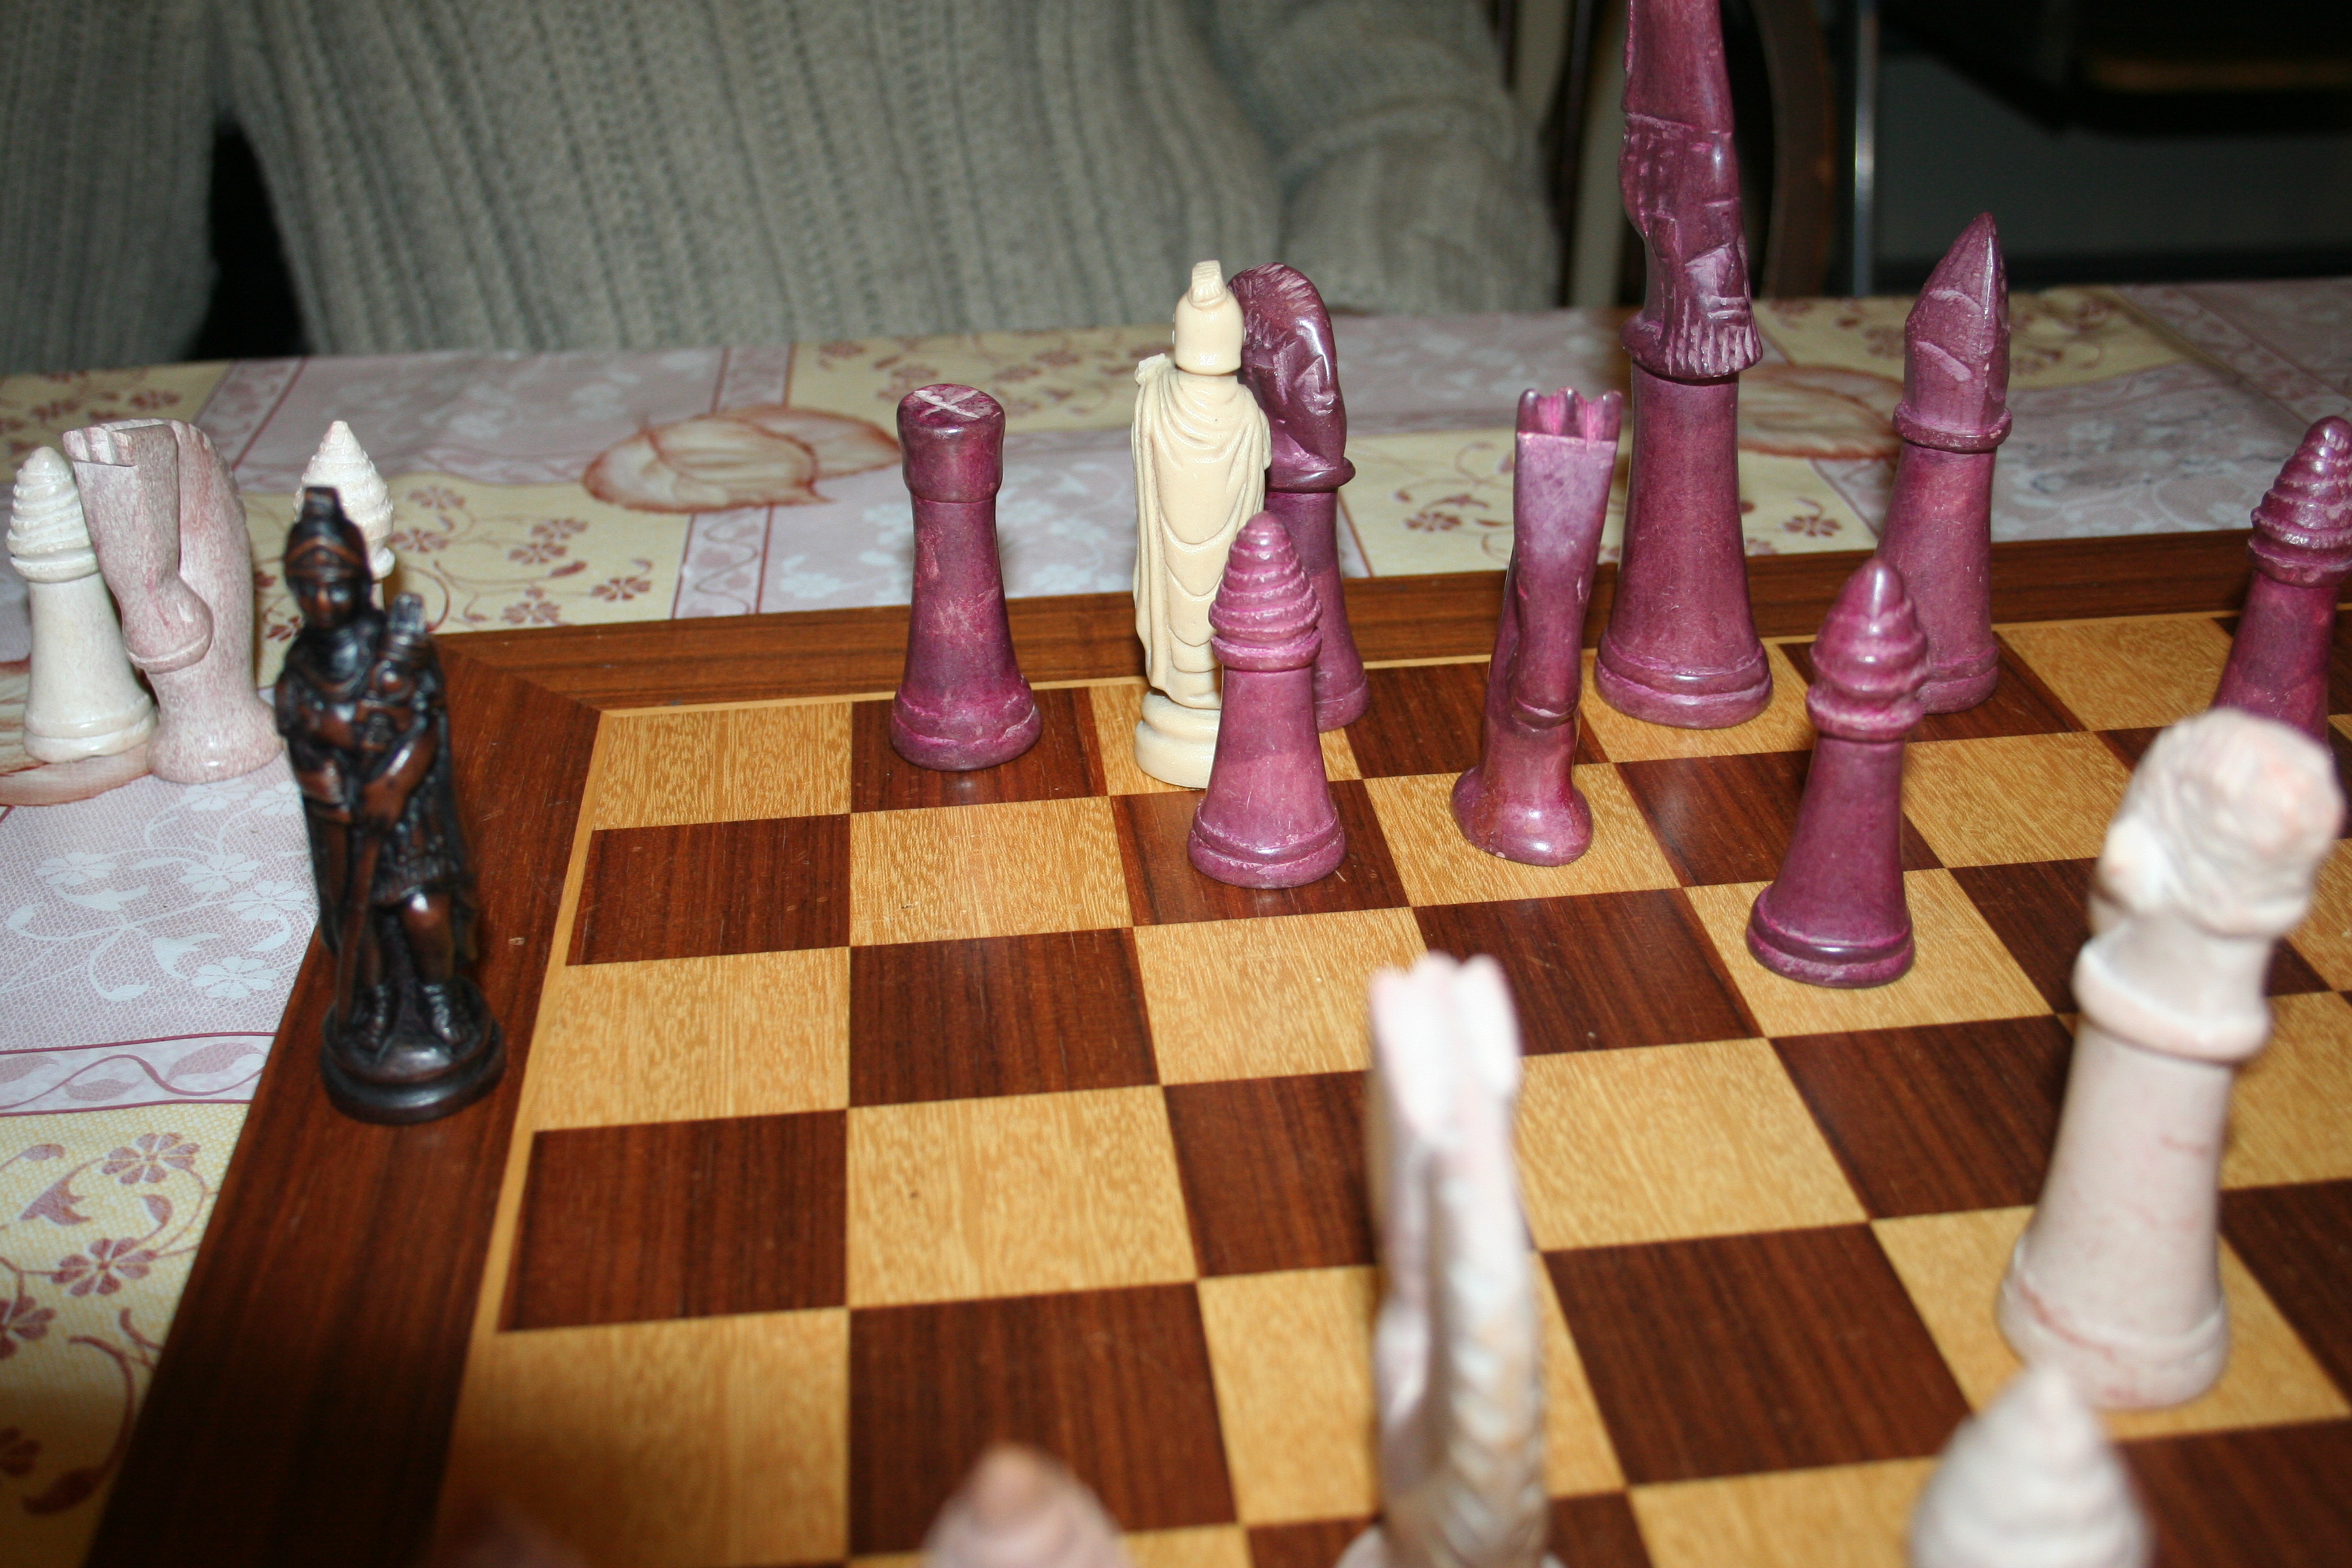
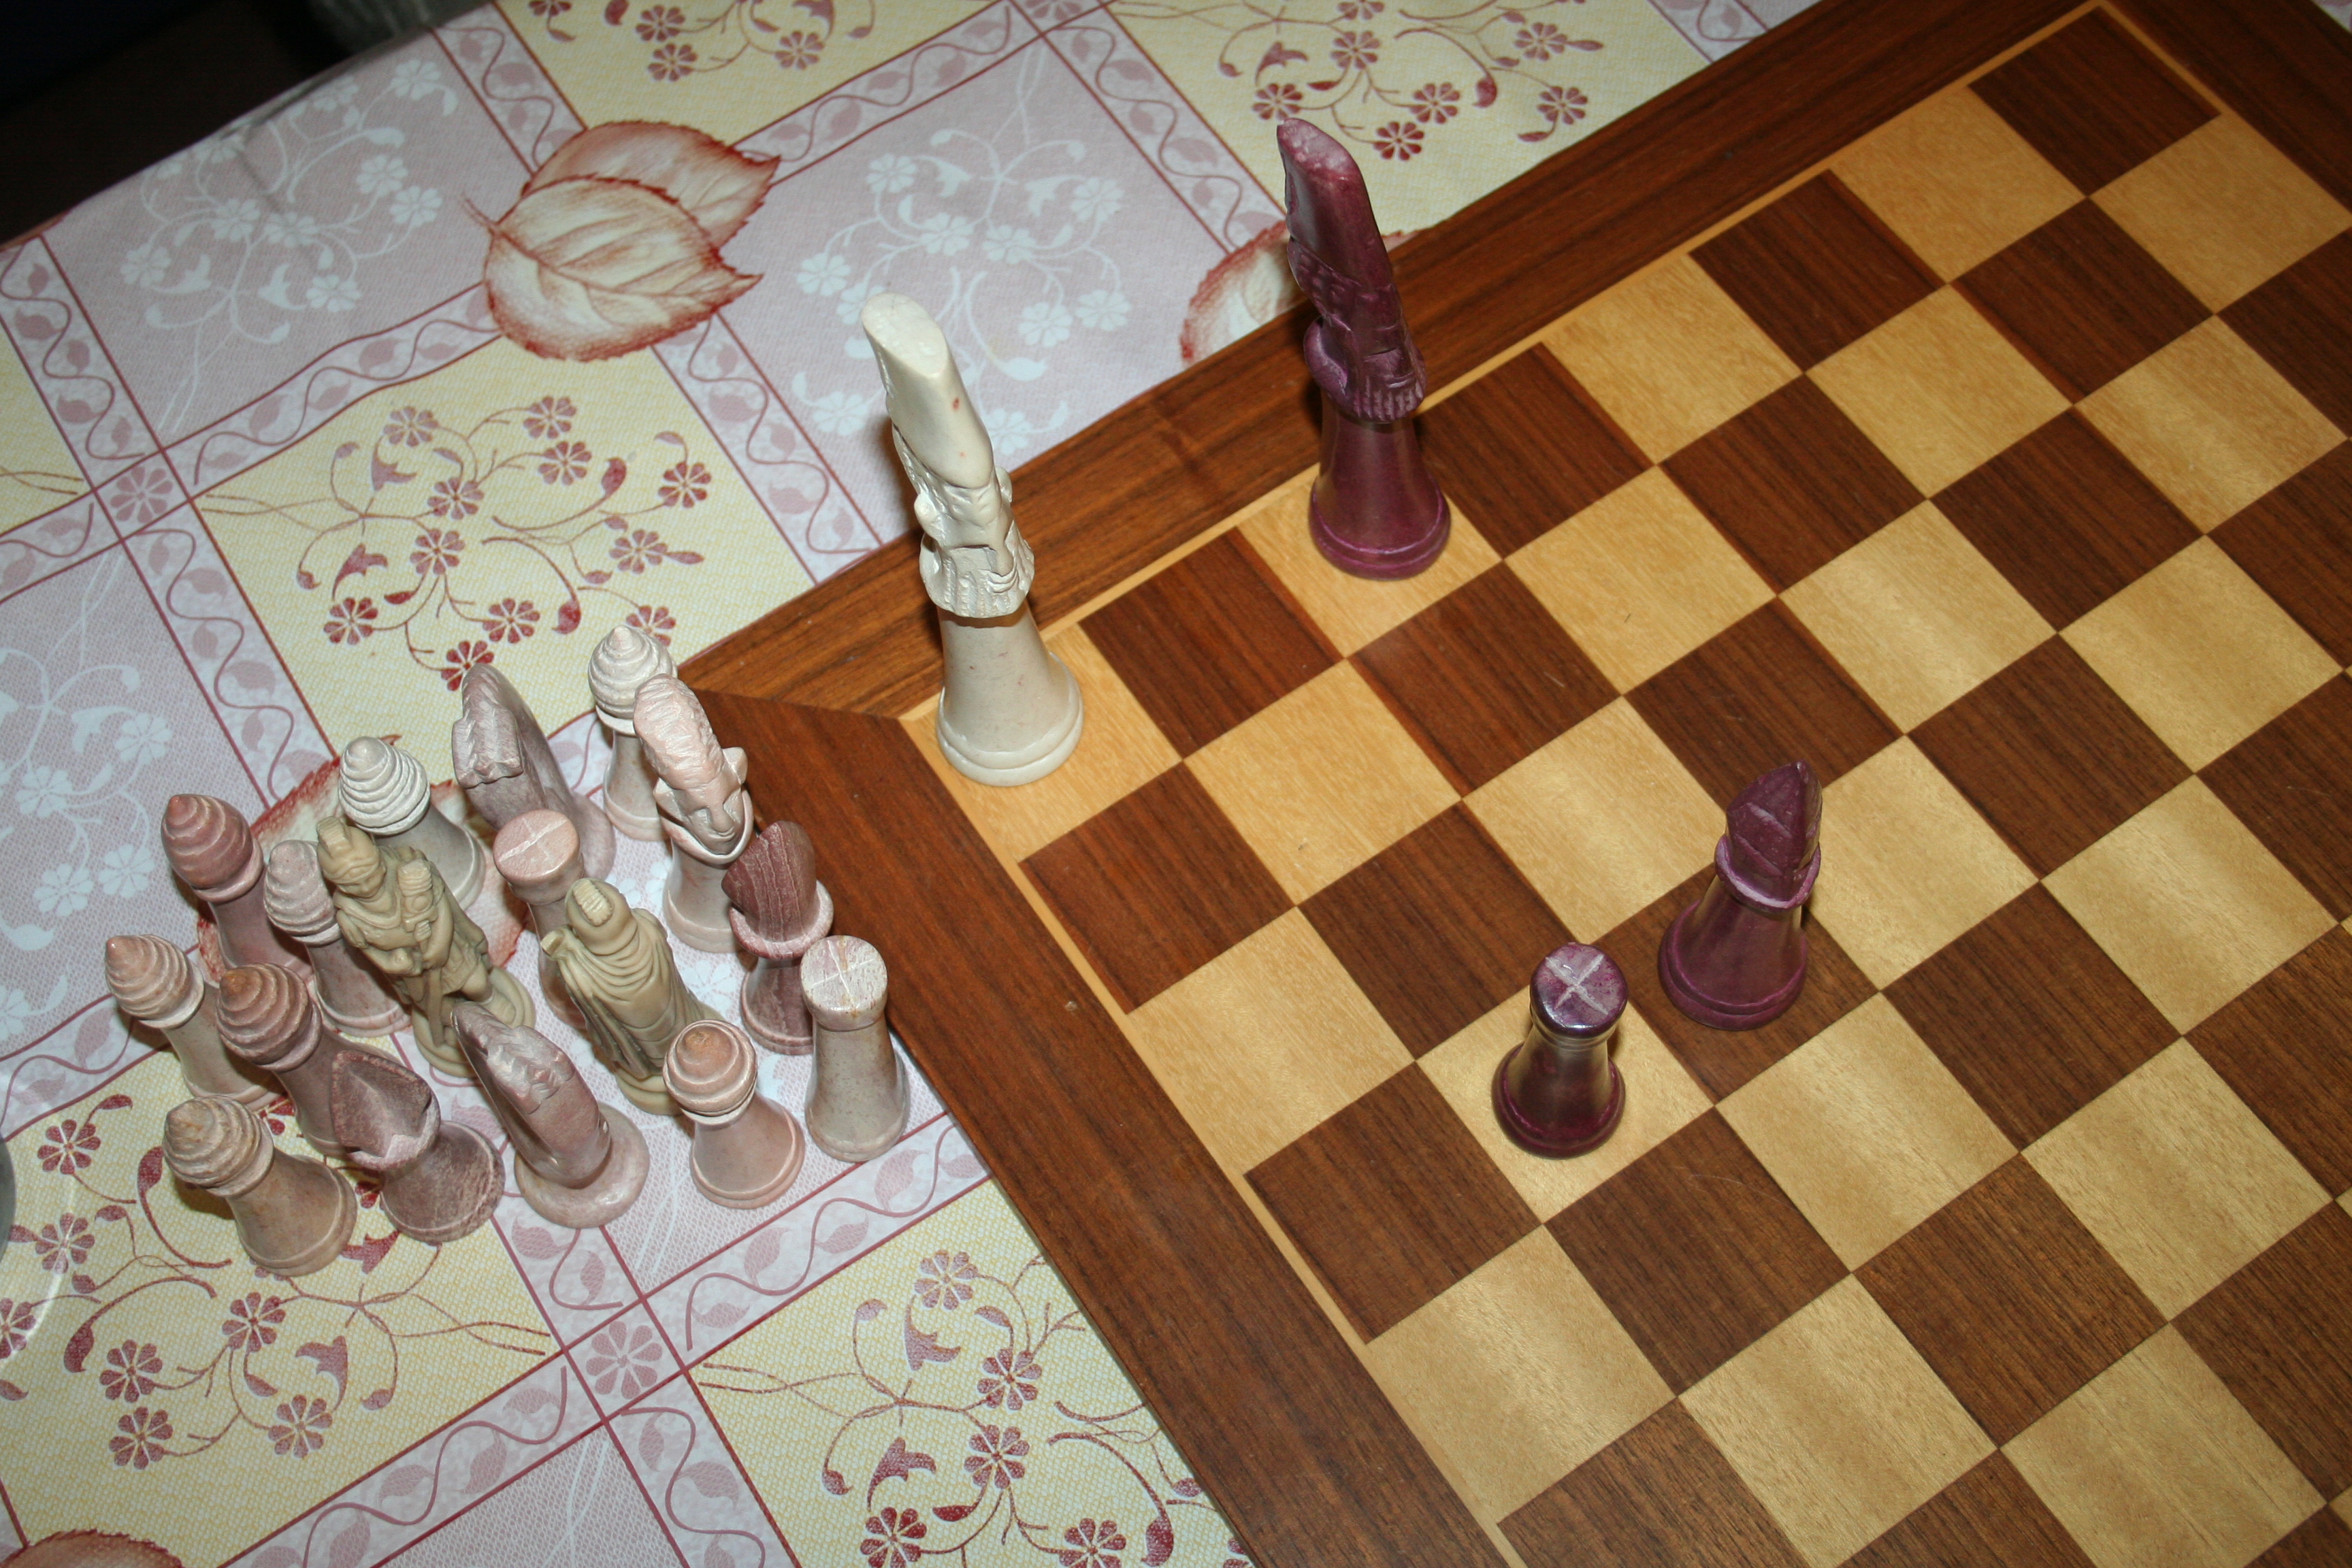
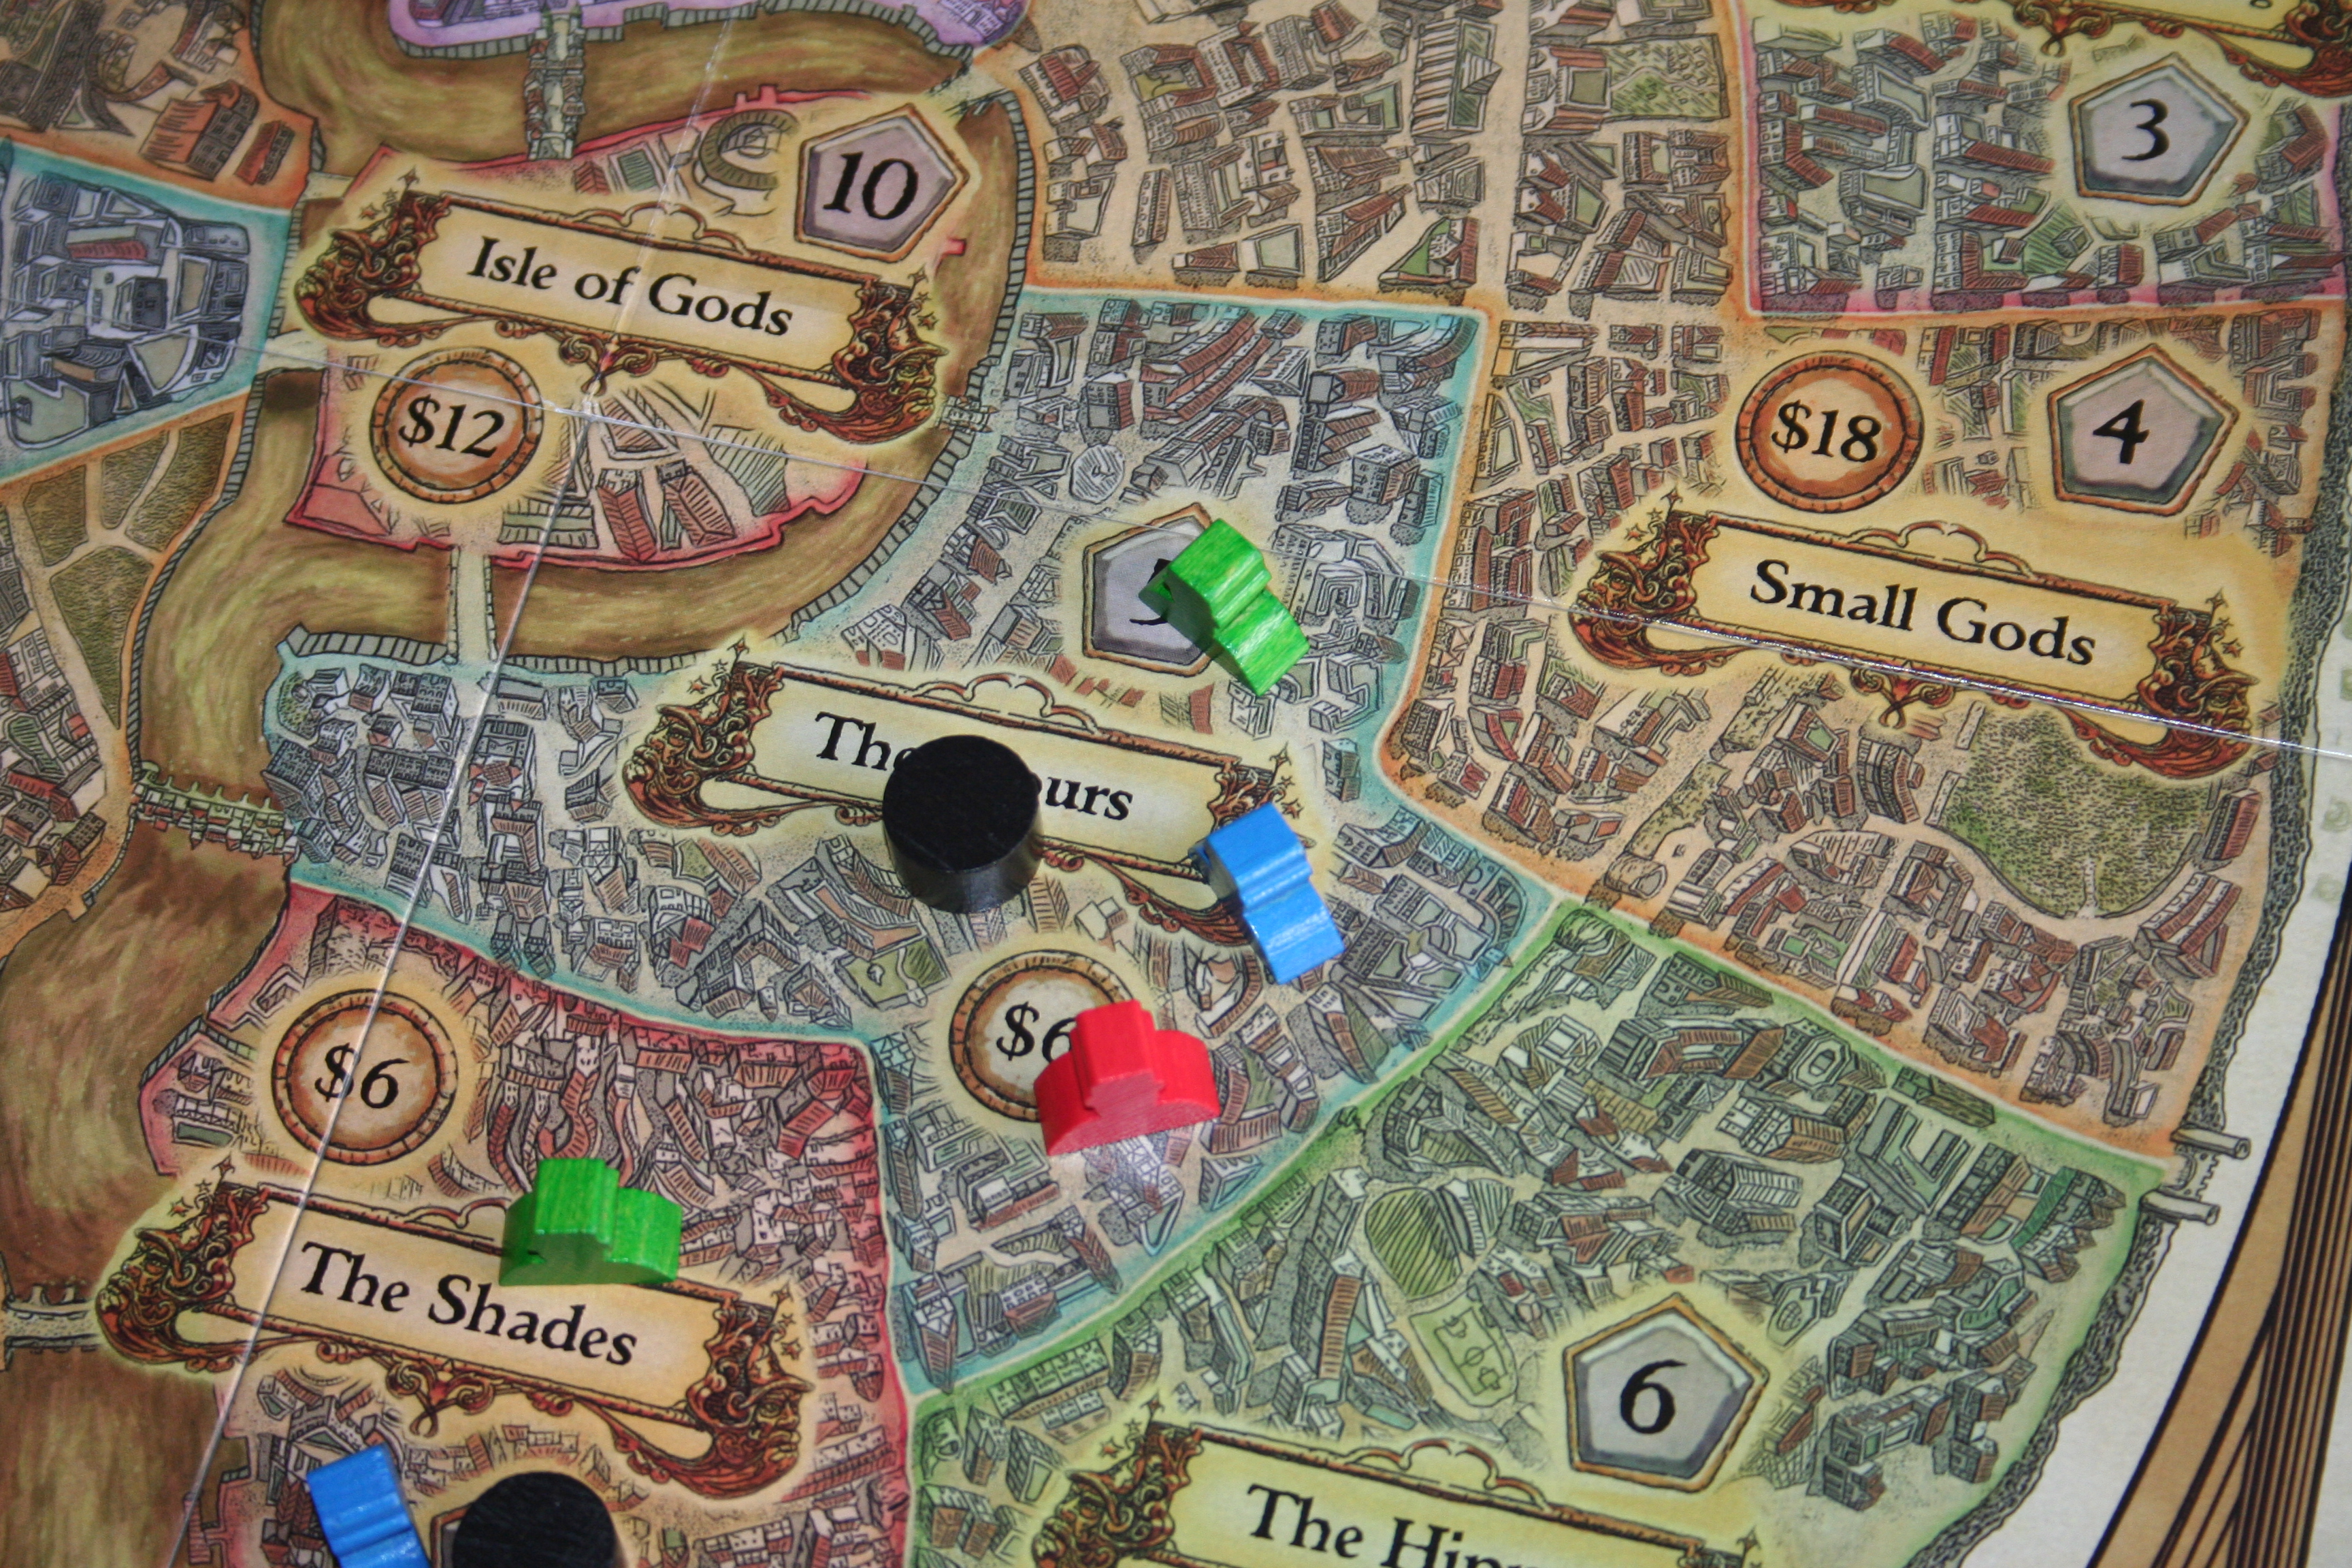
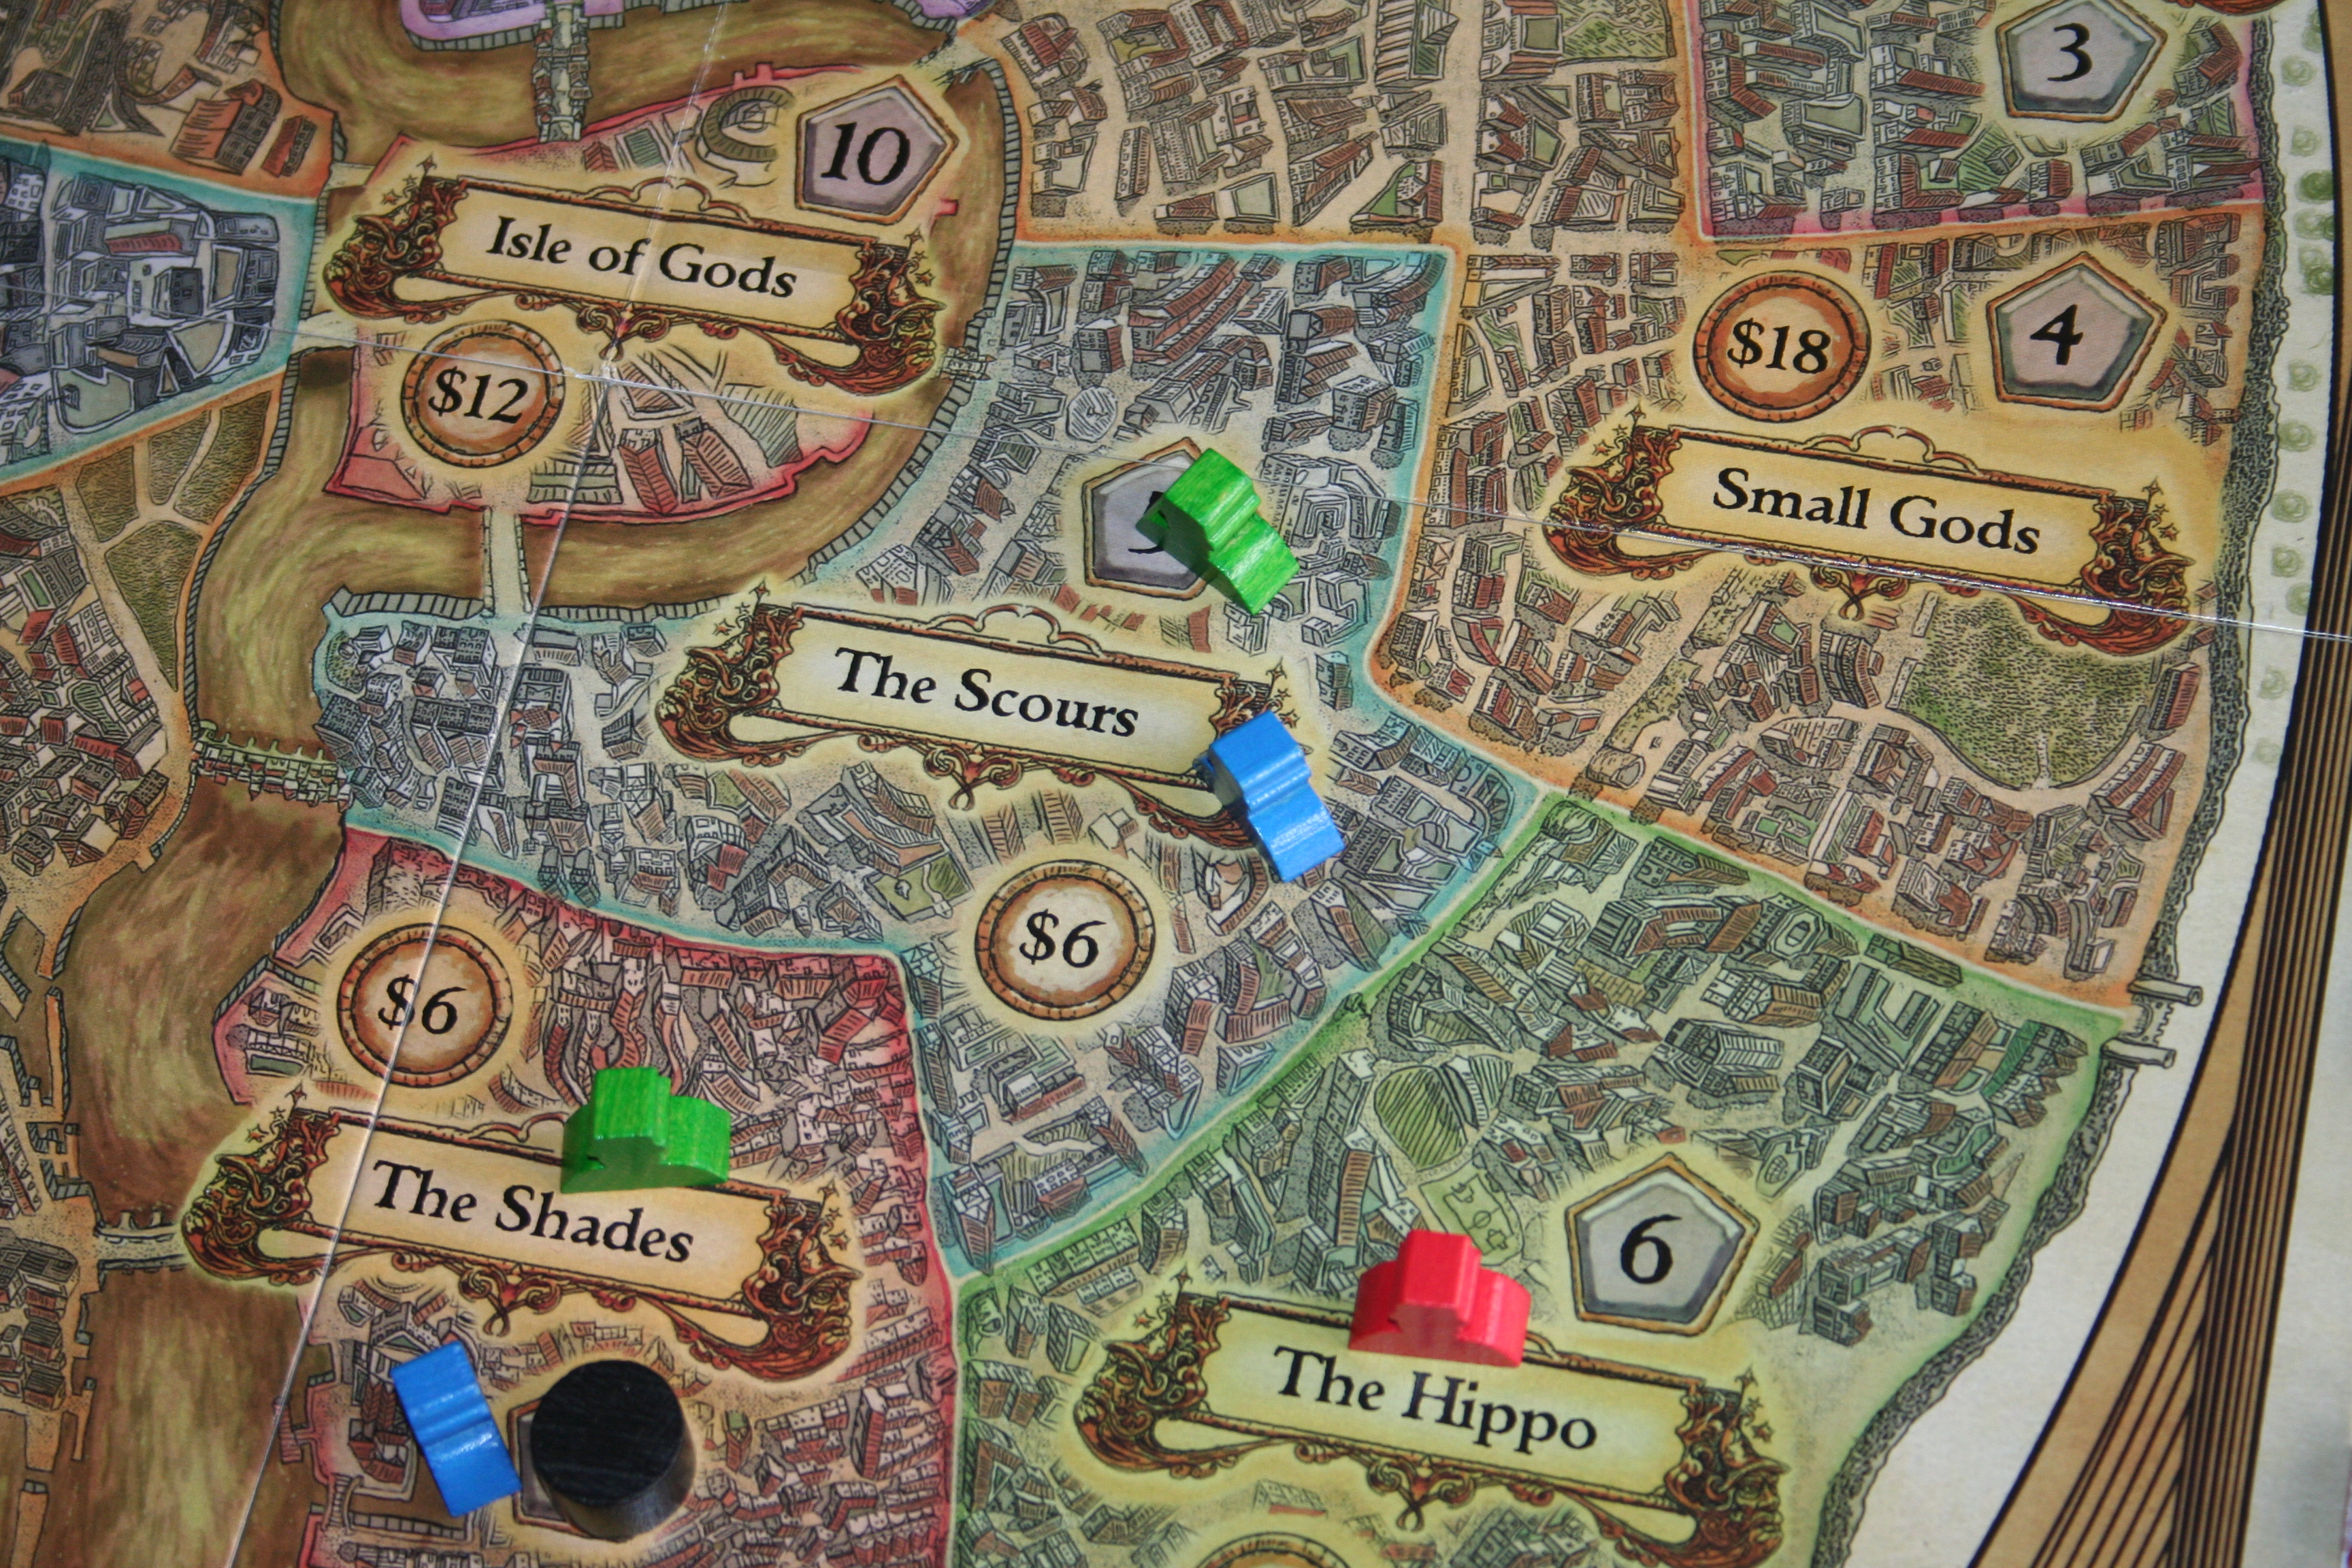
So first up is movement, normal pieces can only move when attached to a General/Caesar. When they’re attached they form a legion; a legion may be up to 5 pieces (of any type) and then the General/Caesar to make a legion of six pieces overall. Without roads normal pieces may only move one space (being from one province to another) in a turn, however General/Caesar may move two, so they may move with a legion and then one further turn on their own. However they cannot fight by themselves – but are useful for conquering unoccupied provinces. The exception to this is roads; once on a road a player may move as far along that road as he/she likes. Galleys are the only units that can move without a General/Caesar, they can move up to two sea provinces even with no units in them.

The first move of the game.

The second part of a players turn is combat. Combat occurs when you move your pieces into a province occupied by an enemy and once you have finished all of your moving.

Just before combat.
Just before combat.

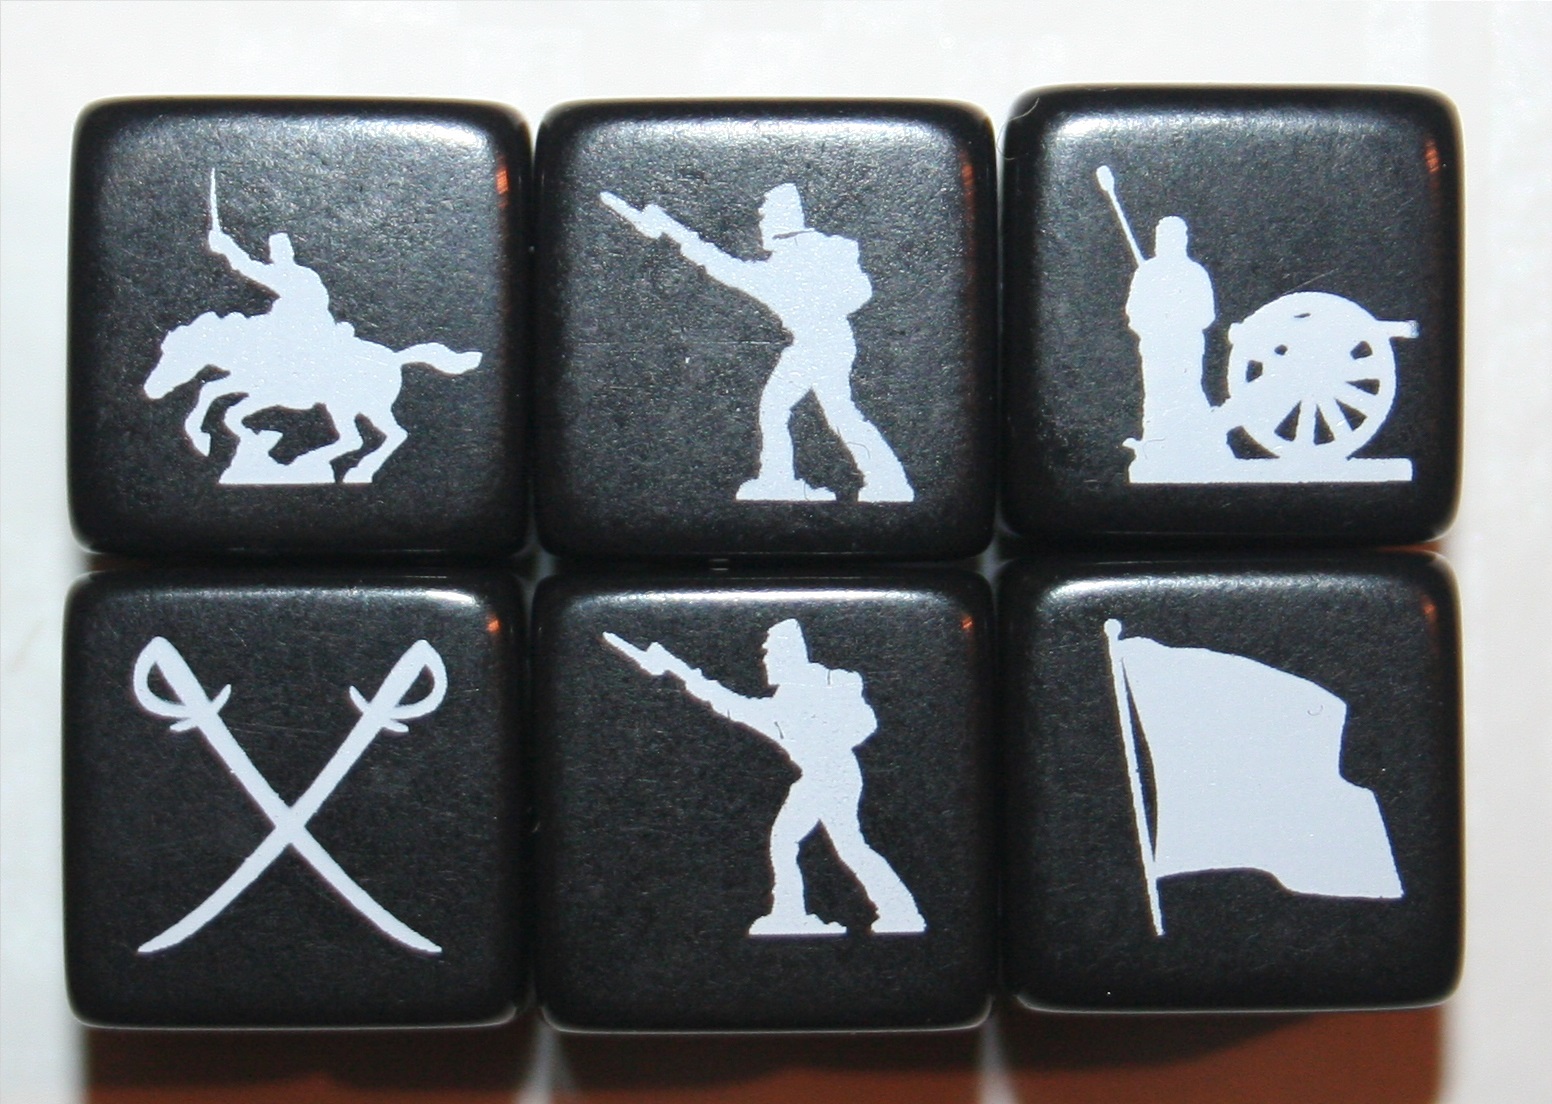
Combat is somewhat similar to Battle Cry! (as reviewed here) in that it uses dice with symbols that show which piece have to be removed. You role as many dice as there are piece in your legion (up to 6) and the defender does the same. the relevant pieces are then removed according to the symbols on the dice, and either you fight again or one player retreats. Generals/Caesar are the last pieces to be removed from any legion and can only be captured when the rest of the legion has been destroyed. Captured Generals are kept by the winner and can be bartered with later in the move, if Caesar is captured the person who loses their Caesar has lost the game and is out.

A captured Cesar.
A captured Caesar.

The next phase of a move is to collect tribute, that’s as simple as it sounds, you look at the tribute scale at the bottom of the board and collect the amount of tribute you are due.

A pile of gold!
A pile of gold!

The next phase is to destroy cites, you can do this in provinces you own if they are about to be captured to stop the other player gaining any benefits from them. This phase doesn’t have to be done as you may not be in a situation where its required.

The next phase is to buy pieces. You use your tribute to to buy pieces to build a bigger army. Pieces initially cost:

  1. Infantry – 10
  2. Cavalry – 20
  3. Galleys – 20
  4. Catapult – 30
  5. Fortified City – 50
  6. City – 30
  7. Fortification – 20
  8. Road – 10

However when inflation is trigger the first time (marked by the change in the tribute scale at the bottom of the board) cost doubles, when its triggered again (by the second change in the scale) the cost triples from the original prices.

A newly bought army.

The very last phase of a players move is to places his newly brought pieces. All new combat units must be placed in the home province of the player buying them, ships are placed on the coast of that province, or on the closest coast if you are landlocked. Cities are placed in the relevant province that you want a city in, only one city per-province and only one fortification per-city. Roads can only be built between two cities in adjacent provinces but multiple road sections between multiple cities can be used to make one long road.

Roads!
Roads!

This process is then repeated until there is only one players Caesar remaining.

Strategy:

Now, like most games on this blog I don’t claim to be a master ,but here are a few things I picked up that are important:

  1. DON’T FOR GET ABOUT YOUR CAESAR! That’s how I won the game we played, he was left in a province by himself. Always know where he is and always have him protected away from the action (unless you have no choice but t0 have him in the action.)
  2. MONEY IS POWER!  Conquering provinces is important to generate more tribute so you can buy more units so you can have more power.
  3. DON’T FORGET ABOUT SHIPS! Ships look like they can be a very useful tool to attack your enemy where he/she is not expecting.
  4. DON’T FORGET YOU CAN DESTROY YOUR OWN CITIES! Also destroying a city will destroy a road that runs between it and another city as roads can only exist between two cities. This could help slow a fast enemy advance.
  5. BRUTE FORCE IS KING! Due to the luck/probability of the dice actually being 100% tactical is difficult, so just out manning the other player in all conflicts is advised.

History and Interesting Things:

      1. While I have stated the publication date of the game as 2005, and hyper linked the 2005 game on BoardGameGeek, the original version of the game was released in 1984 by Milton Bradley and it’s sole designer was Larry Harris, Jr.
      2. However the original version of the game’s catapult rules were considered to be “broken” so the 2005 version of the game was issued with two sets of rules, one that was similar to the original rules but with fixed catapult rules (the classic rules, the ones played in this article) and another completely new set that were based on Martin Wallace’s Struggle of Empires (these are Conquest of the Empire II rules).
      3. The original version of the game also had different combat rules and the rules in the 2005 version were changed along with the dice that have images that correspond to the different units.
      4. The game is thought to be very similar to the game Axis & Alliesthis may be because it’s also designed by Larry Harris, Jr. (and because of this Axis & Allies is obviously going on our Games We Want page).
      5. It was a 2006 Golden Geek Best Wargame Nominee
      6. The original version of the game is now completely out of print and therefore a prized collectors piece.
      7. However, that’s what Wikipedia says but you can buy a 1984 original copy from America for around £55 on Ebay here (eBay listing was active at time of publication).
      8. The game is set in the Roman Empire after the death of Marcus Aurelius. So just after this happened:

(This may be from the film Gladiator and therefore may not be historically accurate).

      1. Like I said in my introduction, the game really is a physical version of Rome: Total War, just less complex and in some ways more fun.
      2. It is also the largest game we have played to date, which makes it just a little bit more awesome.


To Conclude:

I like this game, I like it a lot, but I was always going to – as I said in my introduction, it’s just table top RTW. However this version of the rules has quite a lot of ambiguity but with careful reading and a  bit of logic you can think your way through this. There are a few thing I think should be done differently, for example you should be able to build units in places other than your home provinces, other cities would have had barracks and been able to train men etc. Also it just feels wrong to collect your money half way through your turn, everyone knows turns begin with collecting money, it’s true of so many games, both table top and computerized. However I understand the building units one turn and not being able to move the till the next because it represents a training time.

The biggest issue with this game though is this:

Everything thrown in the box!

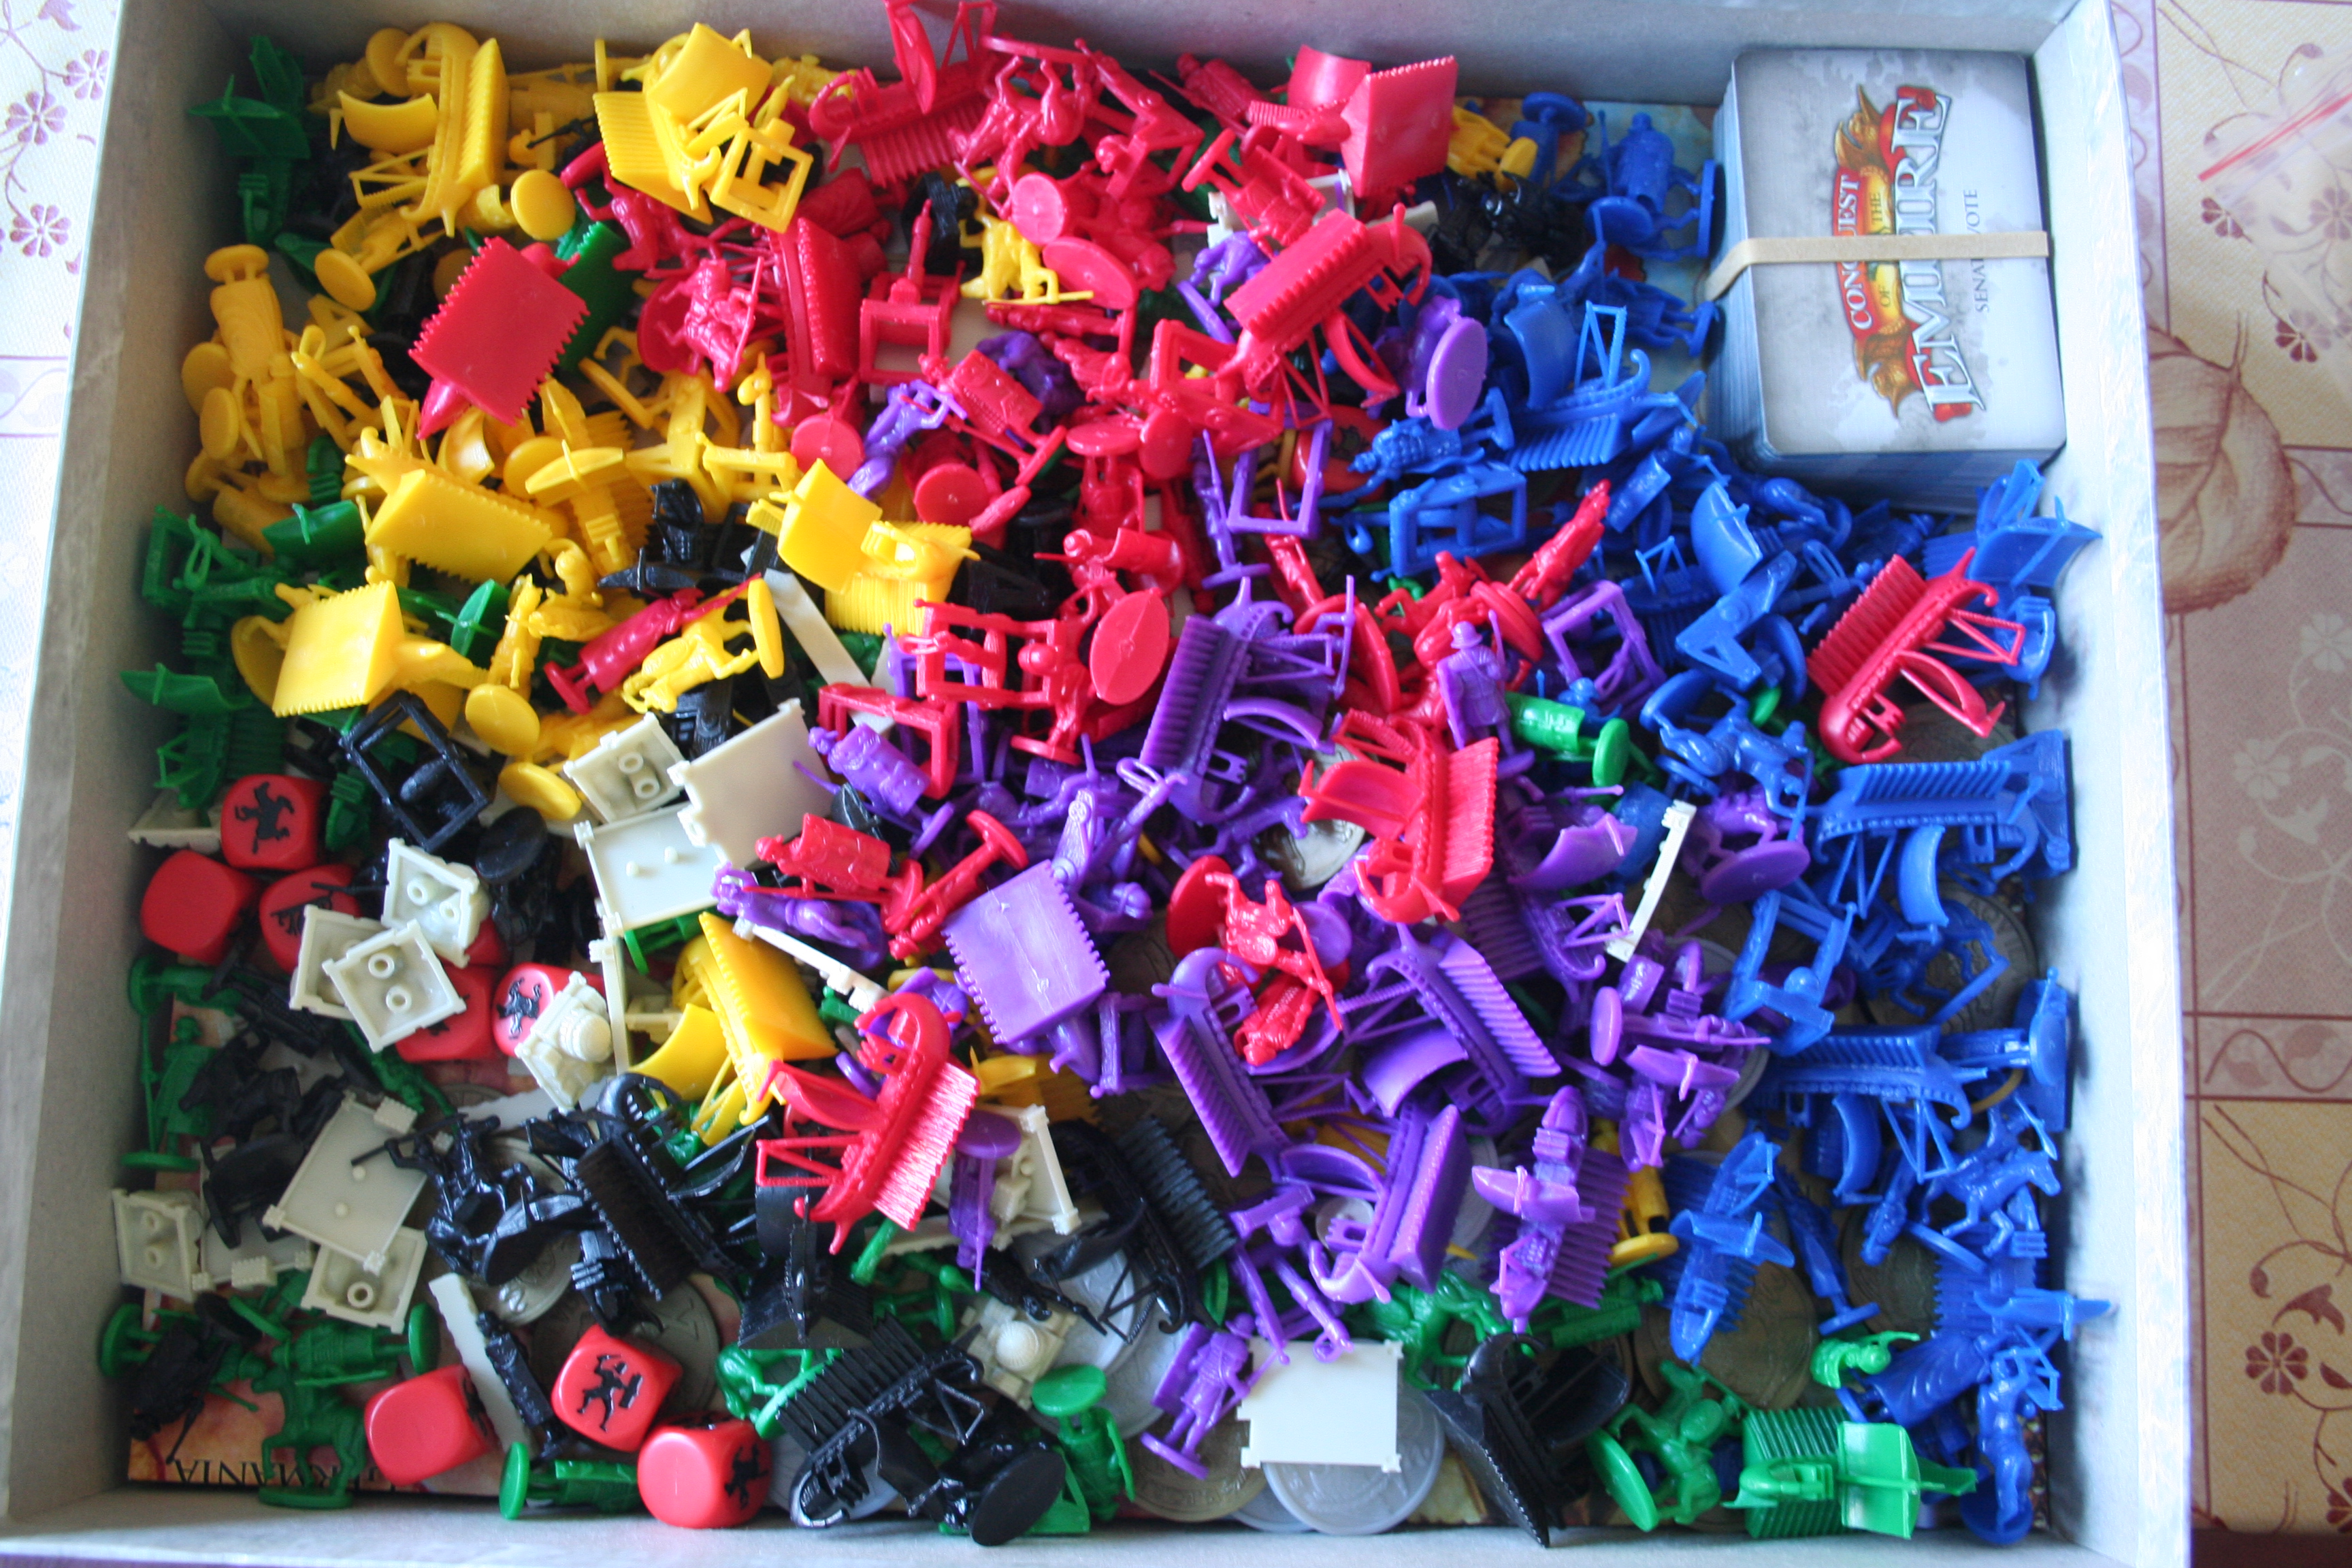
POOR BOX DESIGN! Now you may say that this is irrelevant to the game in the sense that it doesn’t affect game play. But it does, if you’ve had to spend 20 minutes sorting out pieces because there in a mixed mess you’re not going to have the same amount of fun playing the game as if they were all sorted already in a vacuum-formed tray in the box like 90% of games I’ve played (like Battle Cry!.) The only other game I’ve come across to rival this is the Pirate of the Caribbean edition of Buccaneer! Which you can read my rant about at the end of the post on it here.

But all in all Conquest of the Empire is a good and fun game (perhaps not quite as good/well thought out as Battle Cry! and definitely not as versatile). It’s also very large which for some unknown reason makes it more exciting…

We’ll have to wait and see if the other way of playing it is as good or perhaps better.

P.S. I (Miriam) wouldn’t usually add on to a post like this, but it was more like 2 hours sorting time than 20 minutes which makes this, in my opinion, an epic design flaw… Especially when trying to determine if all the pieces were still there.

They weren’t.

Battle Cry!

4 - 5


Number of Players: 2

Year of Publication: 1999/2010 (Anniversary Edition)

Creator: Richard Borg

Picture lovingly borrowed from http://www.sonofthesouth.net/uncle-sam/uncle-sam-posters.htm

As is self-evident from the name of the game Battle Cry is a strategy war game. It recreates the American Civil War. Players play as the Union or the Confederates, in other words, North or South America and can play through each of 30 scenarios from the war. The board is set up using Terrain Tiles with different images on them to create different parts of the country. Each scenario is defined in the Rule Book and has a pictorial representation of the starting layout of the board. My favourite thing about these descriptions is that there’s a little historical information provided about each scenario, but at the bottom, right after it tells you who originally won that battle it says: “The stage is set, the battle lines are drawn, and you are in command. The rest is history.” And it leaves you to find out who the best strategist is!

Dave and I did initially play the game slightly wrong, because we were in a rush. But this just reinforces our firm belief that you should thoroughly read the rules before starting any game.

Our first attempt at playing this game - we set up the board wrong.
Our first attempt at playing this game – we set up the board wrong.

What’s In The Box:

The stuff. I know the layout of the box looks weird, I have since changed it, but taking another photo was a lot of effort...
The stuff. I know the layout of the box looks weird, I have since changed it, but taking another photo was a lot of effort…
  1. 8 Battle Dice
  2. 9 Double-sided Entrenchment/Fieldwork Tokens
  3. 46 Double-sided Terrain Tiles
  4. 14 Double-sided Flag Tokens
  5. 60 Command Cards
  6. 3 Artillery with Flags and 6 Artillery Crewmembers
  7. 3 Generals with Flags, 3 Cavalry with Flags and 6 Cavalry
  8. 10 Infantry with Flags and 30 Infantry

Plus also (and in a different picture just for fun):

The other stuff.
The other stuff. The stuff that didn’t fit in the first photo.

The Game Board, Terrain Reference Sheet and Game Rule Book.

Playing The Game:

Objective: To capture a given number of your opponents flags before they do yours and win the match!

Although this game has a few scenarios that’re a little time-consuming to set up, it’s actually not all that complicated. Turns consist of five parts: playing a Command Card, giving orders, moving, battling and drawing a new card. I’ve only played two of the available scenarios so far, but both have been really good. The starting set up for the board on the simplest set up is this:

The starting set up for the simplest scenario, called First Bull Run. Blue is Union, Grey is Confederate.

To give you an idea of how simple this set-up is comparatively, here’s a photo of the next one on in the Rule Book:

A slightly more complex (and time consuming) set up.

There’re a fair few men on the board here, but it’s a lot simpler than it appears – the occupants of one hex on the board are a unit and all move together. Infantry can only move 1 hex at a time, Cavalry moves 3 hexes, Artillery moves 1 hex, and a General can move 3 by itself or if it’s in a unit with Cavalry, but can only move one when in a unit with Infantry.

Command Cards:

There are two different kinds of Command Cards; the Section Cards and the Tactic Cards and Dave and I have ranked the Section Cards in terms of usefulness. The least useful are the Scout cards, these allow you to order one of your units in one section of the board, then draw two cards instead of one, and choose which one to keep, discarding the other. Next are Probe cards, you can now give two orders to two of your units in one section of the board. Yet more useful is Attack, you guessed it already, you can now give three orders to three units in one section of the board. But the most useful of these cards are the Assault cards, these allow you to give one order per card you have including the one you’re playing, to units in one section of the board. The section of the board you give orders in is always specified on these cards and can be either Centre, Left Flank, or Right Flank.

A Section Command Card in play.

The Tactic Cards are very different, they allow you to do a whole host of things that the Section Cards don’t, such as placing Fieldwork Tokens on the board, which changes the terrain, and impacts on sight lines, amongst other things. There are, however, a lot of Tactic Cards, so I’m not going to go into any detail about them. But you can have a photo of one!

An example of a Tactic Command Card in play.
Giving Orders and Moving Units:

Once you’ve read out the Command Card you’ve chosen to play you put it face up on the board and announce which units you intend to move. You must order all units before moving any of them. Next you move your units, taking into consideration terrain restrictions and remembering that a unit cannot battle unless it’s been ordered, even if it does not move.

Battling and Retreating:

Now you can battle! Any unit that’s close enough to an enemy unit (or an Artillery unit that was ordered but not moved) can now try to eliminate some of the opposing soldiers. This is done by rolling Battle Dice. Terrain restrictions, distance from target and type of soldier all effect how many dice you roll, and therefore how likely you are to succeed in doing any damage.

For example; if you’re attacking an enemy unit that’s on a hill hex, you roll one less Battle Dice than normal depending on how far away from the target you are, because you’re attacking uphill, which puts you at a disadvantage.

All units have one member that has a flag in them, when fighting an enemy unit, you always remove the flag bearer last. 

I won’t go through how each unit attacks, but I’ll use Cavalry as an example. Every unit has a different range to the others, Infantry can attack enemy units up to four hexes away, Artillery up to five hexes away, and Cavalry must be adjacent to the unit they wish to attack.

Depending on where you are in relation to the unit you’re targeting you roll a certain number of Battle Dice. Cavalry always roll three, unless terrain battle restrictions state otherwise.

Of the three Battle Dice rolled here two were hits. As you can see, the small image on the dice is of a Cavalry figure. When rolling to eliminate opponents you must roll the correct symbols.

These are all six of the sides of the Battle Dice, and each symbol means something different. Infantry, Cavalry and Artillery are fairly self-explanatory – for every one of those symbols rolled, you can capture one of the equivalent enemy pieces if there is one in the unit you’re attacking. The cross sabres are the only symbol that can remove a General from the board, however, if there’s no General in the unit, sabres also remove anything else. The flag is a retreat:

The Battle Dice. As you can see, there are two Infantry symbols showing. This is because there are two sides of each die with the Infantry symbol on them. Making them the easiest units to capture.

A flag rolled means that the unit you’re attacking must retreat one hex, however, it can’t retreat onto an occupied hex, unless that hex has a General on it that’s not attached to a unit, the General then become attached to the unit and must move with it.

Different Kinds of Terrain:

There are hexes on top of the board, these are the Terrain Tiles. In both the scenarios I’ve played so far there are only three kinds on the board: Woods, Hills and Homestead hexes. These alter the course of the game in that they place restrictions on movement, line of sight and accuracy. So can be used to your advantage, or to severely disadvantage your opponent. All of these act as blocks in the line of sight when you want to attack a unit, but the Woods and the Hills can be incredibly useful. From the top of a hill the range of an Artillery unit is increased by 1, whilst the accuracy of an attacking unit is decreased by 1. Likewise, on a Woods hex the attacking units accuracy is decreased by 1, but the unit inside the Woods has no such impediment.

Winning the Game!

One the page in the Rule Book assigned to whichever scenario you’ve chosen to play there will be a small amount of information underneath the picture of the starting set up. This will include the historical background to that particular battle, which General both sides are commanding as, who moves first, and most importantly, how many flags you need to capture to win. The first player to achieve having this number of their opponents flags, immediately wins the match. However, to play a complete match, you’re supposed to reset the board and change sides, and the winner is determined after both matches are complete. This probably often ends with a draw, but I haven’t yet played a complete match in this way. The game we played the first player to capture six flags won:

My victory stand at the end of the game!

Strategy:

This game is tactical, it requires strategic thinking and a little bit of foresight. I’ve found that on the First Bull Run the best way to play is just to push forward in more or less a straight line, going up hills wherever you can, or into woods. If you’ve got possession of the hills and woods you’ve got the advantage, because your enemy is less likely to be able to capture you when they attack.

This isn’t a huge amount of help, as it’s things that’re mostly just common sense, but I’m not particularly strategically minded, so although I’m not bad at this kind of game, I also don’t make plans when I play them. Just take each turn as it comes, kinda thing.

History and Interesting Things:

  1. The first game to be published under this name was published in 1961. The concept of this game was the same as the version we’ve got, but much much simpler. Each side only has 22 pieces, the grid is square, not hexagonal, and there’s only one battle scenario available to play.
  2. An online version of this game was released in November 2008, to GameTableOnline.com and can be played player vs player or player vs computer.
  3. It won the International Gamers Award in 2001 for the General Strategy: 2-Player category.
  4. I don’t have anything else to write about the history of the game, so have some points about the Civil War instead: Before William Tecumseh Sherman became a famous Union General he was demoted for apparent insanity.
  5. More men died in the Civil War than in any other American conflict, and two-thirds of them died of disease.
  6. During the war Robert E. Lee’s Virginia estate was confiscated and turned into a cemetery by the Union.
  7. Robert E. Lee was the bloodiest General of the war.
  8. President Lincoln was shot at, and almost killed, nearly two years before his assassination riding to the Soldiers’ Home (his summer residence) from the White house on an August evening in 1863.
  9. On the Union side, black soldiers refused their pay for 18 months because they were being paid less than their white comrades.
  10. Harriet Tubman led a raid to free slaves during the war, this one raid freed more than 720 slaves – more than 10 times the number she had freed in 10 years on the Underground Railroad.

I read about the history of the war here, and got my game info off of Wikipedia.

To Conclude:

So  this game is great for a few reasons; it’s easy to understand, it’s easy (though time-consuming) to set up, and there are so many different scenarios that it’s going to be a long time before it stops being interesting!

I recommend it to anyone who enjoys a proper sit-down game. It takes about an hour to play a scenario, with around 15 minutes set up time (this’ll probably become less as we get more familiar with the board and different layouts). For anyone with a son or daughter who’s an up-and-coming tactician, this would be a fantastic game to play with them.

If this is a game that’s up your street, go out and get a copy, and have lots of fun re-writing the course of history!

Escape From Atlantis

4.5 - 5

Number of Players: 2 – 4

Year of Publication: 1986

Creator(s): Julian Courtland-Smith

Escape This:

You have to imagine the Jaws music

So I thought I’d open with that just to get your attention. Escape from Atlantis is a game that’s really up there for me, it’s just really good fun. I remember if from when I was a child; I can’t remember exactly where we used to play it, either my Grandma or my Godmother had a copy, but I used to love it. Now, my sister being the wonderful person she is, bought me an original copy of the 1986 publication, complete and in very good condition, off the internet for my birthday. Naturally since then we’ve played it more times than any other game we’ve played recently.

What’s In The Box:

The Stuff.
The Stuff.
  1. A playing board.
  2. A instruction booklet
  3. An Atlantean Swirler
  4. 7 Grey (rock) land tiles
  5. 12 Green (hills) land tiles
  6. 18 Yellow (sand) land tiles
  7. 6 Sea Monster Pieces
  8. 6 Shark Pieces
  9. 6 Octopus Pieces
  10. 6 Dolphin Pieces
  11. 12 Boats
  12. 48 wooded play pieces divided in two twelve set of four colours (Blue, Yellow, Green and Red)

Playing The Game:

Objective: To save more of your Atlanteans than any of the other players by the time one player saves their last surviving piece.

The board at the start of the game.

You start the game by setting up the island in the middle and then taking turns placing your pieces on it. You can only have one piece occupying each yellow space at the beginning of the game. You then each place a boat on a space adjacent to the island.

IMG_0555
The board after all pieces are placed.

Then you start movement, each player can move three spaces per turn. These three spaces can be used on one man, or split across any combination. They can also be used to move un-manned boats or boats you have control of. You have control of a boat if there are more of your men in the boat than any other players, you share control if you both have one piece in it; meaning you both can move it. If you only have one piece to another players two you cannot then move the boat. Men who’re in the water (not in a boat) can only move one space per turn but three moves still apply so you can use the other two to move something else.

Yellow has control as there's only one red piece in the boat.
Yellow has control as there’s only one red piece in the boat.

The next phase of your go after movement is to take a piece of the island away. Each piece of island has a symbol on the underside representing one of the following; A whirlpool which sucks everything on adjacent spaces (that aren’t land pieces or on land pieces) in and destroys them, a sea monster, a shark, an octopus, a dolphin or a boat; these are all created on the uncovered sea space. Any men that were on the removed land tile are moved to the closest available space on the island – unless it’s the last piece, then they’re cast into the sea. The yellow land tiles are removed first followed by the green then the grey.

The symbol is a triangle which means shark, so a shark has been placed in the space the land tile was on.

The last phase of a players move is to spin the Atlantean swirler. This shows either a; sea monster, octopus, shark or dolphin and the numbers 1 -3 and the letter D. This indicates that you can move the relevant sea creature the relevant number of spaces or if it says D (meaning dive) you can move the creature to any unoccupied space on the board. The sea creatures are the fun part of the game, if you move a sea monster onto a space with a boat or swimmers in it will eat the lot, if you move a shark onto a space with swimmers it will eat them but it will not eat boats, octopuses will only destroy boats and make everyone in them swimmers but will let them live and dolphins are friendly and will carry a swimmer to safety at the cost of the player next three moves.

Dolphins save lives!

As the island disintegrates and more monsters appear, more pieces end up in the water and so the game becomes much more fun! The winner is the person with the  MOST pieces on the coral islands in the corners when the first player runs out of pieces either by saving them or having them eaten. Now, while the rules don’t specifically state this, we decided this meant no suicides as it could be beneficial to kill your own men off (by swimming them into sea monster/sharks or the other way around) when you have the most men on the islands. We decided this was not in the spirit of survival and should not be allowed.

The end of the game.

Strategy:

The primary strategy to this game is… DON’T GET EATEN! But there are a few other things to consider; like it’s always useful to make someone else save your pieces by putting it is as a tag along/third man in a boat controlled by someone else. Also dolphins are your friends. The best tactic I think is to remember to move not just to aid your escape but to move to hinder the other persons; move empty boats away from the island, block the escape island entrances with sea creatures (preferably sea monsters) and destroy land pieces that hinder the other players as much as possible.

History and Interesting Things:

  1. The game was originally released under the title Survive! in the USA.

    Original Survive! Picture lovingly borrowed from Wikipedia.
    Original Survive! Picture lovingly borrowed from Wikipedia.
  2. It was released like this in 1982 but was remade with 3D pieces to the addition we own and released in the UK with revised rules in 1986.
  3. In the original game the island was built at random in the middle and pieces where removed at random (as you might be able to see from the picture) which resulted in the island sinking in an less-uniform manor.
  4. From 1987 the game sold in many countries, in many languages including Finnish, Dutch, Spanish, Italian, French and German.
  5. In 2010 Stronghold Games announced they where going to reprint Escape from Atlantis and title it Survive! Escape from Atlantis. Which they did in February 2011.
  6. In June 2012 they then released Survive! Escape from Atlantis – 30th anniversary Edition with revised rules and a slightly altered theme involving the explorers actually finding Atlantis and then having to escape from it.
  7. French publisher Asmodee released the game under the title The Island in 2012.
  8. Stronghold Games released three expansions for the Survive: Escape from Atlantis! – 30th Anniversary Edition in 2013 called: 5-6 Player Mini Expansion Kit plus Dolphins & Dive Dice Expansion Kit and The Giant Squid Expansion Kit and because of these this version of the game and the expansions must be added to our Game we Want page.
  9. The game has won boardgame.ru best family game of the year 2012 as well as “2012 Juego del Ano Finalist” (what ever that means exactly… Some sort of finalist for something)
  10. World sales of Escape from Atlantis now exceed 1.25 million units.

To Conclude:

This game is up there with my favourites, it’s a classic that’s just really, really good fun. I will have to get the new one to compare it, so expect a post on that when I do. However never forget the fallen:

To quote a terrible Star Wars film: "the death toll is catastrophic".
To quote a terrible Star Wars film: “the death toll is catastrophic”.

Update – March 2014

This month is going to be themed Conquest, Survival and Civilization Games. Long have I been a fan of RTS (real time strategy) computer games, basically having been addicted to Red Alert back in the day and it still probably being one of my favorite computer games of all time. So naturally, I quite like the idea of these games, as they’re a table top version of the same thing; additionally I used to be a big fan of Warhammer in my early teens so this a slightly less costly version of that too. However, the first game in this month doesn’t fit quite so nicely with the others but we figured it had to go in somewhere as my amazing sister got it for me for my birthday and its one of our favourite games! Also the last one is a bit of an odd fit but likely you can see how they’re kind of related.

Games for March: – Conquest, Survival and Civilization Games

Monday the 3rd – Escape from Atlantis

Monday the 10th – Battle Cry

Monday the 17th – Conquest of the Empire

Monday the 24th – The Settlers of Catan

Monday the 31st – Spartacus: A Game of Blood and Treachery

Other Things to Note:

  • Ratings system! As I should have mentioned before we’ve taken to rating games out of five, and we’ve even done it in pictures of little chess pieces that can now be seen at the top of our review posts! Additionally, if you actually go to the post rather than viewing it on the home page you’ll see there’s a function to rate it yourself out of 5 stars at the top; if you give it a high rating we’ll assume you’re rating the quality of the post, if you give it a low rating we’ll just assume you’re rating the game and you don’t like it very much.
  • Another point of interest is, to highlight some movements in the games, we started making stop-motion animated gif pictures that are pretty cool and will hopefully get cooler as we get better at it. Check out our first one of The Luggage in the Guards! Guards! post HERE and expect a few more in the coming months.
  • I (David) have also started another blog that’s about freedom, philosophy and just obscure things; it’s called Illusion of Free Will check it out by clicking that hyperlink, it’s full of obscure thoughts that cross my mind.
  • Lastly, we’re thinking of putting a word limit on our posts to try and force us to be concise, is this a good idea? Are our posts too long? How can we make them better? Let us know in the comments.
  • And just because this picture made for twitter to promote our Cripple Mr. Onion post is so cool, here it is again:

CMO

Like us on facebook HERE and follow us on Twitter HERE and more cool pictures will be showing up on your news feeds!

Stealth Chess

That Time I almost Lost at Chess…To a GIRL!…Who’s Younger than Me!

Luckily for me she backed herself into a stalemate and my pride was slightly less destroyed than it could have been. Like our Cripple Mr. Onion post this post is a bit of a bonus this month. Being a game invented by Terry Pratchett (well, more an adaptation of a classic game) we decided it needed a mention.

Being Stealthy at Chess:

Stealth Chess is much like normal Chess in the sense that all the regular rules of Chess apply and all the normal pieces are present and used. The game is altered by the widening of the board by one row on each side; these rows are called Slurks, and the addition of two pieces to each side which are Assassins. The Assassins start in the Slurks next to the Rooks, and only the Assassins can move in the Slurks. Unfortunately we did not have a Stealth Chess board lying around so we had to make do with a normal Chess board and imagine the additional rows, additionally the pieces that look very different to the others are pieces we borrowed from a different set to act as the Assassins.

Stealth Chess staring positions.
Stealth Chess starting positions.

Like in normal Chess all normal rules apply with the addition of the rules concerning the Assassins and Slurks. Assassins move one space in any direction but can move two to capture. Only they can move in the Slurks, and now you get the complicated bit; the Assassin can move as many spaces out of the Slurks as he has in the Slurks. To clarify, if over the course of 6 moves the Assassin has moved six spaces in the Slurks (including just backwards and forwards) the Assassin may move up to six space out of the Slurks, when exiting it, in one move and then an additional space to capture. So:

This white Assassin has moved three spaces in the Slurks:

So its in range of the Black (purple) Queen.
So it’s in range of the Black (purple) Queen.

So on exiting the Slurks it can capture the Queen like so:

So the Queen gets taken.

Now the only point of ambiguity we have in this is “can the Assassin move through other pieces in this way?” Our answer was yes as, if you read the rules as laid out on Wikipedia here or the Discworld Wiki here, it describes the Slurks as another board under the existing board. So rather than moving down the side of the board it represents a space under the board which the Assassins move through and pop up to capture things. Additionally to all of this Assassins cannot take each other, out of professional courtesy.

The End and Other Things:

Normally I destroy my sister at Chess and our game of Stealth Chess was going the same way until I made one massive error and then it nearly all ended in tears. Except after a long time she managed to fight me into this position:

How it all ended.
How it all ended.

Which of course is Stalemate. However I think by the fifty-move rule it may have already been stalemate but that’s neither here nor there.

Anyway that’s the last time I lose concentration.

So a few last comments about Stealth Chess:

  • It’s given me an awesome idea for a two tiered version of Chess… Literally building two Chess boards that sit over each other.
  • Also to build an actual Stealth Chess board with the Slurks and proper Assassin pieces.

A couple of interesting “facts” about the game are:

  • On the Discworld it’s thought to actually be the original version of the game – “this belief is corroborated by the in-world discovery, in a tomb in Muntab, of a preserved corpse with an 8×10 board embedded in its skull and a pawn hammered up each nostril”
  • The master of the game in the Discworld is – ” Lord Havelock Vetinari, provost of Assassins and Patrician of Ankh-Morpork.”

All in all it’s an interesting adaptation of Chess and a bit difficult to get your head around if you’re so used to thinking about Chess in the standard way. It’s well worth a play, and you don’t even have to buy anything if you already have a Chess set and a bit of imagination!

Cripple Mr Onion!

Disclaimer: No onions were crippled in the making of this post… Much.
Meet Mr Onion!
Meet Mr Onion!

4 - 5

Number of Players: 2-7

Year of Publication: 1993

Creator(s): Andrew MillardTerry Tao (Designers) and concept created by Terry Pratchett

We’re all aware that it’s Terry Pratchett month, and that the last official post for this month has now gone up – The Witches. So now we’ve played all four officially produced Discworld games we wanted to have a look at the slightly more unofficial games. The most well known of these is Cripple Mr OnionThis is a fictitious card game that Terry Pratchett invented that’s played all over the Disc. It features in Wyrd Sisters, Reaper Man, Witches Abroad and Lords and Ladies. A game called “Shibo Yancong-San” (Cripple Mr Onion in Chinese) also appears in Interesting Times

The game is played with an 8-suited deck of cards, the Discworld has its own deck of cards, called the caroc deck. However, for the purposes of playing in our universe a deck with the following eight suits and suit-pairs is acceptable: Spades and Axes, Clubs and Tridents, Hearts and Roses and Diamonds and Doves.

With the intention of learning the game, I acquired one such deck from the Fat Pack Playing Card Company, which has made learning the game easier, as the other alternative is to shuffle two normal decks together, but this presents the problem of having then two of each suit, and could get very confusing.

The game is a little like Poker in two respects, the first of which is that you must make the highest scoring hand to win the round, and the second of which is that, if you don’t play it often, the rules are such that’s it’s easy to forget them and end up both confused and annoyed. There’s a dealer for each round, which changes at the end of every round. The game starts by each player being dealt five cards face down, which they are immediately allowed to look at and can then discard up to four of them, being given replacement cards by the dealer. Once everyone’s done this a further five cards are dealt face up onto the table in front of each player – except the dealer, who receives theirs face down.

The first player then begins by trying to assemble a high-scoring hand (I’ll list the different hand in point order in a minute), once they’ve done this, the player to their left must assemble a higher-scoring hand, or fold. If they succeed in creating a higher scoring hand the first player is then allowed to try to rearrange their cards to score even higher, or fold. Once on player has been forced to fold play continues to the left until one player remains. This player wins the hand and becomes the dealer for the next round.

Scoring – lowest to highest hands:
  • Bagel – two cards with values totalling 20.
  • Two-card Onion – two cards with values totalling 21.
  • Broken Flush – three or more cards totalling between 16 and 21 inclusive with all but one in the same suit-pair.
  • Three-card Onion – three cards with values totalling 21.
  • Flush – like a Broken Flush but with all cards in the same suit-pair.
  • Four-card Onion – see other Onions.
  • Broken Royal – combination of 678 of any suit.
  • Five-card Onion – same-same, see above.
  • Royal – combination of 777 of any suit.
  • Six-card Onion – you get the idea by now.
  • Wild Royal – combination of 888 in a hand when eights are wild. (Wild eights’ll be explained a bit further down)
  • Seven-card Onion
  • Double Onion – two picture cards and two aces.
  • Triple Onion – three picture cards and three aces.
  • Lesser Onion – four picture cards and four aces.
  • Great Onion – five picture cards and five aces.

Thus ends how to make points in this game. But now you begin to wonder “Isn’t the game called Cripple Mr Onion? We’ve had a lot of onions so far, but no crippling…” and you’d be right to present this question. Crippling Mr Onion comes into play when we get to the modifiers for the game. This is the bit that confused me the most, simply because there’s a lot to remember. So what I’m going to do, for the purposes of keeping this post fairly short, is simply list all the possible modifiers that can be played, and link you to a proper explanation of them. Except Wild Eights, which I said I’d explain, Crippling Mr Onion, because it’s the whole point of this post and The Fool, because that one’s funny. So here we go:

Modifiers:

These can be played through the game to increase the value of a hand and, with the exception of the crippling rule, are all optional extras to the game. I’ll list the ones I’m not explaining first, and finish with the most interesting ones.

  • Wild Crippling
  • Octavo
  • The Lady
  • Fate
  • Great A’Tuin
  • The Sender of Eights
  • Death
  • The Archchancellor

Now, on to the others! We’ll start by explaining how to Cripple Mr Onion:

In the event that a player displays a Great Onion as their hand for a round, another player may immediately display a nine-card running flush and thereby instantly win the hand. If a player’s displayed a Great or Lesser Onion another player may display a ten-card running flush to Cripple Mr Onion, they may also use this to steal a win from a player who’s just Crippled an Onion using only a nine-card running flush. This is the only non-optional modifier.

Once your onion’s been crippled, you may find it looks a little like this:

Poor Crippled Mr Onion...
Poor Crippled Mr Onion…

Wild Eights:

This modifier’s actually called Null Eights but it makes eights wild. So, in a normal hand, where eights are not wild, an eight may be played as if its value were zero or eight, to increase the size of a hand in order to score higher. Because of this you can include them in an Onion to improve its size. However, in the round following the one in which this took place, eights become wild for the duration of that round and this modifier cannot be used again until the following round.

The Fool:

This is the last thing I’m going to explain. If a player holds the Jack of Clubs, they may declare it before the first player’s played their first group of cards. If they do this, Onions and Bagels switch places in scoring so a Double Bagel or Triple Bagel etc, become the most valuable hands with the single exception that a Great Onion will still beat a Great Bagel. It also then becomes possible for another player to Cripple Mr Bagel. Which is the only reason I wanted to specifically explain this one. I just like the concept of crippling a bagel.

Conclusion-y-type-things:

There you have an explanation of how to play Cripple Mr Onion, I promise it’s only complicated for the first few hands, after that it begins to get easier as you begin to be able to spot the most useful combinations of cards! It can be a really quick game too, so it’s good for if you’ve only got a few minutes (provided you don’t have to learn the rules first) and you can play with up to seven people, so play it with all you friends!

All the info I got for this post was got from here, plus there’s extra stuff to read there if you want it, and a full explanation of all the modifiers.

The Witches

3 - 5

Number of Players: 1-4

Year of Publication: 2013

Creator(s): Martin Wallace (designer) and Peter Dennis (artist)  – Based on the books of Terry Pratchett

“Progress just means bad things happen faster”
Terry Pratchett’s The Witches

Lancre could probably be considered a bit of a backwards country, and, complete with all its quirks and oddities, is the setting for The WitchesWhich is a fantastic board game based on part of Sir Terry Pratchett’s Discworld series. As this month is Pratchett month we decided to post the games up in the order that they were published, so The Witches, having only been published last year, is the most recent, and therefore the last post. Guards! Guards! and Ankh-Morpork were published in the same year, and so were tied for second place after Thud.
The Witches is currently the only one of the four Discworld board games that have been published that’s suitable for one player. You can travel around the mountains of Lancre solving problems and fighting monsters all on your lonesome – or you can play with up to three other witches and meet up for tea and a chat!

What’s in the Box:

The Stuff.
The Stuff.
  1. One Playing Board.
  2. One Rule Book.
  3. One Player Aid Card.
  4. Four Trainee Witch Displays.
  5. Three Advantage tiles – one Invisibility tile (blue), one Cure Sick Pig tile (green) and one Magic tile (red).
  6. Four Witch pieces.
  7. Four 6-sided Witch dice (notice here that two of the dice are showing a witches face, this is because these dice do not have the value for 1 on them. The witch face represents a Cackle, which is equal to a score of 0).
  8. Twelve Crisis counters.
  9. Fifty-five Game cards.
  10. Sixteen Cackle counters.
  11. Twelve Black Aliss tiles.
  12. Thirty Easy Problem tiles (green).
  13. Seventeen Hard Problem tiles (purple).

Playing the Game:

Objective: To solve more problems than the other players, and therefore score the most points at the end of the game!
Setting up the Board:

The initial set up for the board is very simple in this game, you simply shuffle all your Hard Problem tiles, and place one face down on each square on the board with a purple square in the top left corner of it, and do the same with the Easy Problem tiles. You then refer to the rules to see how many of remaining tiles from both Hard and Easy are set face down on the spaces in the bottom right of the board. If you look closely at the picture you can see that, if you don’t want to go back to the rules, the board actually tells you how many of each type of problem to put in each square, depending on the number of players.

So in the first stage of setting up the board, it should look like this. We had three players this time that we played, and so the number of tiles in the bottom right of the board are set accordingly.

Once all the tiles are laid out like this, all the Easy Problem tiles can be turned face-up. All the Hard Problem tiles remain face-down on the board until a player moves to deal with one, then it’s flipped for everyone to see. Next you need to shuffle the deck of Game cards, and deal three to each player, the rest are placed face-down next to the board.

Lastly you should assign characters. To do this each player rolls all four Witch dice and the player with the highest total roll is allowed to choose their preferred Trainee Witch display. Note: rolling a Cackle counts as zero here, and in the event of a tie, both players re-roll all the dice. Once the highest rolling player has chosen their Trainee Witch Display, then player who had the next highest total chooses… And so on.

You then take the Witch piece of the correct colour for your persona for the game, and, if your Trainee Witch has one, also your Advantage Tile. Tiffany, Petulia and Annagramma all have these, Tiffany’s is blue and is an Invisibility tile, Petulia’s is green and is a Cure Sick Pig tile, and Annagramma’s is red and is a Magic tile. I’ll explain the benefits of these tiles later on. Annagramma also starts with one Cackle counter, if she’s in play. The last Trainee Witch that can be chosen is Dimity Hubbub, her special ability is that whichever player chooses to play as her, gets to play first. If she’s not in play, the player who chose last goes first, and play then proceeds clockwise around the board. Finally, each player (starting with she/he that chose last) should place their Witch piece on any empty space on the board.

The board should look like this just before the first player takes their turn:

Complete starting set up for three players - as you can see, Dimity Hubbub is not in play in this game.
Complete starting set up for three players (although the Easy Problems in the bottom right section are supposed to be face-up too, whoops!) – as you can see, Dimity Hubbub is not in play in this game.

The Rules:

Playing the game is very simple. A turn consists of three phases, placing the next Problem tile, moving you Witch, and drawing cards. The first thing you do during your turn is draw the top card from the deck and place it face up beside the board. Each card in the deck has a location written on it, if there’s no Problem tile or Witch in the location on the card you draw, the top Problem tile is taken from the leftmost stack, and placed face-up in this location. If there’s already a problem here however, a Crisis counter is placed on top of it. These add two points to the difficulty of the problem and look like this:

A Crisis counter on top of an Easy Problem tile, this adds two to the difficulty of the problem.

If there’s a Witch in the location you draw then a problem cannot be placed there, and if they’re in either Lancre Castle or Lancre Town, where there are multiple spaces available, you do not place Crisis counters on problems existing there. If a Witch is present, Crisis cannot happen and problems do not occur. If you place a Crisis counter on a problem, you must continue drawing cards until you find an empty location in which to place the next problem. You may then continue with your turn.

Next you move; a Witch can move up to two connections per turn, unless they have in their hand a card with a broomstick symbol on it. If they choose to play this, they can fly to anywhere on the board and it counts as one of their movements.

Lastly, you tackle problems! To beat a problem you have to roll either equal to or higher than the number shown in the white circle on the problem tile, you must also factor in the Crisis counters, if there’s one on the tile. To beat a problem you roll all four dice, but not together. You roll two first and can then decide if you want to play any of the cards in your hand. The text is often useful for solving problems. Once you’ve decided, you roll the next two dice. Note: if you roll enough on your first roll to beat the problem, you must still roll the second set of dice to see if you get any Cackles. If you roll any Cackles, you take one Cackle counter for each Cackle rolled.

Rolling to solve a problem, this player must take one Cackle counter for their roll.

If you fail to beat a problem, you must run away, and if it was a Hard problem, you must face the consequences! There’s a lot of variance in consequences however, so I won’t go through them.

At the end of your turn you discard any cards you played and refill your hand to the maximum number of cards you can hold. If the deck of cards runs out, the discard pile is shuffled and flipped, and play continues, the game comes to a natural end at the end of the turn of the person who places the last problem tile on the board.

Lastly I’ll explain the Advantage tiles I mentioned earlier. Tiffany has a blue Advantage tile, which is invisibility, this allows her to go onto the same space as a Hard problem tile, look at it, and then choose either to solve it, or go somewhere else. Everyone else has no choice but to try and solve the problem, no matter how hard it may be, if they enter the same space as it.
Annagramma has a red Magic tile; there are three different symbols that appear on the top of each Game card; either a broomstick, a star, or a pair of glasses and a mustache (also known as Headology). Of these three symbols, Magic and Headology can be used to your advantage when solving a problem. Magic gives you a plus two bonus (but you must take a Cackle counter for every Magic card played) and Headology gives you a plus one bonus. Annagramma’s Magic tile can be played for the plus two bonus when solving one problem at some point in the game.
Petulia has a green Cure Sick Pig tile. This is fairly self-explanatory; when Petulia enters the same space as a Sick Pig problem tile, this Advantage tile can be used to automatically solve the problem.

Petulia's Cure Sick Pig tile in action!
Petulia’s Cure Sick Pig tile in action!

All three Advantage tiles can only be used once in the game. They must then be discarded by the player that used them.

Strategy:

There’s not a lot to be said for strategy for this game, as it mostly comes down to the roll of the dice. But it’s good to have tried to solve a variety of Easy and Hard problems throughout the game, not only do Hard problems usually score more points than Easy ones, they also give you a different benefit the more of them you collect.

History and Interesting (or just other) Things:

There isn’t much history to this game (and even less that’s interesting enough to write about) so have some things about the fictional Discworld country of Lancre instead:

  1. Lancre is good Witch country, there’s a high level of background magic, and the country has always been renowned for producing some of the best Witches and Wizards in the history of the Discworld.
  2. It’s shown to be about 40 miles by 10 miles in size, but this isn’t the truth. Because of the background magic some areas of Lancre have been known to take on other geographical properties.
  3. It has Gnarly Ground. This is a place, on the Lancre Moores, where reality has become folded, and so two places may appear to be right next to each other, but are actually miles apart. Crossing it (or flying over it) is not for the faint-hearted.
  4. It is the physical location of, certainly one, but possibly two, gateways to Parasite Universes, inhabited by Elves.
  5. The current King of Lancre is Verence II. He is believed to be the illegitimate son of Verence I; he was the castle Fool until his half-brother, Tomjon’s immediate abdication after being offered the crown.
  6. Lancre is technically as constitutional monarchy, in that Verence II has set up a parliament, but mostly the people aren’t interested.
  7. Regicide is an accepted method of becoming King in the history of the country.
  8. The population is only 500.
  9. The Lancrastians generally aren’t particularly religious, but they do believe in services for births, marriages and deaths and know exactly what they believe religion should sound like, which is more or less a Latin Roman Catholic service.
  10. The climate there goes to extremes, with burning summers, unbelievable storms and masses of snow, respective to the time of year.

More information on the country can be acquired by reading A Tourists Guide to Lancre.

Different publications of the game:

There is a collectors edition of this game, which is the same in rules and gameplay to the edition we’ve got, but with the addition of sculpted pewter figurines, instead of small wooden witches hats as your playing pieces and a different shaped box and artwork, and a bonus A1 poster.

Further Reading and Conclusion:

Although Dave recommended (amongst other things) all Pratchett books in the Update post for this month, there are actually only a few that you need to read to really understand all the goings on in this game, and they are: Equal Rites, Wyrd Sisters, Witches Abroad, Lords and Ladies, Maskerade, Carpe Jugulum, The Wee Free Men, A Hat Full of Sky, Wintersmith and I Shall Wear Midnight.
I realize that I said “only a few”, but 10, when looked at in context of all the available books by Terry Pratchett, is actually not that many.

I’m personally of the opinion that Ankh Morpork is the best Discworld board game so far, and I believe Dave agrees with me. However, this game is also brilliantly conceived. It’s more laid back than Ankh Morpork, in that, you’re not really trying to one up any of the other players, or double-bluff them into not knowing your objective, or anything like that, because you’re all sharing the same objective and there are plenty of problems on the board, so you don’t usually ever have to go for the same one as another player!

It’s also great because you can play it as a 1-player game, just to fill a rainy afternoon. I highly recommend this game, to everyone, but also specifically to people who prefer games that aren’t super-competitive!

Guards! Guards!

NOW SELLING THIS GAME HERE: https://www.ebay.co.uk/itm/283678712760

3.5 - 5

Number of Players: 2 – 6

Year of Publication: 2011

Creator(s): Leonard Boyd & David Brashaw – Inspired by the books of Terry Pratchett

“Noble dragons don’t have friends. The nearest they can get to the idea is an enemy who is still alive.” – Guards! Guards!

Guards! Guards! is a board game based on the book of the same name from the genius mind of Terry Pratchett (if you are unaware of Terry Pratchett read our update post for this month here).

Whats In The Box:

jgfuhbjk
The Stuff.
  1. Playing Board
  2. Rule book
  3. 8 Guild Cards
  4. Player’s Guide
  5. 4 Dragon Cards
  6. 30 Shades & Shadows Volunteer Cards
  7. 30 Man & Beast Volunteer Cards
  8. 30 Lords & Ladies Volunteer Cards
  9. 36 Fate Cards
  10. 1 Luggage Piece
  11. 20 Odds & Sods Item cards
  12. 20 Curses & Cures Scroll Cards
  13. 6 Saboteur Tokens – Fools Quadrant
    6 Saboteur Tokens – Thieves Quadrant
    6 Saboteur Tokens – Assassins Quadrant
    6 Saboteur Tokens – Alchemists Quadrant
  14. 6 Alchemists Fire Water markers
  15. 6 Pox Markers
  16. 6 Spell Run Tokens
  17. 36 Spell Returned Tokens
  18. 1 8 sided die
    6 Coloured Playing Pieces
  19. 39 Gold 5 Ankh-Morpork $ coins
  20. 56 Silver 1 Ankh-Morpork $ coins
  21. 18 Attribute Markers (red cubes)
  22. 25 Great Spell Markers (gold cylinders)

This is by far the game with the most individual pieces we’ve played so far.

Playing The Game:

Objective: To return five of the eight Great Spells marked on your Guild card to the Unseen University before anyone else.

Now, this game is very complicated and also not very all at the same time. It has a LOT of rules, and took us a good hour to read through them all, but once you get the hang of it it’s actually all quite simple and is effectively just a slightly complicated race. So because of the complexity of the rules I will only outline in rough what happens.

You set up the board like this:

Board set up
Board set up

Each player starts at their start marker in the relevant guild quadrant, the board is divided into for quadrants, Assassins, Thieves, Fools and Alchemists quadrants. You start the game by picking a guild, for which you get a guild card for which has stats on it for Charm, Magic and Guild. You can increase these stats throughout the game by various methods and you blocks go up as shown bellow.

Not that all of my stats (marked by the red blocks) have increased by one.

Your stats are mostly increased by the recruitment of volunteers which is done by charming or bribing. To bribe a volunteer you simply pay the amount marked in the bribe section on the card, to charm it you must roll the dice and achieve a number higher than its charm value, for this you also add you charm value from your stats to that number.

A selection of volunteer cards.

These cards also determine the movement of the coolest function of the game…THE LUGGAGE! At the top of each card it says “Luggage Moves” and then a number or instruction. The player who drew the card then has to move the luggage around the set track marked on the board, at splits in the track they get to chose which way it goes. If it collides with a player, even if it’s the piece of the person moving it, the player is sent straight to the nearest hospital, as shown bellow:

Nom, Nom, Nom!
Nom, Nom, Nom!

All of this is with the aim of returning spells to the Unseen University; you do this by getting to a spell you require and starting a spell run. This is where the volunteers you have collected are needed; you send them with the spell back to the University where you have to complete different levels of the wizards challenge to get the spells back in. I won’t go into the full mechanics of this as that would make this post very long. But as you return more and more spells the wizards challenges get harder and harder and you add more gold cylinders to you section of the Unseen University to mark the spells you have returned:

At this point we had both completed three levels of the wizards challenge and therefore returned 3 spells each.

These spell runs can be sabotaged and you can use your volunteers to fight with each other, there are also items and scrolls that can be very helpful but I won’t go into these as, again, we would be here forever.

The other cool thing is that dragons can be summoned onto the board if three members of the Brotherhood, when called, are in play:

The symbols in the bottom left mark them as members of the brotherhood.
The symbols in the bottom left mark them as members of the Brotherhood.

When this happens a dragon is summoned like this:

A summoned dragon in play.

The dragon mechanics are complicated and in many respects kind of irrelevant, as once the dragon is summon and the threat initially met it’s very easy to just ignore it and carry on with the game regardless. However, one fun aspect is that if all four dragons come into play the game ends and nobody wins, this is a bit of a reoccurring theme in Terry Pratchett’s game as there is a similar mechanic in the Ankh-Morpork (read our post on it here) game as well as The Witches. Although this can have the downside of  being rather anti-climactic and making you feel like you just wasted a few hours.

The game is won by the first person to return all the spells:

The game finished...and won by me!
The game finished… And won by me!

There are plenty of other rules about playing the game and other things and if you want you can read the revised rules here. We were following the unrevised rules, having an original edition of the game, so there was some ambiguity at points as to whether you actually could sabotage like that, amongst other things, but we worked through it.

Strategy:

Having only played this game twice I have a limited idea of the best strategy. But one thing I did notice was that the person who collects as many volunteers as possible rather than going straight for the spells seems to have an advantage. Also NEVER forget about the scrolls and items as they can get you out of some tight binds, the first time we played I basically ignored them, to my own peril. Also PLACE SABOTEURS! It is the difference between winning and losing, if you can sabotage the other persons spell run you have the edge!

A saboteur ready to pounce.

History and Interesting Facts:

  1. Although the board game was published in 2011 it was originally conceived in 1991.
  2. Leonard Boyd Originally conceived the idea and played it with friends until in 1995 he showed it to Terry Pratchett.
  3. Terry Pratchett liked the game but said they needed the backing of a major games company to make it all happen.
  4. In 1999 Colin Smythe (currently Terry Pratchett’s agent) suggest that the game never be published…I’m quite happy that he was wrong and they didn’t give up on it.
  5. In 2006 Gary Wyatt (of the Green Games Company) advised that they tried again with the publication of it as the board games market had picked up significantly since 1995.
  6. So in Junes 2008 it was taken to the Speil Toy fair in Essen, Germany where it was shown to many companies, a couple of companies requested copies for play testing.
  7. In 2008 Wolfgang Ludtke of TM-Spiele/Kosmos Games in Germany asked about developing a game based on the books of Terry Pratchett so they go sent a prototype too.
  8. All three companies that had play tested the game felt that it needed a redesign to be aimed more at the hobby market.
  9. So after FIVE redesigns it was sent for testing by the same three companies, it was also test played by Terry Pratchett fans, it got the backing of Z-Man Games and a license from Terry Pratchett.
  10. The game was finally published in September of 2011! Showing that the road to getting a board game published can be long and very hard but if you end up with a great game its worth it in the end. Also while Thud is the oldest of the Terry Pratchett board games by publication date this one is probably the oldest in concept.

To read the full history of the game go to the official website here.

To Conclude:

Guards! Guards! is a good game however it has it’s flaws, for example it took us over an hour to read the rules…We’re patient but there’s a limit. Also for all its rules it manages still to be quite simple in the sense that it’s a race and the person with the best luck tends to win. However it is a fun way to spend a couple of hours with some friends and the artwork and layout of the game are well conceived. I would recommend it, especially if you are a fan of the Discworld universe as each volunteer card has a unique quote on it that is taken from one of the books and are mostly quite amusing, as well as passages in the rule book being quoted and funny. For another overview of the game watch this video review here:

Ankh-Morpork

5 - 5

Number of Players: 2-4

Year of Publication: 2011

Creator(s): Martin Wallace (designer), Peter Dennis, Paul Kidby (artist) – Based on the books of Terry Pratchett

Could You Be The Next Lord Vetinari?

Well, actually, in this game, yes!
The Ankh-Morpork board game is an amazing, detailed game that completely encapsulates Sir Terry Pratchett’s brilliant city from the Discworld Universe (if you’re unfamiliar with Terry Pratchett, read our update post about how awesome he is, here). I want to write a bit about the game, but I feel that the opening paragraph from the rule book will tell you everything you initially need to know, and do it far better than I could:

“Welcome to Ankh-Morpork, the largest, smelliest, and most ‘interesting’ city on Discworld. The city’s patrician, Lord Vetinari, has disappeared, and the citizens are calling out for firm leadership. Will one of the noble families take control of the city, or will the people welcome the return of the king to restore peace? Then again, Vetinari’s absence may have been temporary and his spies could be spreading around the city, ready to start pulling the levers of power for their master.”

What’s in the Box:

IMG_0016
The Stuff.

Well, there’s a lot of exciting things in this box:

  1. One Playing Board.
  2. Four Player Aid Cards. These are reference cards for the players and have different important aspects of the game explained on them.
  3. One Rule Book.
  4. Two decks of Player Cards; 48 with a green border, and 53 with a brown border.
  5. 17 gold coins, worth $5.
  6. 35 silver coins, each worth $1.
  7. Four orange Demon pieces.
  8. Three brown Troll pieces.
  9. Twelve black Trouble Markers.
  10. Four sets of six Building pieces in Blue, Green, Red and Yellow.
  11. Four sets of twelve Minion pieces, in Blue, Green, Red and Yellow.
  12. One 12-sided die.
  13. Seven Personality Cards. These are given randomly, one to each player, at the start of the game, they are kept secret and have on them your objective for the game.
  14. Twelve Random Event Cards, some, or all of these, will be played throughout the game.
  15. Twelve City Area Cards, these match the areas that the board is divided up into, you may be familiar with them from the books.

Playing the Game:

Objective: To achieve the aim on your Personality Card and win the game before anyone else!

To start the game each player chooses a colour and takes all of the Minion and House pieces of that colour. Then they are dealt a Personality Card, because the maximum number of players for the game is four and there are seven Personalities available, they can never all be in play at once. This adds an extra element to the game as part of winning is to figure out what your opponent(s) objective is, and prevent it.

Personality Cards:

There are seven Personalities available in the game, each of which represent well-known characters from the Discworld series (these Personality descriptions are copied straight from the rule book) :

  • Lord Vetinari – You win if at the beginning of your turn you have a certain number of minions in different areas on the board (think of them as your spies). With two players you need to have minions in at least eleven different areas. With three players you need to have minions in at least ten different areas. With four players you need to have minions in at least nine different areas. Areas must be free of demons.
  • Lord Selachii, Lord Rust, Lord de Worde – you win if at the beginning of your turn you control a certain number of areas. If there are only two of you playing then you need to control seven areas, if there are three of you then you need to control five areas, and if there are four of you then you need to control four areas. You control an area if you have more playing pieces in it than any single other player (a playing piece being a minion or a building). You would also have to have more pieces there than the total number of trolls in the area. You cannot control an area that contains one or more demons. The presence of a trouble marker does not affect the control of an area.
  • Dragon King of Arms – If at the beginning of your turn there are eight trouble markers on the board then you win. The rationale is that the city has fallen into more chaos than normal and people want the king back (who would be controlled by you).
  • Chrysoprase – If at the beginning of your turn your net worth (your cash plus the monetary cost of each building you have) is $50 or more then you win the game. Please note that any loans you have taken out count as $12 against your total worth (certain cards allow you to take out loans).
  • Commander Vimes – you win if nobody else wins by the time the draw pile has been exhausted.
Setting Up The Board:

Now that you’ve got your Personality for the game and have chosen which colour you’re going to play as, you need to place your first Minions. Each player starts the game with three Minions on the board, one in each of The Shades, The Scours and Dolly Sisters. Now, because there’s more than one Minion in each of these areas, a Trouble Marker must be placed there. Trouble Markers are important in game play, as they determine how and when Minions can be removed from the board, and are also relevant to one of the Personalities objectives.

You can't see the actual numbers or names of the areas the board's divided into in this picture, but you can see the minions we  had on the board to start, and that there's a trouble marker in each area with them. Which is good enough for now.
You can’t see the actual numbers or names of the areas the board’s divided into in this picture, but you get the idea of what the board looks like to start the game.

As soon as a Minion is placed into an area with one or more Minions already existing there, a Trouble Marker must be placed there too. However, as soon as a Minion is moved out of an area, or removed from the board, the Trouble Marker is also removed, even if more than one Minion remains in the area.

There are three Minions in The Scours, and so a trouble marker has been placed there too.
There are three Minions in The Scours, and so a Trouble Marker has been placed there too.
Now the red Minion has been moved to The Hippo, and so the Trouble Marker has been removed. Because red is the only player in The Hippo, no Trouble Marker is placed there.

NOTE: There cannot be more than one Trouble Marker in an area at a time. 

Each player is then dealt five cards from the top of the deck, which they are allowed to look at. The dice is rolled to determine who plays first and play then proceeds clockwise around the board. You’re now ready to start the game!

The Rules:

Essentially, the first rule of this game (and of all board games) is, if in doubt, DO NOT HESITATE TO CONSULT THE RULE BOOK. I don’t know how much we say this, (we should probably get it on t-shirts or something) but it’ll never cease to be the first, and most important, thing you should do, especially if you’re confused about something.

Ankh-Morpork is essentially a card game, played with a board, so you don’t have to hold lots of information in your head all at once. In your turn you play cards, the card(s) you play from your hand dictate how the game progresses. When you set up the board, you split out the green deck from the brown deck and you play through the green deck first. This is important because, as the game progresses and you move from the green deck to the brown deck, different things start to happen.

The Cards:

The cards all have symbols across the top of them, which are played in order from left to right, and it’s these that determine what’s going to happen in your turn. A player may choose to not play some of the symbols on their cards if they wish, with the exception of Random Events, these must be played.
The symbols are each explained on your Player Aid cards and breakdown as follows:

  • Minion – this symbol allows you to place one of your minions in or adjacent to an area you already have a minion.
  • House – this allows you to build a house in an area that you have at least one minion in, providing there are no trouble markers there, and you have the right amount of money, which will be shown on the board in the area you wish to build.
  • Skull and Crossbone – this allows you assassinate one minion of another player, from any area with a trouble marker in it.
  • City Watch Badge – this allows you to remove a trouble marker from any area.
  • Money – the coin symbol will have a number inside it, you can then take this much from the bank.
  • Random Events! – these are represented by an eight-point start. A card is then drawn from the top of the Random Events deck and read out, consequences are dependent on each card.
  • Play Another Card – this is what it says, you can play any other card from your hand.
  • Scroll – you then play the text on the card.
  • Interrupt – a hand sign, this card can be played at any time, even if it’s not your turn, and they usually protect you from something; i.e. they can stop someone who’s trying to assassinate one of your minions.

As with all games with cards, there are good cards and bad cards, useful cards and cards that’re generally a bit naff. Some of the cards can also be considered a bit of a two-edged sword, for example, loan cards. A loan card, when played, allows you to take a loan of $10 from the bank, which can be very useful if you want to build houses, or just want money. However! At the end of the game, if you come to score up, you must pay $12 back to the bank, before you  count your points. Also there are two cards in the deck that, if you play the text, allow you to give them to another player and they must pay you $5, if they refuse they keep that card face up in front of them for the rest of the game, and their hand size is reduced to four. This, ultimately, isn’t the end of the world, but it can become a real nuisance as the game progresses. In my experience, people usually just pay, unless they don’t have enough money, in which case, they’re screwed.

If you have multiple cards with the “Play Another Card” symbol on them in your hand, you can link them to create chains of cards like this:

So, in this chain, (from top to bottom) I was able to take a loan of $10 from the bank, play another card, take $3, play another card, do something I can't read, play another card, remove a trouble marker, play another card, assassinate someone, and finally, take one dollar, for my services to the game.
So, in this chain, (from top to bottom) I was able to take a loan of $10 from the bank, play another card, take $3, play another card, do something I can’t read, play another card, remove a trouble marker, play another card, assassinate someone, and finally, take one dollar, for my services to the game.

Or this:

Here I was able (from left to right) the place a minion without placing a trouble marker, which can be very a useful at some points in the game, play another card, take $3, assassinate someone, play another card, assassinate someone else, take $3, and I then played Doctor Mossy, to interrupt my own turn and not have to discard Dr Cruces. in this way I was then able to assassinate more people on my next turn!
Here I was able (from left to right) to place a minion without placing a trouble marker; which can be very useful at some points in the game, play another card, take $3, assassinate someone, play another card, assassinate someone else, take $3, and I then played Doctor Mossy, to interrupt my own turn and not have to discard Dr Cruces. in this way I was then able to assassinate more people on my next turn!

There is one card in the deck, called The Peeled Nuts, which is completely useless. All it does, is sit in your hand doing nothing. It has no text on it, and no symbols, and therefore, cannot be played. However, it can be discarded using the text on other cards, or it can be passed to a different player to infuriate them, if they play a card that requires you to give them one of your cards.

 Random Events:

The Random Event are an interesting addition to the game, and represent, for anyone familiar with the Discworld series, real events from the books, such as a dragon lading in the city. There are twelve Random Event cards and they can have drastic effects on the game, or no effect whatsoever, it’s mostly down to the roll of the die and the current set up of the board. Each card will say on it how the consequences of drawing this card should be played, and I’m not going to go through all of them, but as an example of one that can have uncool consequences I’ll tell you about the Fire card.

You can see here, the card that was played that caused the Random Event, and what the actual card looks like, the text on these cards is brief, and tells you our favourite thing - to refer back to the rules!
You can see here, the card that was played that caused the Random Event, and what the actual card looks like, the text on these cards is brief, and tells you our favourite thing – to refer back to the rules! You can also see the City Area rolled, number 6, which means the red house in The Hippo, would now have to removed.

When this card’s drawn, the person that played the Random Event rolls the die to see where the fire starts and, if there are any buildings in the area that corresponds to the number rolled, they’re removed. The player then continues to roll the die to see if the fire spreads, if the next number they roll is adjacent to the area previously rolled, and there’s a building there, this too, is removed. Rolling continues in this way until a number is rolled where there’s no building. If there are no buildings in the areas adjacent to the first area rolled, there’s no need to roll the die again, as the fire cannot spread.

City Area Cards:

The board is divided up into twelve sections, each with a number in it, and a price, shown in dollars. These correspond to the City Area cards available for when a player builds a house. When a player builds a house in an area, they get the card that goes with it, that gives them certain benefits that they can use during their turn, as well as having their house count as one minion in an area, which can be very handy. only one house can exist in an area at one time.

The benefits gained from building houses are as follows (copied directly from the rules):

  1. Dolly Sisters – Once per turn you can pay $3 and place one of your minions in Dolly Sisters or an adjacent area.
  2. Unreal Estate – Once per turn you can draw one card and then discard a card.
  3. Dragon’s Landing – Once per turn you can take $2 from the bank.
  4. Small Gods – Whenever one of your minions or buildings is affected by a Random Event you can pay $3 to ignore the effect. If more than one piece is affected then you must pay $3 for each piece you wish to protect.
  5. The Scours – Once per turn you can discard one card and take $2 from the bank.
  6. The Hippo – Once per turn you can take $2 from the bank.
  7. The Shades – At any point in your turn you can place one Trouble Marker in The Shades or an adjacent area (area must contain at least one minion).
  8. Dimwell – Once per turn you can pay $3 and place one of your minions in Dimwell or an adjacent area.
  9. Longwall – Once per turn you can take $1 from the bank.
  10. Isle of Gods – Once per turn you can pay $2 to remove one Trouble Marker from the board.
  11. Seven Sleepers – Once per turn you can take $3 from the bank.
  12. Nap Hill – Once per turn you can take $1 from the bank.

My favourite place to have a house is The Scours, simply because it’s useful both for drawing more interesting cards, if you don’t have a very good hand, and for giving you money. With the added bonus that, to build in The Scours, it only costs you $6, whereas other areas of the board, such as The Hippo or Small Gods, cost $12 or $18, respectively.

Winning the Game!

Your Personality Card will tell you the different conditions under which a player wins the game, however, there are two other ways to end the game, either a player draws the ‘Riot’ Random Event card,  or the last card is drawn from the deck, and Commander Vimes is not in play. In the event that this happens, all players score up. This is done by adding the amount of money you have at the end of the game, to the total value of any properties held (minus any loans you may have taken from the bank at any point in the game) to the amount of Minions you have on the board. Each Minion is worth five points. If you’ve taken a loan and cannot pay it back, you lose fifteen points from your total score. Then the player with the most points wins.

The board at the end of the game. All the Demon and Troll pieces are in play, although I haven't explained them to you - play the game to find out what they're all about!
The board at the end of the game. Commander Vimes has won. All the Demon and Troll pieces are in play, although I haven’t explained them to you – play the game to find out what they’re all about!

Strategy:

Because you want to try and make it as difficult as possible for anyone else to win, whilst secretly carrying out your own objective, double-bluffing plays an important part in this game. One of the sneakiest ways to win (and one that Dave has employed on a few occasions) is to play very well as a personality you’re not to convince everyone that that’s what you’re going for, whilst simultaneously building up to your real objective. I am terrible at this aspect of the game; I once managed to successfully confuse my sister by not actually playing my objective at all. For the whole game she thought I was playing as a personality I wasn’t, simply because I decided I wasn’t going to be able to achieve it, and therefore didn’t try.

Whilst keeping your personality for the game a secret from everyone else plays an important part in how easy it is for you to win, luck of the draw is also a key feature. If you get dealt useless cards, and as a result cannot either advance your own objective, or hinder someone else’s, you just have to keep playing cards hoping that you’ll pick up something much more useful.

History and Things:

There’s not a lot of history around on the game, because it was published so recently, so instead I’m going to provide you with fun facts about the historic city of Ankh-Morpork (you may begin to see parallels between some of these facts and some old stories from our universe):

  • Legend tells us that the city of Ankh-Morpork was founded thousands of years ago by twin brothers, raised by a hippopotamus.
  • The original city was a walled keep, built to protect the Tower of Art. The origins of the Tower are unknown and may well pre-date the Disc itself.
  • At one point it had an Empire that spanned half the Disc, largely the creation of General Tacticus, who later, in his role as King of Genua, declared war on it.
  • There was a Golden Age of Kings in Ankh-Morpork, whom legend recalls to be wise and noble and fair, this line died out around 2000 years before present day, and was then replaced by more realistically corrupt and (occasionally mad) rulers, as referenced in Men at Arms.
  • The Age of Kings ended completely in Ankh-Morpork when “Old Stoneface”, Commander of the City Watch at the time (and ancestor of the current Commander, Sir Samuel Vimes, the Blackboard Monitor), executed the last king, Lorenzo the Kind, who, amongst other things, reputedly was “very fond of children”.
  • From this point forward the Patrician has ruled the city. But like the kings, there have been many who were mad and oppressive.
  • Lord Vetinari replaced Mad Lord Snapcase as Patrician at some point following the revolt in Treacle Mine Road in Night Watch.
  • Under Vetinari the city became multi-cultural as he opened the city to immigration, gradually inviting in all other nationalities as well as species. His pragmatic view on multiculturalism being “Alloys are stronger”
  • Although Vetinari is the tyrant of the city, the only real sign of his tyranny is the banning of Mime Artists. Anyone caught practising Mime is hung upside-down in a scorpion pit with “Learn the words” written on the walls.
  • Lastly, over the course of the Discworld series, the avid reader will see Ankh-Morpork develop from a crumbling, ruinous city, to a well-greased(ish), organized (sometimes), thriving (definitely) city, the second most developed nation on the Disc – after the Agatean Empire.

Further Reading and Other Editions of the Game:

Although the game is pretty new – only three years old – there are two other editions of the game that we don’t have. We own the standard edition of the game, but Treefrog (who publish the game) have also released The Collectors Edition; which comes with wooden coins, a larger board, and a custom twelve-sided die, and the Deluxe Edition, which is the same as The Collectors Edition, but also comes with resin Minions, Buildings, Trolls and Demons.

For further reading I would just recommend you go and read all the collective works of Pratchett. Which should keep you out of trouble for a while!

Conclusions:

3800 words too much? I don’t think so! I actually wanted to write a lot more about this game than I have, if I’d continued as I wanted, I’d have explained every possible Random Event, and given an in-depth consideration to the best way to win as each personality… But in the interest of not making this post any longer than it already is (which is fairly long), I’ve stopped.

I’ve rated this game a five at the top of this post, and Dave agrees with me. It’s possibly one of the best games I’ve ever played, brilliant in conception, design and execution. The rules have little to no ambiguity about them, the cards and personalities are interesting and accurate to the books; providing a few jokes for those that know the series, or just an interesting time for anyone that doesn’t, and the actual pace of game play is excellent. As with most games it’s best played with the full four players, but three’s also a good game, and it’s only with two that the game starts to drag a little, and I think that’s only because it’s much easier to work out what your opponents objective is, and therefore thwart them.

In all, a game that everyone should now go away and play; play it with your brothers, sisters, parents, cousins, friends, dog, neighbours, people you meet in the super market… The possibilities are endless, just play this game!

Special thanks to Wikipedia for all the additional information! I spent far too much time reading it, instead of writing the post, but anything else you wish to know about Ankh-Morpork can be found here.

The Games We Have – Update

We decided, in our infinite genius, to get all the game we have together for a photo…we under estimated a bit how many game we actually had. This is what happened after A LOT of arranging:

All the games we have as of Febuary 2014.
All the games we have as of February 2014.

A Tad Excessive?

Don’t be ridiculous, of course it’s not. There’s no such thing as too many games! Now not all of them are ours. The ones on the left at the top are mine and the ones on the left at the bottom are my sister’s, but the rest are communal family games… Our love of games had to come from somewhere!

A Bit of a Thought:

So from this picture of the collection of our games we decided we were going to make a “Games We Have” page as well the the “Games We Want” page to keep a catalogue of all the games we have and to mark the ones we’ve played, the ones we’ve reviewed, and how we rate them. So up the top now you should see “Games We Have” and “Games We Want“. Check them out and feel free to recommend games by commenting on the “Games We Want” page and see what our favourite games are on the games we have page and how many of these 100+ games we still have to play!