We decided that the best way to get a copy of Fanorona was to make one as copies seem to retail for £50+. I was quite happy with the end product so want to show you how to do it for anyone out there who wants the same but doesn’t want to spend that kind of money.
What You Will Need:
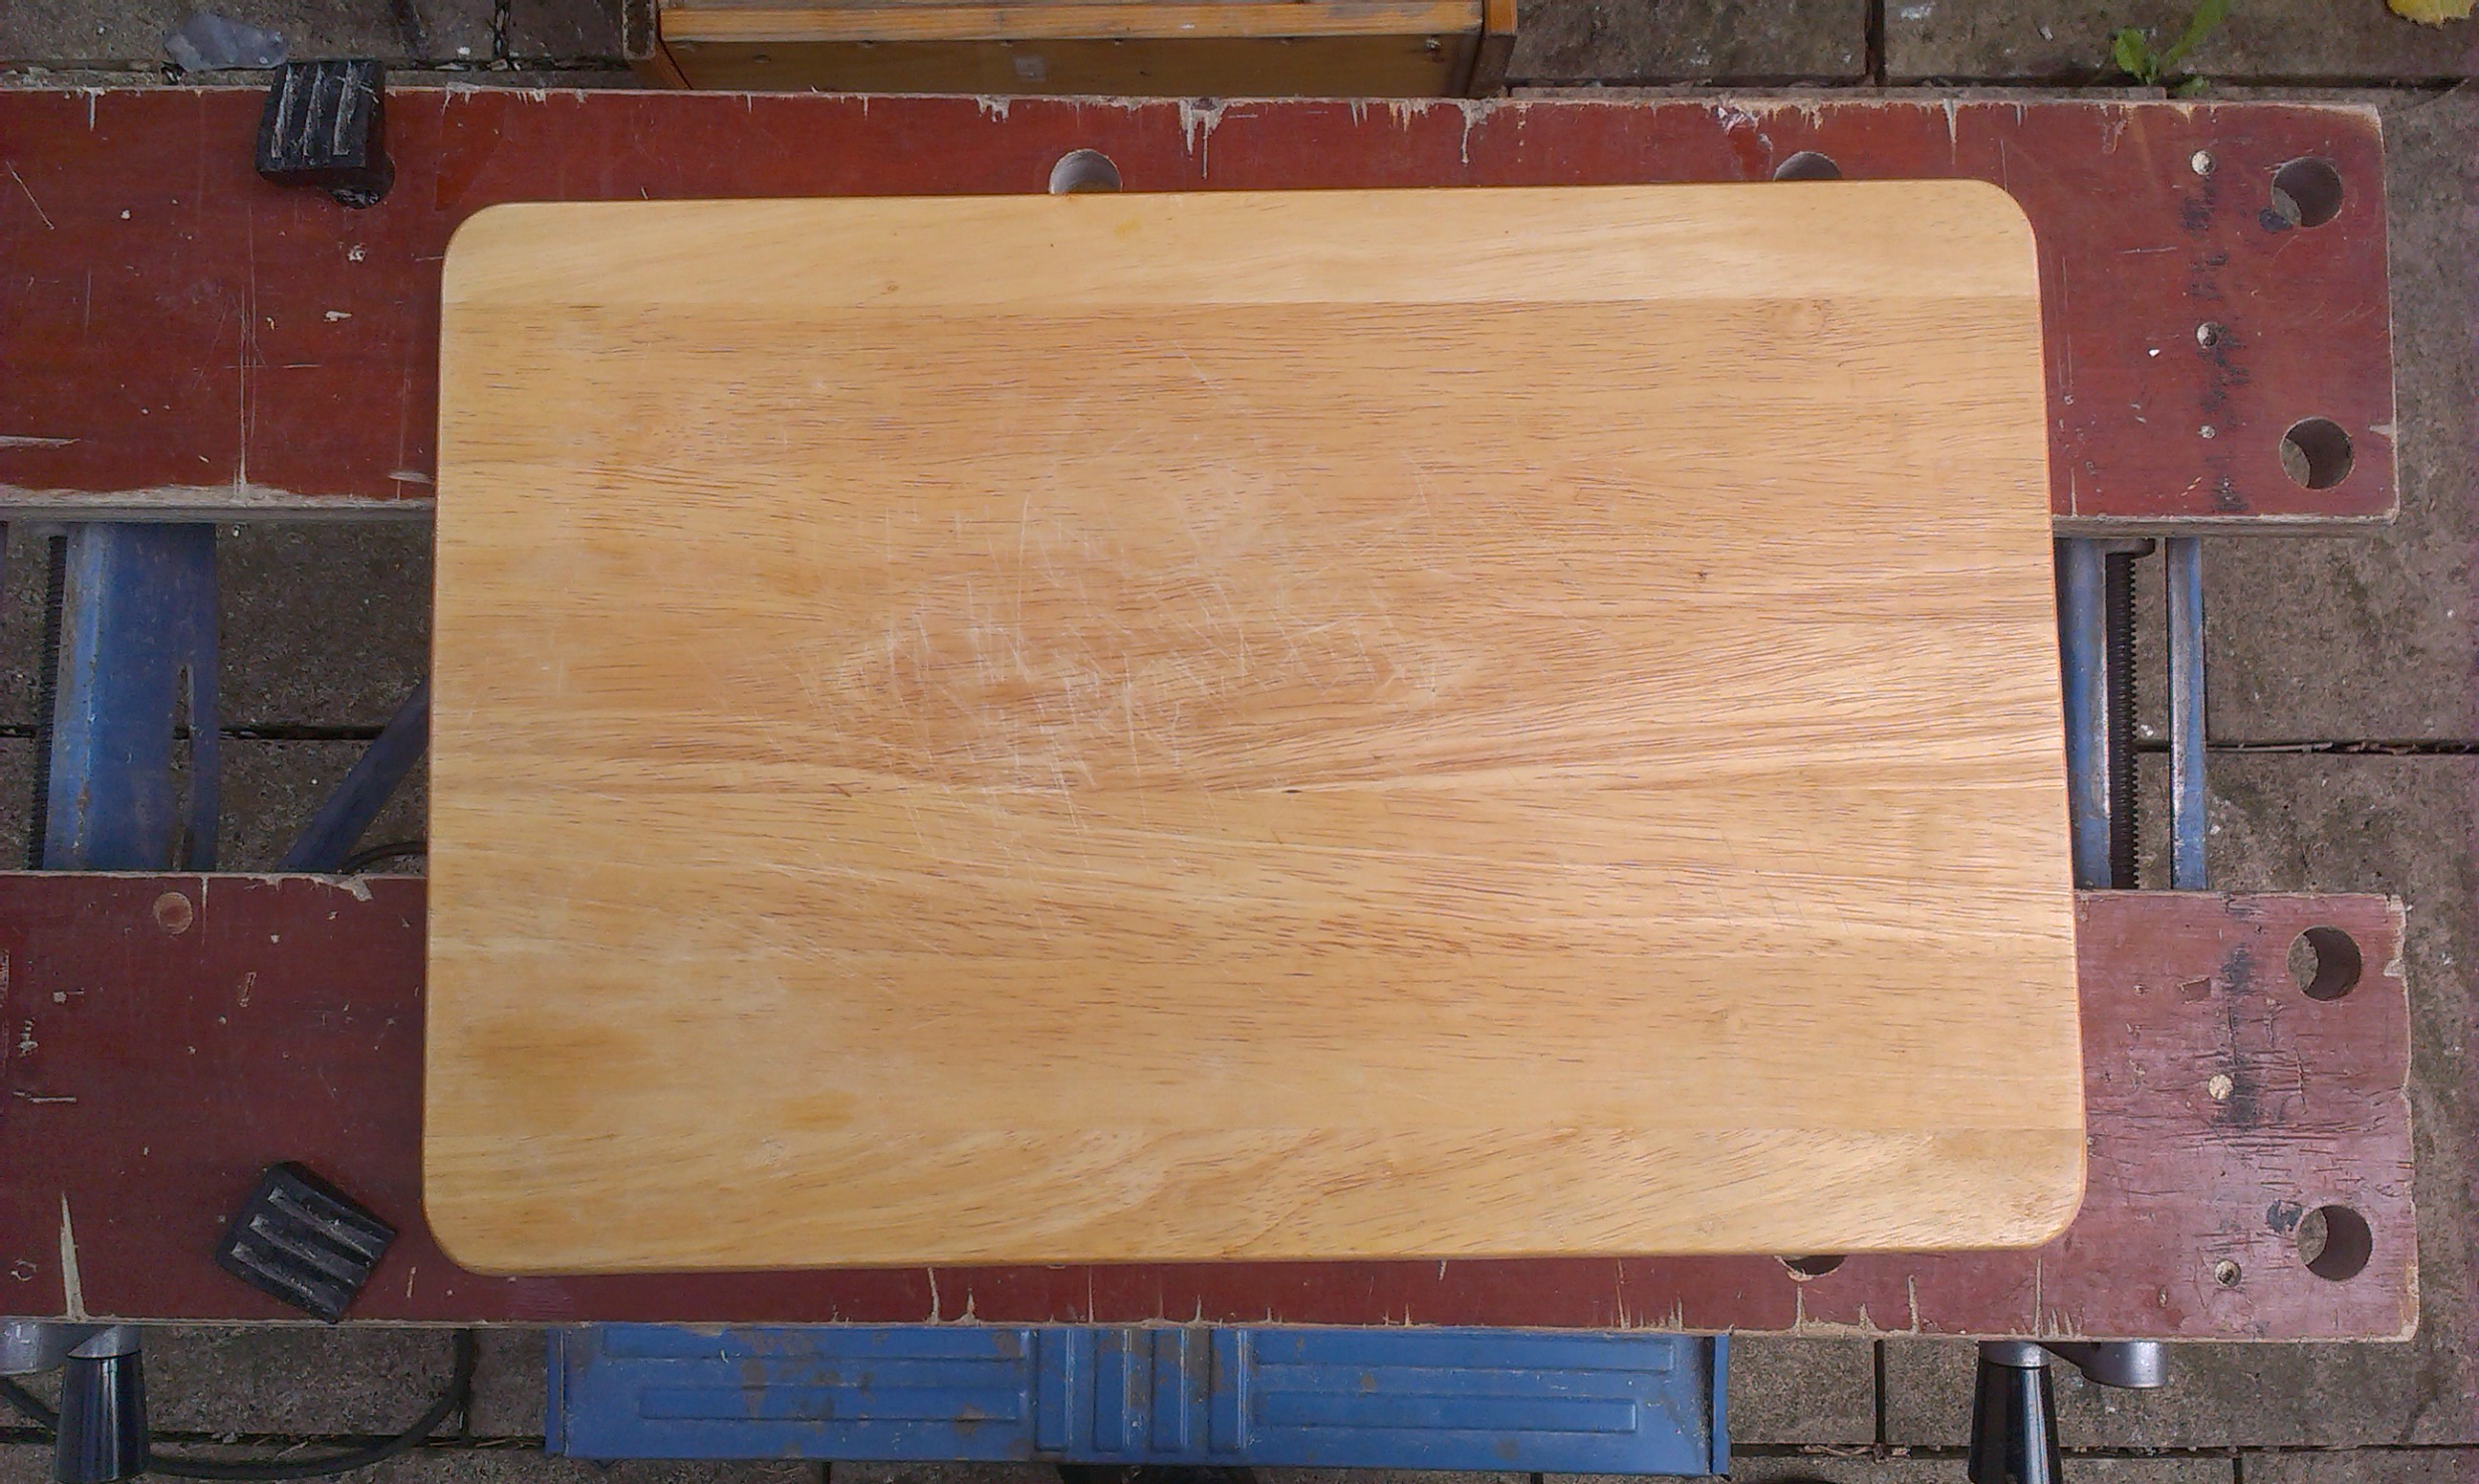
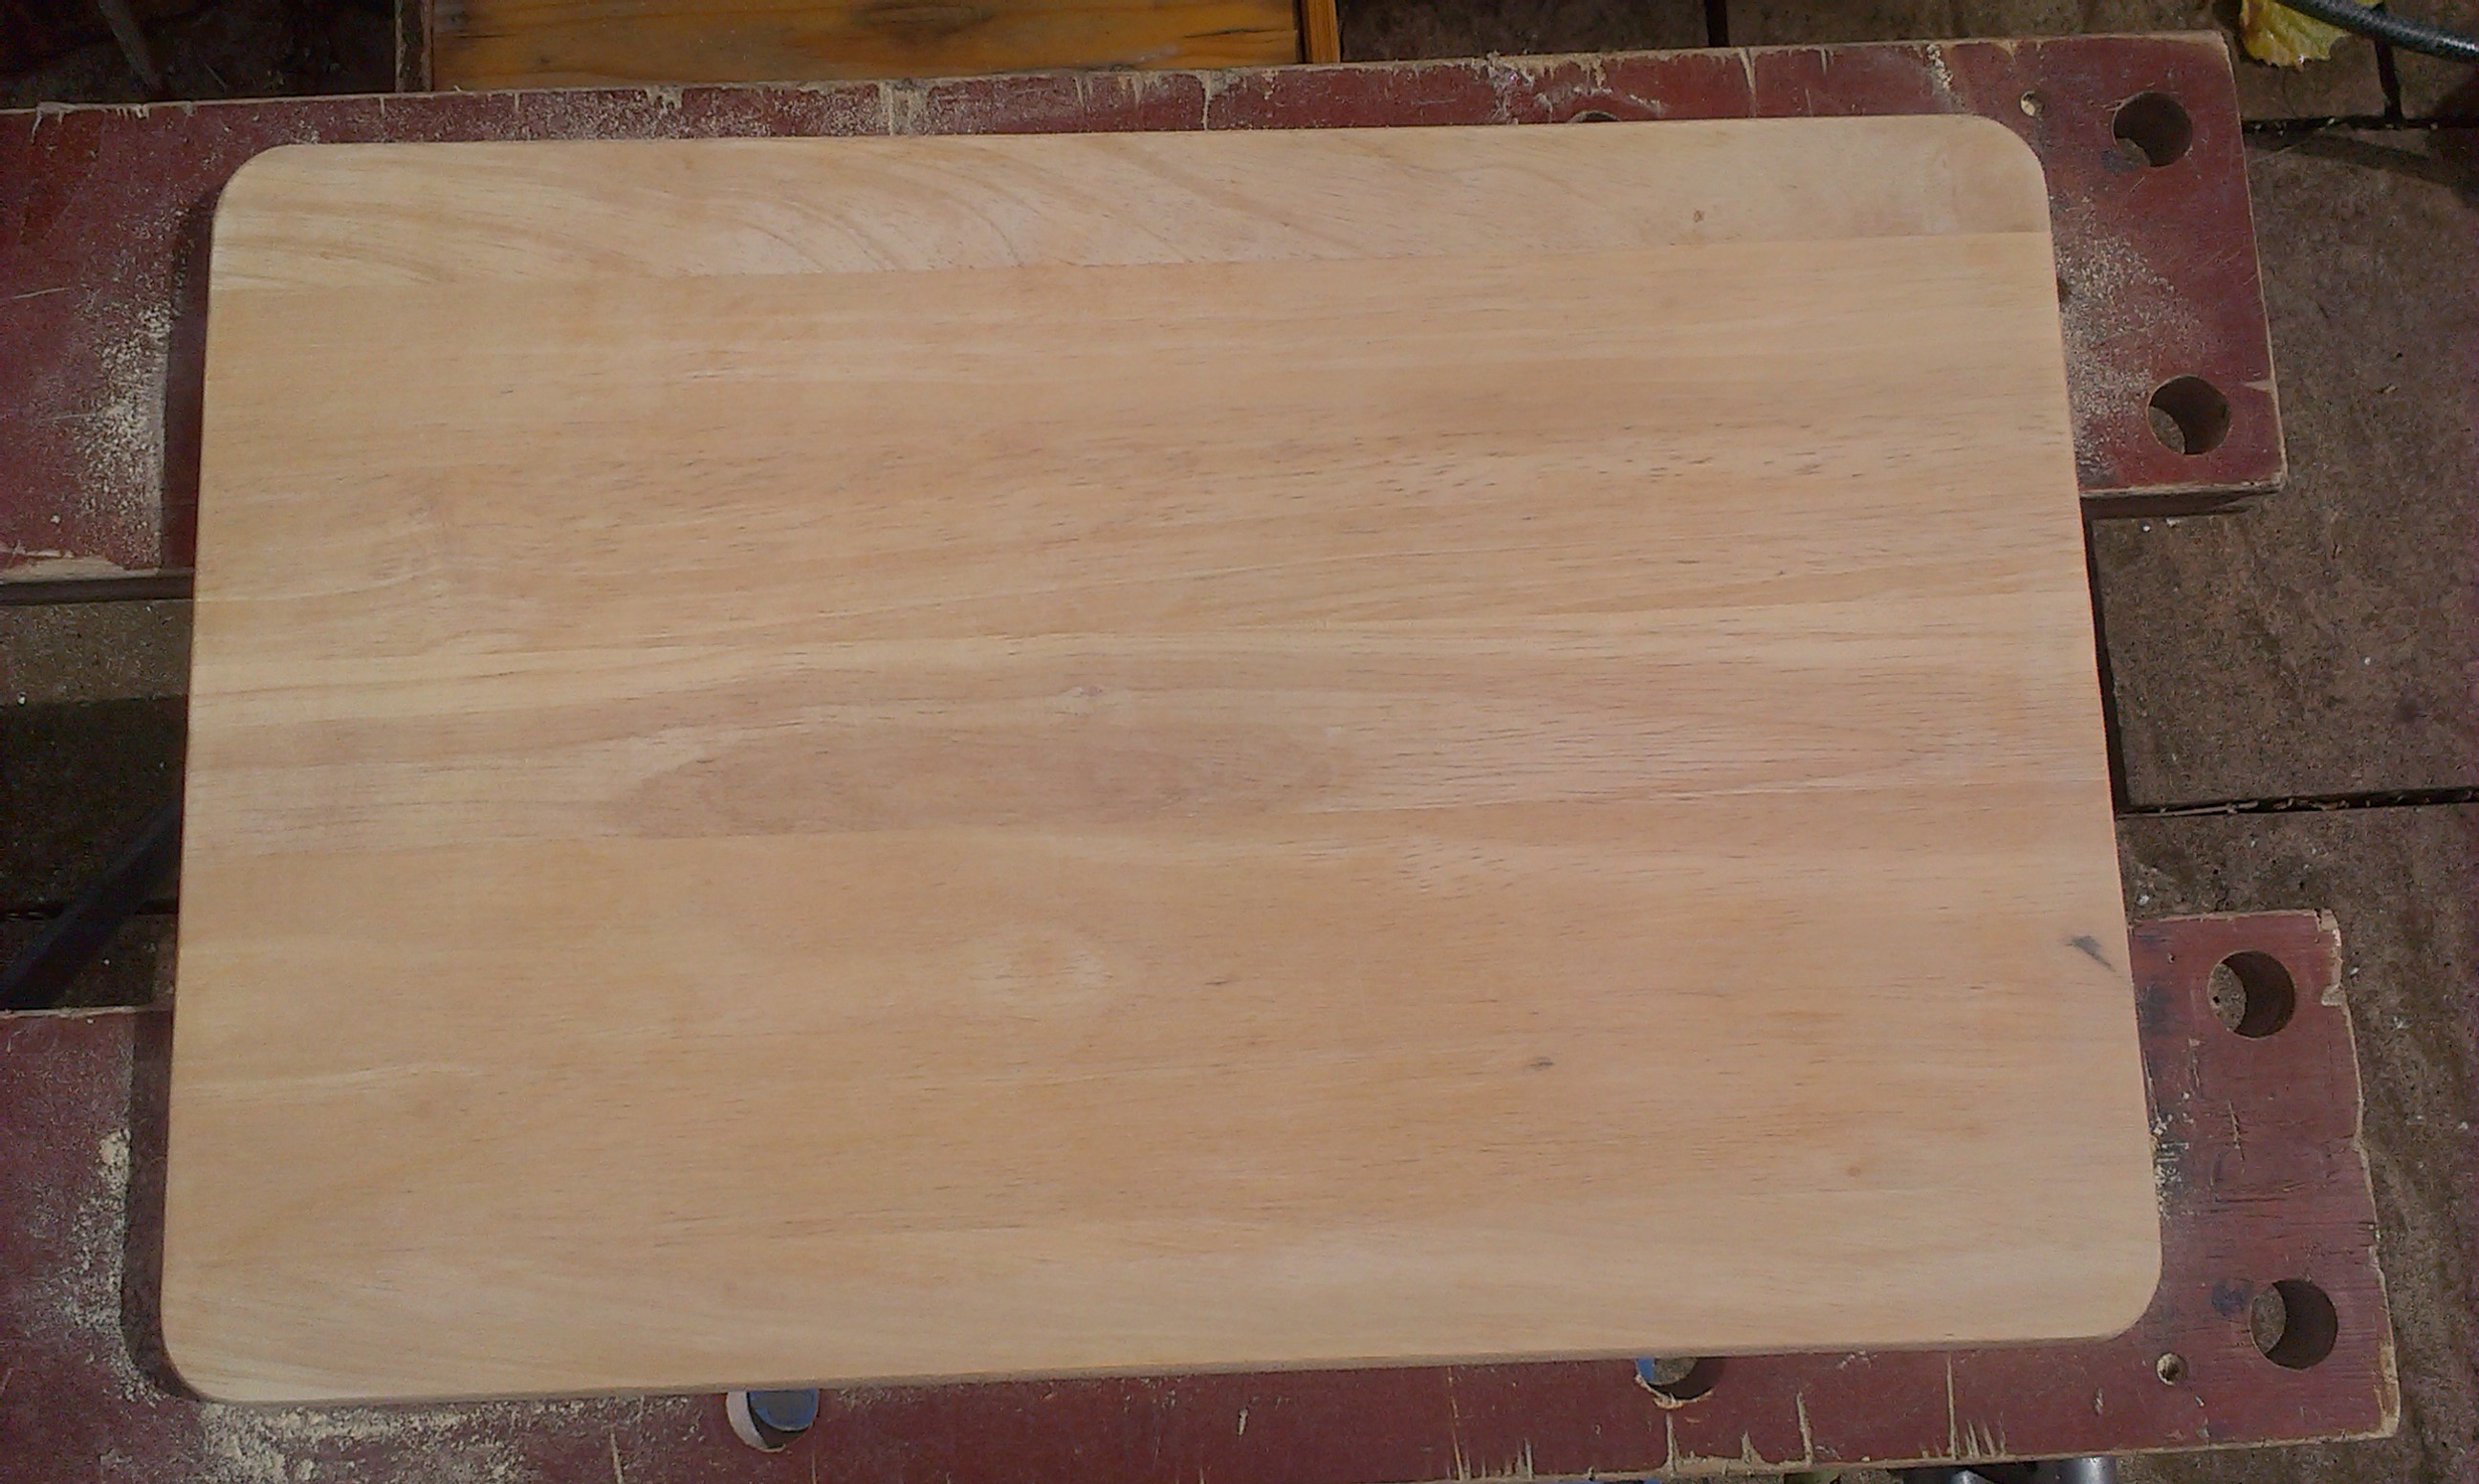
- A board – For this I used a chopping board. I was lucky enough to have recently been given an old one that I sanded down and used. However if you don’t have an old one that you can use you can buy one or any piece of wood no less than 34cm x 20cm. This will allow you to make the grid of 4cm x 4cm squares with space left around the edges. Anything less that a 4cm x 4cm square is going to be hard to play on and personally I recommend a 5cm x 5cm square (which is what I used as my board was 44cm x 39cm).

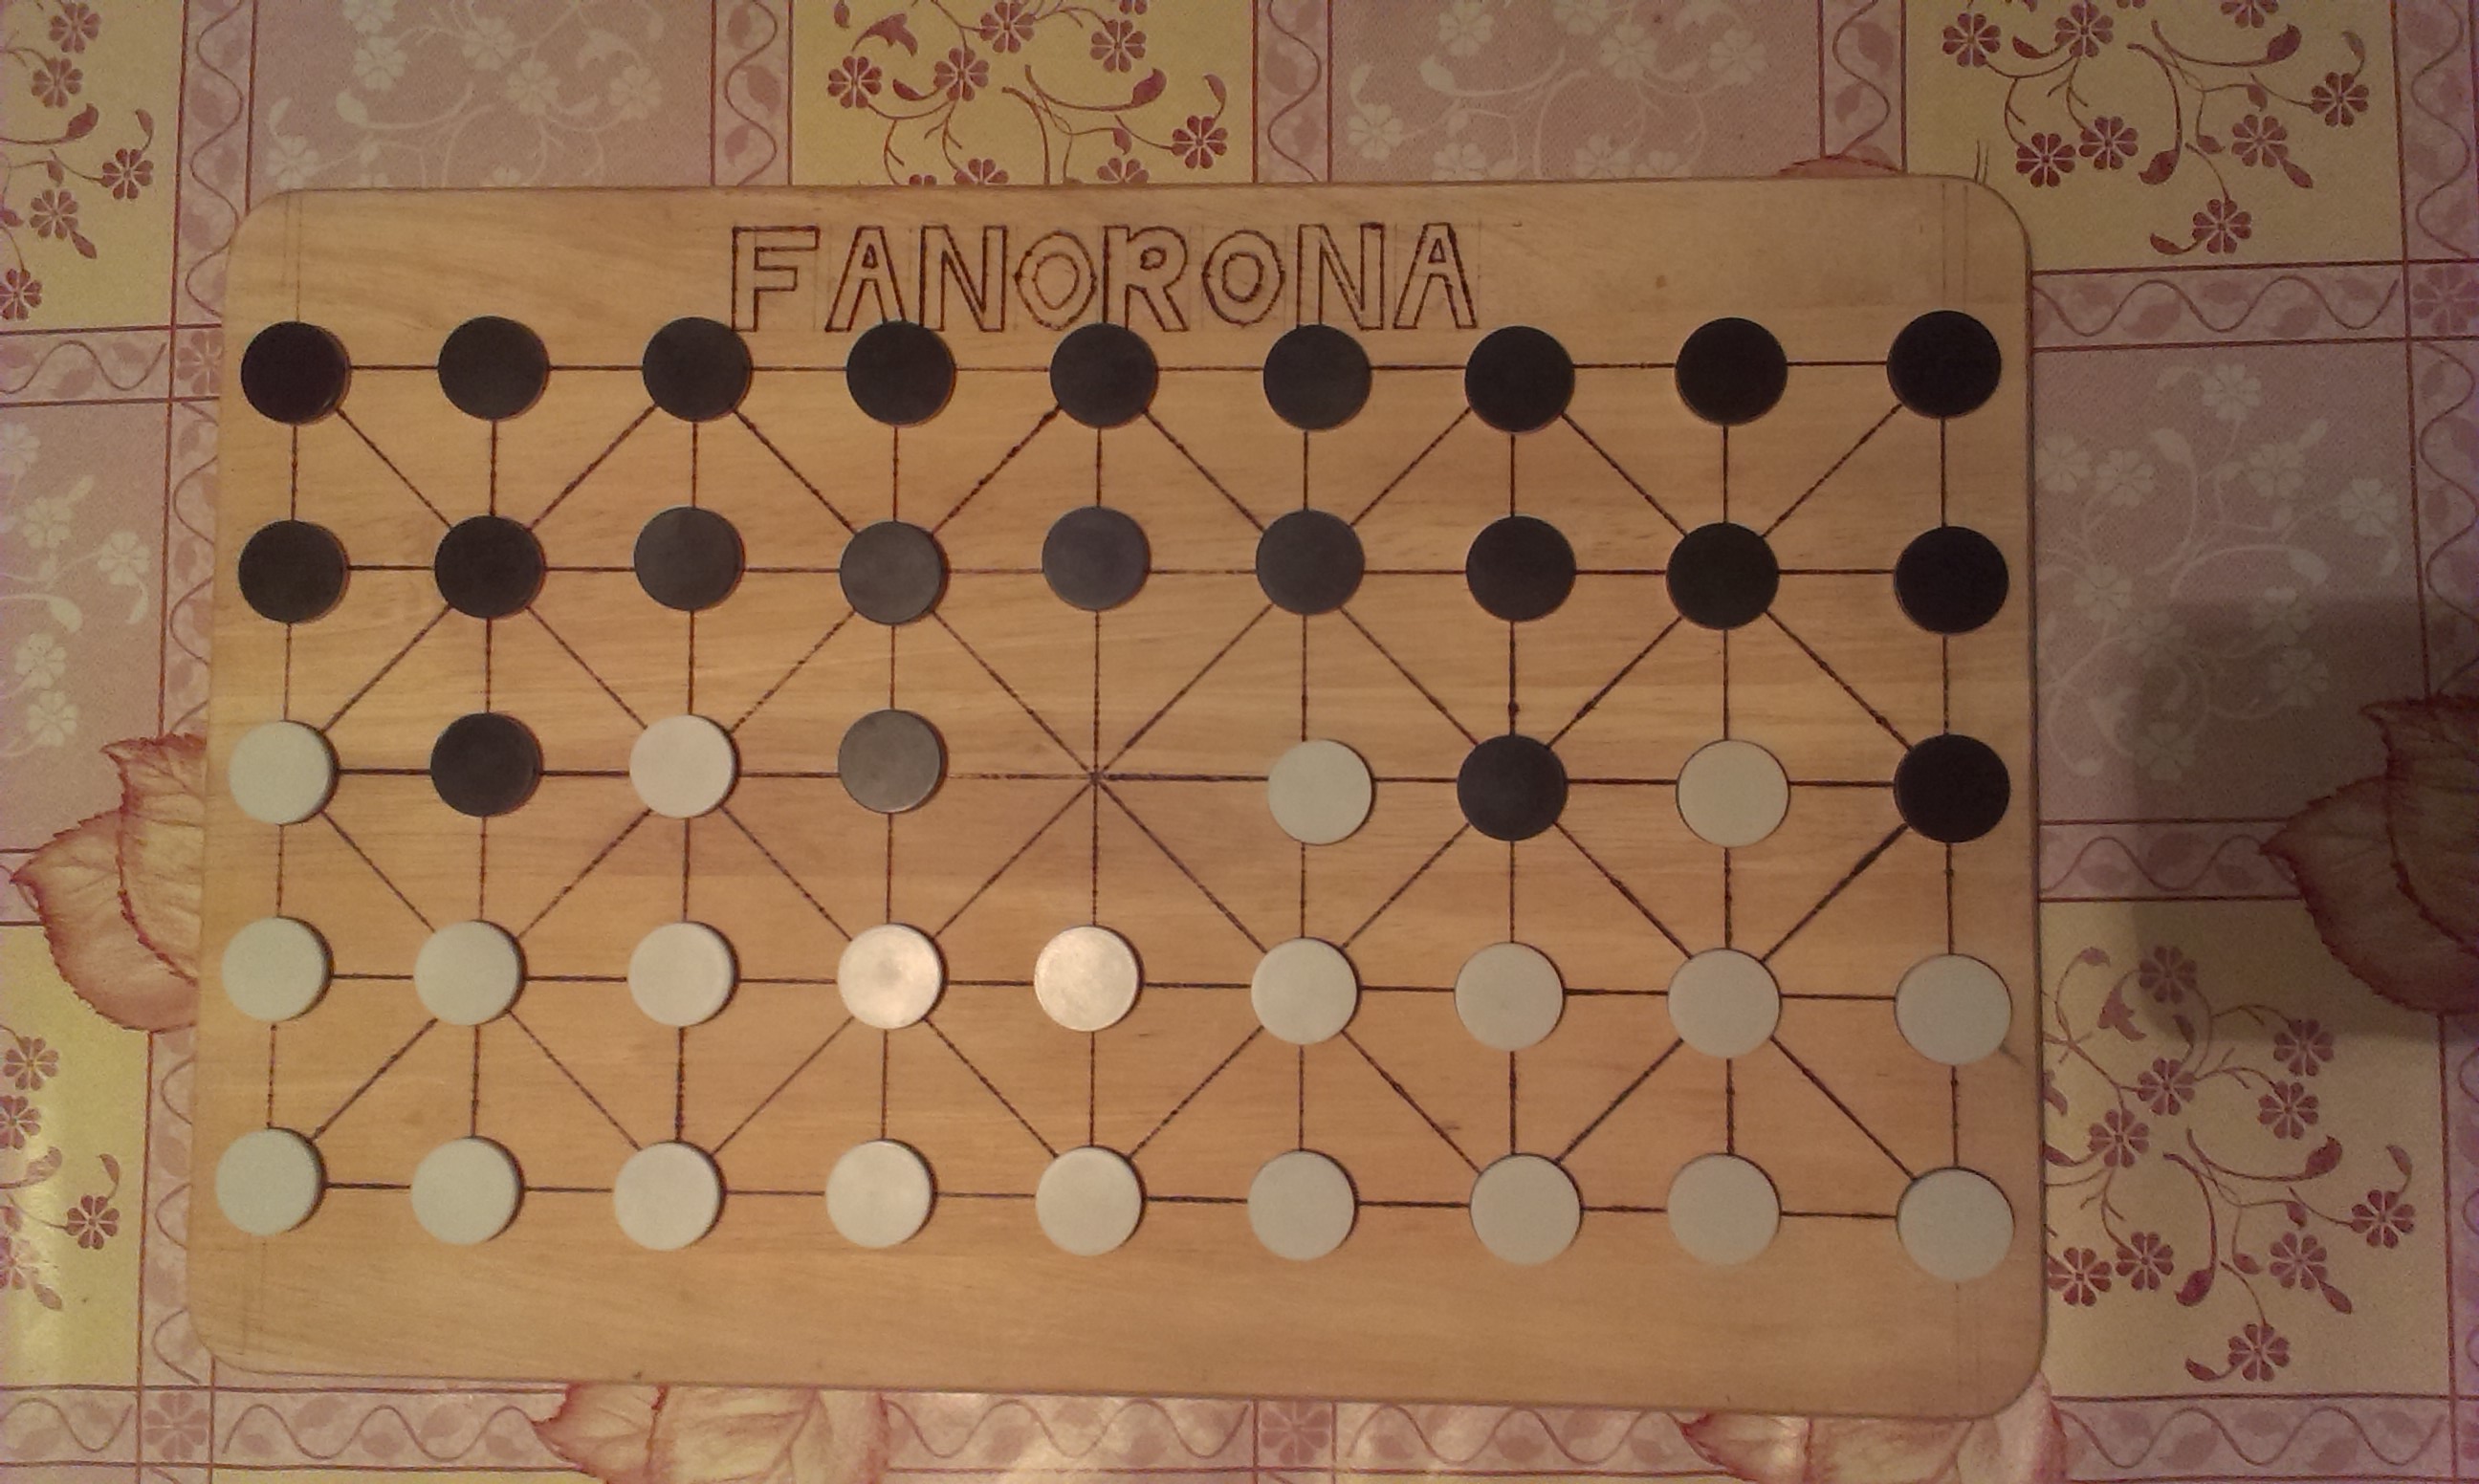
The original scratched up chopping board I was given - Pieces – It is important to decide what pieces you are going to use on the board as this will affect the size of the squares you use. I would recommend Othello pieces as these aren’t difficult to come by, especially on places like eBay, or, if you already own an Othello set you can just borrow them from it costing you nothing. Also they are a nice 2.5cm in diameter which is smaller than a lot of Draughts pieces you can buy and so easier to play with.
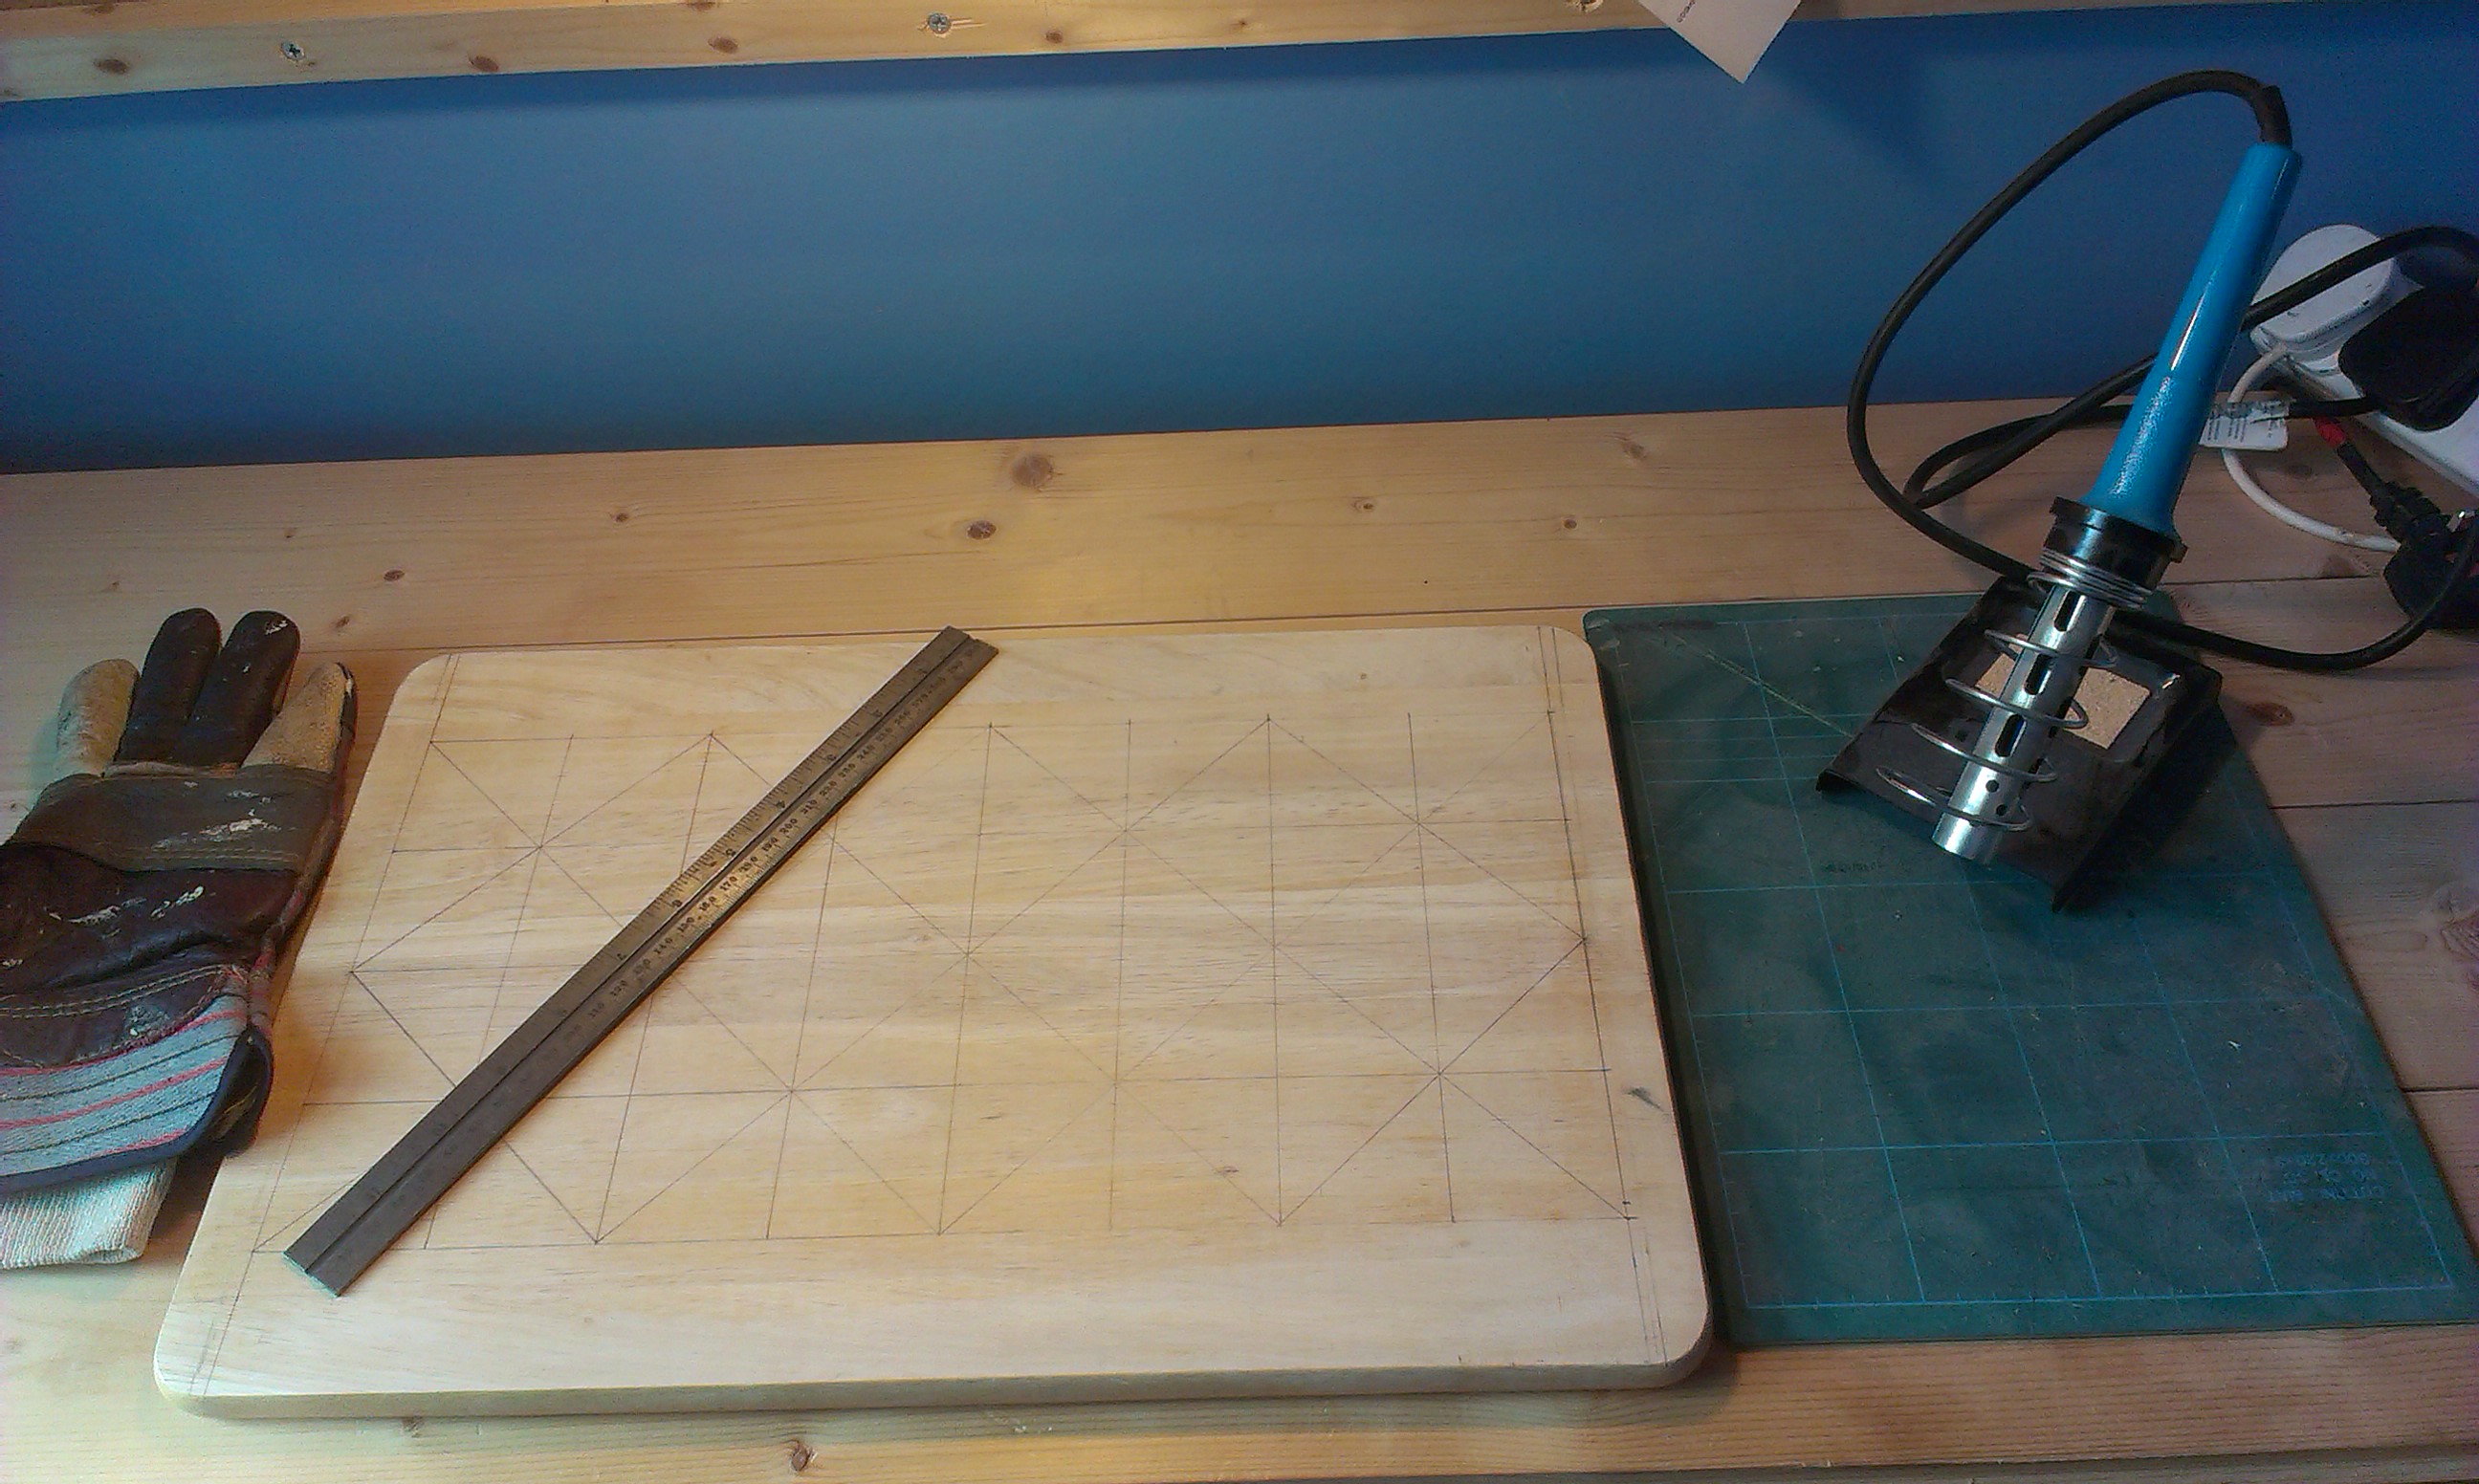
- A Soldering Iron – to brand the board. I used a 40 watt Iron with a brand new pointed tip.
- A Metal Ruler – to keep the soldering iron straight as you brand.
- Pencil – for drawing the design on to the board.
- A Heat Proof Glove – to protect your hand when your holding the ruler next to the soldering iron. I just used a heavy duty gardening glove as the aim is not to touch the soldering iron against the glove, the glove is there just in case.

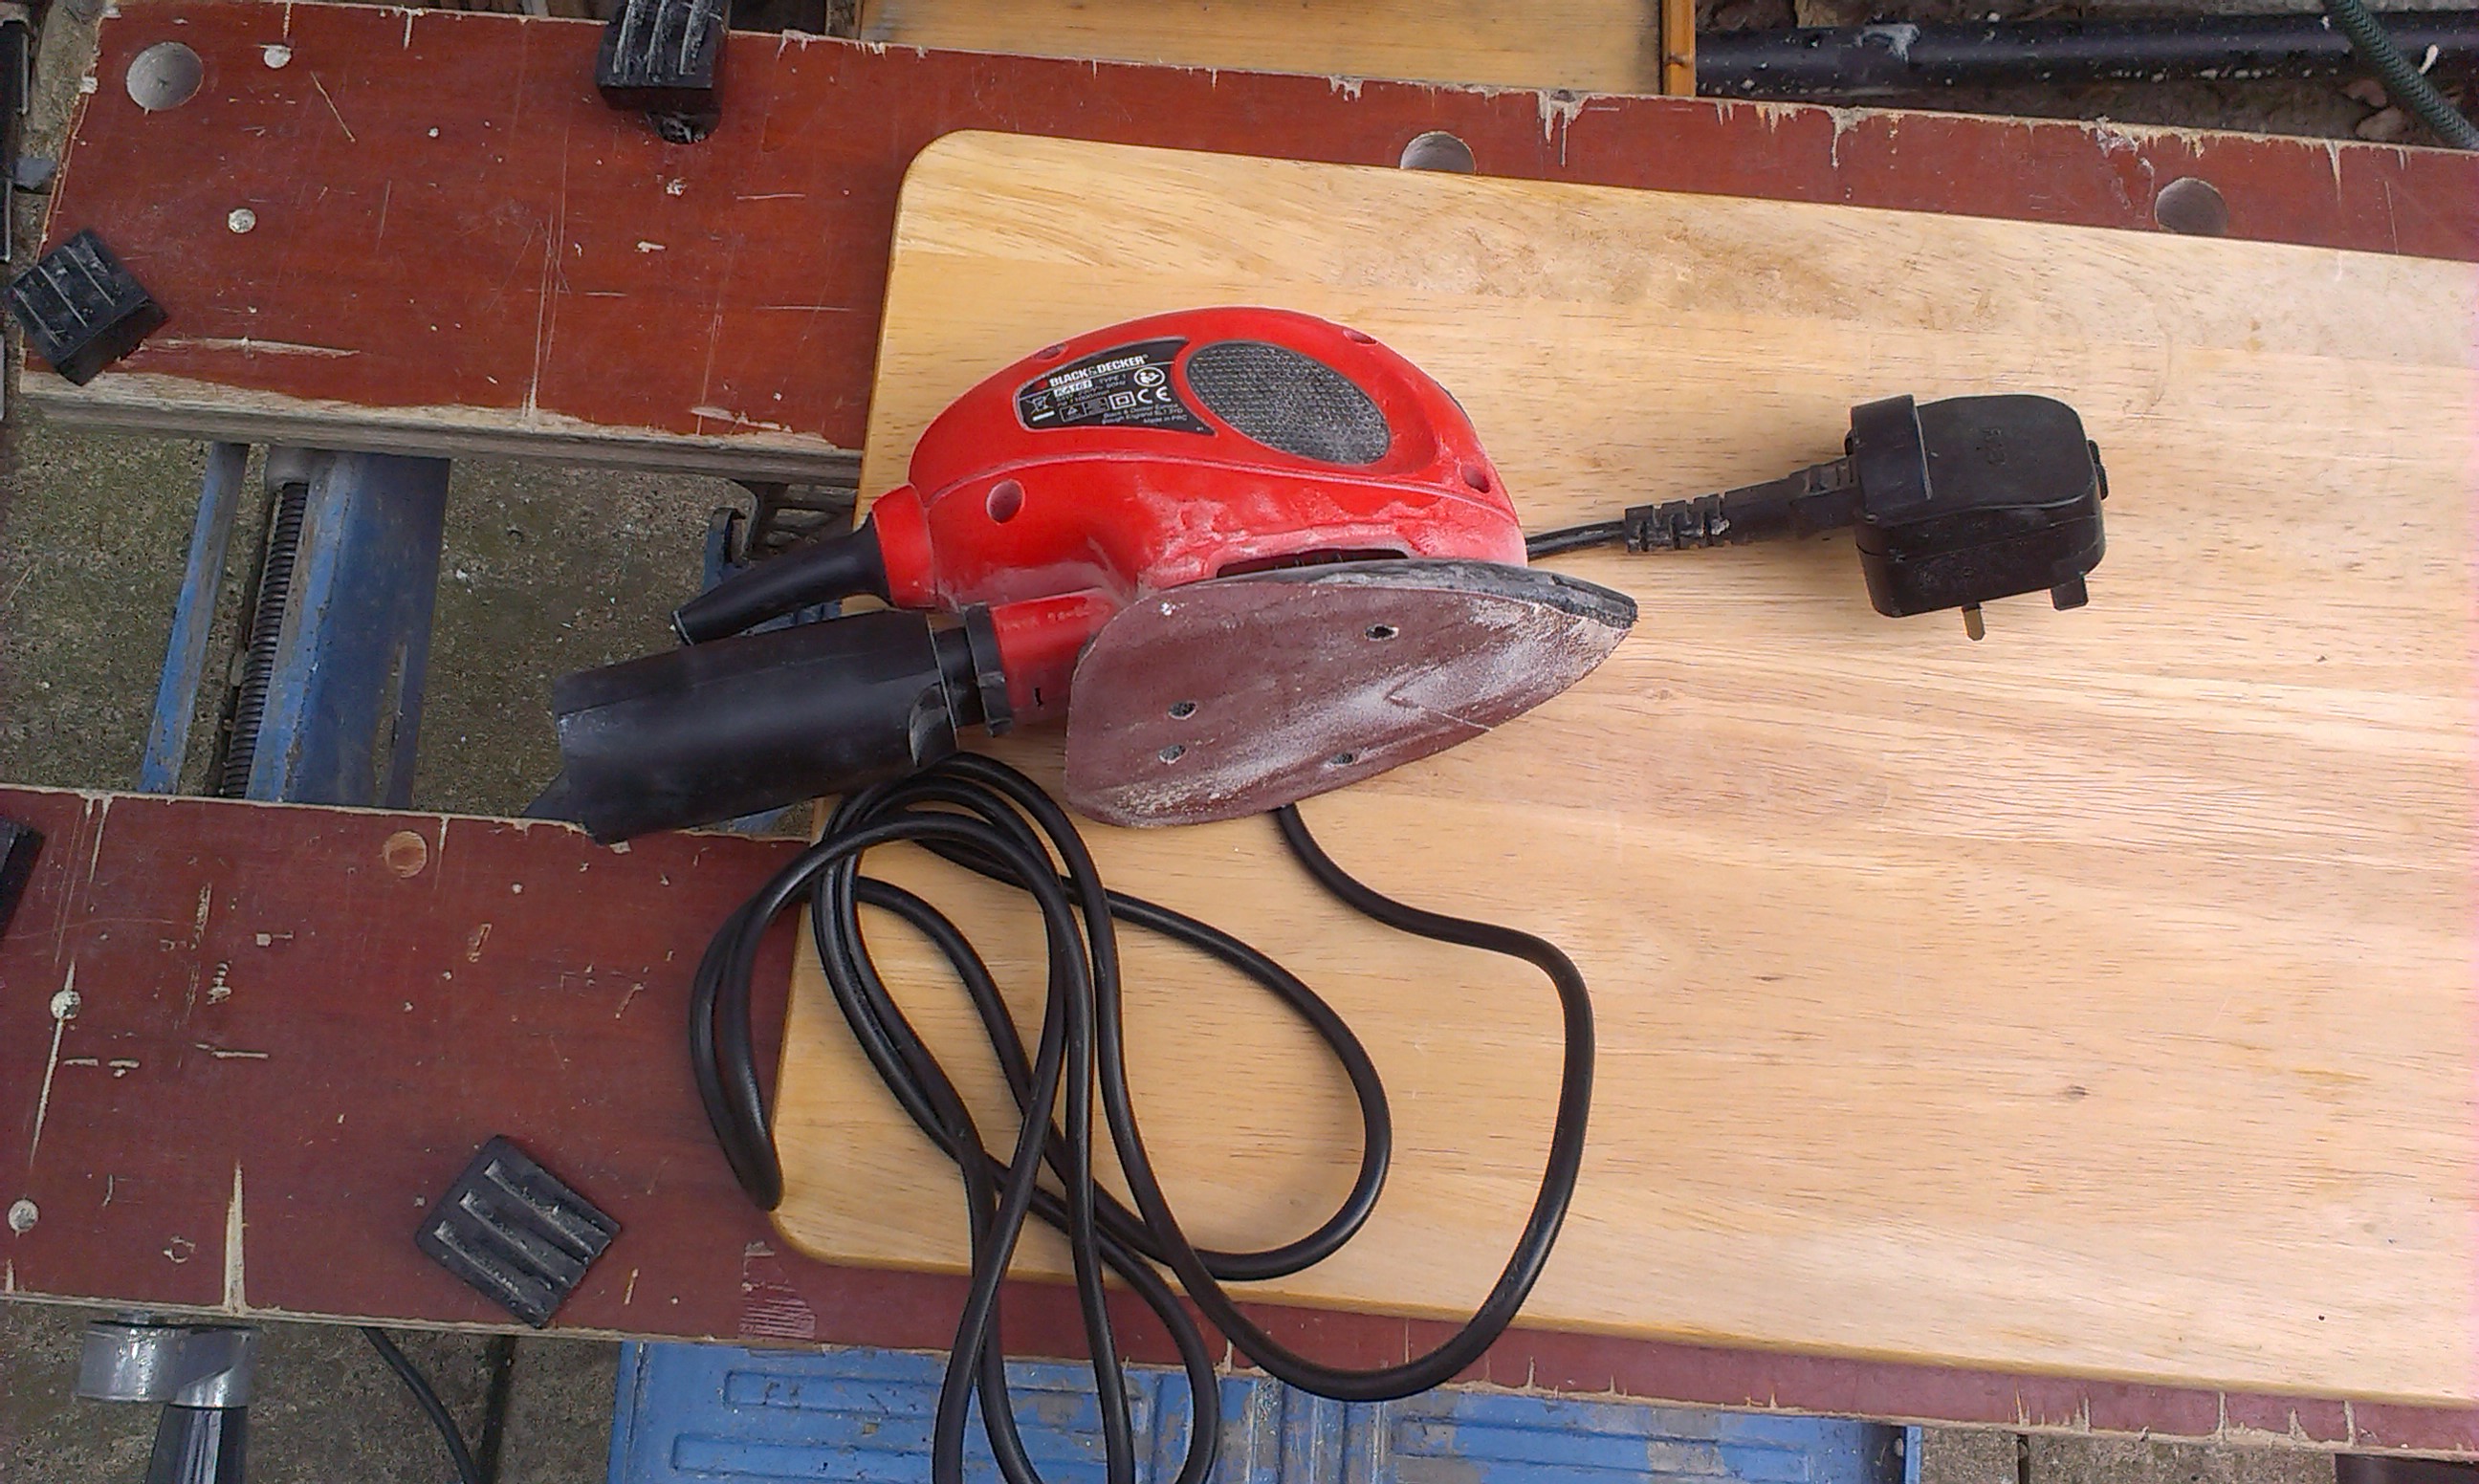
The soldering Iron, Metal Ruler, Glove and board ready to go. - Sand Paper or An Electric Sander – You will only need these if your board has been previously used or is coated in varnish or something. You will use these to remove any previous scratches or and varnish.

The electric sander I used to remove the scratches and marks. - Varnish – Optional depending on how you choose to finish your board.
Step One – Preparation:
If you have a brand new piece of wood with no coating skip points one and two.
- Sand the board down to remove any scratches, marks or varnish finishing.

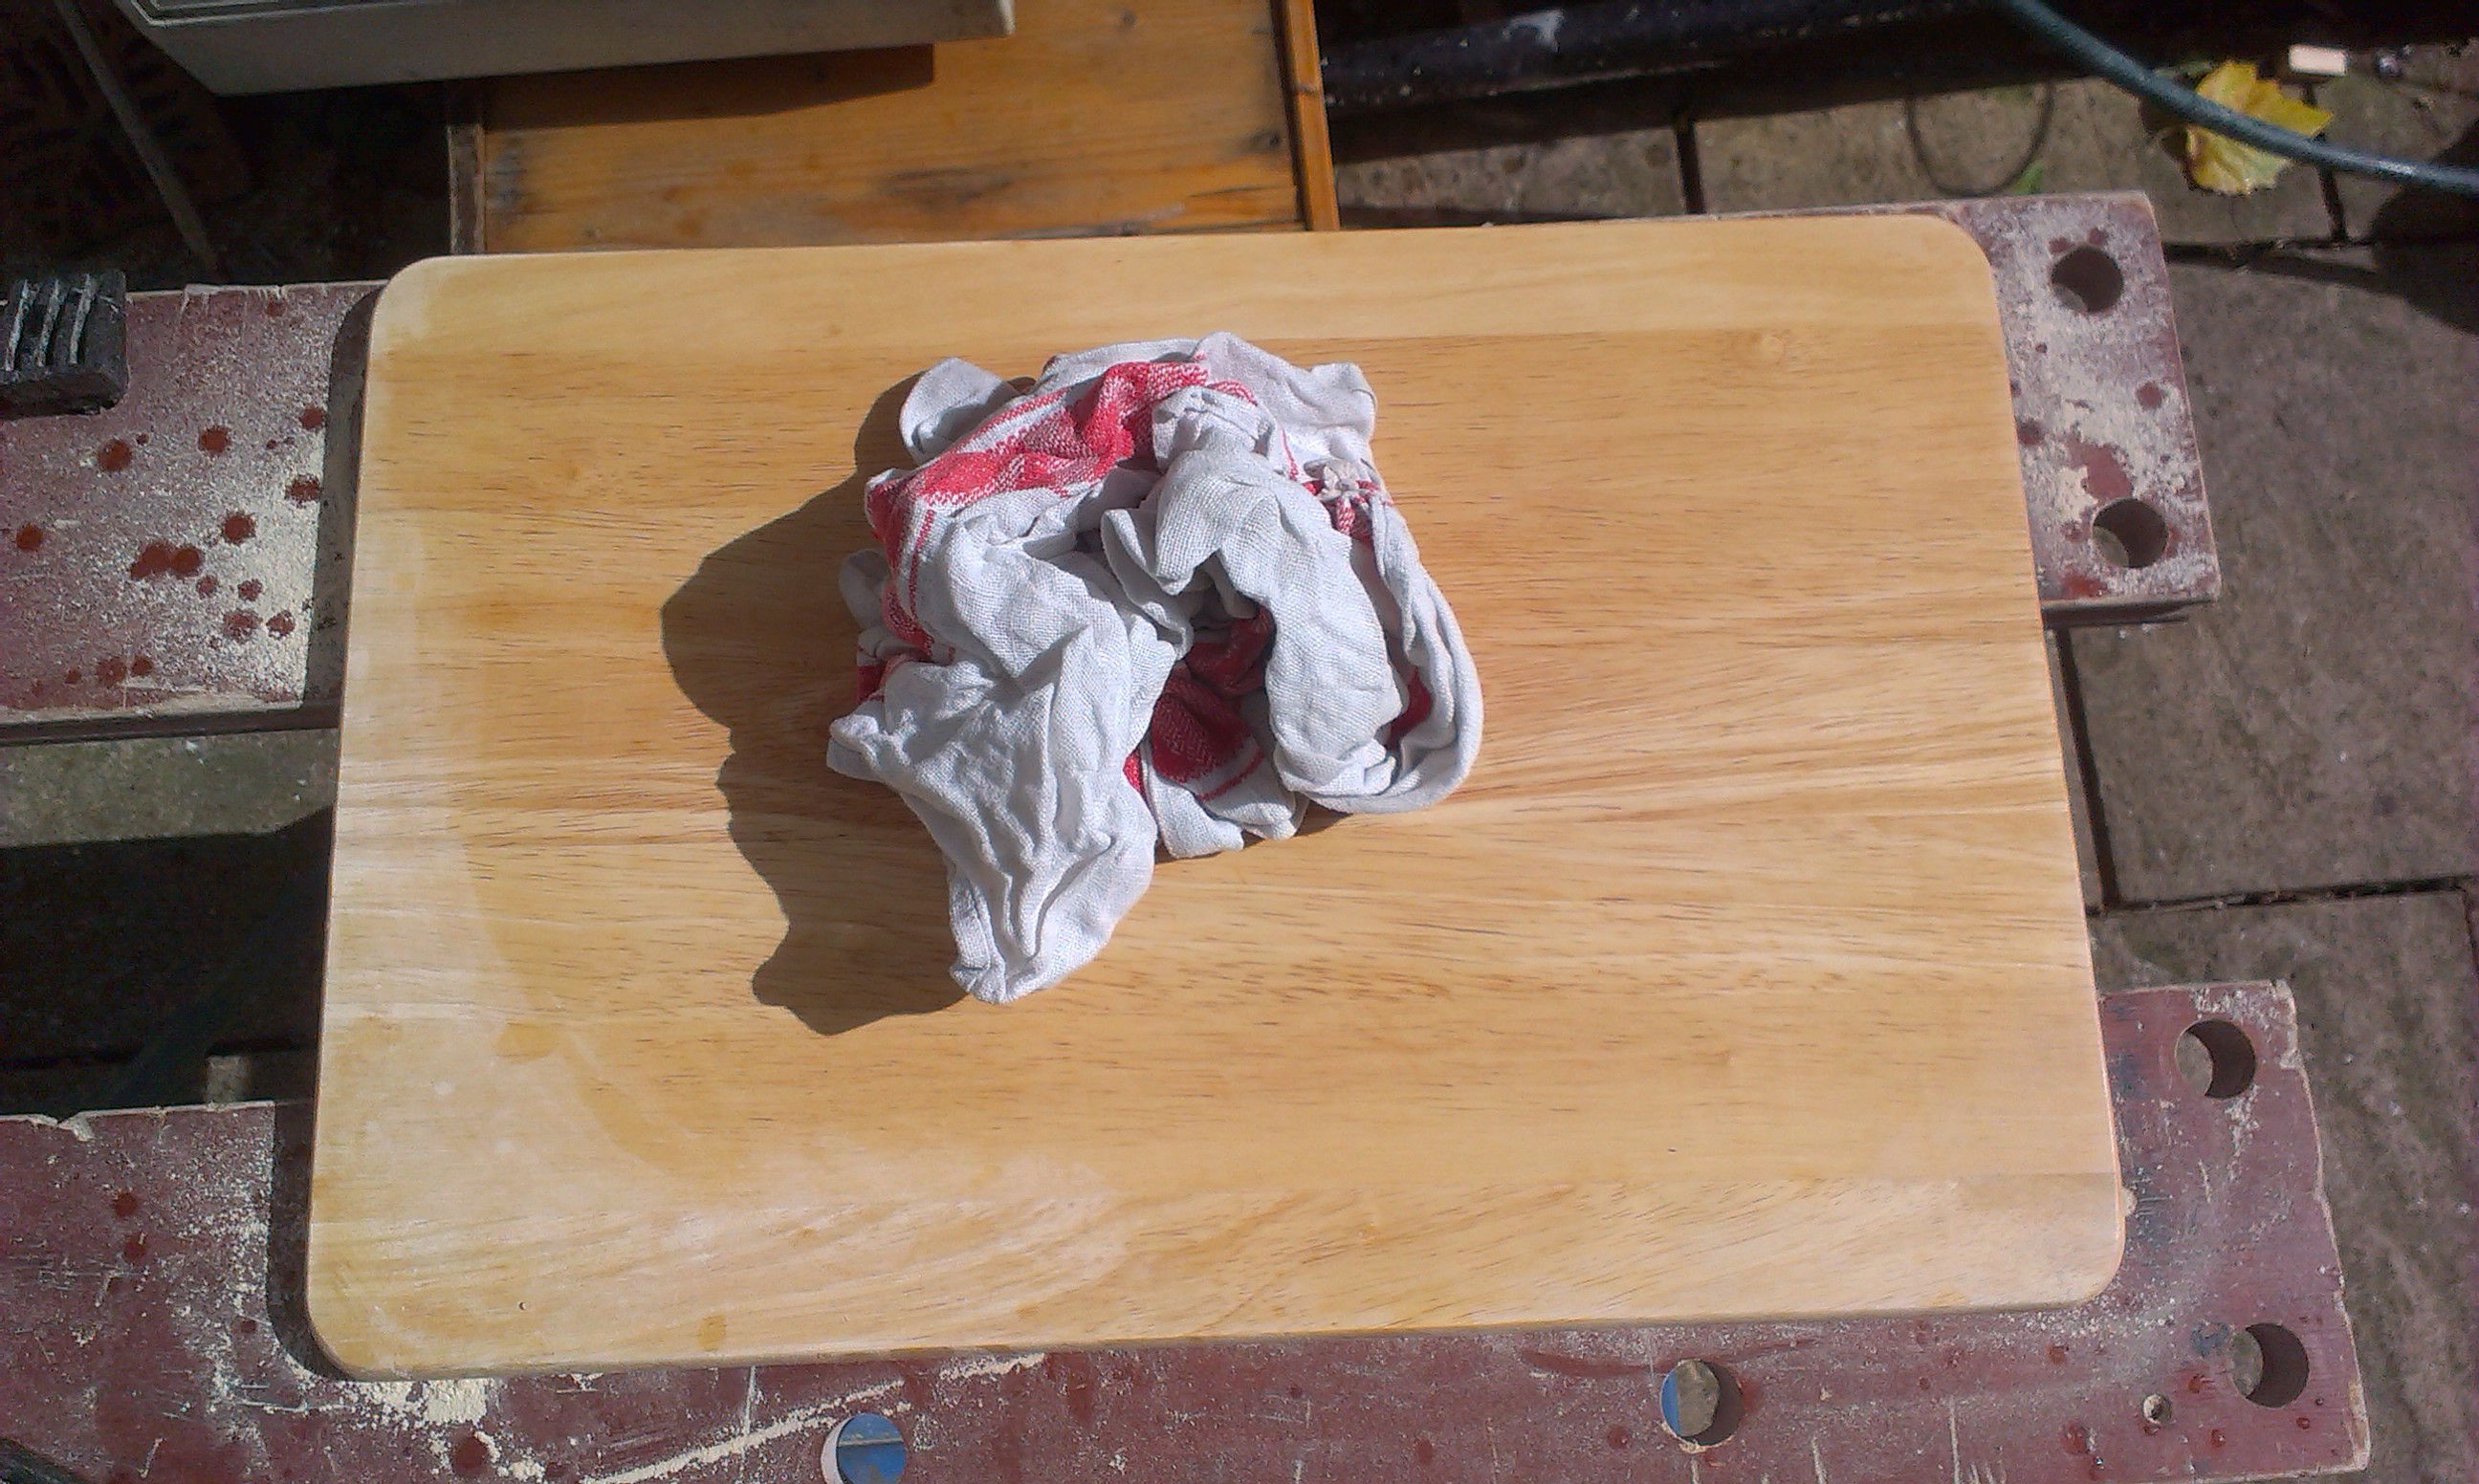
The board after it had been sanded. - Then wipe the board down with a damp cloth to remove any dust left from the sanding process.

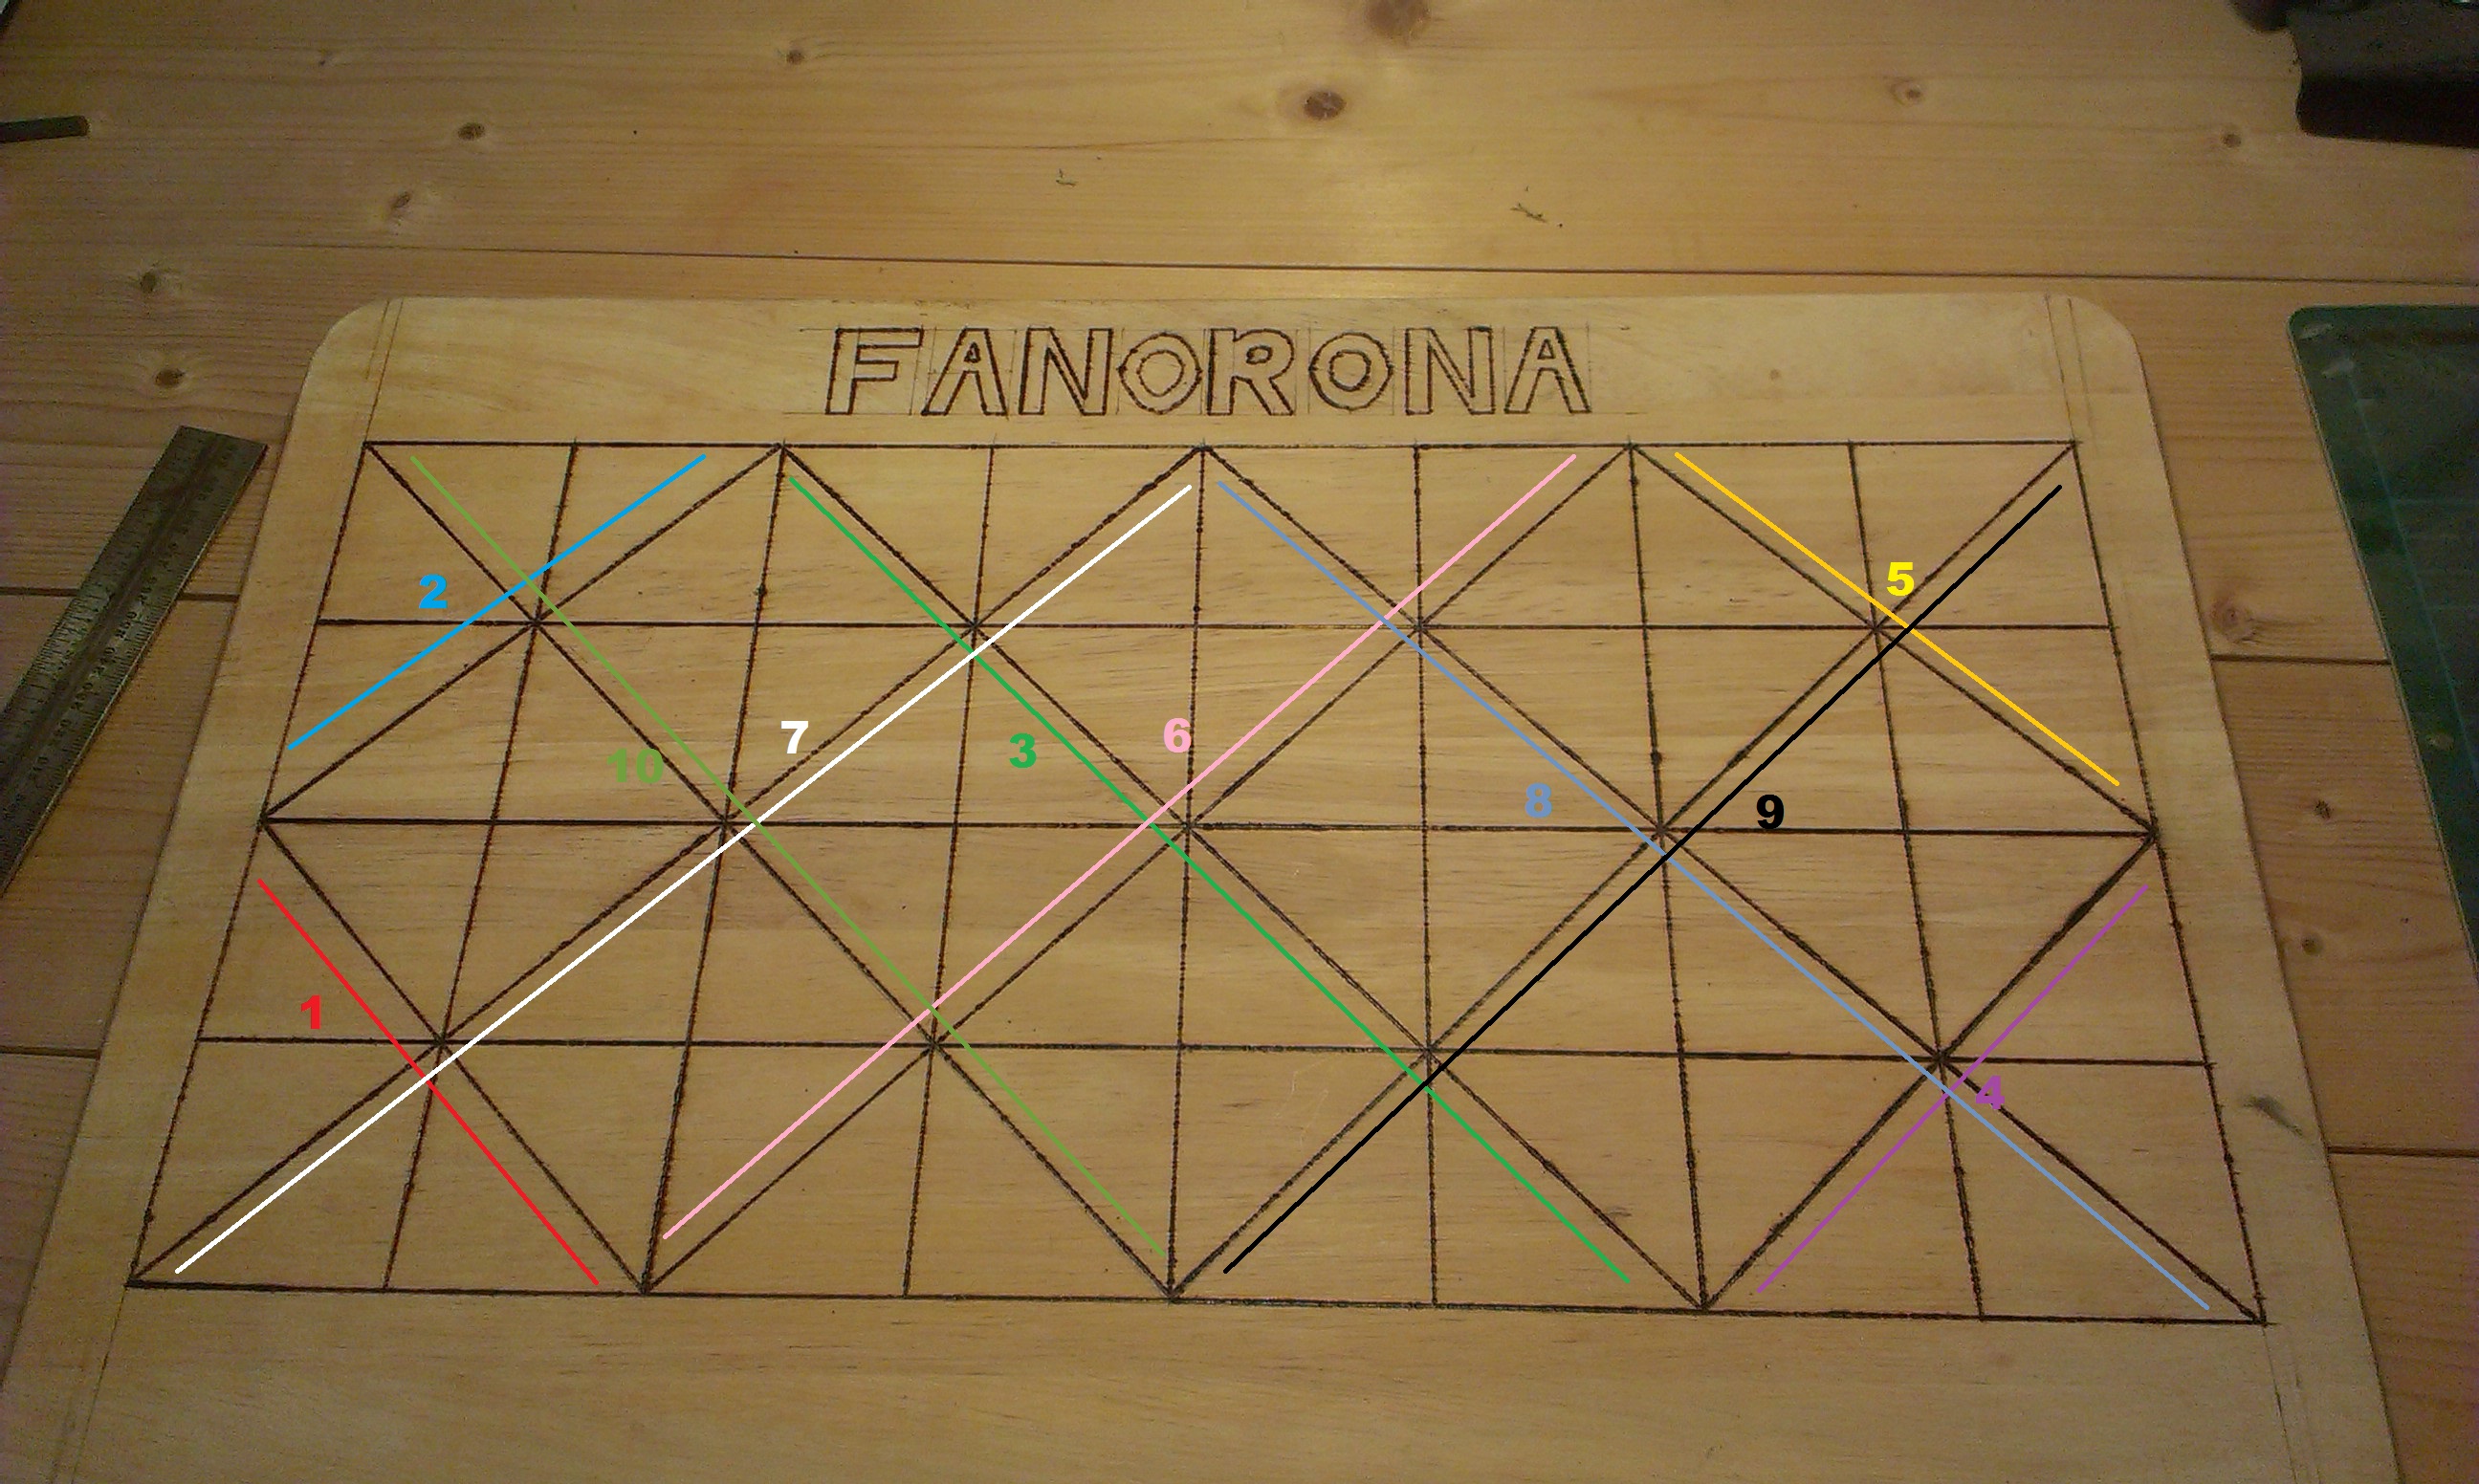
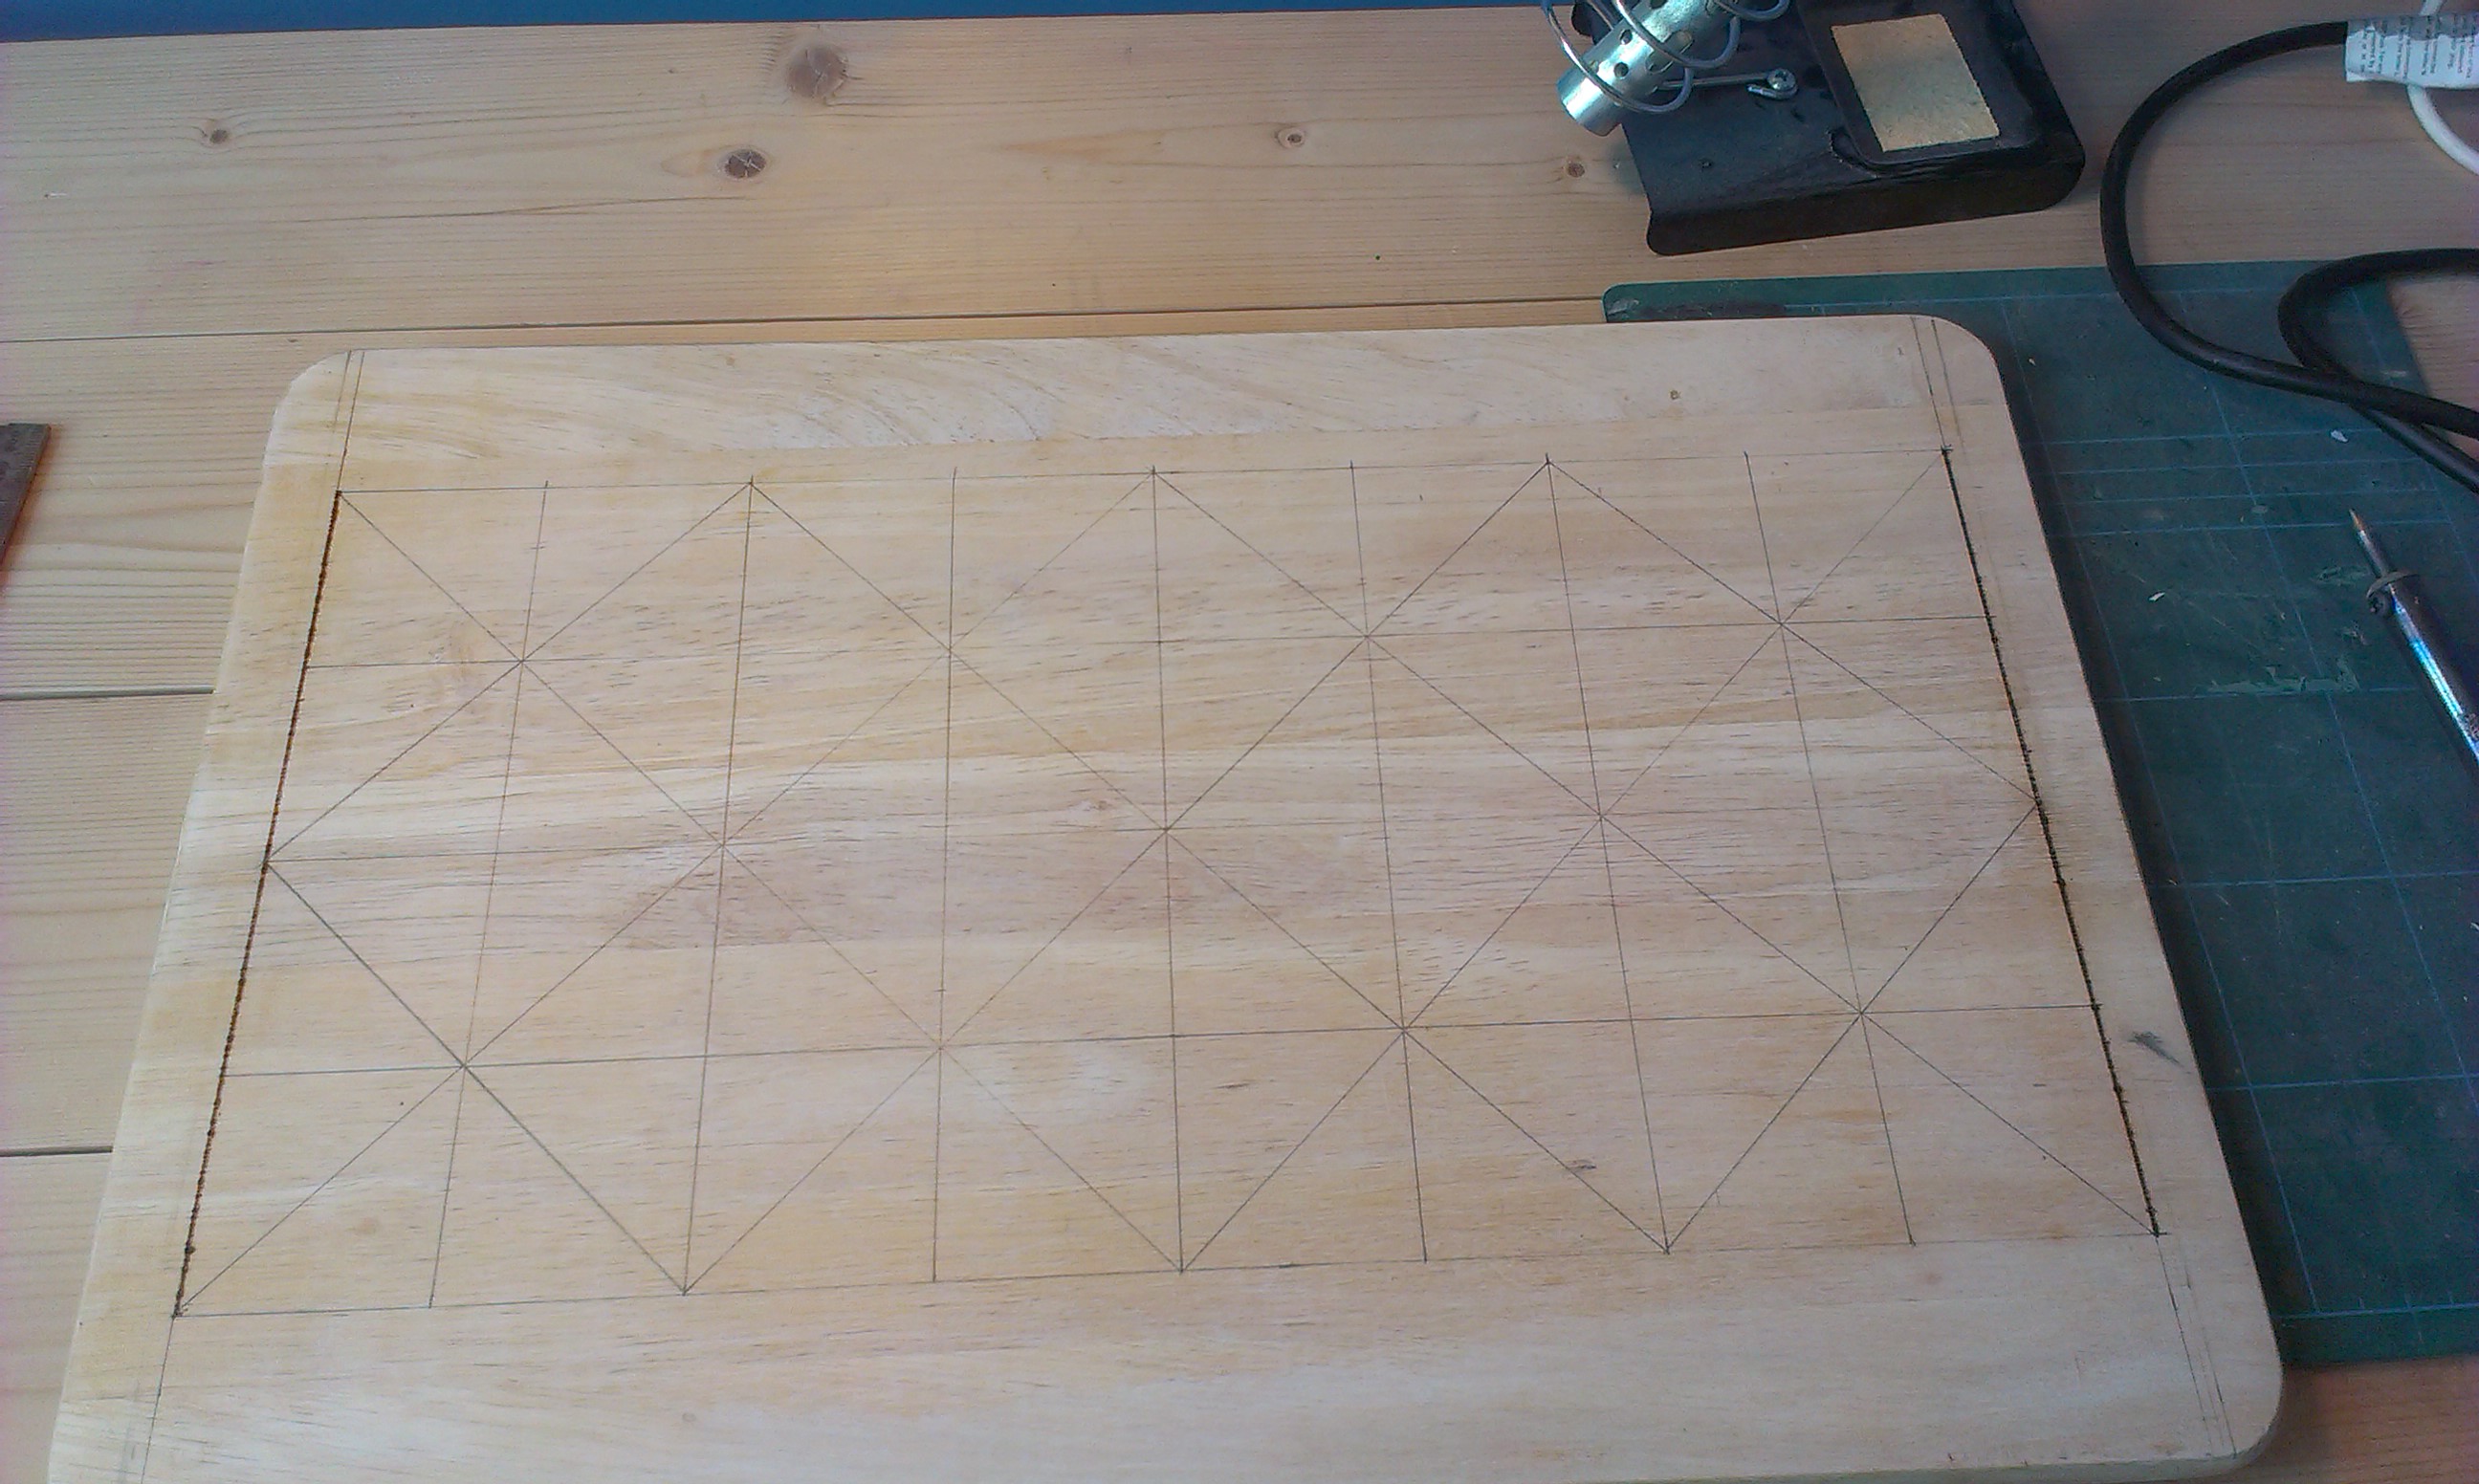
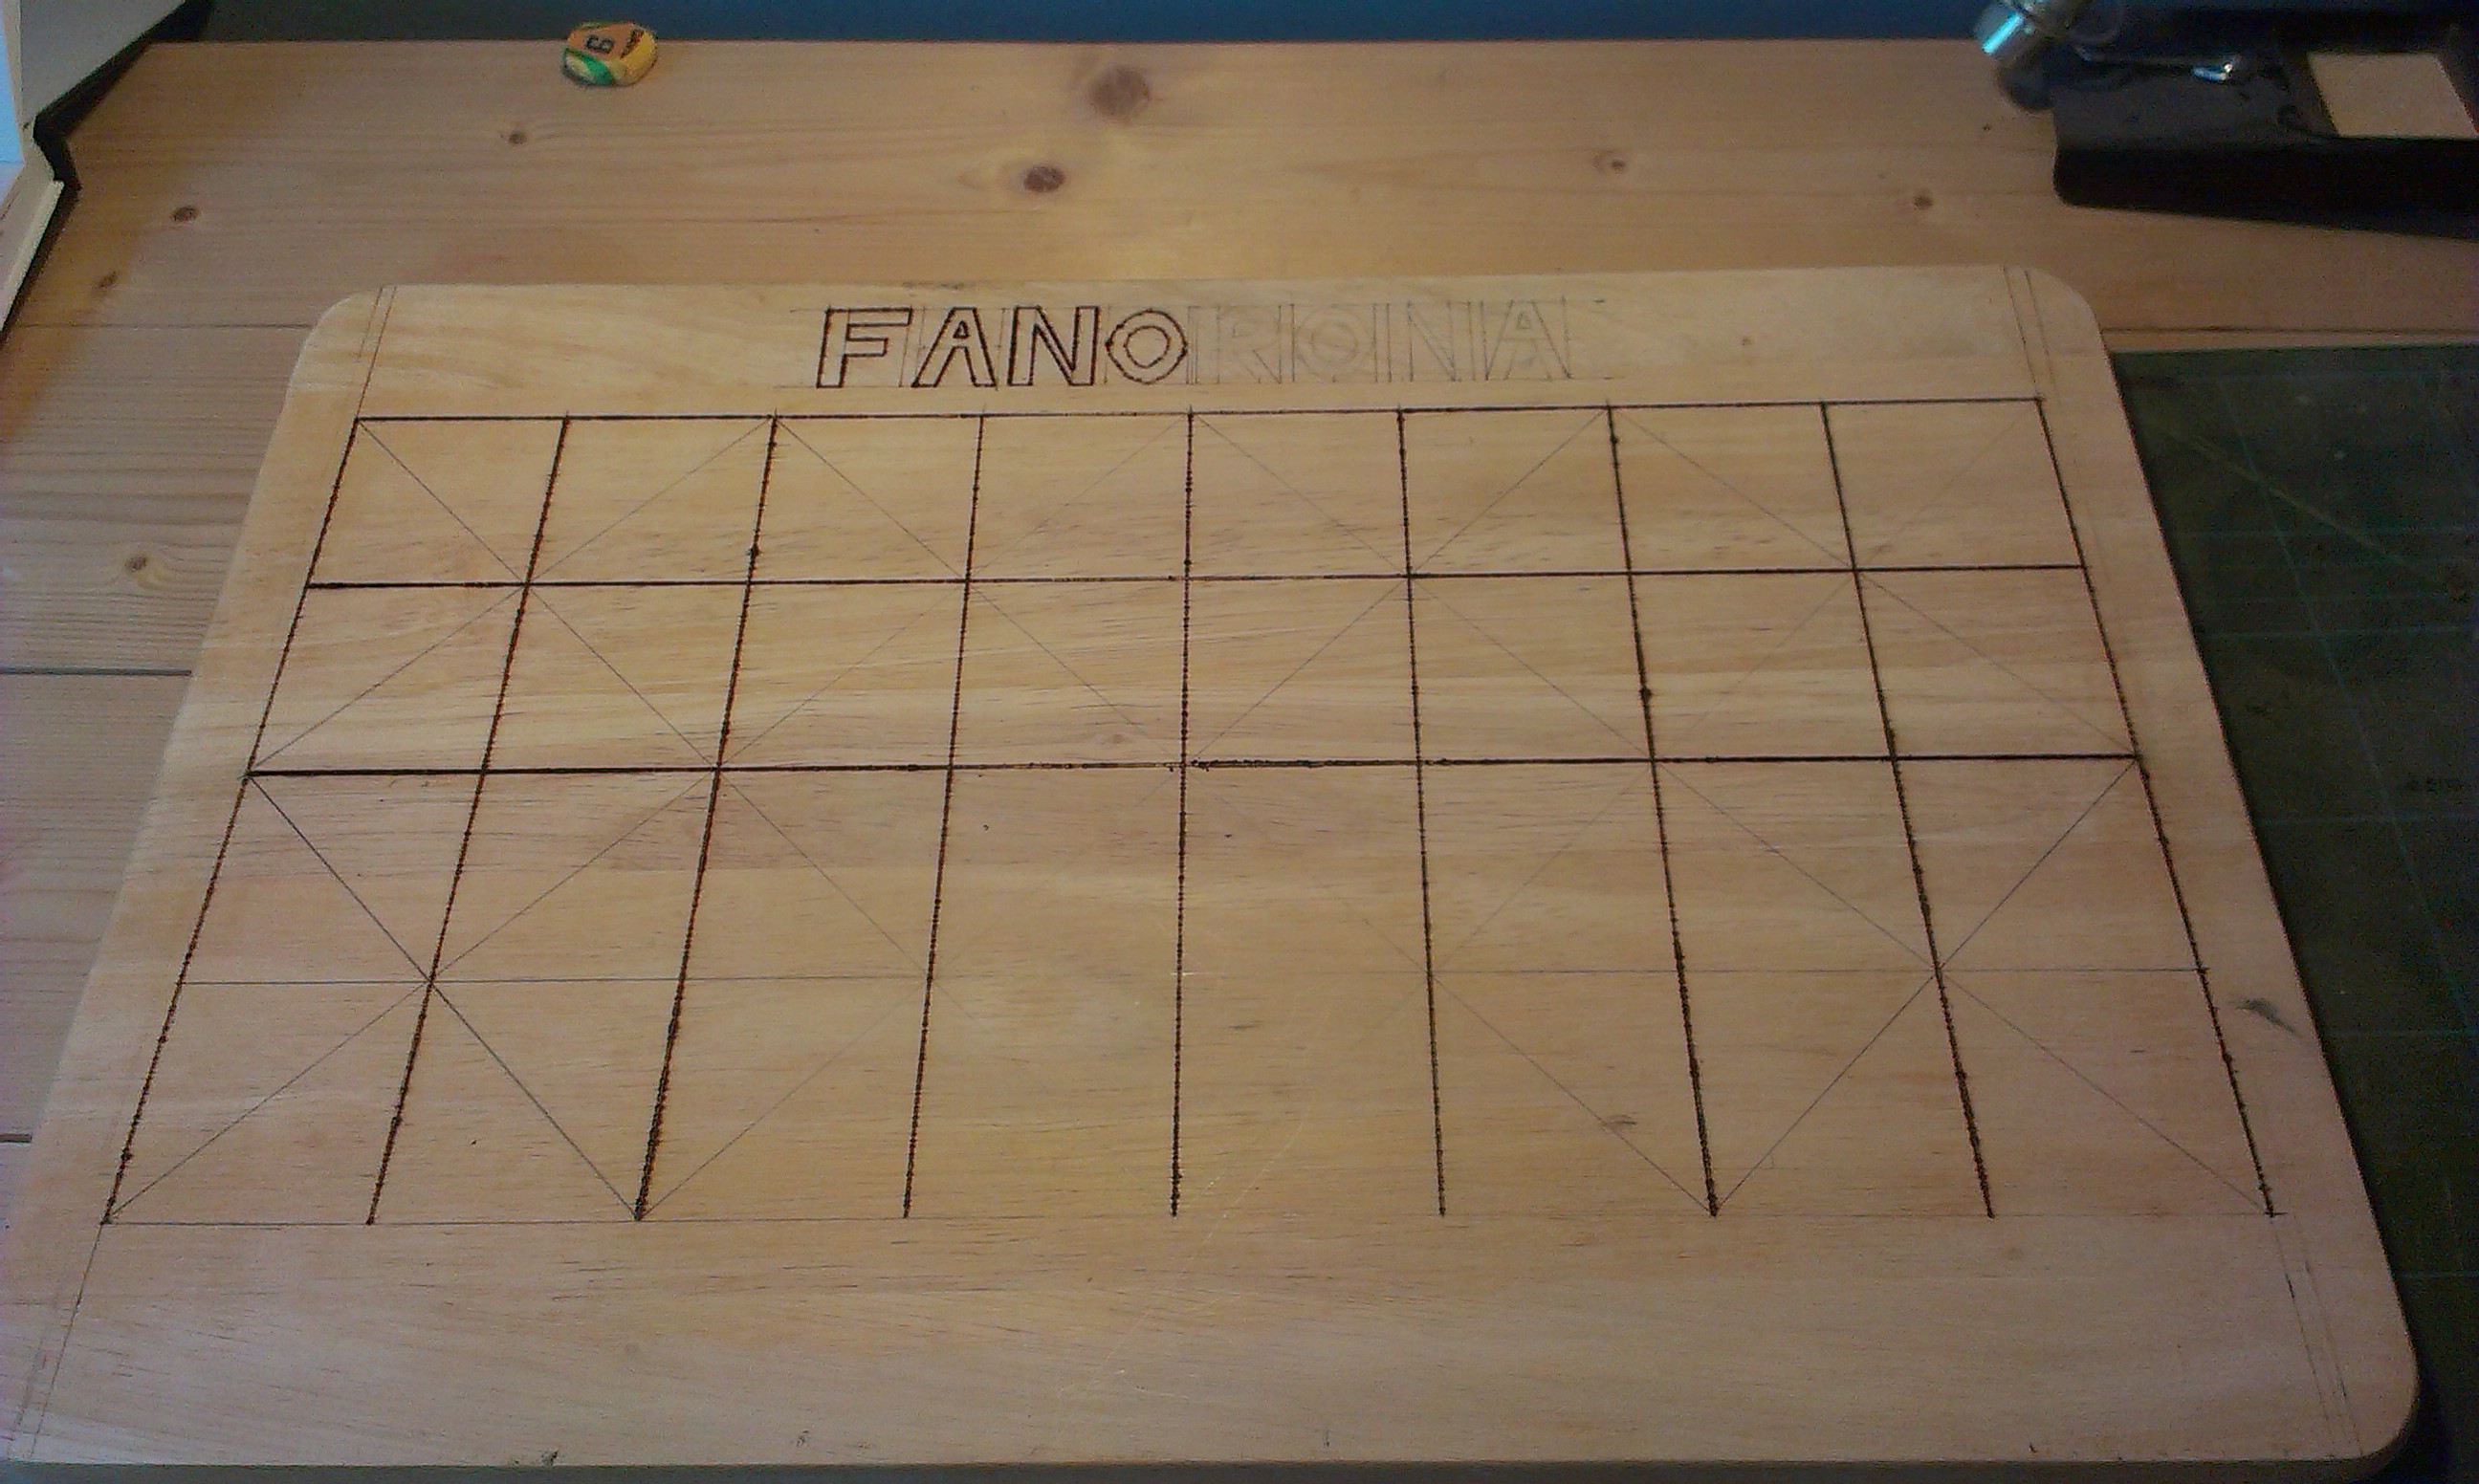
Use a damp cloth to get rid of any dust. - Draw out the design. The board is made up of a grid of squares of eight across and four down. Depending on the size of your piece of wood the size of this board is going to vary. If you are making it with 5cm x 5cm squares you need to measure the length of the board take away 40 and divide the remaining number by two (e.g. 48 – 40 = 8/2 = 4) you then measure that amount in from each side and draw vertical lines. These are your two vertical edges. You then do the same horizontally except taking away 20 rather than 40. This gives you your horizontal lines.
- You then join the top and bottom lines and the left and right lines at every 5cm (if you are working to a 5cm x 5cm scale) interval until you have a full grid.
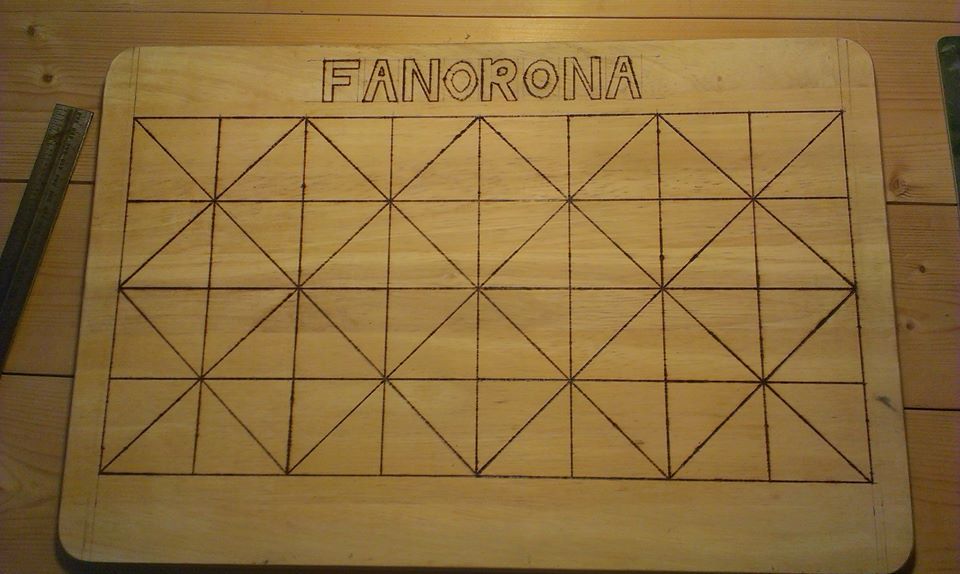
- Lastly you draw ten diagonals as shown on the picture bellow.

Follow the numbers starting from the bottom left.
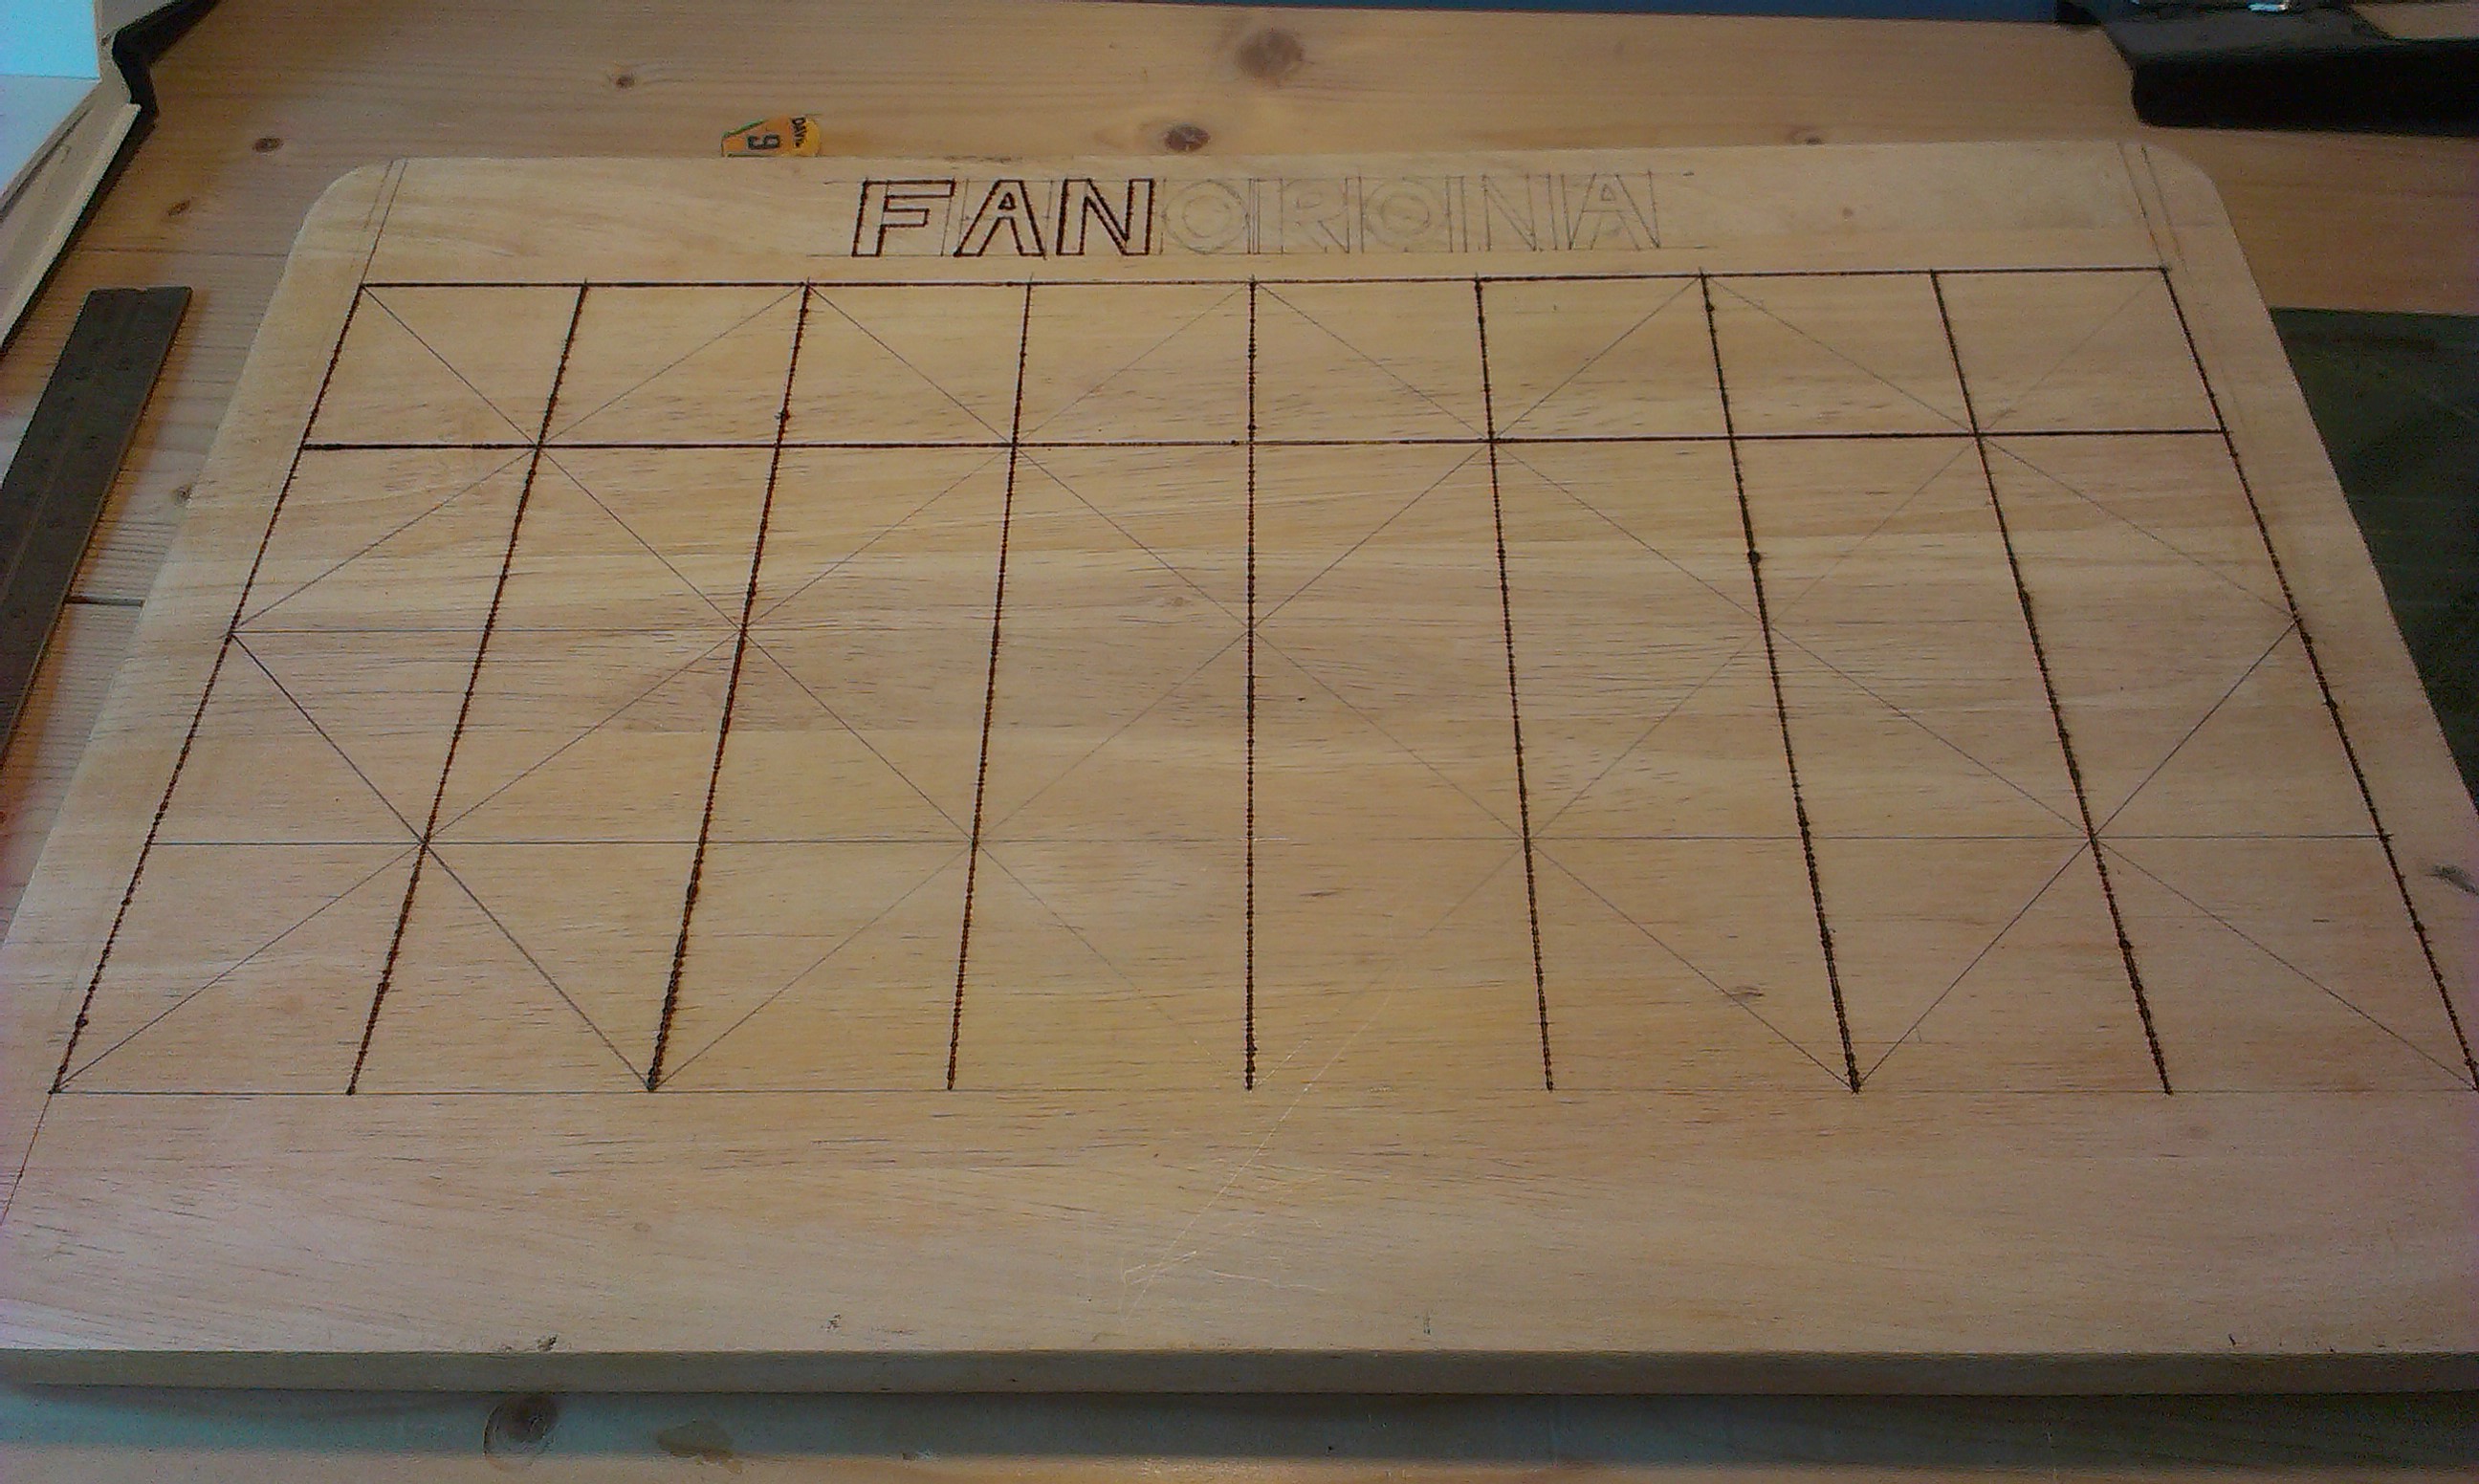
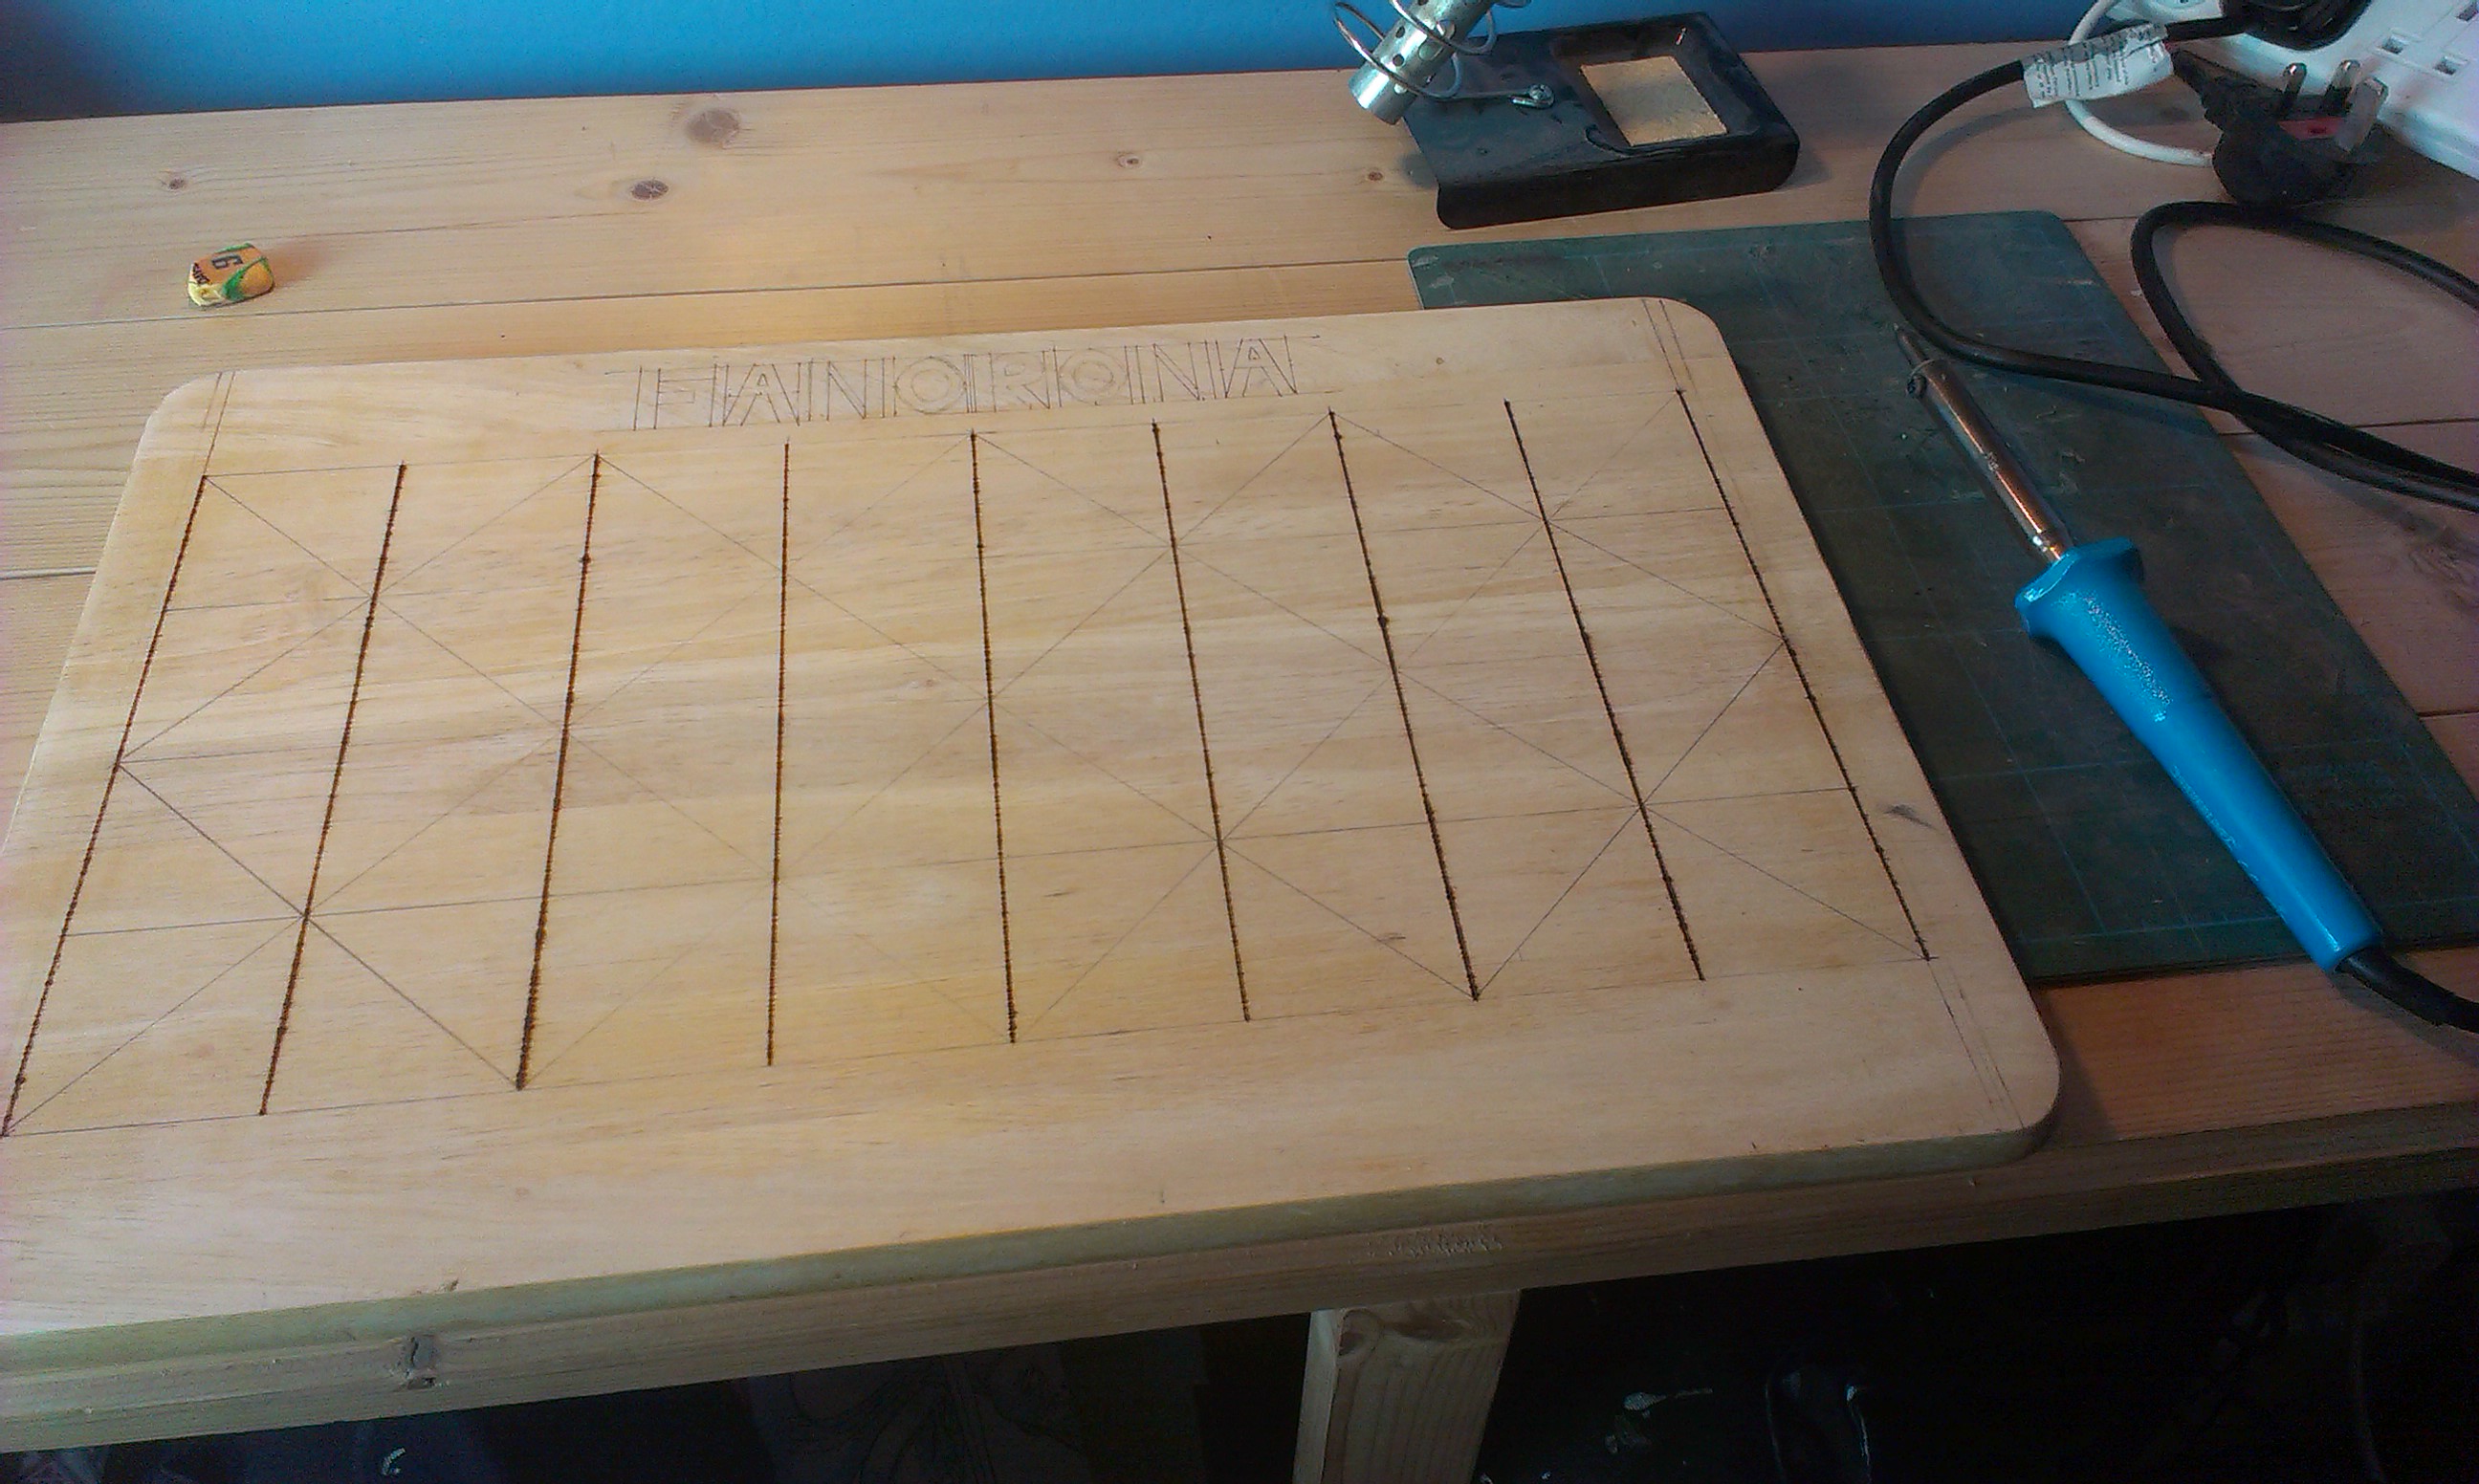
Step Two – Branding:
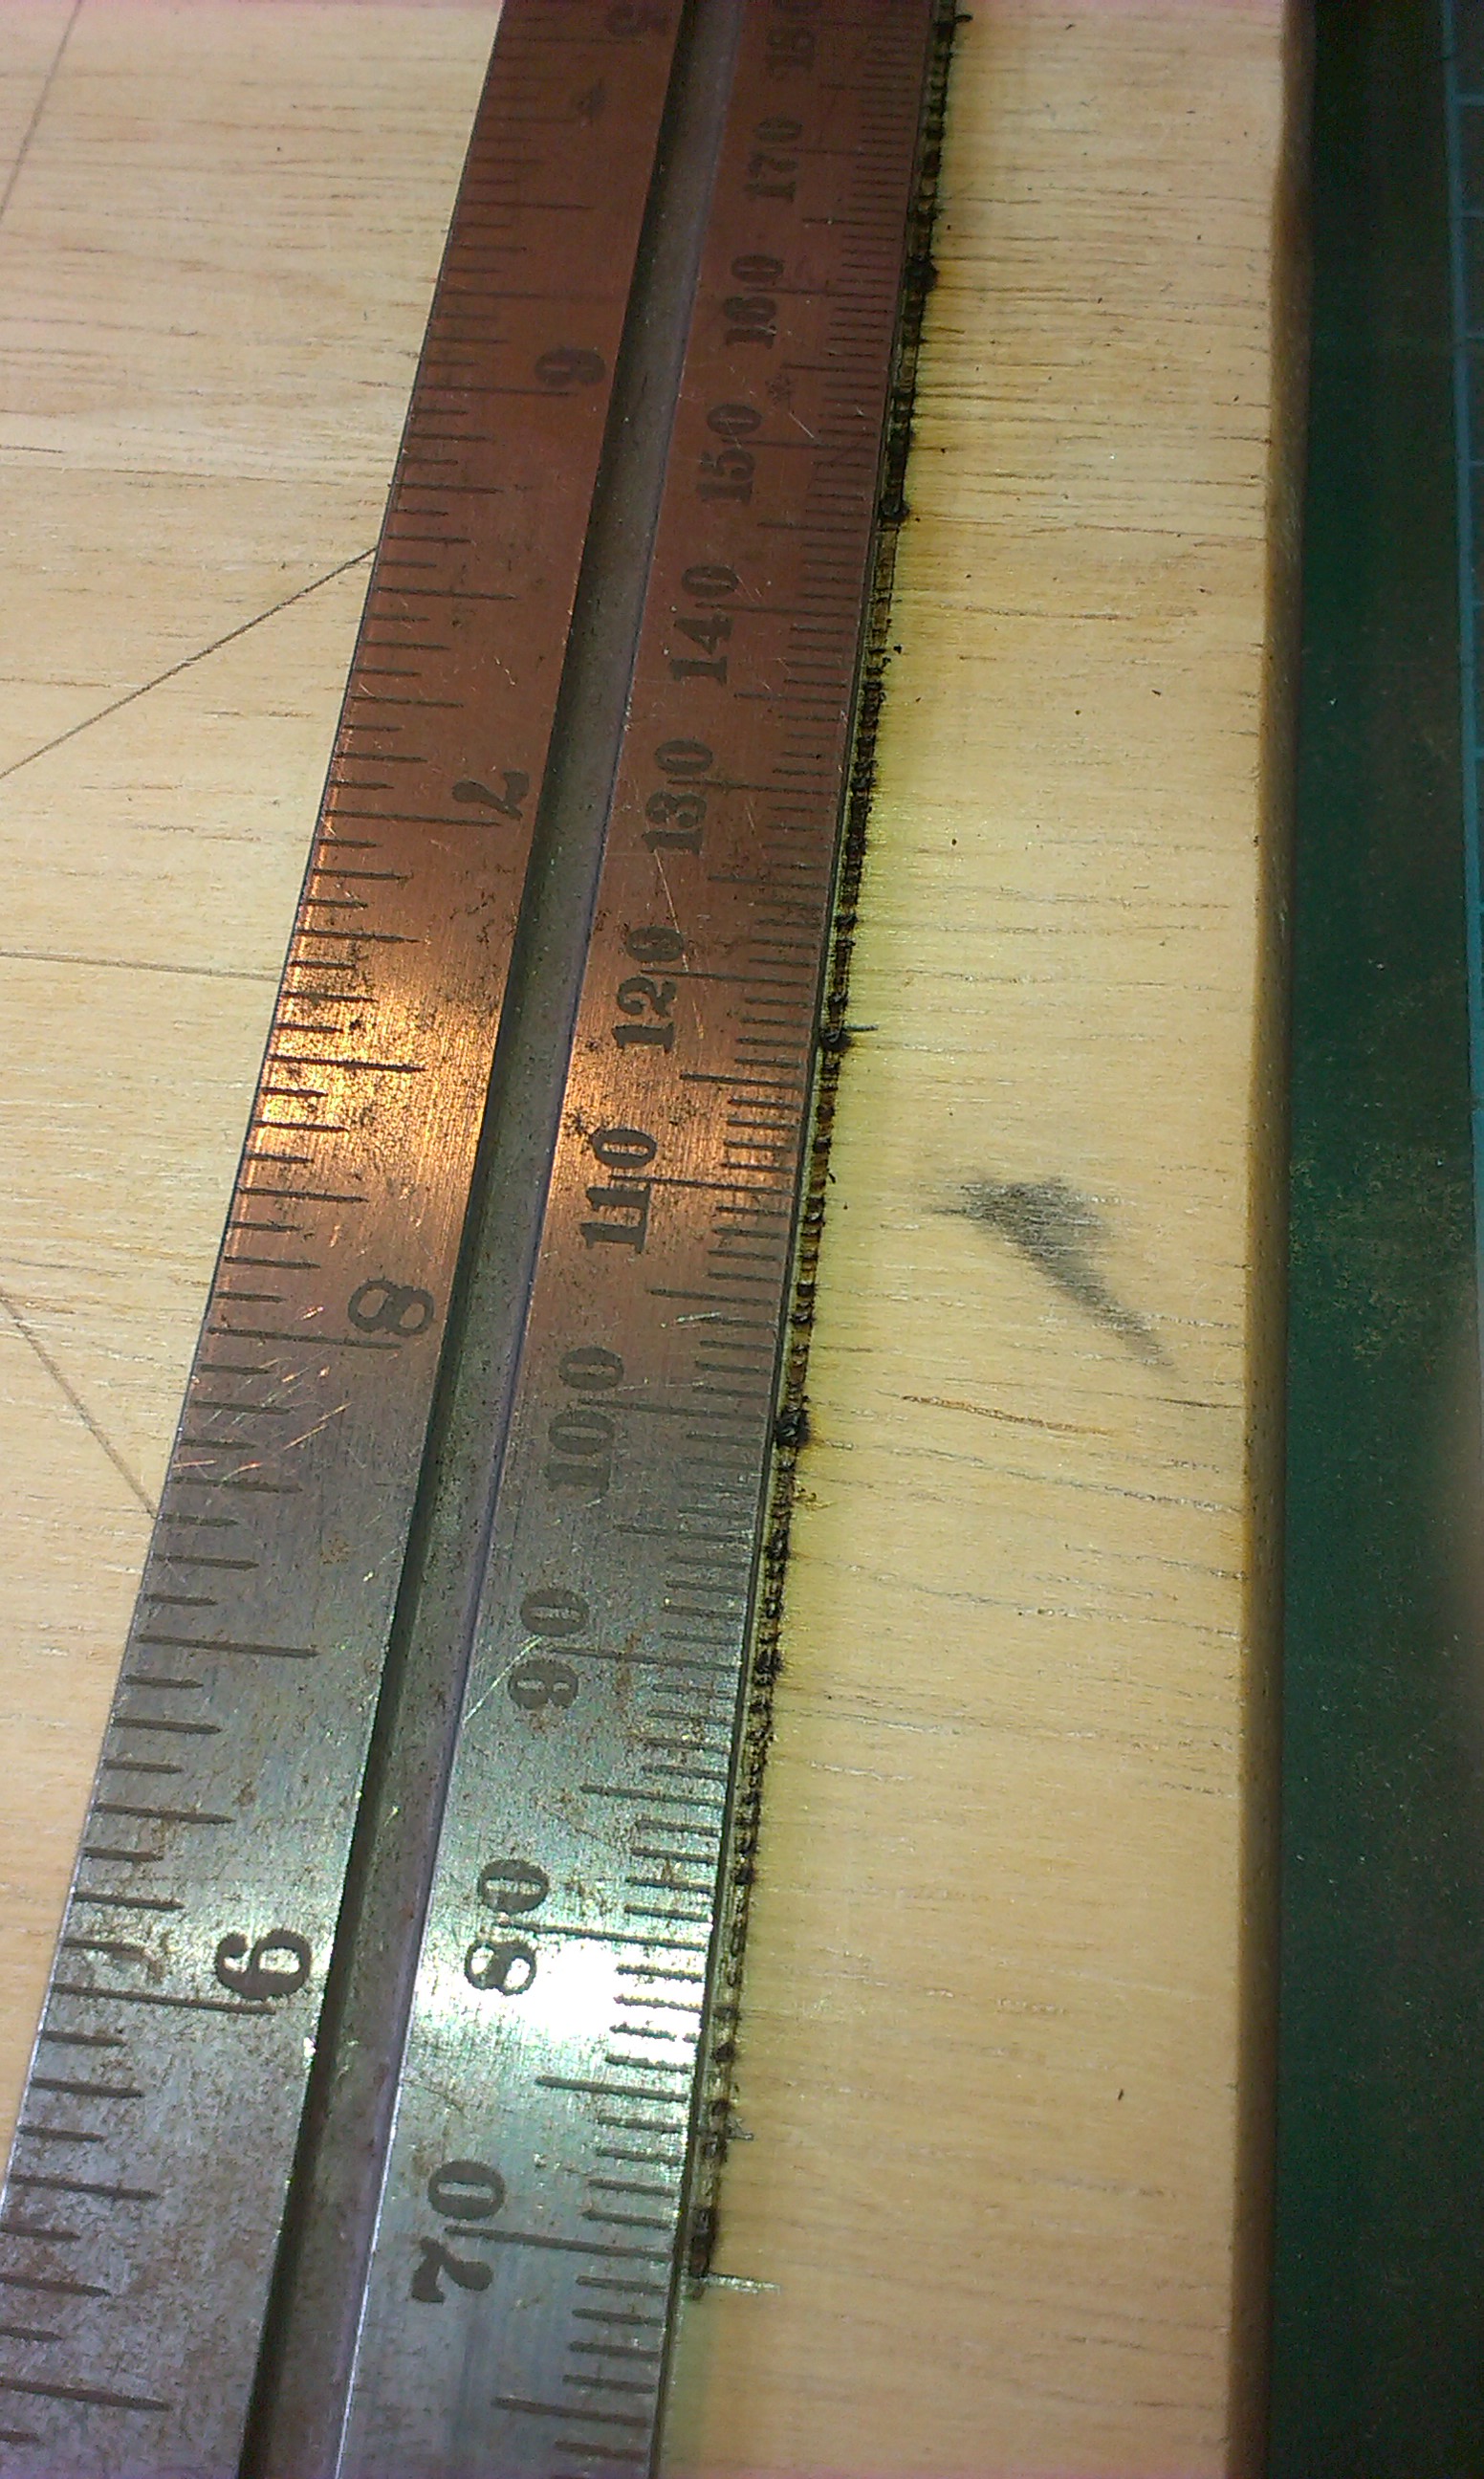
- Now comes the tedious part. You need to let your soldering iron heat up as much as possible, put on your glove and hold the metal ruler in place next to your first line, make sure it is not on top of the line as the soldering iron tip will burn next to where the ruler is.

The ruler next to the burnt line. - Then you apply the soldering iron to the wood. Be careful as you don’t want to burn the wood too much but it is also a slower process than you might imagine. The soldering iron cools off after you first apply it to the wood, so I found the first centimeter or so goes quite fast and then you have to slow your movement to allow it to work. Also I found pulling it across the wood rather than pushing it works much better as if you push it you end up pushing it into to the wood and just creating a large hole.
- This will take immense patience and is a slow going process, it probably took me the best part of five hours.
Pointless maths (skip this if you don’t care):
If you consider that there are 9 vertical lines of 20cm (9 x 20 = 180cm) and 5 horizontal lines of 40cm (5 x 40 = 200 + 180 = 380cm). Then there’s 6 diagonal lines of 28.3cm (28.3 x 6 = 169.8 + 380 = 549.8cm) and there’s 4 diagonal lines of 14cm (4 x 14 = 56 + 549.8 = 605.8cm). So there’s 605.8cm of line to be branded (that’s 6 meters and 5.8cm).
Now if you consider it might take you about 3 seconds per millimeter that’s 605.8 x 10 = 6058mm x 3 = 18174 seconds. Then to make the minutes 18174/60 = 302.9 minutes. Then to make that hours 302.9/60 = 5.0483 hours.
So yeah its probably going to take you a minimum of around 5 hours.
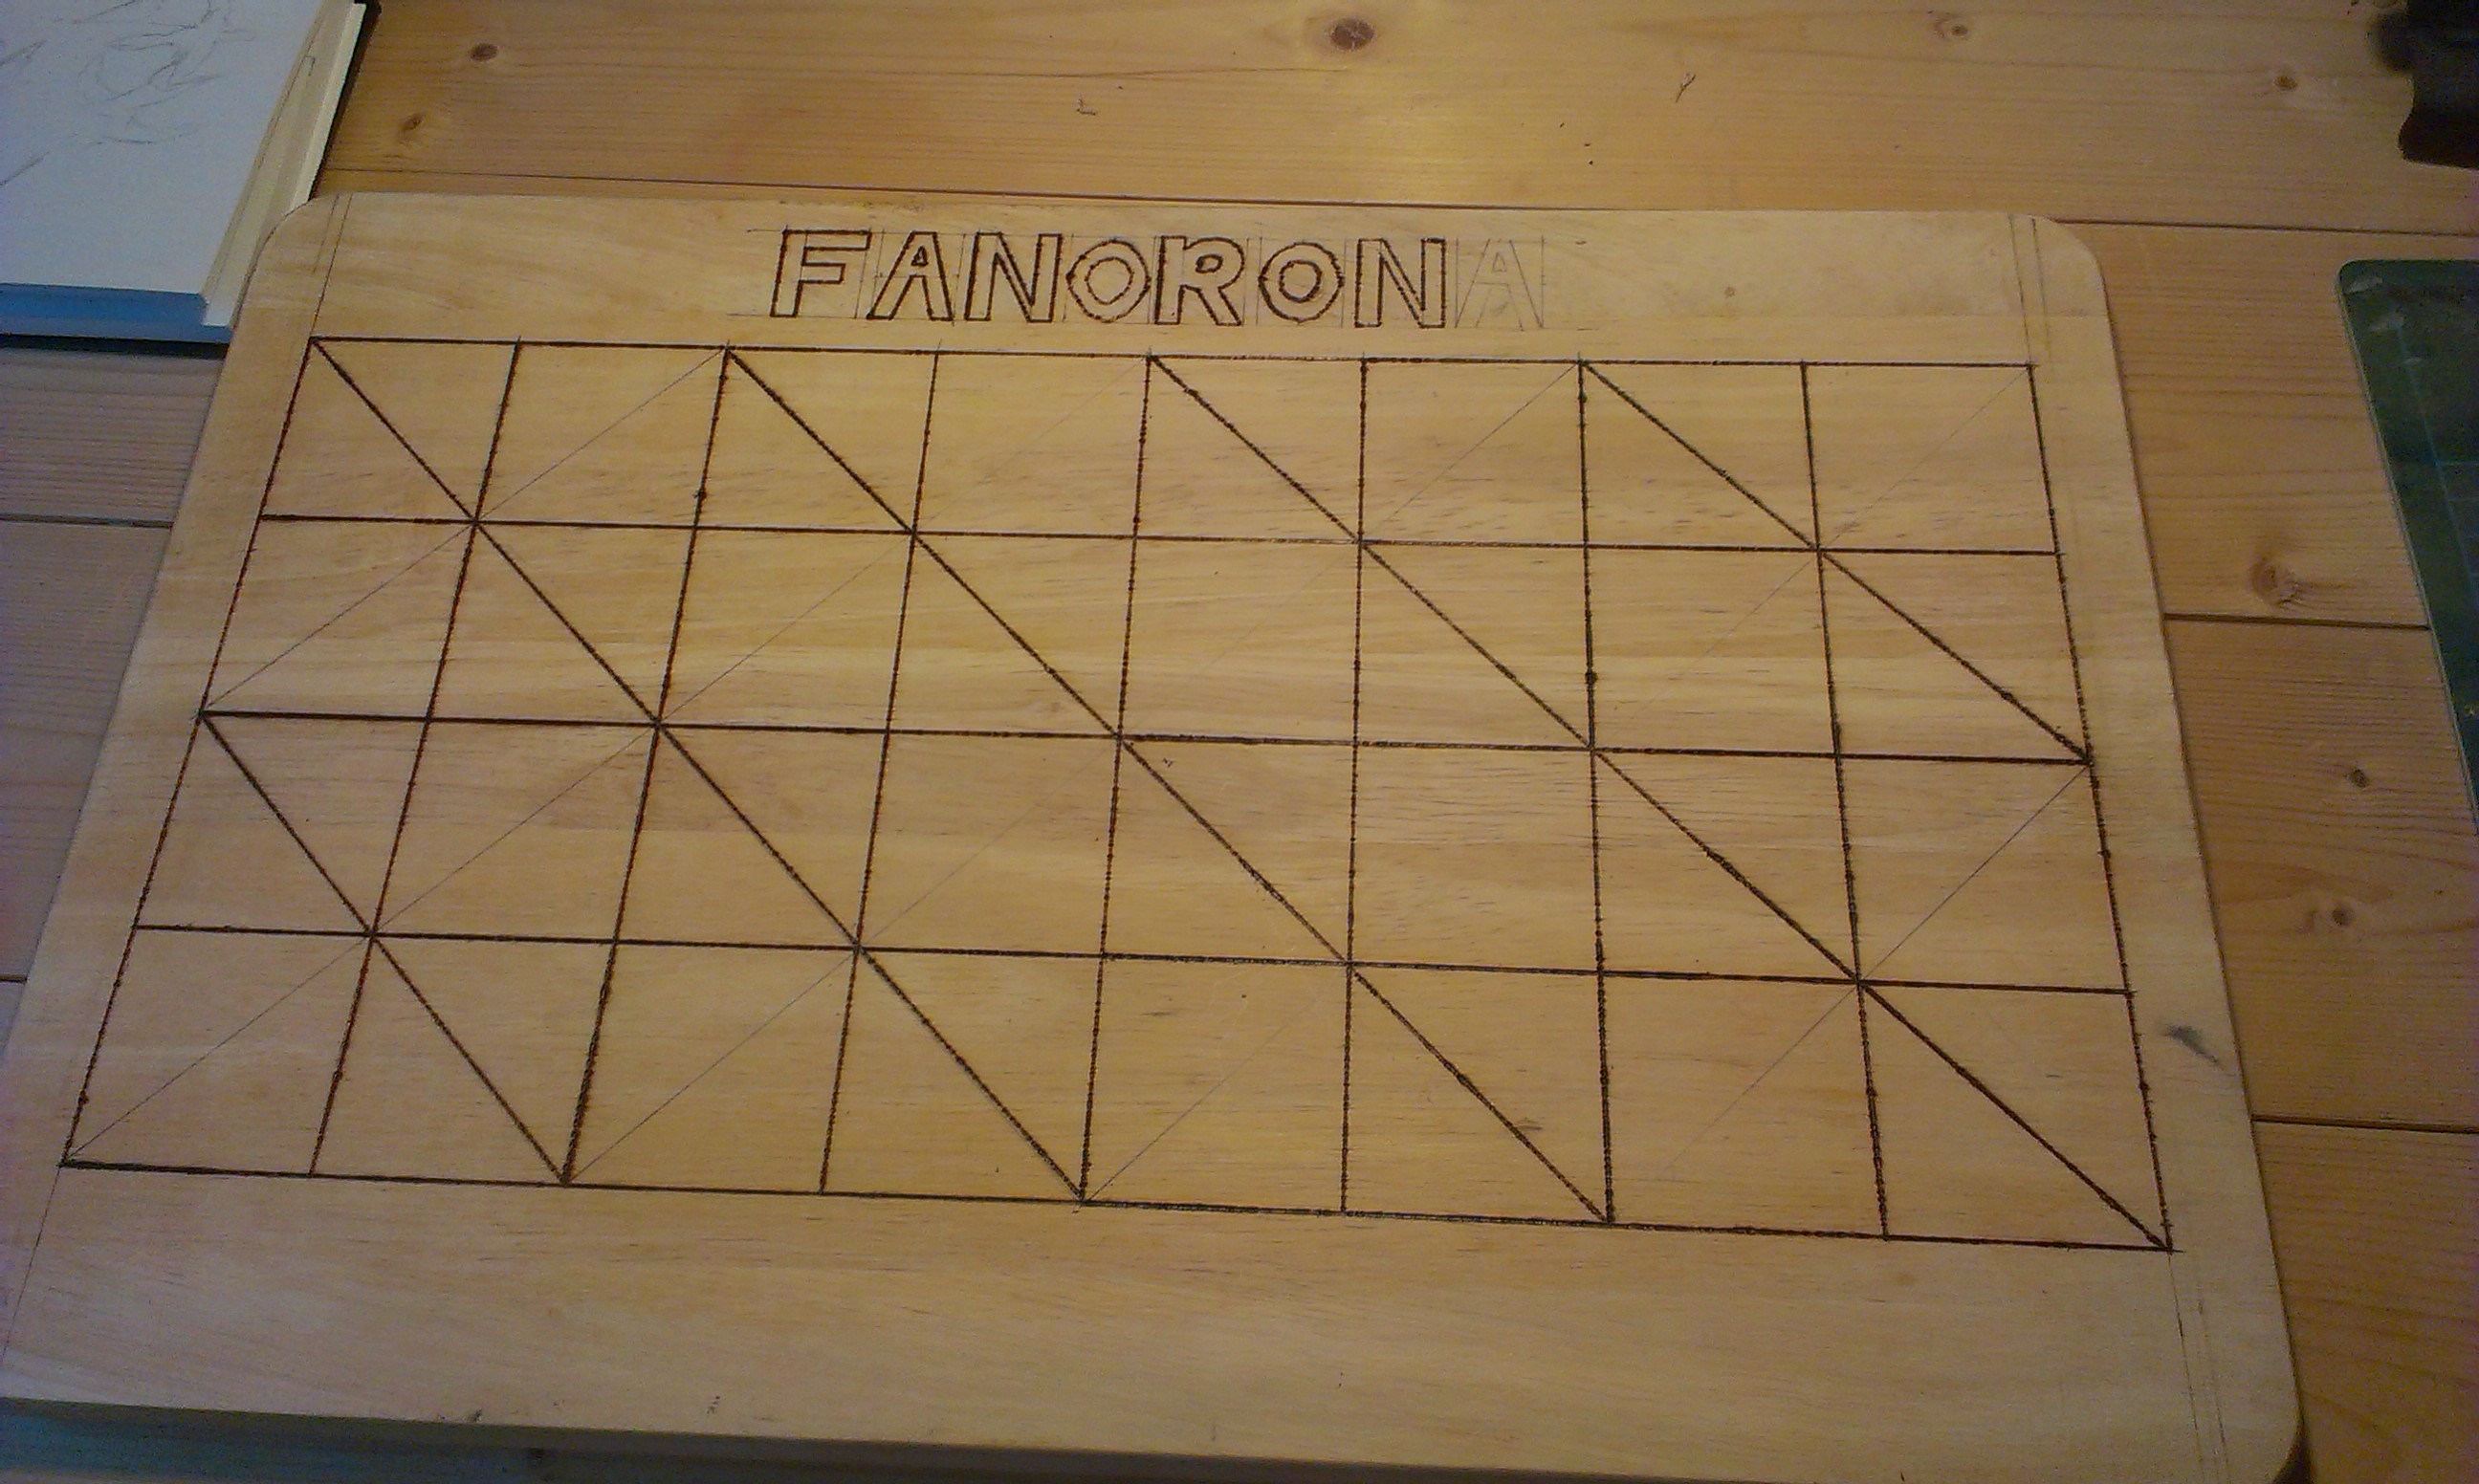
Step Three – Lettering and Varnishing:
None of these things are necessary to play the game and in fact I suggest you don’t varnish the board until you’ve played it a few time and are 100% happy with it and you are sure you don’t want to re-brand any of the lines or add decoration of any kind or even add something else on the other side of the board.
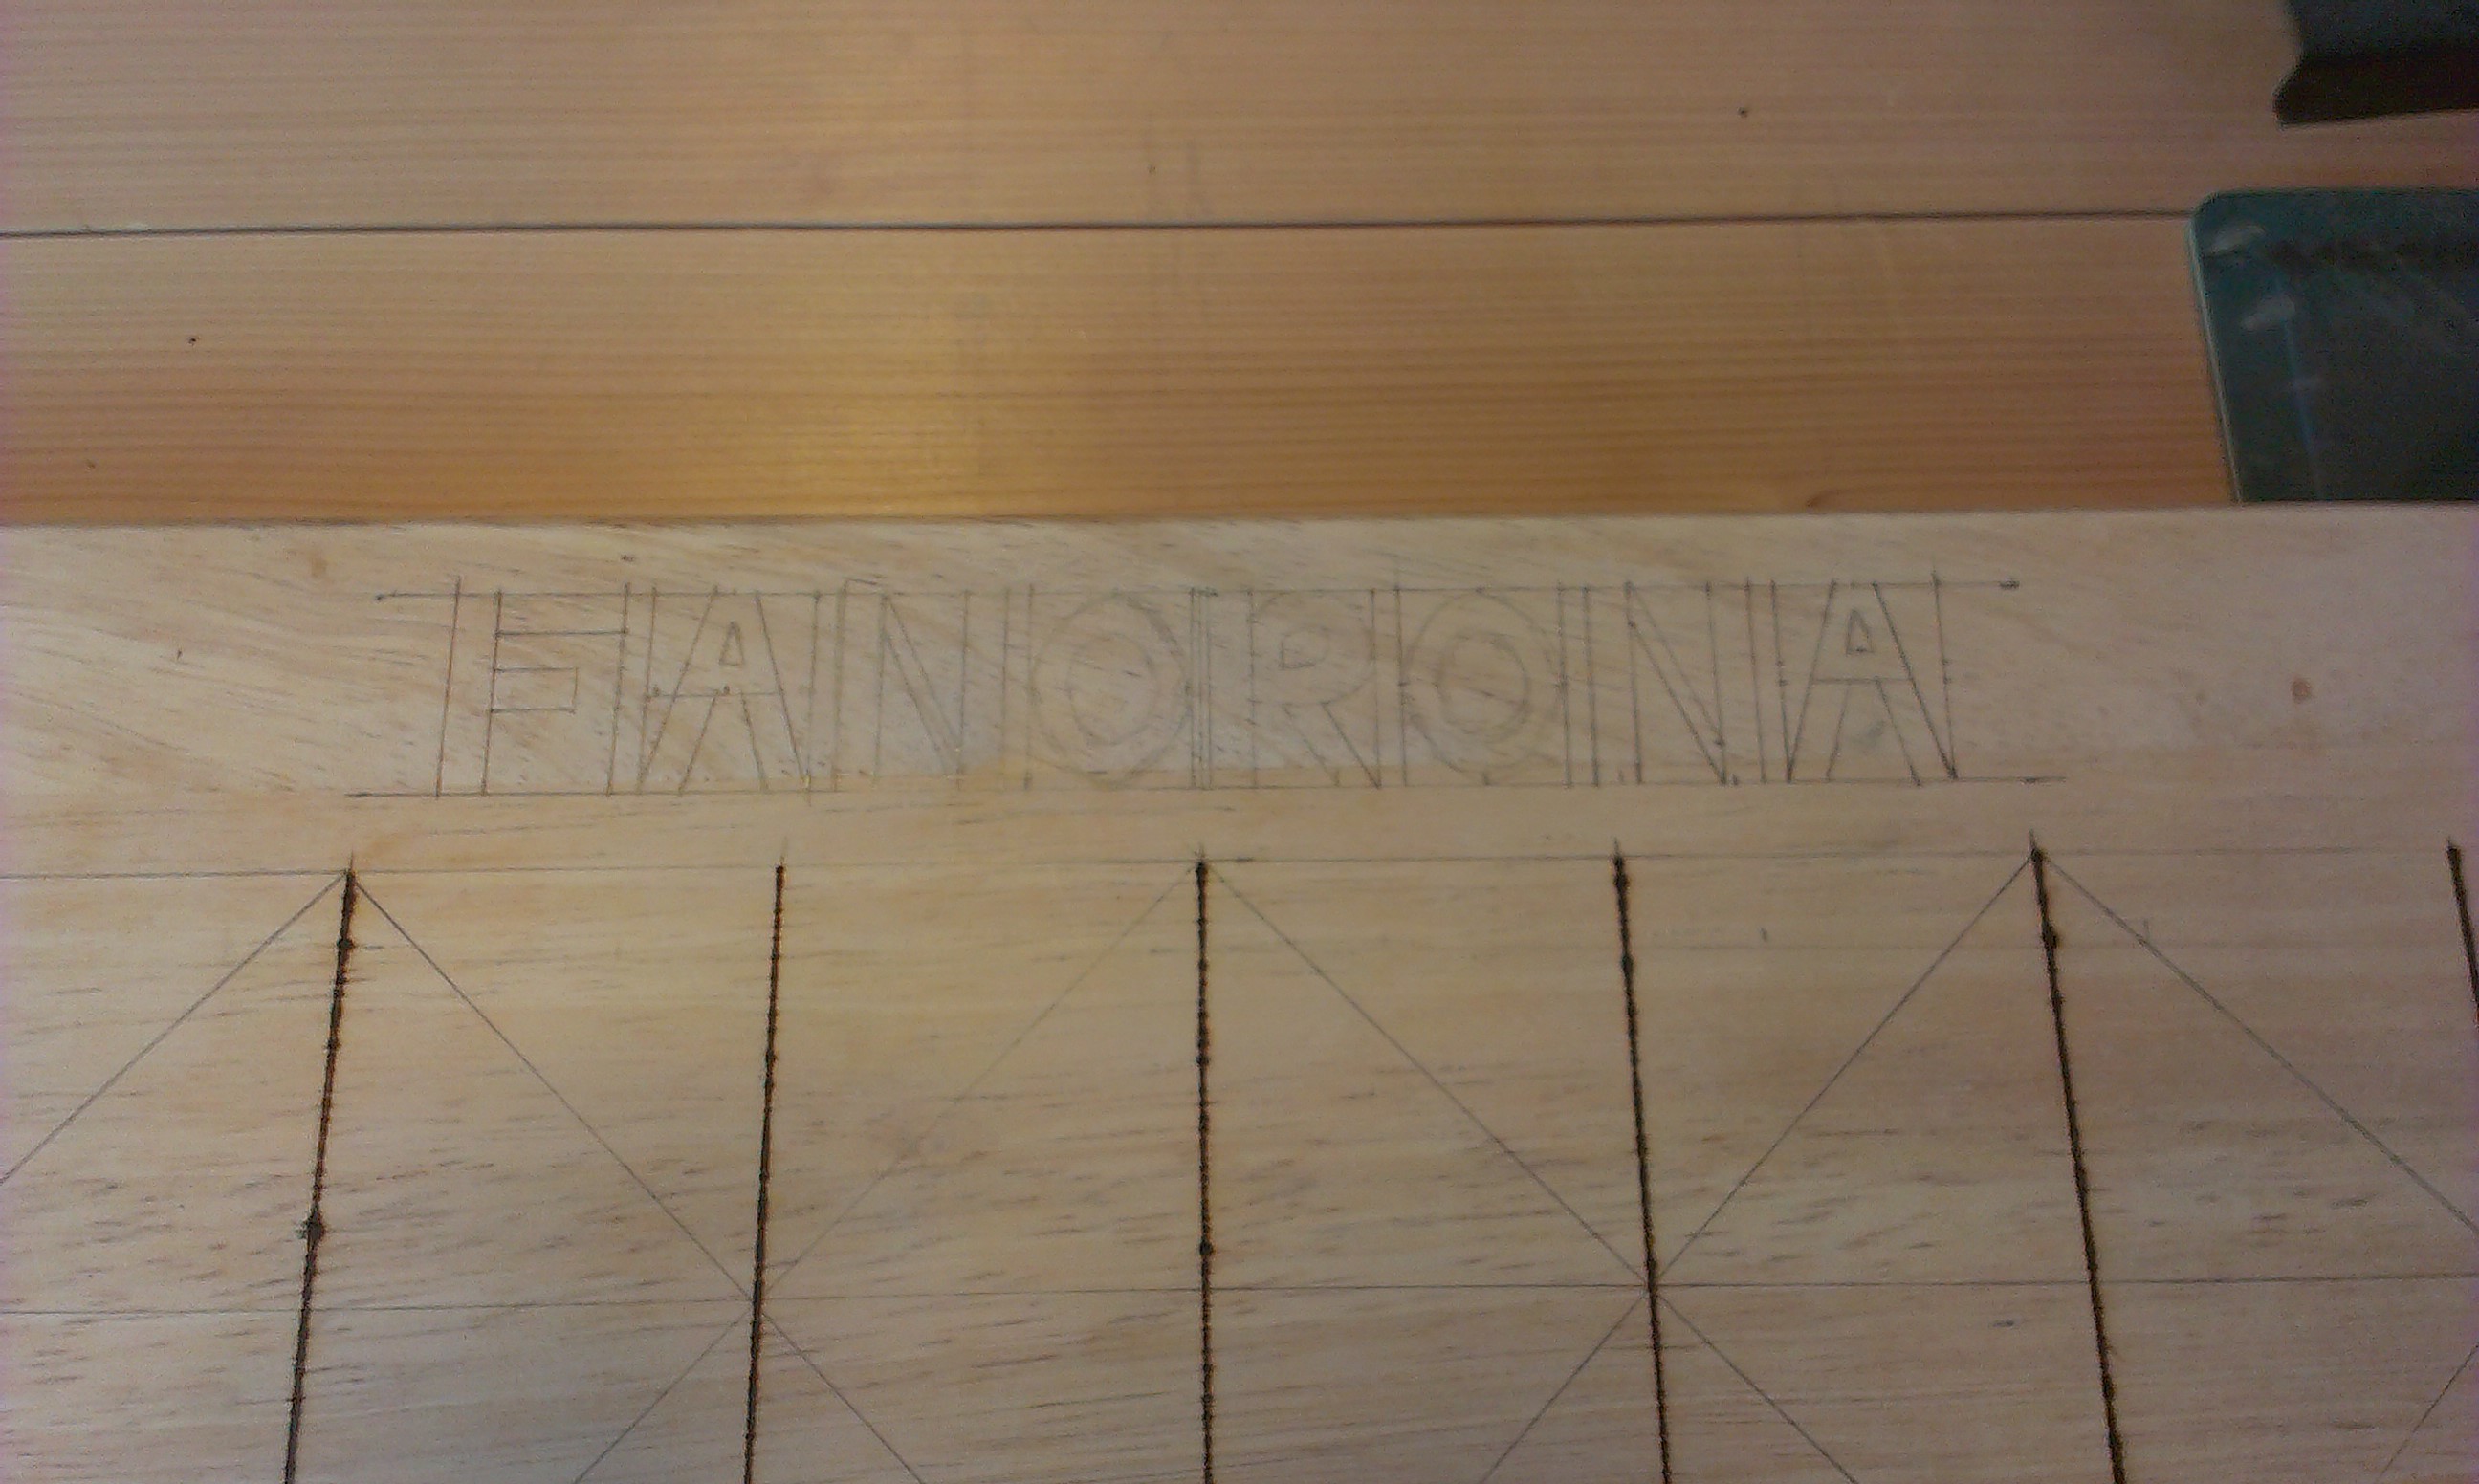
- To add the lettering you need to draw it out on the board first. To do this I found the middle point then used boxes of 2cm with 3mm gaps to space the lettering.

The lettering drawn onto the board. - Then brand it into the wood much like you did the lines accept you will have to do the Os free hand which is tricky and why they look worse than the rest.

O’s look worse because you cannot use the ruler. - Once you’re sure you’re happy with it (which I’m not at the moment, I want to add lettering the other side of the board and possibly some other things which is why I haven’t varnished mine yet) you can varnish it. Make sure you have rubbed off any remaining pencil marks and anything else you don’t want left on there. Now there are many different varnishing techniques. For the best result I recommend spray on varnish of which you need to do at least 5 very thorough coats, and then leave to harden for around two weeks. Then lightly rub the board down with some fine grain sand paper and do a final coat or two.
Now you should have a finished Fanorona board and you’re ready to play with whatever pieces you’ve decided to use.
A Final Ramble:
After all this hopefully you’re super happy with the end product, if not you can always sand it all down and go again (I wouldn’t recommend this if you don’t own an electric sander). And remember, after all that you still have a blank side to your board (unless you were super smart and already made yours on the back of an existing games board) which you could put anything else on, I’m planning to fit a Twelve Men’s Morris and Three Men’s Morris board onto the space on the other side so keep your eyes open for a post on them.
This game was first brought to my attention along with the various Men’s Morris games through the PS3 game Assassins Creed III (yes, I play computer games too, we’re not completely stone age) I am ever thankful to Assassins Creed for trying to educate me through the medium of a computer game as well as being the most fun game that can’t be played on a board out there. However I find Fanorona in Assassins Creed III impossible to win at, I dunno if it’s because I’m just super bad at it or their programming behind it is to good but even on the easiest level I can’t win. Although I also can’t really beat my sister at it at the moment as she addresses in her post on the history and game play of Fanorona here.

[…] made this myself in the same way I made (and on the back of) my Fanorona board which you can see here and also see the technique for making […]
Excellent work ands thank you for the inspiration. I thought you might be exaggerating about the length of time to do the wood burning, but you were spot on. I made my squares about an inch and one eighth and it took me about four and one half hours using a wood burner and a 24 inch straight edge. My board is made out of one quarter inch Oak ply. I made a box and use the board as a sliding lid and store the pieces inside the box. Thanks again for the inspiration.
Thanks for the comment/fed back. I would love to see pictures of what you made and maybe add them to the bottom of the post to show other examples of what can be made if you’d be ok with that?